Articles
All photos from the article
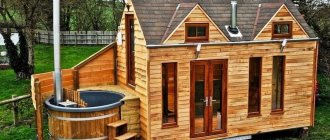
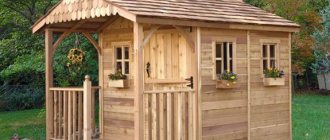
For many people, a bathhouse is not only a means of personal hygiene, but also a place to relieve stress or even relax with friends. In this case, of course, it should be quite spacious and comfortable, but what to do if there is limited free space on the site, and besides, the budget allocated for construction requires savings? An excellent solution in this case are compact, but at the same time quite roomy baths made of 6x4 m timber, the design of which is the subject of this article.
Below we will look at the most common layout options, as well as the main points that need to be taken into account when designing a bathhouse measuring 6x4 m.
Timber bath 4x6 m
Subtleties of the preparatory stage of construction
There are several rules for placing a building that will facilitate the operation of the bathhouse in the future.
Bathhouse layout
The bathhouse can be installed separately or combined with another structure: make it part of the house, connect it with a summer kitchen or workshop. But experience shows that such a neighborhood can lead to dampness and an unpleasant odor. Proper planning of sewerage, ventilation and waterproofing systems will help avoid such a situation.
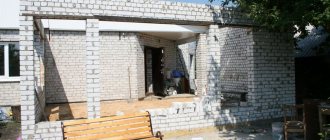
When building a bathhouse, it is necessary to lay the foundation to the depth of soil freezing. Depending on the soil moisture, you can make a simplified version of the base. But, as practice shows, a 6x3 bathhouse is built on a strong foundation of stone, brick or concrete. After about 2-3 months, as soon as the base has dried and settled, you can begin construction.
The building is constructed from environmentally friendly materials that “breathe” and retain and release heat well. Wood is rightfully considered one of the best. Sometimes 3x6 baths are built from natural stone and brick, which are durable and more fireproof.
The lifespan of a 3 by 6 bathhouse depends on proper logging and drying of wood. Wood should be harvested from December to early March. The felled trees should lie down for several months, only after that can you begin to make logs and beams for building a bathhouse.
To preserve this building material, you must adhere to several rules.
- The log is cleared of bark. To prevent it from cracking at the edges, a strip of bark 15 cm wide is left at its ends.
- To prevent spoilage, logs are stored in stacks. In this case, the distance between the logs should be 5 cm, between the rows of the stack - 10 cm, between the ground and the first stack - 20 cm.
- The logs should be covered with some kind of roofing material, such as slate, so that they are not exposed to precipitation. There should be at least 5 cm between the slate and the logs.
- Protect logs from direct sunlight. Place the material in a well-ventilated place.
Design Features
During the design process, it is necessary to decide not only on the layout, but also on a number of other points, such as:
- foundation type;
- roof structure;
- material and its quantity.
Below we will take a closer look at all the design nuances.
Columnar foundation
Foundation
In order for a self-built bathhouse made from 6x4 timber to be durable, it is necessary to competently approach the arrangement of the foundation.
Since the structure is not heavy, the base can have the following design:
- columnar - pillars are erected from concrete blocks or even bricks under load-bearing walls and under the building itself. This type of foundation is suitable for stable soil types. At the top, all the pillars are united by a grillage, on which the building is erected;
- pile-screw - metal screw piles are screwed into the ground, which are also connected with a grillage. The advantage of this foundation is the high speed of construction. However, like a columnar base, it is not suitable for all types of soil;
- Shallow strip - is a closed circuit on which external walls are erected. To equip it, trenches are dug to a depth of about 50 cm, then a sand-crushed stone cushion is filled in, formwork is installed and concrete is poured. The foundation must first be reinforced with metal rods;
This type of base is the most expensive, but at the same time the most durable, which allows it to be used on different types of soil.
The choice of foundation type should be made by specialists, since it depends primarily on the characteristics of the soil. However, you can focus on the foundations of other similar wooden buildings located nearby.
Mansard roof design
Roof
The roof structure of a timber bathhouse does not have any special features. Most often, a gable frame is made, the main one of which is trusses formed by two rafter legs. From below, the rafter legs rest on the Mauerlat, and from above they are connected to each other in a ridge unit.
A mansard roof with “broken” rafters has a more complex design. However, having familiarized yourself with the principles of its assembly, making the frame yourself will also not be difficult.
The only thing is that you first need to draw up a drawing of all the roof elements and indicate the dimensions of the parts. This will simplify your work in the future and avoid mistakes.
In the photo - profiled timber made of solid wood
Material
The timber from which a bathhouse can be built comes in several types:
- made from solid wood - can be planed and profiled;
- glued - can also be smooth or profiled.
It should be noted that laminated veneer lumber is a more durable material that is resistant to negative environmental influences. However, its cost is significantly higher than solid timber.
Note! The walls of the steam room should be made of linden timber, since this tree does not release resin when exposed to high temperature.
In addition to the type of material, it is also important to determine its cross-section, which depends on the purpose of the bath. If it will be used only in the summer, a beam with a section of 150x150 mm is sufficient. Otherwise, you should use 200x200 mm timber.
Glued profiled timber of different sections
Having decided on the type and cross-section of the material, you can calculate how many cubes of timber are needed for a 6x4 m bathhouse.
This is done as follows:
- First of all, you need to find out how many beams are in one wall. For example, the height of the wall is 3 meters, and the section of the beam is 150x150 mm. In this case, you need to perform the following action - 3: 0.15 = 20 pcs.;
- Now you can find out the volume of one beam - 0.15x0.15 x 6 = 0.13 m3. Hence, one wall will require 0.13x20 = 2.6 m3.
- Now the resulting value must be multiplied by four 2.6x4 = 10.4 m3. As a result, you will get the volume of the beam with a small margin, since the two walls have a size of 4 m, not 6. To obtain a more accurate value, you can use the same scheme to calculate the volume of the beam for a four-meter wall.
That's all the instructions for calculating the volume of timber. Now that the project has been drawn up and the amount of materials has been calculated, you can purchase them and begin construction.
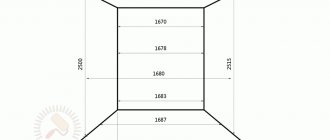
Standards for room sizes
The dimensions of bath windows can be 40x60 or 70x80 cm; the window in the washroom should be positioned higher. The front door should be made small and low so that heat does not escape outside. It is better to place internal doors perpendicularly to avoid drafts and colds (at a short distance from each other). Standards for ceiling heights vary minimally: from 2.1 to 2.4 m. Room volumes can be planned differently, it all depends on the needs of the owners and the number of rooms.
Steam room
You should not make it too narrow so that the bath does not overheat quickly. It is easy to calculate the minimum size based on the number of people who can steam at the same time: 1 m – a seat, 2.2 – a lying one. Number of seats + space for the stove + small passage to the shelves. The distance from the stove to the shelves should be at least 20-30 cm. The upper tier should be at least 115 cm from the ceiling.
Washing
The optimal volume of a washroom is 1.5x1.5 m. If you allocate a little more space to it, there will be enough space for a 1.2x1.2 m shower stall and trestle beds.
Restroom
The ratio of the volumes of warm and cool rooms varies at the request of the owners. An option is available with a spacious steam room, shower and small dressing room, or with a maximally spacious relaxation room and a separate dressing room.
We design premises
Dimensions of 4x6 allow you to get a little creative when planning bath rooms and their location. In solving this problem, several factors are always taken into account. The first is the number of people simultaneously taking bath procedures. The second is the purpose of the room. Since not everyone likes intense heat and waving a broom that burns the body, the emphasis can be placed on the fact that the washing compartment will be slightly larger in size, and a small steam room will be enough to warm up.
The best option would be a steam room where 2-3 people can stay at the same time. In this case, you can make a spacious washing compartment with a small pool. There will also be enough space left for the dressing room in the 4x6 bathhouse project. The allocated area will accommodate benches with a table. If possible, provide a separate room for the location of the entrance panel for supplying electrical wiring to the bathhouse.
We design the interior decoration of a 4x4 m bath
The decision about what the interior decoration will be like is also made at the design stage. Often, standard projects from the catalog already provide for various interior finishing options.
There is no better material for finishing a steam room than wood, so most often finishing means decorating shelves and walls with carved or other decorative elements. Source de.decorexpro.com
When choosing a material, preference is given to the following characteristics:
- Fire resistance.
- Environmentally friendly.
- Ease of operation and quick installation.
The modern construction market offers a wide range of cladding materials. The leader is linden or aspen lining. The walls must be insulated. Mineral wool or ecowool is suitable for this procedure. To cover the walls of the steam room, foil material is used, which reflects vapors and improves the thermal insulation properties of the building.
Particular attention is paid to the finishing at the installation site of the stove, which can be wood-burning or electric. Fire-resistant material is used as cladding
It can be metal sheets, brick, natural stone, ceramic tiles or porcelain stoneware.
3×6, 6×6, 6×4
A bathhouse can be considered not only as a utilitarian building, but also as a place of communication if its usable area is more than 16 m2.
Important! The more spacious the steam room, the greater the number of ventilation holes (with valves) it must be equipped with: each cubic meter of volume is 24 cm2. A frame bathhouse 6 × 3 meters “can afford” to give up part of the usable area to the terrace
The front (short) wall can be “moved” deeper by one and a half meters, then the closed area of the bathhouse is a little more than 13 m2. You will get a 3 × 4 frame bathhouse with a seating area closed on the sides in front of the entrance
A frame bathhouse 6 × 3 meters “can afford” to give up part of the usable area to the terrace. The front (short) wall can be “moved” deeper by one and a half meters, then the closed area of the bathhouse is a little more than 13 m2. You will get a 3 × 4 frame bathhouse with a seating area closed on the sides in front of the entrance.
Both small and large frame baths are complemented with a terrace - along the entire wall, or with “capture” of one corner.
Using all the space as indoor spaces, the 6 × 3 m area can accommodate five visitors. A transverse dressing room more than 2 meters wide will now suffer slightly if separate doors lead to the steam room and washing room.
A video about the proportions of a light bathhouse - frame - 3 × 6 with your own hands (step-by-step instructions for the construction of external walls from 150 × 100 mm timber and cement-bonded particle boards), the position of the foundation of a stationary stove with loading of firewood from the antechamber is successfully noted:
The stove-heater can be supplemented with a fireplace (removing smoke through one chimney) or a second stove.
In addition to the fireplace, the dressing room will accommodate a couch, a bench, a table with stools - the 2 × 3 dressing room will become a relaxation room.
The washing room will accommodate a shower tray, the steam room will accommodate two tiers of shelves. (It is more convenient to make shelves on the floor - so as not to load the wall).
Non-standard bathhouse layouts are possible in larger buildings
For example, a 6 × 4 frame bath is divided by a partition or load-bearing frame wall into two rooms of equal area: a dressing room, a steam room and a washing room.
Spacious one-size rooms are chosen by lovers of mild steam.
You can do the same with a 3 × 5 or 3 × 4 bathhouse - divide it into two identical rooms. For a summer cottage site that allows you to build a 4 × 5 structure, but where every open piece of land is valuable, there is a beautiful solution - the bathhouse is not quadrangular, but “shaped like the letter G.” In fact, it can be a 2 × 4 frame bathhouse and a 3 × 2 dressing room adjacent to its long side.
Information. They strive to position the wood-burning stove in such a way as to reduce the length of the chimney indoors, including the attic, to a minimum.
A 6 × 6 bathhouse can easily become a two-level bathhouse. The attic floor will have to be supported by external and intermediate load-bearing walls. The stairs lead up from the driest area of the first floor - the locker room.
Advantages of a timber bath
Timber is an excellent material for construction
Traditionally, baths were built from logs, but today more and more preference is given to timber as a cheaper material. It has all the properties of natural wood, while the building will be erected in the shortest possible time and at minimal cost.
What are the main advantages of timber:
- Relatively light weight, does not require a powerful foundation. Columnar or ribbon will do;
- It’s easy to assemble with your own hands - you can buy a ready-made project that does not require months of shrinkage. It is erected directly on the site, like a constructor;
- The roof is made of slate, ondulin or metal tiles. Rafters made of timber with a cross section of 150*100 mm are the key to strength and comfort;
- Thanks to the design, it has increased strength;
- Interior finishing can be done almost immediately after the completion of the main construction work.
If preference was given to a bathhouse made of profiled timber, then external finishing and caulking will no longer be required. This type of material has an attractive appearance and good adhesion of parts. Cold air will not penetrate inside, even if there is a strong north wind outside.
With age, the middle of the trunk, from which the timber is made, is impregnated with resins, becoming denser and stronger. Due to this, such high technical characteristics appear.
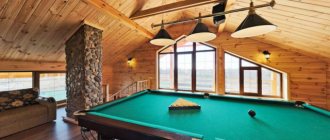
Bathhouse 6x6: advantages
This sauna has good capacity; up to 8 people can feel comfortable in it. If you have a large family or many friends, this project will suit you.
At the same time, a 6x6 bathhouse has quite compact dimensions; it can be built even in a small area, but it will still have good capacity.
The cost of building such a bathhouse will also be low, especially if you choose inexpensive material, for example, build a frame bathhouse.
A 6 by 6 bathhouse is a good option for a small area. It can accommodate not only a steam room, a washing room and a vestibule, but also a bathroom, an attic, and a terrace, in which case relaxation in the bathhouse will become more comfortable.
Layout
When choosing a layout, you need to approach the issue rationally. In this case, some requirements must be met:
- The highest temperature regime should be in the steam room.
- It should be a little cooler in the wash room. In addition, there must be ventilation.
- In the dressing room (rest room) the temperature should be even lower.
Selection and location of the furnace
If no other heating is provided in the bathhouse, it is better to place the stove in the center of the building. This way all rooms will be heated. Most often it is advised to install the stove in a bathhouse with a washing room and steam room so that the door faces the dressing room. In this case, the container with water is located in the washing room, and the stove itself is located in the steam room.
Bathhouse: layout and division of the total area into functional zones
If earlier baths consisted of only one room, then modern versions of these structures include several rooms. These may include a washing room, a dressing room, a recreation area, a swimming pool, a billiard room, etc. So that in the future the owner does not have to resort to rebuilding and adjusting the building, even at the design stage it is necessary to make all important notes in the drawings of the bathhouse. The following points deserve special attention:
For convenience, modern baths include several functional areas
- interior layout;
- water supply system;
- electrical wiring;
- sewerage and drainage system.
Development of a bathhouse plan taking into account the conditions of the summer cottage
To create ideal conditions for relaxing in a bathhouse, you need to take into account some nuances that will allow you to avoid troubles during the operation of the room. It is desirable that the construction area be located on soils with low groundwater levels. Before starting to develop a project, you must immediately exclude all areas that do not meet this condition.
Project of a bathhouse measuring 5 by 7 meters with an open terrace
If there is a well on the territory, then the distance between it and the bathhouse should not be less than 5 m. The minimum gap between the steam room and the residential building is 8 m. The farther the compost pit and toilet are located from the bathhouse, the better. Experts advise making the entrance from the south. In winter, fewer snowdrifts form here, so there is no possibility of blocking access to the door. It is better if the windows face west, which will allow sufficient sunlight to enter the room.
If there is a pond at your summer cottage, by building a bathhouse 15-20 m from it, you can use it instead of a swimming pool. In addition, the presence of a river or lake near the structure will provide a water supply system.
Bathhouse project measuring 7.74 by 6.24 meters
For small areas (3-6 acres), 3 by 3 bathhouse projects are suitable; photos of such buildings are available in abundance on the websites of construction companies. Even in such compact buildings, the main room remains the steam room. The maximum possible amount of space should be allocated for the organization of this room - about 8 m². This is enough to install 2-3 sunbeds (shelves) and a stove.
Other rooms can be included in the layout of a bathhouse of 3x4 m or more (optional). The structure can be used for its intended purpose even in the absence of a billiard room or bathroom. A bathhouse cannot exist without a steam room. For this reason, the division of the internal space into functional zones primarily depends on the size of the project.
It is recommended to build baths at a distance of at least 8 m from a residential building
If you want additional amenities, you can include a small shower room or washing room in the design of a 3 by 4 m bathhouse. After the steam room, you can wash off the dirt and freshen up here. Typical projects are characterized by the presence of a relaxation room, which will be used during breaks between steam sessions. To organize it you will need 4.5 m².
Other rooms, for example, a locker room or vestibule, would also be useful. They are compact enough to fit into a 5 by 5 timber bathhouse project along with the main rooms.
Design of a bathhouse measuring 6x6 m with a second attic floor
Do-it-yourself bathhouse made of foam blocks: step-by-step construction
They begin to build a foam block bathhouse with their own hands by laying the foundation. The next stage is the organization of drainage, forcing out walls, and building a roof. The final touch is the interior and exterior finishing of the bathhouse.
Choosing a place for a bath
But before you begin construction itself, you need to complete a number of preparatory activities. They are, in general, simple, but in many ways the convenience and comfort of your vacation spot will depend on them. First of all, you need to choose a place to build a bathhouse.
This issue must be approached thoroughly. First of all, if you have a river flowing through your property or have access to a body of water, think about the possibility of flooding. Therefore, the building should not be placed closer than 15 meters from the reservoir. Even if the likelihood of a flood is low, erosion of the foundation is quite possible.
Also, you should not place a bathhouse near unfenced areas or exits to the street. A sauna holiday requires a small group of people and prying eyes are not acceptable. If the bathhouse is adjacent to any other room, take care of its waterproofing.
It is important to know that foam concrete absorbs moisture strongly, so we need high-quality waterproofing of the walls from the inside.
Choosing a material for a bath
The choice of material, as well as the choice of project, largely depends on your financial capabilities. After all, the price of a wooden bathhouse will be much more expensive. The choice of foam concrete will significantly reduce costs. In terms of material quality, foam concrete is practically not inferior to wood, and in some components it also has a number of advantages.
So foam blocks:
- This is a “breathable” material just like wood.
- It has good sound insulation, which is almost 10 times higher than that of ordinary brick.
- This is a lightweight material, so you don't need a solid foundation.
- This material is easy to use. Due to its lightness and increased dimensions, this material allows walls to be erected quite quickly and easily.
- Unlike wood, aerated concrete is not flammable, which is an important indicator for a bathhouse.
- Just like wood, it is an environmentally friendly material.
What types of blocks are suitable?
Block baths began to be built relatively recently, but experienced craftsmen have already left feedback on which blocks are best to use for the construction of the structure. Foam concrete blocks have different sizes and different densities - the strength of the material depends on this indicator. The more air that was used to create the foam during the production of the blocks, the less dense they will be.
Foam concrete blocks with a density of D600-D800 are suitable for the construction of a bathhouse. Blocks of this brand are perfect for building a sauna due to their good strength and thermal insulation. They will become the optimal raw material for the construction of load-bearing walls of the structure.
From the requirements for materials for a bath it follows that the raw materials must be reliable and withstand the effects of heat from the inside, and also not absorb moisture. Since foam concrete has the ability to absorb moisture, at the construction stage before finishing it must be treated with a water-repellent agent. Blocks of the D900-D1200 brand will be irrelevant here, since they require additional high-quality thermal insulation. Grade D1300-D1600 will be redundant due to its excessive strength: such material is used for multi-story construction. The most popular stone size is 600x200x300 mm.
Foundation for a bathhouse made of foam blocks
Most foam block bath projects are based on the construction of a strip foundation. On the base it is convenient to remove walls from foam blocks.
Attention! If the groundwater is high, preference is given to a grillage foundation or a foundation made of a monolithic slab. On dense, stable soil, you can get by with a shallow concrete strip. On loose soil, the project calls for deepening the foundation for a bathhouse made of foam blocks with your own hands below the freezing point.
The base for the bath can be made of two types:
- pour a monolithic concrete strip;
- lay out from ready-made concrete blocks.
In the second option, construction is simplified, but it is necessary to organize access for lifting equipment for laying blocks.
The thickness of the tape is made taking into account the width of the foam blocks. The edges of the foundation should protrude beyond the walls of the bathhouse. For a concrete strip thickness of 30 cm, a trench 50 cm wide is dug. The total height of the base is about 80 cm, of which 20 cm protrudes above ground level.
The construction of the base of the bathhouse consists of the following steps:
- The area is leveled and cleared of vegetation and debris. Markings are made from pegs and cord.
- The trench is dug to the required depth. If we take the average rate of soil freezing in most regions, then the hole is deepened to 80 cm.
- A cushion of sand and crushed stone or gravel is poured onto the bottom of the trench. The total thickness of the two components does not exceed 20 cm. The pillow is watered from a hose with water, and after the liquid is absorbed, it is compacted.
- Formwork is placed along the perimeter of the trench. The shields must protrude at least 20 cm above ground level.
- Inside the trench, a box-shaped reinforced frame is knitted from rods. Reinforcement is used with a thickness of 12 mm. The optimal size of the frame cells is 15x15 cm.
- Concrete with gravel or crushed stone is poured at a time with breaks of a maximum of 3 hours. The mixture is compacted with a vibrator or pierced with a rod to allow air to escape.
- The foundation of the bathhouse is covered with film and moistened daily. After three days, the formwork is removed, and the tape is given at least a month to completely harden.
Important! If the project involves the construction of a pouring floor inside the bathhouse, then ventilation windows - vents - are made in the concrete strip.
After the foundation hardens, construction of the sewer system begins. Remove all the fertile soil inside the tape, where the floor of the bathhouse will be. The pipe is placed outside the concrete strip at a slope of 2 cm/1 linear. m. From above, the pipeline and the entire area inside the tape are covered with a layer of sand 10 cm and gravel - 15 cm. After compaction, an armored mesh is laid on the cushion and filled with a concrete screed 15 cm thick. When it hardens, a monolithic base for the furnace is poured. Outside, along the perimeter of the tape, a similar screed is installed - a blind area, 50 cm wide.
Walling
In a month, the foundation of the bathhouse will stand, you can begin building walls from foam blocks. To prevent the porous material from drawing moisture from the ground, 2 layers of roofing felt are laid on the base along the width of the tape. Using a level, the entire foundation plane is measured again. If shrinkage occurs within a month and differences appear, they are leveled with a screed.
The construction of walls begins from the corners. The first row is laid on cement mortar. Each foam block of the next row is coated with glue 5 mm thick and connected to each other. Leveling is done with a rubber mallet and level. To ensure even laying of the entire row, pull the cord. If halves are needed, the foam block is cut with a hacksaw.
Each row is laid with a shift in half of the foam block, forming a bundle. After every third row, reinforcement is made. A groove is cut along the perimeter of the end of the wall using a wall cutter or grinder, rods are laid, and filled with mortar.
When building walls, following the design, provide window and door openings for the bathhouse. A lintel made of concrete, thick board or metal is placed above them. A new row of foam blocks is laid along the lintel.
Waterproofing and vapor barrier of walls
The problem of hygroscopicity of gas blocks during the construction of baths is solved quite simply today: there are cement-based impregnations with polymer additives that significantly reduce the amount of moisture absorbed by the material (such as “Penetron”). They can be used to coat the finished building inside and outside (in two layers). This will protect against water in its liquid state. But it is better to make a ventilated facade on the outside: it is more reliable in the sense that it protects from precipitation and makes it possible to ventilate the wall, drying out the steam present in it.
But in the most problematic rooms - the steam room and washing room - additional protection from steam will be needed. Vapor barrier from the inside will be done using a special film. Moreover, for a steam room they often use foil on a cardboard or paper base (Izospan FB), for a washing room you can get by with a regular vapor barrier.
Steam room wall insulation
You can do it differently: without impregnation. It costs a lot, and the consumption is decent - at least 7 liters per square meter. To reduce consumption, you can first putty the wall (with breathable putty) and then treat it. But in this situation, labor intensity increases.
If you provide good ventilation, there will be no problems without impregnation. For example, a cake of insulation and waterproofing in a steam room made of aerated concrete can be made like this (from the wall, inward):
- sheathing;
- heat insulator (basalt wool with minimal formaldehyde release) 5 cm thick;
- foil paper taped at the joints and in places of fastening with foil tape;
- counter-lattice creating a ventilation gap of 3-5 cm;
- lining.
If you ensure normal ventilation of the facade from the outside, and do not close the pores tightly, such insulation should work normally, and it will dry out quite well. It is only important to make the vapor barrier from the inside (from the steam room) reliable. For this film, the films are laid with an overlap of 10-15 cm, and at the joints (two strips are obtained) they are glued with double-sided tape.
There is a second approach to thermal insulation of walls. It is based on preventing moisture from reaching the outer wall. In this case, it is recommended to build a frame inside that will completely cut off the walls from moist air.
To do this, a vapor barrier is placed on the walls, a sheathing is placed on it, then a rough wall, another sheathing, between the beams of which the insulation is laid out. It is covered with another layer of vapor barrier film, on top of which the sheathing and finishing (lining) are already placed. This frame “eats” about 20 cm around the perimeter. A luxury that not everyone can afford.
In both cases, for effective ventilation of the insulation, closed on all sides with films, it is necessary to make two ventilation holes in each wall, closed with doors. The holes are not through. They do not go into the steam room (washing room), but end in a layer of insulation. In order not to reduce the temperature, the doors are closed while vaping. They are opened to dry after the procedures, because steam will still get inside, albeit in smaller quantities.
With any solution, the bottom of the wall 10-15 centimeters is decorated with ceramic tiles - they protect well from splashes, covering the wettest part. And higher up (but with an overlap in height onto the tile) comes the sheathing.
For waterproofing in the steam room, there is another option - gluing foam glass slabs. This material is quite expensive, but its waterproofing is excellent and there are no leaks. There is foam glass: European, Belarusian, Chinese. The most expensive and highest quality is European, the cheapest and lowest quality is Chinese. They “put” it on a special glue, there is no hassle with gluing: everything is easy and simple. To achieve the required degree of waterproofing, a layer of 50 mm is sufficient.
Washing room wall insulation
There is not much point in walling up such a pie in the sink: if the walls are finished with tiles laid with special glue, the problem is easier to solve. True, it still requires treatment: first, a layer of plaster is applied to close the pores of the aerated concrete, and then a layer of thin-layer hydrophobic waterproofing (these are cement-based compounds).
It is only important to coat the walls well with liquid waterproofing, following all the manufacturer’s recommendations. This coating works simply: it penetrates the pores of the concrete. The polymers contained in it begin to crystallize, and the growing crystals prevent the passage of water. The amount of water absorbed becomes significantly smaller.
The same composition can be used to treat walls outside. But such impregnation costs a lot, and the consumption is high. Moreover, the facade still needs finishing in this case: the surface is not very attractive.
Roof
The roof of the bathhouse must not only be reliable, but also withstand steam shock from the inside. A gable rafter roof is the best choice for a bathhouse made of foam blocks.
The roof is installed after the laying of the stove and chimney is completed. Roof installation sequence:
- Place a mauerlat - a beam with a cross-section of at least 180 mm - on the longitudinal walls. Secure it with anchor bolts.
- Make a rafter template: take 2 boards, connect them with the edges to form a kind of “scissors”, nail them.
- Place the free ends of the rafters on the mauerlat, select the desired angle of the slope and fix it by attaching the transverse board with self-tapping screws.
- Take beams 150x500 mm, attach them to the template, make the necessary markings and cut the rafters.
- Fasten the rafters with self-tapping screws (3 pieces for each connection).
- Raise the rafters to the edge of the bathhouse, mark the places where they join the Mauerlat.
- Hem the junctions of the rafters and the mauerlat so that they fit tightly together.
- Connect the rafters and the mauerlat using steel angles, staples, overlays and self-tapping screws.
- Make rafters for the opposite end of the roof using a similar pattern and secure them.
- Pull the cord between the two installed rafters, secure their trusses with oblique supports.
- Cut the remaining trusses and fasten them in increments of 500 mm strictly along the stretched cord.
- Take 100x400 mm boards and secure them with self-tapping screws or nails as roof sheathing at a pitch suitable for subsequent fastening of the insulation.
- Make a rough ceiling from 25 mm thick boards, securing them between the rafters.
- Lay 190 mm thick foam on top.
- Lay the finished attic floor from boards 20–25 mm thick.
- Lay the roofing material (corrugated sheeting or metal tiles).
- Secure the ridge and make a galvanized collar around the pipe.
Do not forget about the ventilation equipment for the interior of the bathhouse, for which leave 2 holes with a diameter of 100 mm at opposite ends of the floor. The gap between the rafter leg and the chimney must be at least 400 mm.
The last stage of wall construction and the reinforced sauna belt:
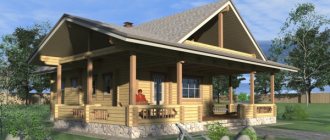
Advantages of a bathhouse with a log attic
Excellent relaxation room and wonderful microclimate in the attic of a wooden bathhouse
Perhaps you will be interested in the project of a bathhouse made of 6x4 logs with an attic, and precisely because of the advantages this material has:
- Environmental friendliness - being in the interior of the bathhouse, there is no fear of any chemicals hazardous to health getting into the air. On the contrary, the essential oils found in wood have a beneficial effect on the human body.
- Wood has low thermal conductivity, therefore, having caulked the log house well, you can count on excellent heat retention. Consequently, even in extreme cold, the bathhouse is easily and quickly heated and cools down for a long time.
- Wooden walls provide natural air exchange. As a result, drafts are eliminated, which protects against colds.
- Long service life, subject to all log installation rules, can be calculated in decades. If you build a bathhouse from aspen or larch, then such a bathhouse becomes even stronger over time.
- Relatively low price for a bathhouse made of rounded logs.
- The installation process does not take much time, because the grooves in the logs and cups cut in the right places significantly reduce construction time.
Features of foam blocks
One of the interesting qualities of foam blocks is their resistance to fire. In many ways, this is what makes them suitable for construction in this case. But this material has both its pros and cons, which must be taken into account when adopting it:
- In terms of thermal protection, foam blocks are three times better than conventional bricks. They remain durable at high temperatures.
- They are safe in an environmental sense. They don't rot. Rodents do not show interest in them.
- They do not require treatment with antiseptic or anti-flammable agents.
- They weigh relatively little and are easy to saw, which makes them convenient for construction.
- Requires small financial costs for the installation of a building box.
A significant disadvantage of this material is that it is saturated with moisture.
This can lead to a decrease in its strength characteristics and, finally, to destruction. Therefore, additional efforts are required to prepare foam blocks for existence in conditions of high humidity.
When developing bathhouse projects, you need to take care of good ventilation, possible measures for forced ventilation in the building, as well as organizing the slope of the drains so that water drainage is reliable.
It is also necessary to keep in mind that if the project includes the use of foam blocks of twenty or thirty centimeters thick, you will not have to take additional efforts to insulate the building. And if the bathhouse is used only in the summer, in order to heat it without using too much firewood, blocks even ten centimeters thick will be enough.
During construction, the walls inside are covered with foil or special vapor barrier membranes.
All joints are insulated with wide metallized tape.
To insulate the outside, the walls are covered with mineral wool. This material does not burn, is environmentally friendly, and does not contain mold. Another option is to cover the walls with polystyrene or foam plastic, reinforce them with mesh and cover them with special plaster that does not allow moisture to pass through, but only air.
Material selection
When choosing materials for building a bathhouse, you need to focus on the overall design of the site into which the building should fit harmoniously, personal preferences and the properties of each type of building material.
A wooden, log bathhouse is a good old classic. Wood is environmentally friendly, durable, retains heat well, and you can save money on interior and exterior decoration - natural wood itself is very aesthetically pleasing.
In addition to logs, you can use timber. The only difference between a beam and a log is that the first is square when cut, and the second is round.
The number of cubic meters of timber required for construction is calculated individually for each project. To do this, you need to know the dimensions of the foundation (height, length, width), the number of rows of reinforcement, its diameter, the dimensions of the formwork boards, and so on.
Chopped bathhouse, of course, is good, but not the only option. The building can be made of brick, expanded clay concrete or gas silicate blocks, gas block, cinder block and others. Each of these materials has its own advantages and disadvantages.
Expanded clay concrete, for example, retains heat well, is strong, durable, moisture-resistant, it is resistant to fire, and is not susceptible to mold and mildew. In addition, an expanded clay concrete wall is much lighter than, for example, a brick wall, and is erected faster.
This material has significantly fewer disadvantages. These include:
- unattractive appearance of the blocks, requiring additional finishing costs;
- the need for careful calculations during construction, taking into account the strength of the blocks;
- the material does not “breathe” well.
The main advantages of gas silicate blocks are their fire resistance and environmental friendliness.
The porous structure of aerated concrete allows this material to retain heat well, provide sound insulation, and also maintain a normal level of humidity.
The undoubted advantages of cinder block are:
- affordable price;
- speed of construction;
- sound insulation;
- decorative types of cinder blocks do not require additional finishing.
Among the disadvantages are the unattractive appearance of ordinary cinder blocks (non-decorative), heavy weight, instability to moisture (begins to collapse).
Another option is to install a frame bath. It is rebuilt in production, the material is adjusted, and they check that everything has been taken into account. Then they dismantle and build on site.
Do-it-yourself 6x4 sauna. Projects and their implementation
Despite the external simplicity of this building, its construction should be approached extremely responsibly. This is especially true for the choice of building material. Experienced professionals advise choosing one of the following options:
- wood (timber or log);
- frame;
- brick;
- foam blocks.
Each material has advantages and disadvantages. In addition, the speed of construction of the building and the final cost of the project depend on the choice of construction technology. The choice of material must be made before the start of the project, thanks to this it is possible to make adjustments to the drawing of the bathhouse.
Bathhouse made of logs or timber
In modern construction, more than a dozen materials are used to construct buildings, but wood occupies a leading position, as it did many centuries ago.
A log or timber bathhouse has several features:
- Environmental friendliness. Wood is a 100% natural material and therefore has no harmful effects on human health. In addition, steam rooms made of logs have always been in demand in Russian villages.
- Construction speed. When using already processed logs or timber, you can build a bathhouse in a short time.
- Savings on finishing. A wooden bathhouse looks aesthetically pleasing and does not need finishing.
The cost of such building material is relatively high, but a 6x4 bathhouse is small in size and will not require large financial costs.
If the choice is made in favor of natural wood, then aspen, linden, and alder are best suited for building a steam room. When heated, conifers release resin and emit an intrusive odor that not everyone will like. Oak, despite its durability, has disadvantages - high cost and susceptibility to elevated temperatures. Birch is relatively inexpensive, but when in contact with water it quickly loses its quality.
In terms of technical characteristics, timber and logs have no differences. In this case, the log has a round shape, and the timber has a square shape. This affects the appearance of the building. In addition, when using timber, a more precise fit is achieved, which reduces costs.
Frame-based sauna
A frame steam room can be a cheaper alternative to a bathhouse made of timber or logs. The peculiarity of this structure is that a frame made of wooden blocks is first installed on the foundation. After this, the base is sheathed with a “pie”, which consists of internal and external cladding, insulation, and a waterproofing layer.
This technology has several advantages:
- Saving on foundation. The light weight of the structure allows the bathhouse to be erected on stilts.
- Effective heat retention. This point is only possible with good thermal insulation.
- Short construction time. You can completely build a 4 by 6 steam room along with the foundation in 3-4 days.
- Low cost. Compared to wood, frame technology requires less costs.
One of the disadvantages is the shrinkage of the frame. In this case, cracks and deformed areas appear on the sheathing panels.
Brick bath
For the construction of steam rooms, brick is in less demand than wood, but its features are also worth studying. There are several advantages of using this:
- Fire safety. Brick has increased fire resistance compared to solid wood and frame buildings.
- Duration of operation. Brick buildings do not require repairs for up to 50 years.
- Environmental friendliness. The composition contains components that are safe for human health.
- Wide choice of architectural solutions. 4x6 baths can be not only 4-corner boxes, but also have a complex shape.
The disadvantages of brickwork include the following features:
- Increased heat capacity. Heating such a room will require more time and resources than heating a log or frame building.
- Moisture absorption. Bricks are a hygroscopic material, so they need increased insulation.
- The need to lay a strip foundation. This increases construction costs.
- High price for bricks.
Bathhouse made of blocks
A steam room made of foam blocks is well suited for DIY construction. This can be explained by several advantages of this building material:
- Construction speed. 1 foam block is equal in size to 13 bricks, so the laying process takes less time. With the optimal size of the bathhouse, construction can be completed in 1-1.5 weeks.
- Possibility to use immediately after construction. The blocks do not shrink.
- No harmful chemicals in the composition.
- Energy intensity. Premises of this type retain heat for a long time.
- Increased fire safety.
- Resistant to mold and parasites (unlike wood).
The disadvantage of this material when building a bathhouse is its hygroscopicity. To prevent moisture absorption, the walls must be treated with a waterproofing agent.
How to build a 6 by 6 sauna with your own hands
The construction of a wooden bath consists of the following stages:
- Drawing up a drawing, construction plan.
- Markings.
- Construction of the foundation.
- Frame assemblies.
- Roof decking.
- Interior decoration of walls, floors, ceilings.
A strip foundation is considered a reliable foundation for a bathhouse, but pouring it will be expensive and it will take several months to completely harden.
At the same stage, the supply of communications to the bathhouse is thought out.
After assembling the frame, it is important to consider the hydro- and thermal insulation of the interior of the room. You should not leave a wooden bath without insulation - it will heat up for a long time and cool down quickly
Attention should be paid to the flooring in bath rooms. Popular underfloor heating system
Construction works
In order for the service life of the bath to be long, the norms and requirements must be observed during construction. The whole process consists of several stages:
- Selecting a location and marking the site.
- Purchase of building materials.
- Construction of the foundation.
- Walling.
- Installation of doors and windows.
- Roof and roof installation.
- Finishing facilities.
Choosing the location of the bath
The ease of use and service life of the steam room depend on the correct choice of place for construction. There are several features:
- A bathhouse with your own hands should be built on a hill. If it is not there, then it is recommended to erect an artificial hill. In this case, it takes a year for the soil to settle.
- Water pipes. The best option for quickly drawing water into the steam room is a well.
- Delivery and storage of fuel materials. Storage space should be selected at the planning stage.
Selecting materials for the foundation, walls and roof
The foundation should be arranged taking into account the building material chosen for the walls:
- For log, timber and frame buildings, a pile or columnar foundation is suitable.
- For heavier buildings made of bricks and blocks, a strip is required.
Corrugated sheets or metal tiles can be used as roofing material.
Marking and foundation
When the bathhouse diagram according to the drawings is ready, you can begin marking the site. To do this, in strict accordance with the project, pegs with a taut rope are installed in the corners. If you plan to install a pile or columnar foundation, then in this case it is necessary to install pegs in all places where the supports will stand.
In the case of a strip foundation, a trench is dug taking into account the depth of soil freezing. To prevent swelling, the bottom of the trench is filled 10 cm with a “cushion” of gravel and sand.
After installing the formwork, the trench is filled with concrete and reinforcement elements.
Professionals warn: with such dimensions, the baths with a relaxation room are a five-wall structure. For this reason, the partition is laid at the foundation stage.
Walling. Windows and doors
The first stage of brickwork, foam blocks or crown (when erecting a building from logs and timber) is considered extremely important. The entire further course of work depends on the correctness of its implementation. After finishing the laying of the first row, it is worth checking it using a level. If there is a distortion, it is better to redo it right away. The second row begins to be laid from the corner.
Already at this stage, the location of windows and doorways is noted. You need to remember: frames and doors can only be installed in a finished building. These elements for steam rooms are best made of wood.
Roof of the bathhouse
After the walls are erected, the roof must be installed. This work can also be done without the involvement of specialists:
- After the walls are built, ceiling beams are laid and covered with boards.
- The next stage is the installation of the rafter system and sheathing.
- The roof can be represented by corrugated sheets or tiles.
- The final stage of installation includes installing a drain.
Floors
Floors in a Russian bathhouse are installed in several stages:
- Rough floor.
- Waterproofing layer. With its help, they block moisture from entering from below.
- Insulation. This layer is required in all rooms except the washing room and steam room. Mineral wool can be used for this purpose.
- Another layer of hydro- and vapor barrier is laid on top of the thermal insulation.
- The final stage is laying the finished floor.
Design
The interior and exterior of the bathhouse completely depends on the will, taste and imagination of the owner. You can make a classic Russian bathhouse, creating the atmosphere of the past from the inside, and at the same time feel like a rich gentleman among birch brooms and wood. For example, a traditional design can be complemented with wrought iron and iron elements, herbs hanging from the ceiling and walls, and stylistic utensils such as wooden ladles and basins.
The main rule of the interior decoration of a bathhouse is calm and relaxation. In a place of relaxation, no one will like pretentious shapes and bright, flashy colors - it is better to abandon such crazy ideas
And you should give preference to calm, natural shades that will help you relax and not pay attention to your surroundings. After all, when visiting a bathhouse, the main thing is comfort and relaxation, and your eyes very often remain closed
The light should be slightly dim and warm, soft and diffused. But at the same time, you should not arrange twilight - it strains your eyes more, and this is not conducive to rest.
A modern bathhouse gives scope in the choice of solutions and design, but it is better not to overdo it with originality, and do everything simply, in soothing colors, but with taste, and then guests will definitely appreciate the decoration of all the rooms in the house.
Materials
Before drawing up a project for a future bathhouse, you need to decide on the materials for construction. Basic requirements for materials: environmental friendliness, resistance to atmospheric conditions and temperature changes. The best choice for a bathhouse is brick or more traditional wood. The choice also depends on the climate of the area and soil.
A wooden bathhouse can be assembled from a ready-made frame, built from logs or beams. A log bathhouse does not require additional insulation. A building made of beams must be lined with linen after each row so that the structure is airtight. A wooden roof can be covered with corrugated sheets, or with metal tiles.
Brick baths are less common, but more durable and do not require constant maintenance. The cost of wooden and brick baths is approximately the same. Red or clay bricks are better suited for building walls; fireclay bricks are better suited for laying stoves and interior decoration. Wooden materials are preferred for windows and doors. They are the most reliable and durable.
What should the foundation be?
The main data needed to select the type of foundation are the characteristics of the soil and climate. In Russia, heaving soil predominates with varying degrees of freezing, which is what you should focus on. If you are going to build a bathhouse yourself, then it would be better to choose a strip foundation, since it is considered the most versatile and reliable.
A strip foundation can be laid without the professional skills of a builder; its only drawback is high labor costs. However, when finance plays a significant role, this will not be an obstacle to the implementation of the project.
Projects
When drawing up a project, it is recommended not to forget about important nuances. The layout is divided into two main rooms.
In one there is a rest room, in the second there are:
- steam room;
- shower;
- toilet.
The sizes of the rooms inside do not have to be the same. Here everything depends on the will of the homeowner.
For a compact location, the stove is installed near the wall on the side of the rest room. The unit can also be located in any part of the facility; this is a purely voluntary matter.
It is important that fire safety is at the proper level
An important detail is the vestibule; its presence makes it possible to:
- keep warm in the winter season;
- free space in other rooms is saved.
In the process of designing a 5x4 m bathhouse, it is necessary to keep in mind the following essential details:
- the entrance can be made from any side, this is due to various features of the layout of the site and the object itself;
- the space between the main house and the bathhouse is made at a minimum distance;
- the distance between rooms should be minimal;
- the drain pipe should be located as close as possible to the sewer pit;
- Most often, the steam room is made more spacious than the washing room.
A sink is equipped, and in the steam room there is a wood-burning or electric stove. Shelves are made in the room, the width of which is at least 50 centimeters. You can make a separate toilet.
Thus, 4x5 meters is quite enough to make a good bathhouse; there may be enough space for this. The adjacent room is heated by heat coming from the steam room.
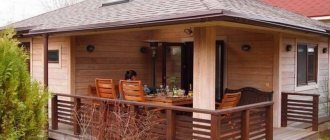
The second option is the construction and arrangement of a bath house. This option is popular. You can make a porch and terrace measuring 140 x 390 cm, which is enough for the whole family to fit at the same table with guests.
The dressing room can really be made very multifunctional. In it you can:
- store firewood;
- change clothes;
- while relaxing, watch TV or sing karaoke.
Be sure to cover the wall with fire-resistant material; the place where the stove is located is sheathed with stainless steel, the thickness of which is at least 2 mm. In such a compact bath you can install a small shower and toilet. Installing a small vestibule never hurts; it can be either in front of the locker room or in front of the steam room.
The advantages of the veranda are obvious:
- this could be an ideal place to relax during the warmer months;
- a wide canopy and the presence of windows can solve problems if the weather is inclement.
When designing a bathhouse, it is important to calculate the size of each room. It should be taken into account when planning: how many people will be in the room at the same time
If 2-3 people are steaming, then a steam room of no more than 5 square meters will be enough.
The dressing room is convenient to use for placing a table and chairs, as well as a TV and refrigerator. Some homeowners even install a microwave oven.
The dressing room is calculated according to the following rule: one person – at least 1.2 square meters of free space.
Often, a double-glazed window is installed in the dressing room to improve air exchange. The door leading from the steam room to the dressing room should open towards the dressing room.
The washing room is an important room in which both cold and hot water should be present. Water can be heated using a water heater that is in contact with the stove
The calculation is made per square meter per person. It is also rational to place a shower stall in the washing room.
The main factors that influence the design of a room:
- dimensions of the furnace and its technical features;
- the distance between the stove and surrounding objects in the room;
- the number of people who can be present in the room at the same time;
- the dimensions of the shelves and their location.
When talking about calculating an average of one square meter per person, it should be borne in mind that this area does not include the square meters that are occupied by various objects located in the steam room, as well as passages. The height of the steam room is about two meters.
Such parameters make it possible for maximum heating of a small room.
It is desirable that the room exceed two meters in length and width. Shelves are often made even more than one meter, with a length of 2.2 meters. These sizes allow almost any person to comfortably fit.
The main parameters of the design of a 4 x 5 meter bathhouse, protected from wind and rain:
- area along the external base – 20 m2;
- internal area – 12 m2;
- veranda – 3 m2;
- steam room – 5 m2
- washing room – 4.3 m2;
- dressing room - 3.5 m2.
We see that the plan for a 4x5 m bathhouse is not difficult to make. But you can buy a ready-made bathhouse, it will cost around 500 thousand rubles, but this does not include the price of finishing and insulation.
Interior arrangement
The internal structure of the bathhouse can be made in a traditional style made of wood, but shower cabins and trays in the washing area would be appropriate. They are convenient to use. In addition, they prevent water from getting onto other objects.
In the recreation room you can install chairs, armchairs, sofas, storage cabinets, and a TV.
The steam room should be equipped with shelves. This is the only attribute without which vaping will not be comfortable. The width of the shelves can vary from 40 to 90 cm.
Upholstery of walls and ceilings in the steam room and washroom
The finishing inside the bathhouse is best made of wood. This material is highly durable, safe for health and has a long service life. The best option is a board or lining.