Snow shovels
Before you go to the store to buy a suitable tool, you should find out which manufacturers produce the highest quality and most reliable snow removal equipment. But to ensure that your snow shovel doesn’t disappoint, you need to look beyond the manufacturer. The ease of use of the purchased device largely depends on the size and material. If you wish, you can consider the option of making a snow shovel with your own hands, but in this case, you will first have to find out all the nuances regarding such devices.
In the design of a snow shovel, two main elements can be distinguished - a bucket for collecting snow and a handle. Sometimes in stores you can find models that are made using a larger number of parts. But even with such differences, similar instances are intended to perform the same function.
Traditionally, wood, plastic and metal are used to make snow shovels.
Made of plastic
The plastic used by manufacturers must be frost-resistant.
For some models, it is complemented by a metal edging on the bucket, which allows the product to more easily withstand mechanical loads and increases its service life. Plastic shovels are more convenient to use due to their light weight. This is an ideal solution for women and teenagers. At the production stage, the material is treated with chemical compounds, and the area near the handle with the bucket is protected with a special edging, which makes the product more wear-resistant.
Made of wood
They are most often chosen by those owners who want to save money. The main disadvantage of such devices is the fragility of the material. In addition, wood tolerates moisture much worse than plastic, which very quickly causes cracks to appear on the surface. Wooden snow shovels are best used for removing recently fallen snow. In order to easily cope with ice and wet precipitation, you will need to additionally equip the bucket with a metal edging, which will increase the service life of the tool.
Made of metal
These shovels are the most durable and therefore last longer than other snow removal tools. But they are also more expensive than other types, although this is not surprising, given their high level of performance. Metal shovels can easily handle not only snow, but also ice.
To reduce fatigue, you can purchase a tool made of aluminum or duralumin, which weighs less than steel products. Aluminum is lighter than wood, but still does not have the same amazing strength as metal shovels. In comparison, duralumin looks preferable, because this material is much stronger, although much heavier than ordinary aluminum. Steel shovels require considerable physical effort, so, as a rule, only men work with them.
When evaluating shovels by weight, you also need to pay attention to the handle. For more convenient work, the handle must correspond to the height of the owner. Cleaning the area with a short-handled shovel will be very tedious.
It is equally important that the bucket has the appropriate width. The wider it is, the more snow you can collect in it. But to remove wet sediment, it is best to purchase a small shovel.
It is most convenient to clear the courtyard area of snow using a three-sided model, since it allows you to retain all the collected light and loose snow. Its bucket has longitudinal ribs that increase the degree of its sliding over the surface.
When choosing a snow removal tool, you need to pay attention to the nature of the work and the individual load.
To ensure that snow clearing equipment can be transported in a car and conveniently stored, manufacturers produce special folding and collapsible models. There are solutions for children too - small shovels that will allow even little helpers to take part in joint cleaning.
Preparation of materials and equipment
Before you make a snowblower, you should do a lot of preparation. To do this, you need to prepare all the necessary equipment and materials. You will need:
- Set of wrenches of different sizes;
- Nuts and bolts;
- Drill;
- Bulgarian;
- Set of screwdrivers of different sizes;
- File and hammer;
- Vices and pliers;
- Electric hacksaw;
- Welding machine and chains of different diameters;
- Roofing iron sheet;
- Profile pipes of different diameters;
- Conveyor belt and plywood sheet;
- Metal corners;
- Several sealed bearings.
It is best to place all collected tools and materials on a flat surface, covering them with an old thick towel. This way you can quickly find the part you need and not be distracted by trips to the garage.
Making a shovel with your own hands
You don't have to spend money on buying a snow shovel.
If desired, each owner can make it himself, thereby saving not only money, but also time searching for a suitable model.
There are no particular difficulties in making a shovel for removing snow. Many owners of private territories have long been engaged in making wooden products with their own hands. But for those who are going to make a wooden snow shovel on their own for the first time, it wouldn’t hurt to first find out what materials will be needed for this work:
- nails and screws;
- wooden slats;
- strip of galvanized steel;
- plywood sheets 5 cm thick.
After preparing everything you need, you can proceed directly to assembling the tool:
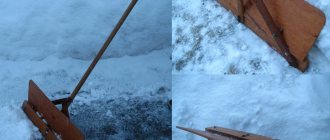
- First you need to make a back wall, for which you will need a piece of plywood 4-5 cm wide. This part should be in the form of an arc and have a height in the center of no more than 8 cm, and in the area of the sidewalls it should narrow to 5 cm. For further fastening of the handle it is necessary to Make a cut in the middle with a bevel of about 1 cm.
- Now you need to attach the rail to the profile of the back wall and mark the place for cutting off the excess. In this case, the cutting will fit tightly into the cut.
- After the scoop is ready, it needs to be attached to the arc wall and secured with nails. Usually three nails are enough - one is driven exactly in the middle to the back wall, and the other two - on the sides. Be sure to inspect the bucket and make sure there are no gaps. Otherwise, during cleaning, stuck pieces of snow will be absorbed into the material, which as a result will very quickly deform.
- After making sure that the edge of the handle is closely adjacent to the plywood sheet, it must be secured with self-tapping screws.
- For the lower edge of the scoop, in order to strengthen the fixation at the junction of the handle with the back wall, you need to prepare steel strips of the required length. The finished strips are attached to the wood with self-tapping screws.
In order for the snow clearing tool to last a long time, it is advisable to make a bucket for it from stainless steel or galvanized metal.
To better understand how this will all look, you should take a closer look at the workflow:
- From a pre-prepared sheet of metal, you need to cut a square or rectangular workpiece, the thickness of which should be 0.7-1 mm.
- On one side of the sheet, through two opposite corners, you need to draw diagonal lines 5 cm long, and then make slits along them.
- The corners of the workpiece must be bent upward on three sides to form peculiar sides.
- In the resulting wall of the scoop, you need to cut a round hole corresponding to the diameter of the handle.
- The end of the wooden handle must be processed, giving it a slightly pointed shape. You need to make a metal holder for it, which is then attached to the middle of the bucket using self-tapping screws.
- The handle is driven through the side hole into the holder and fixed with self-tapping screws to secure the connection.
How to make a snow blower for a walk-behind tractor
Craftsmen show a lot of videos with homemade snow blowers attached to a walk-behind tractor. Their only difference is that the mechanisms are hinged. Homemade snow blowers receive traction force through a belt from the walk-behind tractor motor.
There are 3 common models of homemade attachments:
- A homemade rotary hitch is made in the same way as for a rotary snow blower with a gasoline engine. Two guide vanes can be installed, which allows you to increase the width of snow capture.
- The easiest way is to equip the walk-behind tractor with a homemade blade. The working part is cut out from ½ part of a pipe with a diameter of 300 mm. Rods and a coupling mechanism are welded on the back side, allowing you to quickly connect the blade to the walk-behind tractor.
- A self-made rotary auger hitch is a combined device. For a walk-behind tractor, this is the most productive mechanism. The rotor volute is attached to the back side of the auger snow receiver bucket. First, the screw blade grinds the snow. The loose mass enters the cochlea, where the rotor mixes it with air and throws it out through the outlet sleeve.
Rotary and auger-rotor attachments for walk-behind tractors are usually placed on skis. It is advisable to equip the blade with a lifting mechanism to create a full-fledged homemade bulldozer.
Scrapers for the garden
There are periods when there is more snow than usual, and you have to devote a lot of time to cleaning the area. It is not always possible to quickly cope with this task even with the help of a wide shovel. For such a case, it would not hurt the owners of private territories to have a scraper in their arsenal - a scraper for removing snow. In appearance, such a tool resembles a regular snow shovel, only with a wide bucket. With the help of this device, you can, without much effort, clear areas near your house and paths from snow masses.
Structurally, the scraper looks like a wide bucket for clearing snow with a large arched handle attached to it. Depending on the size, you can use this tool with two or four hands. Working together with a drag scraper allows you to clear an area of snow by moving large layers of snow.
But such devices can only be used for removing light snowfall. To remove compacted snow masses and areas of ice, you will have to use a shovel. Although for this case there is a good solution - a scraper on two or four wheels. With the help of such a shovel, you can clear the area of wet deposits without much effort.
Scrapers are similar to snow shovels in many respects. In particular, manufacturers use the same materials to make them.
Using the Mole cultivator
Owners of vegetable gardens, small farms, and summer cottages who are planning to purchase a domestic motorized cultivator “Mole” (tested not only by time) are often interested in what attachments for this motor cultivator are sold on the domestic market.
Their interest is understandable and valid, because it is thanks to all kinds of trailed and mounted attachments that this unit becomes indispensable, one might say, a universal assistant on the site.
Where to find diagrams and drawings of snow removal machines
We suggest that you carefully read the forum threads , which describe the independent production of certain mounted snow blowers with your own hands.
Perhaps there you will find ready-made schemes suitable for your situation.
Or use
the experience of forum members to develop something of your own, for example:
- Manufacturing of an auger snow thrower with a hydraulic motor (mounted for a mini tractor).
- Another auger thrower (mounted for the MB-2S walk-behind tractor).
- Bulldozer blade (blade) for a car.
- Chainsaw snow blower.
- Various tips for building a snow blower yourself.
- Another thread with various tips on making a snow blower, including attachments.
- Mounted auger snow blower for mini tractor.
Safety precautions
When starting to make snow removal equipment with your own hands, you should carefully read the safety requirements :
- When working with an angle grinder, be sure to wear safety glasses (mask) and headphones ;
- When working with a welding machine, be sure to wear a protective mask with black glass ;
- Carry out welding and painting work indoors with good ventilation or in the open air ;
- Do not use the welding machine in a wet/damp room or outdoors during rain ;
- When putting on your work clothes, make sure that nothing is hanging ;
- After finishing work, be sure to clean the work area and prevent the accumulation of chips and debris ;
- a stocked first aid kit near your work area .
Motorized option
Cleaning the yard and street in winter can be made easier if you make your own snow scraper using a walk-behind tractor. To do this, you don’t have to make any special efforts, since it’s enough to attach a snow removal blade made, for example, from a curved stainless steel sheet to the bumper. You can also use a ready-made blade. You can also install a snow blade on your bike by attaching it below the handlebars.
Wood scraper
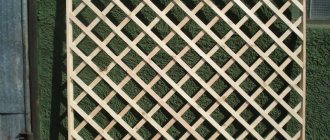
To create scrapers with sides made of pine boards, it is necessary to prepare a rail from the same material.
Everyone makes the dimensions of the latter more convenient for themselves. You also need to take a sheet of galvanized iron so that its dimensions are 73 by 70 cm.
This version of the scraper is very simple to make. The sides made from boards need to be attached to the sheet of iron with screws (you can even use self-tapping screws). After this, the rail itself is attached, which will act as a handle.
Criterias of choice
Modern options for snow scrapers can be very diverse. For example, there are manual options and there are mechanical ones. Moreover, the former are much cheaper.
However, all dump models share certain properties:
- ease;
- strength;
- They have a high quality handle.
The latter should not slip in the hand and have poor thermal conductivity, which is justified by the need to keep the hands of the person using it warm.
It follows from this that the choice of the required scraper option for clearing snow should be based on the specified properties.
This is necessary to ensure that the device is lightweight, but at the same time durable. Due to this, the person who uses the scraper will be less tired, and the chance that the device will break is minimal.