Creating a source of uninterrupted supply of clean drinking water is an important task for those who live in a private home. To do this, it is necessary to drill a well through which the precious liquid will flow. For this purpose, many invite a team of professional drillers. But you can create the necessary drilling rig with your own hands. Next we will talk about creating a hydraulic drill at home.
Main types of drilling rigs
Drilling rigs differ in their design due to the choice of different methods for creating a well. For example, an impact drill destroys soil using a special weight tied to a pyramidal support frame. But a rotating drill is a much more complex structure, but it is much easier to make a hole of the required size in the soil with its help. Based on the type of construction, it can be divided into several categories:
- Shock-rope installations. The design is represented by a frame with a pyramidal base, to which a cable with a projectile (bail) is securely attached. The principle of operation of such an installation is quite simple: the load is lowered and raised as many times as is required to create a hole of the required depth in the soil.
Drilling rig
- Screw installations. Drilling is carried out using an auger that breaks through the ground according to the principle of rotation. In this case, the hole dug during the drilling process is not washed out.
Attention! Keep in mind that this type of drilling rig is a design that is too complex to be created by hand: most of its functional elements are almost impossible to create without the appropriate skills and tools.
- Rotors. Rotary structures operate on the hydraulic principle.
- Manual rotary type designs. These installations are considered the simplest, largely due to the fact that they do not have an engine in their design. Accordingly, the process of creating a well in the soil is carried out manually, which requires considerable physical effort. That is why such manual designs are very rarely used.
Advantages of a DIY installation
Undoubtedly, a drilling rig for creating a water well has a number of advantages. These include:
- Reasonable price. It has been noted that a factory design for drilling a water well in most cases costs much more than one made by hand.
- Compact and light weight design.
- The technical characteristics of a hand-made drilling rig, as it turned out, are in no way inferior to factory-made units.
- Easy to install. Homemade drilling rigs are very easy to both install and dismantle.
Homemade impact drilling rig - Mobility. Due to its dimensions and design features, a homemade installation can be used for drilling wells in the most inaccessible areas. In addition, the disassembled drilling rig is quite easy to transport, since it fits into a regular trailer.
The most popular equipment for drilling water wells MGBU
Small-sized installations are often purchased by individual entrepreneurs, small companies and summer residents. The main features of compact machines are light weight, mobility and relatively low price. Some models are in the range of 70-900 thousand rubles. are in high demand due to the opportunity to organize a business in the construction of water intakes using MGBU.
Installation of Hummingbird
Available drilling methods: auger with a diameter of <200 mm, rotary with flushing and blowing, solid bottom or core. Drilling wells in soils of categories I-VI.
Installation of Hummingbird.
Specifications:
- drilling depth - 50-70 m;
- drive power - gasoline engine 16.4 kW (22 hp);
- assembled weight - 270 kg.
MGBU is mounted on a trailer, UAZ, Gazelle chassis. Available in a modular version for hand carrying. Cost 900 thousand rubles.
Hydrodrill installation
It is manufactured for drilling wells Ø70-320 mm in rocks of any hardness to a depth of 50-70 m. The crew consists of 2 people.
Characteristics of the Gidrobur-1 Mole model:
- electric drive power from a 220 V network - 2.2 kW;
- average drilling speed - 4-5 m/hour;
- weight without projectile and drilling tool 200 kg.
The price of the basic set is 70 thousand rubles. Control devices are supplied separately - 14 thousand rubles. and electric drive for raising and lowering the column - 14 thousand rubles.
Installation TM 80
Used in hard rocks up to strength category 12. Initial diameter <300 mm, drilling depth with auger 150 mm - <10 m, with blowing up to 50, flushing - 150 m.
Installation of TM-80.
Parameters of MGBU TM 80:
- drive from VAZ 2106 engine - 80 hp;
- drilling speed for sand - 15, clay - 10, hard rock - 5 m/hour;
- weight - up to 750 kg.
The machine is installed on its own chassis and equipped with 4 retractable jacks. Available in 3 modifications: Premium, Standard, Budget. Cost from 570 thousand rubles.
Features of making various small-sized drilling rigs with your own hands (purpose of a windlug)
In general, the technology for assembling various drilling rigs is almost the same (and this will be discussed a little further), but the working tools for different types of structures are radically different. Therefore, first you should consider the manufacturing technology of the main mechanism (drill) for different designs and only after that proceed directly to the creation of the main frame and the working elements attached to it.
So, let’s look in detail at the most commonly used drilling rigs (the “glass” rig and the auger rig).
Homemade drills
A drilling rig with a “chuck” uses a so-called “chuck” (“chuck”) as the main working mechanism. If you want to make it yourself, then you will only need a piece of pipe with a diameter of about 1 m. When creating a suitable base frame for such a drilling rig, the dimensions of the “chuck” must be taken into account. The “cartridge” itself must have not only impressive dimensions, but also considerable weight for effective soil drilling.
Advice. On the bottom of the pipe you can make points in the form of triangles. Thanks to this trick, you will increase the speed of digging a hole in the soil and the quality of loosening.
If you do not want to give the edges of the "chuck" a triangular shape, make sure that they are sharp (sharpen them if necessary).
We will fasten the “glass” with a cable, so it is necessary to make several holes on the load (in the upper part). We fasten the cable and then hook it to the pre-prepared frame. Please note that the length of the cable must be such that the “cartridge” can fall down and rise up completely freely.
Impact glass
The auger installation uses a drill as the operating mechanism. An ordinary metal pipe is also quite suitable for its manufacture. Make a screw thread on the top of the pipe, and an auger-type drill on the bottom (the most convenient drill length is about 2 m).
Advice. 2-3 turns on the drill will be enough to create a water well of medium depth.
A pair of knives must be attached to the ends of the drill using a welding machine: they must be positioned in such a way that during the drilling process they plunge into the soil at a certain angle.
To make the design convenient to use, weld a part of a metal pipe (about 1.5-2 m long) to the tee. The tee itself must be equipped with a screw thread inside.
Separately, it should be said about the swivel, which is used in drilling rigs as a compensator for the resistance of the moving part of the rig (drill) and the stationary part that supplies water. The structure of this part is quite simple: a pair of flanges, partitions with rubber sealing rings, the body itself (made from a piece of metal pipe) and a metal rod.
It should be noted that you can make this part yourself only if you have turning experience and the ability to make technical drawings.
Features of drilling on various soils
For different types of soil rocks, the technology for percussion-rope drilling of wells is different. The working body is selected depending on the physical characteristics of the soil being destroyed. In some cases it is necessary to combine a percussion instrument. Let's take a closer look at the technique:
- When making a well pit in sand or quicksand, it is allowed to use a flat bailer. It freely destroys loose soil and brings it to the surface. A mandatory requirement for creating mines in such unstable rocks is the casing of the shaft, which prevents the collapse of the walls. It is undesirable to lift the projectile higher than 0.5 m above the casing. Violation of the condition leads to distortion and jamming of the column in the shaft.
- The I-beam bit configuration is used to crush gravel horizons and pebble formations. The excavation is made by a bailer with a flat valve mechanism.
- For viscous soils represented by plastic clays, it is recommended to use a percussion tool of a specific design. Improved flat projectiles or chisels made in the form of an I-beam are complemented by cross-shaped parts.
Hard-to-break boulders or large stones can interfere with the vertical passage of the mine. In such cases, production must be moved to another location. You can cope with crushing rocks of increased hardness using a weighted chisel.
Fractured layers are prone to crumbling
To prevent collapses, impact drilling of wells must be carried out with extreme caution, controlling the parallel casing of the walls of the shaft well
MGDU (small-sized drilling rig) assembly technology
So, the working mechanism of the drilling rig is prepared, now you can proceed directly to assembling the entire structure. Please note that you will need some tools for the job: an electric drill, an angle grinder, a welding machine, as well as a galvanized pipe, a pipe bender and a plumbing cross. Let's look at the process of assembling the structure step by step:
- We prepare pipe sections to create the base of the drilling rig. They will need to be fastened into a bracket and a cross. At the ends of the pipe sections, cut the threads a couple of centimeters deep.
Drilling Rig Parts
- Weld pre-sharpened metal plates to the ends of the metal sections (such an installation will allow for a continuous supply of water).
- To supply water to the installation, connect a pump hose to one of the sections of the cross.
- We connect the prepared parts to the threaded connections. We weld a metal piece with a tip to the bottom of the main pipe.
- Let's start assembling the installation base from a square profile. We connect the metal supports to the main rack by welding.
- We attach the engine and platform to the profile. The profile itself must be attached to the main post in such a way that it can move freely along it.
Advice. When choosing a suitable electric motor, pay special attention to the power rating of the device: 0.5 horsepower will be enough for comfortable and efficient operation.
- The engine power will be regulated using a gearbox, to the shaft of which a flange must be attached. We attach another one to it, and place a rubber washer between the flanges.
- The last step left is to check the water supply. It must happen without interruption.
This concludes our consideration of the technology for creating a drilling rig for water supply at home. Good luck!
Carrying out measurements and arrangement of the site
The first stage of work is to calculate the groundwater level. This is required to determine the complexity of drilling and prepare the required number of pipes.
The most accessible way is to contact the appropriate service to obtain a geodetic map of the area. You should also decide on the water source that will be used to collect the drilling fluid.
The required volume of fluid for flushing during drilling is determined taking into account the composition of the soil and the size of the well; on average, it ranges from 5 to 21 cubic meters. m of water.
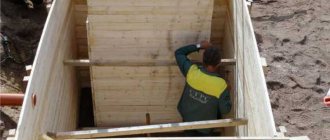
The next stage is preparation of the work site. Manual drilling involves removing soil from the borehole channel and constructing containers for the flushing solution - two pits, the size of which is 1 cubic meter.
One container is intended for draining liquid and removing impurities, the second is for pumping water into the drilling rig. The pits are connected to each other by a trench, which ensures free flow of liquid. Prepared pits prevent dirt from spreading across the site.
The drilling device is mounted level to avoid even a slight slope. The pump inlet hose is installed in the first pit, and the outlet hose is located towards the swivel. Through it, the flushing solution enters the well string.
For this reason, such drilling technology is quite simple and economical.
