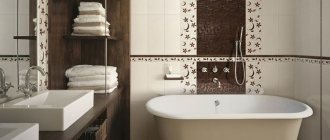
Not every person can purchase a marble countertop. A tabletop made of tiles has undeniable advantages. This design is quite often installed in the bathroom. You should know that the countertop in the bathroom will be exposed to moisture and high temperatures. The tiles that are laid on the countertop must be combined with the tiles that are laid on the floor and walls.
Scheme of tile laying options.
Why choose tiles
Ceramic tiles, like any other material, have their advantages (compared to analogues):
- Affordable price. Not everyone can afford to install marble or natural stone countertops in their bathroom, so ceramic tiles are an excellent alternative for many.
- Versatility. The tile fits perfectly into any interior, regardless of its stylistic orientation. It can be either classic or modern style. Not every material has this property.
- Practicality. Ceramic tiles are highly waterproof, durable, last a long time and are resistant to mechanical damage. In addition, it perfectly tolerates temperature changes and the effects of abrasive detergents. The tiles are easy to care for and easy to clean and wash.
- Range. Regarding this point, tiles can rightfully be placed in first place in the ranking of assortment diversity. No other finishing material can boast so many shapes, sizes, textures and shades. This allows you to use tiles to create truly unique projects.
Materials for making an overhead bowl
Overlay-type models are presented on sale in quite a variety of ways, largely due to the fact that they are made from a wide variety of materials.
Countertops, like the sinks themselves, can be made from a variety of materials. For example, a luxurious marble countertop looks great with a faience bowl
The most popular and in demand are products from:
- Faience. The main advantages of earthenware products are their smooth surface and overall attractiveness. In addition, the price of earthenware containers is affordable for most consumers.
- Porcelain. The porcelain surface looks very aesthetically pleasing. It is practically devoid of pores, so it does not absorb rust and dirt. Porcelain products are very easy to care for.
- Tree. Of course, not every wood is suitable for this purpose. Larch and oak, beech and mahogany are suitable for creating a sink. But interiors with wooden accessories look especially aesthetically pleasing and always attract attention. But such models are not cheap and require special care.
- Glass. The tempering procedure provides the glass used for the manufacture of such structures with the necessary strength. Glass bowls look impressive, but they can leave stains and smudges that are difficult to get rid of.
- Acrylic. These are inexpensive models that have amazing strength, despite their lightness. But acrylic sinks can be scratched, so they should be handled with care and special pastes should be used when caring for them.
- Marble. Marble products are very beautiful, but it has a porous surface, so it gets dirty quickly. Marble is not only expensive, but also a rather capricious material.
- Fake diamond. If we compare it with marble, the stone is more practical and easier to maintain: it can be cleaned with any modern detergent. It costs less than marble, but in general it cannot be called cheap.
- Metal. When we talk about metal products, we usually mean copper, brass and stainless steel. Metal containers are highly durable and durable. But they also have a significant disadvantage: they are expensive.
- Livinteg and polymer. Polymers can be used as an independent material, and when mixed with crushed stones, the polymer resin forms livinteg. These are new materials that have yet to conquer markets.
This sink is made of metal and placed on a stone countertop. The entire bathroom is made in steam punk style and looks original and attractive
Choosing a countertop type
A tiled bathroom countertop can be of the following type:
- Monolithic design with sink. This option looks very stylish and laconic. The room will look more spacious and easier to clean.
- Built-in design. This type is the most common. A sink integrated into a tile countertop in a bathroom opens up a wide range of stylistic possibilities.
- Countertop with countertop sink. It looks very original, given the variety of sinks available. An ideal option for those who decide to make a bathroom countertop from tiles with their own hands, since installing an overmount sink is the easiest way.
Choosing a product manufacturer
There is a huge range of manufacturing companies from different countries that produce a variety of configurations of countertop sinks for the bathroom. You can buy them in certified stores. Before you give preference to any particular manufacturer, check out the table below.
| Image | Manufacturer and model | Material | Average price, rub. |
| Linkasink Bronze Brocade Sink | Metal | 53 194 | |
| Macro Cup | Faience | 37 485 | |
| GSI MODO | 18 277 | ||
| Gala Emma Square | 6 010 | ||
| Laufen Pro | 8 530 | ||
| Franco Ceccotti WAVE | Tree | 112 700 | |
| Ledeme L124-9 | Glass | 6 800 | |
| ArtCeram Tai | Ceramics | 14 152 | |
| GSI Old Antea | 31 040 | ||
| Sheerdecor Sfera | Stone | 23 600 |
All further use of the device depends on the choice of manufacturer
Mounting options
There are several ways to install the countertop:
- Floor-mounted mounting. The tabletop can be installed on a cabinet or legs. This method is the most reliable and sustainable.
- Suspended design. The device is attached to the wall using pre-installed brackets. Such a countertop made of tiles in a bathroom looks modern and stylish, creating a light effect.
Tile sizes
The choice of ceramic tile size depends on a number of parameters. First of all, it is necessary to take into account the dimensions of the room itself. If the bathroom is quite spacious, then you can take large-sized material - 30*30 or even 60*60 centimeters. These tiles are more convenient to lay, and they are also easy to maintain.
But few can boast of the large size of this room, so most often small-sized products are used to cover the tabletop - 10*10, 15*15, 20*20 centimeters. The small size of ceramic tiles visually expands the boundaries of the room. In addition, it fits in a small bathroom much more logically than in large blocks.
Care
Care instructions:
- Difficult-to-remove contaminants, such as fat, iodine, brilliant green, coffee, tea and others, must be washed out immediately.
- Glass countertops can be easily washed with window or mirror cleaners.
- All wooden products are afraid of water. They must be wiped with a damp cloth and then wiped dry. Hard to remove stains can be removed with baking soda. Sometimes it is worth impregnating with special means (so that the wood does not deteriorate).
- It is enough to wipe the artificial stone with a damp and dry sponge. It is advisable not to use detergents (such as soda, powder).
- Marble countertops can be wiped with a damp cloth and a small amount of detergent. Do not use metal jaws. To remove heavy stains, it is advisable to use a special marble cleaner.
Conclusion! The choice of countertop, wall or floor, material and everything else is an entirely individual decision. But a person who does not like constant changes and wants to install it for a long time should pay attention to a marble countertop.
And for those who have not decided what exactly they want and love constant changes, you can look at cheaper options, such as drywall, glass, wood.
Color solution
The range of tiles presented in stores is very diverse. The variety of colors and patterns makes it possible to choose the material for any stylistic decision.
The most popular colors for decorating tile countertops in a bathroom are white, blue and all its shades. Marine themes are always popular in bathroom design. This trend is still in great demand today. This includes turquoise, azure shades, sea green and other rich and dull tones. The tabletop can be made exactly to match the wall and floor, or, conversely, become the main accent in the room. To do this, the product is made somewhat darker or completely contrasting.
Neutral and practical shades of ceramic tiles – beige, sand, black and gray – are no less popular. These colors go well with furniture and fit harmoniously into any interior style.
A tile countertop for a bathroom sink can be made in monochrome or combine several colors that are similar in shade. The most daring ones choose products in which two or more contrasting tones juxtapose. Black and white, sea green and white, red and black go well together.
Tiles of brighter shades are selected when the tile countertop in the bathroom (photos presented in the article) is made to match the wall and ceiling. For example, if the room is decorated in lilac and white, then the table under the sink can be made bright purple.
As for choosing a print or pattern, it all depends on the style of the room. Most often, plain canvases are laid out or those that combine no more than two contrasting shades. Some opt for multi-colored mosaics, but you should be careful here, since it is appropriate to use this material only if it is already present in the interior.
Selection and installation of bathroom countertops
The fastening system and the height of the countertop are determined by the level at which the sink and plumbing are installed.
Designing a bathroom that includes installing a tile countertop opens up vast possibilities for creating a stylish interior. In addition, it allows you to hide communications and a washing machine. The washing area becomes more comfortable and a functional area appears for storing related accessories and other parts.
Having decided on the style of the product, you can install a countertop under the tiles in the bathroom with your own hands. When choosing a ready-made structure, you will not need any special abilities or skills for installation. After studying the instructions below, you can easily do the work yourself.
DIY tile bathroom countertop
Designs covered with ceramic tiles for the bathroom are very popular due to their practicality. But not everyone has the opportunity to pay a builder for installation of the product. Therefore, many people do this work on their own and do not lose anything.
To install the countertop you will need:
- Metal corner.
- Level.
- Roulette.
- Goggles for eye protection.
- Construction knife.
- Screwdriver.
- Electric jigsaw.
- Spatula-comb.
- Silicone spatula.
- Sponge.
- Grinder with a nozzle for polishing stone (disc-turtle).
- Tile cutting device.
Necessary materials:
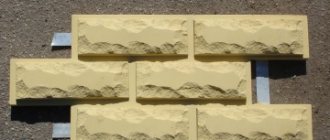
- Ceramic tiles 30*30.
- Plywood sheet, 19 mm thick.
- Cement particle board, 6–13 mm thick.
- Screws.
- Masking tape.
- Paste for tiles.
- Grout.
- Sealant.
Tips that will not be superfluous
You may find the installation process too simple. But it is not so.
Errors or negligence during this work can lead to deterioration in the appearance of the sink or damage to the countertop if water constantly penetrates into the space between it and the sink.
If you are not sure that you are able to cope with the task, invite a specialist. But then you won't be able to save money. Think about what is more important to you.
To completely dispel your doubts, we suggest you watch a video in which the installation process is performed by a professional.
Creating a plywood base
Not sure how to make a tile countertop in your bathroom? First you need to prepare the frame. The foundation formation process consists of the following steps:
- Removing the old countertop. You can assemble the base for the structure yourself, either new or leave the old one if it is in good condition.
- Using a level, check whether the cabinet is installed straight.
- Preparing the surface for laying tiles. You need to take plywood and cut out a frame that will be attached to the base. Expert advice: if you plan to lay heavy tiles, then it is recommended to lay plywood in two layers or strengthen the first one with stiffeners.
- Fastening the frame. The cut sheet must be fixed to the base using screws, corners or plates on the bottom side.
Installation of DSP
Due to the high coefficient of thermal expansion, tiles cannot be laid directly on the plywood surface. The top of the plywood is sheathed with DSP. Stages of work:
- Preparing a piece of DSP according to the mold. You can cut out the desired shape with a grinder, but in this case there will be a very large amount of dust. It is better to use a knife - make grooves of 2-3 mm and break off along the contour on the corner of any surface.
- Fastening the DSP. The finished sheet is attached to the plywood using self-tapping screws. The holes should be countersunk so that the heads of the studs are “recessed” into the surface.
- Processing the end of the table top. It is necessary to cut a strip 5 centimeters long from the DSP and fix it at the end under the top part.
- Fixing the DSP sheets with a fiberglass mesh.
- Preparing the hole for the sink. You need to take a jigsaw and cut a hole where the sink will be installed. Most modern sink models come with a template. Before you start cutting, you need to drill a hole exactly in the middle of the tabletop into which the jigsaw blade will be inserted.
Various photos of bathroom countertops with tiles are posted in the article. They can also be used as an example or sample.
Step-by-step instructions for installing a console sink
When installing the console device, follow the technological sequence. For installation you will need the following materials and tools:
- drill with drill bits for concrete;
- laser level;
- tape measure, marker;
- set of wrenches;
- fastening elements (dowels, screws);
- sealing tape;
- sealant.
Fastenings for a wall-hung sink are welded blanks of different shapes. More reliable fixation is provided by frame-shaped parts. Models of non-standard shapes are supplied with metal brackets. Before starting work, check whether the wall can withstand the load. If the nail easily enters the material, then increase the size of the fasteners or install a frame.
Console sink.
Preliminary surface marking
When performing markings, consider the following:
- Sink location and height. When calculating the parameter, we focus on the ease of use of the equipment. The standard height is 85 cm, it is suitable for a person with a height of 160-180 cm. At the desired level, draw a horizontal line, which is the upper limit of the device. At right angles to the floor, draw 2 lines, the distance between which should be equal to the width of the washbasin.
- Location of tile joints. In order for a wall-hung sink to look aesthetically pleasing, it is necessary that the fastening elements coincide with the seams. When making markings, use a level.
Making holes for fasteners
To insert the brackets, the bowl is turned over. After installing the fasteners, the level is moved to a horizontal line. Places of fixation are marked on the wall. At the resulting points, holes are drilled with a drill 1-2 mm smaller than the diameter of the dowel leg. For reliable adhesion, they are filled with glue. Next, polymer dowels are driven in, into which self-tapping screws are screwed. To prevent the drill from moving, apply masking tape to the tile.
Drilling holes for the sink.
Installation of the sink bowl
Before fixing the bathroom sink to the wall, check the reliability of the brackets. The pins are inserted into the mounting holes of the bowl. Self-tapping screws are equipped with gaskets and nuts, which are tightened until the washbasin takes the desired position. The joint between the device and the wall is coated with sealant. When screwing in the fasteners, apply moderate force.
Otherwise, the surface of the device will be damaged. The insertion points for self-tapping screws must be covered with plugs.
Connecting the siphon to communications
The installation process of a drainage device includes the following steps:
- Fixing the bell. A rubber seal is installed on the hole, allowing for a tight connection, grille and clamping bolt. The spacer should not move while screwing in the screw.
- Siphon assembly. The bell is connected to a flask and a flexible tube. The latter is inserted into the sewer pipe outlet using cuffs or a rubber seal.
Siphon connection.
Faucet installation process
The faucet is installed before hanging the sink on the wall, because... Once the sink is fixed, it is difficult to install. Installation is done as follows:
- Flexible water pipes are connected to the mixer body. Using these elements, the device is attached to the washbasin and water supply system. To seal the joints, sealing tape is used.
- Flexible hoses are inserted into the sink hole and semicircular gaskets are put on them. The threaded end is connected to the mixer, and the end with the clamping nut is connected to the pipes. If the dimensions of the pipe and hose do not match, use an adapter sleeve.
- Testing the system. To do this, restore the water supply while inspecting the connections. If there is no leakage, the installation was completed correctly.
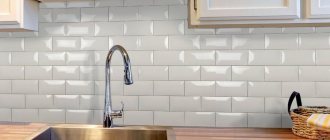
Laying tiles
The process of laying tiles on a countertop is similar to working with other surfaces. It is performed as follows:
- You need to take a small spatula and apply tile adhesive to the smooth surface of the comb. Next, it needs to be evenly distributed over the surface of the countertop. Use the serrated side of the comb to remove excess. This is done in such a way that even grooves of glue are formed. Expert advice: the mixture should be applied in sections, as it quickly hardens and loses its plasticity.
- The laying out of elements begins from the first row. It should protrude slightly beyond the edge of the base so that after laying the tiles on the end, the surface is level. In addition, instead of the initial row, you can install special corner elements.
- When laying ceramic tiles, seams are made, so it is necessary to use plastic crosses.
- It is recommended to constantly check the evenness of each tile using a level. This is done so that defects can be corrected before the glue hardens.
- After the solid tile elements have been laid out, you need to take a tile cutting device and make adjustments (substitute or cut off pieces).
- As soon as the surface of the tabletop is ready, you need to move on to facing the end. Glue the 5 cm wide sections with tile adhesive and secure them temporarily with masking tape.