Pine wood has a noble texture, rich natural shades and is characterized by a long service life. These qualities determine the consistently high consumer demand for furniture made from this natural material.
It is worth understanding that wood requires proper care, which will increase its strength and extend its service life. Most often, varnish is used to coat furniture made of pine furniture board for this purpose. This has important advantages
:
- The consumer can buy furniture for a set from different manufacturers - colorless varnish will make all items the same from an aesthetic point of view.
- Varnish, unlike paint mixtures, is distributed evenly over the surface, which emphasizes the beauty of natural wood.
- Pine is an inexpensive material, and varnishing increases its final cost.
In addition to varnish, paints and stains are used to coat pine wood products. The staining process is quite complicated and requires experience in working with a sprayer, and painting is usually done with a wide brush or roller.
What does furniture coating provide?
Wood processing is carried out for various purposes: giving the desired color, increasing quality characteristics, improving moisture and heat resistance. For example, a combination of a tinting composition (stain) and parquet or yacht varnish will make the set strong, beautiful and durable.
Today, manufacturers have launched the production of furniture made of pine, tinted to resemble cherry, beech, oak, walnut and other species. However, these technologies can satisfy only a certain group of consumers, since the products on the market do not differ in either the breadth of colors or the variety of aesthetic images. That is why many connoisseurs of natural materials decide to take a difficult step: painting wooden furniture and interior items themselves. And here a reasonable question arises: how to cover pine furniture panels?
Today there are three main wood processing technologies:
- Tinting;
- Full painting;
- Varnishing.
Acrylic tinted varnishes
Acrylic-based tinted products are very common these days for treating flooring materials. This paint and varnish product consists of acrylic water dispersion, tinted additives and driers. Acrylic tinting varnish for wood is best suited for treating floor coverings, on which the solution creates a presentable and very beautiful protective layer. Acrylic mixtures can have antiseptic properties, providing protection against fungi and mold. Acrylic-based compositions dry quickly enough, they are used for the following purposes:
- for internal and external work on processing and decorative finishing of wood. Acrylic tinted varnish can be applied to wooden baseboards, lining, panels, trim and doors;
- to make tinted parquet;
- carry out interior finishing of various types of surfaces, including mineral materials, for example, brick, stone, concrete, foam blocks, etc.
Characteristics and properties of tinted acrylic-based varnish:
- colorless, glossy shade, or pine, oak, Oregon, and others;
- packaging 1-10 liters;
- varnish consumption: 1 liter is enough to treat 8-14 square meters of parquet or other wooden surface;
- The drying time is 40-60 minutes, but the tinted type of varnish finally dries in about 48 hours.
Painting options for pine furniture
To get started, answer yourself a few questions:
- Do you want to highlight the natural shade of wood or paint over it?
- What is the structure of the source material (presence of irregularities, knots, defects)?
- How will the product fit in with other items and the overall design of the room?
The choice of method and means of covering a wooden set or individual items depends on the answers to these questions.
Furniture tinting
Pine has a natural color, which is dominated by amber-golden tones. Furniture made from this wood “breathes” and harmonizes with any interior, from the living room to the children’s room.
Tinting emphasizes the natural color of the material and hides its defects, highlights the structure of the wood and evens out uneven shades. In addition, this technology can give raw materials non-standard colors, as well as the effect of simulating valuable tree species.
Are you thinking about how to cover furniture made from furniture board? Processing is usually carried out with aniline dyes and aqueous solutions of salts, tannins and acids. These products interact well with water and are quickly absorbed into the material.
When tinting wood, a number of important criteria should be taken into account:
- The working surface must be sanded before and after processing;
- The tint is applied to the primer layer;
- Dark spots, drips and other defects of the dye will spoil the final result - you need to get rid of them;
- After treatment with stain, the material must dry.
Varnishing and painting of furniture
If desired, you can varnish the furniture panel or simply paint it. In general, these works boil down to the following actions:
- The surface of the furniture is cleaned of old coating, all defects, knots and roughness are removed;
- The wood is de-resined;
- All irregularities and cracks are sealed with putty;
- Apply the primer using a roller or wide brush;
- The first layer of paint is applied and sanded with fine sandpaper;
- A second layer of paint is applied.
Pine wood is heterogeneous, which complicates the painting process. In particular, its high resin content does not allow it to evenly cover the entire surface of the product. To solve this problem, the furniture board should be deresined.
Removing excess resin is not only a guarantee of high-quality processing of the material, but also care for the aesthetics of wooden furniture. The fact is that resin drips acquire a dark color over time and spoil the appearance of a product or piece of furniture. But still, their main drawback is the inability to evenly apply primer, paint and varnishes - the resin creates unevenness on the working surface and produces a sticky film that prevents the absorption of the applied products.
How is wood detarred? First you need to prepare a special liquid consisting of technical alcohol (10 g), 25% technical solution of acetone (0.2 kg), potassium carbonate (50 g), soap flakes (50 g), ordinary baking soda (50 g ) and one liter of hot water. This product is applied to the surface, then it is thoroughly washed and dried. Too large resin growths can be cut out with a knife and puttied.
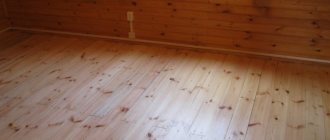
Thus, treating wood with stains, paints and varnishes will not only give solid pine furniture a rich, rich color, but will also extend its service life. In addition, these processes can be carried out independently, without the help of third-party specialists.
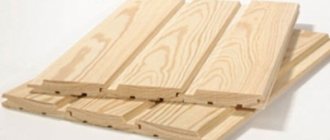
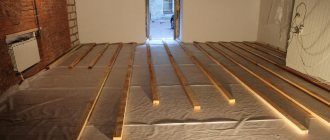
It is worth adding that the strength and aesthetic characteristics of the material depend not only on the quality of the impregnations, but also on the characteristics of the source raw materials. produces 25 and 40 mm, which combines high practicality, environmental friendliness and affordable cost.
Pine furniture is very popular due to its pleasant texture, reasonable cost, and long service life. It is clear that wood requires appropriate care, which will increase its strength and extend its service life. In most cases, pine wood products are not tinted or painted, but simply varnished. There are several reasons for this:
- You can buy furniture from different manufacturers, and it will still look good together.
- The varnish, distributed evenly over the surface, emphasizes the beauty of the wood.
- Pine is considered an inexpensive material and varnishing increases its final cost.
In addition to varnish, paints and stains are also used to paint pine furniture. So what is the best way to paint pine furniture? Let's look at this in the article.
Advantages of ZAR tinting oil over other oils
ZAR oil products are in great demand among customers. The presented product has no analogues in the world. Always available for sale, used mainly for interior woodwork. When applying oil to horizontal surfaces, it is recommended to cover the top with ZAR polyurethane varnish, regardless of the base, or with tung oil. When using it outside, it is necessary to coat it with varnish for exterior use (ZAR Ultra Exterior).
The formula of linseed and tung oil allows them to be applied to vertical and horizontal surfaces.
The uniqueness of ZAR tinting oil for wood is that the consumption of this oil reaches up to 70 sq.m. per 1 quart (0.946 L) oil. Compared to oils from other manufacturers, this consumption is at least 2 times less.
The advantage of these oils is that they are oils that dry out quickly compared to other oils, such as soybean, hemp, and sunflower. A product coated with ZAR tinting oil, compared to other oils, does not fade over time during use and is not toxic. The UV filter in the formula of these oils prevents the wood from fading when exposed to sunlight.
The surface treated with ZAR tinting oil has a very high level of water resistance and durability. Another advantage of using ZAR oils is that it gives the wood a noble matte shade.
Furniture tinting
Pine has a beautiful amber-golden color. Such furniture fits into any interior, from the living room to the children's room. What can be achieved by tinting:
- highlight the wood structure and improve its natural color;
- hide surface defects by painting in a darker shade;
- give pine furniture the appearance of a valuable type of wood;
- hide color unevenness;
- get a color unusual for wood, for example, green or blue.
Important! For tinting, aniline dyes, aqueous solutions of tannins, salts, and acids are used. They are perfectly absorbed by wood and quickly dissolve in water.
Features of the technology
When processing wood, you need to consider several important points:
- The surface of the wood must be sanded before processing, as well as after it.
- Before tinting, the surface must be primed.
- You need to get rid of dark spots or streaks, as they will ruin the final result.
- After applying the stain, the wood must dry.
- Then the wood is covered with translucent paint or varnish.
Advantages of oils over other compounds
Wood has never gone out of fashion; it is rightfully considered the most popular material in construction, as the noble shades of valuable wood fill it with luxury and wealth. If previously wood was popular only due to the lack of other materials for construction, now we try to buy wooden materials for the main reason - environmental safety and durability. What should I use for processing (tinting) wooden structures, pieces of furniture, various products in the house, in the country, in the apartment, in the bathhouse, on the balcony, in the garage? With all the variety of materials for wood processing, in order to ensure a long and effective service life, it is worth choosing and buying the material that, according to its technical characteristics, is suitable for use for specific purposes. When choosing a material, you must consider:
- type of wood;
- operating conditions (humidity, air or room temperature);
- history of previous coatings, if any.
Stain, varnish, and oil are mainly used for tinting wood.
Liquid impregnation for wood, called stain, based on its production can be water, alcohol and oil. It is produced in the form of a ready-to-use solution and in powder form, allowing you to paint basically in the shades of any wood from the lightest to the darkest. Water-based stain has a significant drawback - it lifts the wood fibers, which makes the wood susceptible to moisture. Therefore, before applying stain, you need to wet the wood, let it sit for a while, and then saturate it with stain.
Alcohol-based stain dries very quickly - this is the main drawback, as a result of which stains form on the treated surface. Uniform coloring is obtained if the stain is applied from a spray gun.
Oil stain gives wood any color that can be obtained by mixing oil-soluble dyes, diluted with White Spirit solvent, dries quickly, does not lift fibers and is applied evenly. To achieve the desired color of wood, it must be coated in at least two layers, and each of these layers must be completely dry.
Varnishing and painting of pine wood
At the very beginning, the surface of the wood is cleaned of old paint or varnish, and all knots are removed. Due to the presence of resinous substances on the surface, many difficulties arise, therefore, in order to properly paint pine furniture, it must be deresined.
Resin removal of wood
Pine furniture requires special attention and additional processing. This happens for several reasons:
- Areas where resin accumulates darken over time and spoil the appearance.
- The resin creates a sticky film on the surface that prevents the primer from being absorbed.
- Due to the resin, dyes are applied unevenly.
Resin removal is the process of complete or partial removal of resin from the surface of wood. A special composition is prepared for this:
- 200 g of 25% technical solution of acetone;
- 50 g potash;
- 40-50 g baking soda;
- 40 g soap flakes;
- 10 g technical alcohol;
- 1 liter of hot water.
All components are mixed and the composition is applied with a brush. Then the surface is washed and dried.
Important! If there are large areas of resin, it is better to cut them off with a knife, and then fill these depressions with putty.
Priming, painting
After degumming, a primer is applied. It can be applied using a wide brush or roller. Then a layer of paint or varnish is applied, sanded, and then another layer of paint is applied.
Important! It is better to choose good quality varnish or paint, but not necessarily imported - domestic solutions are also excellent and are cheaper. When choosing a specific type of solution, give preference to a safer, non-toxic mixture, based on the component composition.
Many carpenters prefer pine for its ease of processing, light weight, low price and widespread availability.
And with a transparent finish, its wood seems to radiate a warm glow that is rarely found in other species.
What's not to like?
If a darker color is desired, the result of using stain is often unpredictable because clear pine wood absorbs liquid unevenly, resulting in an unnatural, mottled or zebra-like coloration.
But one should not refuse to work with this wonderful material just because of this. Pine can be successfully tinted evenly - all you need to do is spend a little time preparing it.
What to consider when applying water-based varnish
- Water-based varnish should not be diluted with solvents. You can add water, but not more than 10-15%.
- Stirring the varnish before applying to the surface is mandatory.
- Varnishing, as well as drying of the coating, should take place with doors and windows closed to prevent drafts.
- Avoid direct sunlight on the fresh coating.
- To avoid sagging or bubbles, before applying the last, finishing layer of varnish, you need to go over the varnished surface with sandpaper.
- At first, it is better not to walk on already dried varnish in shoes with hard soles, but to place pieces of fabric or cardboard under the furniture - the water-based varnish gradually gains hardness and resistance to damage.
Prime the wood.
As you can see in the first three samples in the top row, applying stain to clean pine wood results in uneven toning and staining. Gel stain is absorbed less than regular liquid stain, so the color of the surface is more even. However, the board still looks mottled due to too much contrast between the lines formed by the layers of early and late wood. To put an end to uneven stain absorption, the surface must be primed.
We tested four methods, starting with a simple sanding with 320-grit sandpaper and applying three different compounds: shellac, a commercial primer conditioner specifically designed for wood with uneven absorbency, and a polyurethane pad compound (called a varnish that you can make up). yourself by mixing equal parts of polyurethane and white spirit).
When the surfaces primed with these compounds were completely dry, we lightly sanded them along the grain with a 320 abrasive sponge and applied a liquid stain. The sample primed with polyurethane polish (the last sample in the top row) turned out to be the most evenly painted, and we chose this method to prepare the surfaces for the next step.
Apply stain gel to pine
Why is stain-gel for pine better?
While you can successfully apply any stain to a surface primed with diluted polyurethane, gel stain allows you to have more control over the results when you want to achieve a deep, rich color.
Thanks to its thicker consistency, you can apply it in a thicker layer, which darkens the wood more, and apply several such layers in succession. The bottom row of samples shows the effect of applying another layer of stain-gel on top of the dried one.
Consecutive application can take a long time, since each layer of stain must dry completely. In addition, there is a risk of partially damaging the first layer when applying the next one. We tested the gel stain on the same board, applying it directly to clean wood after sanding with 320-grit sandpaper without priming (the last two samples in the bottom row).
And in this case, just as when using conventional liquid stain, spotting appeared. We also wanted to see if sanding with 220-grit sandpaper before priming would improve the result as opposed to the commonly used 180-grit paper. It turns out not (first four samples in the bottom row).
You can now begin tinting your pine products without worrying about streaking or staining. However, don't be overconfident - you still need to test your chosen finishing method on scraps first.
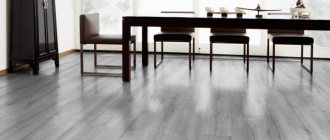
Wood painted white looks very simple, stylish, and cozy at the same time. This type of painting while preserving the wood texture has become one of the most popular interior and exterior styles!
In this article we will look at 3 simple methods of painting wood with worn or aged effects.
, as well as beautiful and inspiring examples of floors, walls, doors and furniture painted with them.
Traditionally, whitewashing was used as a cheap and easy way to protect wood (lime has antibacterial properties) and give it a neat appearance. Now, when we recreate a whitewash, it is usually done using any water-based or acrylic-based white paint for interior or exterior work.
(this is exactly what we will do in the methods described here).
Water-based or acrylic paints without odor!! and can be used indoors
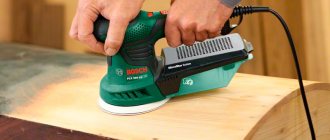
Proper grinding
A step-by-step proven method on how to properly sand a pine board:
- to begin with, you can take coarse-grained discs for a grinder and, changing them in descending order, finish the procedure with disc No. 180;
- then, additionally sand it manually using a block with sandpaper No. 180. It is necessary to move along the fibers: this will remove marks from the sander;
- The final stage is sanding the ends with sandpaper with grit No. 220. This will prevent them from excessively absorbing the stain.
Wood and necessary materials:
Different painting methods will show how much of a difference the appearance of wood can make, whether it's a smooth pine board or an unsanded pallet.
. All three methods are very easy, fast and with wonderful results!
- White water-based paint for interior and exterior use
- Paint mixing container
- Rag
- Brush
- Scraper or piece of hard plastic for method #2
- Candle for method No. 3
How do tinted oils differ from each other?
Tinting oils differ from each other in composition, technology of application and purpose (for external or internal work), but they all serve mainly to protect wood from the destructive influence of the external environment and aggressive influences of various types.
Flaxseed oil is in particular demand among consumers, after tinting the surfaces acquire a beautiful silky, matte shine or a clear, natural shade of colored linseed oil, according to the color palette. Other characteristic features of linseed oil are better absorption than other oils and resistance to the development of bacteria. Linseed oil can be used as an independent decorative coating for both interior and exterior use. Impregnating wood with linseed oil improves the appearance of wood, increases the service life of products, and can be tinted perfectly to match any shade. Treated products are resistant to cracks, fading, and drying out.
#1: Painting with a rag
Many types of wood that are sold in hardware stores are already sanded and have a smooth surface (for example, boards or sheets of plywood
), but there are also untreated boards.
This whitewashing method is suitable for both smooth and unsanded wood.
. It creates a neat and refreshing look, great for modern, farmhouse or Scandinavian style.
White paint makes the wood more refined, while leaving the opportunity to see the structure of the boards and their natural pattern.
How to do:
- First, dilute the white paint
with a special solvent. - After this, dip a rag into the resulting paint mixture and wipe it over the wooden surface, making an even layer.
Apply 1-2 more coats of paint if you want the color to look deeper white. Let the paint dry after each new coat.
Of course, you can use a brush, but it leaves strokes, while a rag makes the surface perfectly smooth.
Choosing the “right” boards
Pine has significant knotiness, but in our case this is part of its attractiveness and uniqueness. Regular, non-rotten, hard knots, which are an integral part of the structure of the board, are not a hindrance, but “dead” such elements of wood should be avoided. That is, the rotten ones, those that stagger, fall out. Also, boards with accumulations of these formations near the core or with knots around which the wood grain lines sharply change direction should be rejected.
But even boards with these disadvantages are quite suitable for use. The problem can be solved in a simple way: by securing the falling knots with epoxy glue. Do not be afraid that over time its adhesive properties will weaken and the board element will fly out or crumble. This glue is based on epoxy resin, which is extremely durable after drying.
No. 2 Paint filling method
This method works best on unsanded wood with a slightly rough surface (such as a wooden fence). With its help, wood can be given a rustic look and an antique effect.
Step by step:
- Clean the wood with soapy water and a brush and leave to dry.
- If your paint is too rich, thin it with thinner.
- After this, pour some paint onto the wood surface, and then take a scraper and spread the paint over the wood.
On an unsanded, that is, not completely flat, wooden surface, the paint layer will not be the same everywhere. A little more paint will flow along the depressions and less on the bulges, that is, in some places the white color will be more saturated, and in others more transparent, which will create the effect of antiquity.
You can see the result of painting a wall using this method above.
Operating principle of the oil
The principle of operation of tinting oil is impregnation of wood, deep absorption, filling all pores, in order to exclude access of insects, dust, moisture and dirt to the fibers, imparting strength, resistance to negative external influences and biological aging. Tinting oil applied to the surface of wood emphasizes the natural beauty wood and preserves its natural texture, creates a feeling of warm and natural wood, allows you to give the wood an original appearance and unexpected shades.
No. 3 Painting method using a candle
Worn white paint, through which in some places you can see the wood itself in its natural color, is wonderful when restoring antique furniture or creating new ones, but in the same style.
In the photo below you can see an example of such painting of wood with wonderful designer pens laid out on it.
Instructions:
- Take a clean wooden board (no matter sanded or not) and a candle. Rub the candles onto the surface of the wood in several places. You need to press quite hard on the candle so that a clear trace of wax or paraffin remains on the wood.
- After this, paint the wood with white paint and let it dry completely.
- Wipe the dry painted surface with a rag, applying some pressure. In those places where there was a trace of a candle, the paint will come off the surface.
Below is an example of a white wood floor painted using this method. It is worth noting that when using this, it is better to apply a layer of protective varnish on top of the paint for more durable use.
Antique wooden furniture always serves as interior decoration. But what if you want to update your decor a little? And I seem to be completely bored with the natural color of wood... Toning solid wood furniture
– a great way out! Doing tinting yourself is not that difficult. The main thing is to select the necessary materials and be extremely careful in the process.
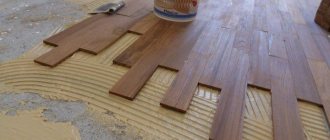
How to paint with stain
Treating parquet with stain and varnishing
There are no difficulties in the process of painting with stain. But you should read a few rules on how to properly stain wood.
1. The stain needs to be heated a little. This will increase the degree of its penetration into the wood structure.
2. It is not recommended to dip a swab or brush into the stain too much, as this will lead to drips and uneven painting.
3. The stain must be applied behind the fibers. If there are drips on the surface, soak up the excess with a soft cloth.
4. After the first layer has completely dried, apply subsequent ones until the desired color is obtained.
5. Finally, the surface treated with stain is covered with several layers of varnish. Each layer should be sanded with fine-grained sandpaper.
Return to content
Selecting materials
Several types of coating are suitable for tinting wood yourself. Their choice depends on what result you want to achieve in the end. Here are the most common coloring compositions:
- Acrylic paint
. You can buy it not only in construction stores. It saturates the surface well, but there is a significant drawback - when wood strongly absorbs the tinting composition, the fibers of its structure rise strongly. Therefore, it is better to mix acrylic with other substances for decoration. For example, with molding or glazing. - Mordant
. This is a dry pigment that is diluted with water before application. The big plus is that this dye does not saturate the surface, but simply clogs small particles of wood. Tinting with this composition will help to avoid unevenness and roughness of the structure. The mordant does not just color, it penetrates deep and acts chemically. This means that the brightness of the resulting colors is guaranteed! But after tinting the wood using this method, the array must be varnished. Otherwise, if moisture gets in, stains may remain on the furniture. - Wood stain
. The best option for tinting wood yourself. It does not lift fibers and does not require the application of an additional layer of varnish. You can also purchase patination - this is almost the same as stain, but its shades can be adjusted.
Along with the dye, buy a special brush for woodworking or a roller, a swab and a lint-free cloth. It is better if the brush is made of natural bristles, although synthetic materials - nylon or polyester - are also suitable.
What types of wood oils are there?
In modern domestic and foreign chemical industries, thanks to amazing developments, there is a wide range of types of wood oils, including: for interior use, for exterior use, for different types of wood, universal, with and without beeswax, for fire protection with the addition of special material. Made from natural resins and oils. Among the main and frequently used natural oils are sunflower, linseed, soybean, olive, jojoba, and pine tree resin. The palette of tinting oils for wood is varied and large, and therefore the oil not only completely protects the wood and extends its service life, but also gives it bright multi-colored shades to suit every taste, giving the product sophistication and beauty.
Let's start tinting
There are several ways to tint. Paint by hand, spray or dip. The most common method that can be successfully used at home is painting with a brush. So, the old wooden bedside table is ready for its color transformation. And this is what she has to do:
- Cleaning and sanding
. Before painting, it is important to level the surface and make the wood structure as smooth as possible. An ordinary sandpaper will help with this. - Applying stain
. Using a roller or brush, spread the paint evenly over the wood along the grain. And to remove excess, simply rub the stain with a dry cloth or swab. - Paint drying
. This stage is extremely important. It is better to be patient and wait until the layer dries thoroughly. Only in this case can you evaluate the final result of the work and the resulting shade. If it is not saturated enough, you can apply the stain again. - Varnish coating
. This completion of tinting prolongs the wear resistance of the colored wood product.
DIY wood tinting
– the process is quite labor-intensive. However, if you love creativity and are not afraid to try new things, then this type of work will certainly bring maximum pleasure. And bright wooden interior items will delight you every day!
Methods of applying oils
Treating wood with oil begins with preparing the surface.
- do not wipe the surface with a damp cloth (wood moisture content should not exceed 15%);
- Clean the wood from dirt and plaque and dry thoroughly.
- if work is carried out outdoors, then the weather should be sunny, and if indoors, then it should be dry.
Next, you can proceed in the two most commonly used ways: rubbing and soaking.
Rubbing consists of rubbing the wood 3-4 times along the grain with a cotton rag or any other lint-free cloth soaked in oil. You can also use a brush or applicator for rubbing, but in this case the oil consumption will be much higher.
When applying, constantly remove excess oil with a clean cloth.
We always make sure to maintain the consumption indicated by the manufacturer on the can.
After the 1st layer has dried, if necessary, cover the 2nd layer to obtain a darker color.
The second method, soaking, is used to treat small objects: crafts, knife handles and other objects. In this case, the product is completely immersed in oil for a certain time, then wiped and dried. The disadvantage of this method is the high consumption compared to the rubbing method.
Lakra
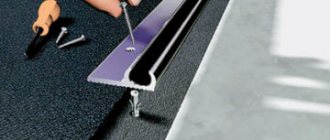
Tinted lakra varnish is produced in various modifications and is used as a decorative and protective finish for wood materials located indoors. A tinted lakra varnish is produced, which has antiseptic properties and can be used to coat baseboards, ceiling and wall panels, doors, and other products.
This varnish mixture decorates and makes wooden surfaces more attractive, emphasizes and highlights the natural texture and pattern of wood, and allows you to tint products to match any type of wood. Lakra varnish is made from environmentally friendly and safe substances for humans. The composition can be applied using various methods - spray gun, brush or roller.