The main function of a thermal imager is to monitor the changing temperature distribution on any surface. All received information is displayed on the display as a color field, where each color corresponds to a specific temperature value. Modern models of thermal imagers can be stationary or portable. Using stationary devices, various technological processes performed in industrial enterprises are controlled. Handheld thermal imagers are used in specific environments where speed and ease of use are critical.
The complexity of manufacturing a thermal imager
This device detects infrared radiation emitted by animals. Experienced hunters in practice use the device not to quickly search for prey, but to find wounded animals. The device is not suitable for other purposes, since its range is limited by sensitivity.
The design of a thermal imager is in many ways similar to a classic digital camera. Its design uses the following components:
- photosensitive matrix. It consists of many photocells that record the difference in the spectrum of the image in the area of operation of the optical system;
- optical system. Needed to focus the image, as well as to redirect it to the receiving device;
- information processing block;
- display for displaying graphic information.
The main difficulty in creating a thermal imager yourself lies in the materials used in the production process of the photosensitive matrix and optical system. These components can be purchased separately and independently adapted to work together.
What can you use a homemade thermal imager for?
Any living or nonliving objects with a surface temperature above zero emit heat. It is impossible to distinguish it with the naked eye, since we are talking about a glow in the infrared range. But a special device, a thermal imager, allows you to see such radiation. It provides a color image where warm objects are highlighted in colors ranging from purple to red depending on the specific temperature.
The cost of professional thermal imagers is quite high, but you can make a useful device yourself from old equipment, for example, from a digital camera.
Important! The device will be less functional than a purchased one, but it will cope with the main task.
A thermal imager can be useful for several purposes.
- Control of heat leaks. Using the device, you can evaluate the quality of thermal insulation and find out exactly where sudden temperature changes are observed.
- Diagnosis of energy leakage. A thermal imager will help identify weak points in electrical appliances and understand where excessive heating of conductors occurs due to poor contact.
- Night vision. A thermal imager from an old camera can be very useful on a dark street or in the forest to help detect people and warm objects.
Infrared spectrum devices are also used in mechanical engineering, metallurgy, medicine and rescue operations. But here we are talking about professional devices with a high level of reliability and advanced functionality.
Reviews of thermal imagers
Sometimes reviews of thermal imagers can make it even more confusing to decide which device to choose. Consumers agree on one thing: you need to choose based on the purpose of use and the available budget. Don't bother with all the bells and whistles unless you need them. For hunting and security, devices with rangefinders, telescopic lenses, and clear images are better. For industry - with high range, fault tolerance. And for inspecting houses, cottages, and dachas - compact, autonomous devices that last for several hours on battery power.
Following users, I also recommend paying attention to:
Form factor.
The device must be easy to use. Some thermal imagers have a handle like a pistol, others are made in the form of a video camera. It is necessary to ensure that the weight of the thermal imager is also comfortable, especially when frequently inspecting objects on the road.
Supported formats.
The information collected by the meter must be readable by other devices. Universal video format - mpeg-4, audio - mp3, wav, pictures - jpeg. Such files will open on both smartphones and computers. Specialized formats are suitable if the thermal imager comes with “native” software installed on a PC.
Operating modes.
Useful options include picture-in-picture and image merging. With their help, monitor heat leaks, overheating due to malfunction, defects, etc. it becomes much more convenient. Reports with thermograms based on image combination become more visual and effective.
Warranty and technical support.
Thermal imaging equipment is expensive, so keep an eye on the warranty. This will help in case of detection of defects or malfunctions. It is better to choose devices from reputable companies.
Finally, most users agree that if a thermal imager is needed only for a couple of checks of a country house, inspection of an apartment or a country cottage, then there is no need to buy a thermal imager, which will then gather dust among the tools. It is much more profitable to order a thermal imaging inspection service on my website. After conducting the diagnostics, I will identify the vulnerabilities of your house or apartment for ventilation, provide a full report with photographs, transcripts and basic recommendations for elimination.
Operating principle of the device
Without going into the jungle of physics, I will tell you: all bodies with a temperature above absolute zero emit heat. In the mid-infrared range (7-14 microns), invisible to the human eye, the maximum degree of radiation is for bodies with a temperature of -50 to +50 degrees. The display of the thermal imager reflects a color picture of the temperature difference of the surface being studied. Color gradation occurs in the rainbow range of colors from violet to red, depending on the degree of heating of the surface.
For some production processes temperatures of several hundred degrees are interesting. The wavelength of radiation in this spectrum is shorter - 3-7 microns . But according to the principle of operation, the devices used for measurements, regardless of operating temperatures, are completely identical.
If the body has a temperature of about a thousand degrees, auxiliary devices are no longer needed, the glow is visible to the naked eye.
The operation of the device includes three main stages:
- registration of radiation in the infrared range;
- converting recorded data into digital values;
- displaying the resulting thermogram, that is, a heat map of the surface of the observed object.
Modern devices allow such conversions to be made and images to be obtained with virtually no delay, in real time .
What are thermal imagers and why is it needed?
What is a thermal imager and why is it used by builders? The device is a measuring instrument necessary to display infrared (thermal) radiation in the form of color images. Such a tool “sees” objects regardless of lighting conditions, at any time of the day or year. The thermal imager is designed to measure the temperature of bodies and objects in a non-contact manner.
Essentially, a thermal imager is an infrared camera. It is used in construction, industry, medicine, hunting, security, because it captures and displays everything that is warmer than absolute zero, even water ice.
Do-it-yourself thermal imager from a smartphone
The smartphone itself cannot be turned into a thermal imager without the use of additional equipment. However, recently a special attachment, Seek Thermal, has begun to be produced, which is essentially a mobile miniature thermal imager, with dimensions no larger than a matchbox.
This mini-device is capable of working with many smartphones based on Android version no lower than 4.3. It performs the same functions as real branded thermal imagers and is connected via standard connectors. It turns out to be quite easy to assemble with your own hands. Despite its small size, the camera lens is equipped with a focusing ring, as well as a sensitive sensor in the form of a 32 thousand pixel matrix, the shooting frequency of which is 9 Hz. The main advantage of the device is the operating temperature range ranging from -40 to +330C.
A smartphone for a thermal imager is not only a screen that displays information, but also a kind of computing machine. All actions are performed using a special Seek Thermal application, which has extensive capabilities. This program allows you to select a color palette, temperature units, adjust the image and many other operations.
Smartphone
For people who do not have knowledge of electrical engineering, manufacturers of modern gadgets offer a simple device for connecting to a smartphone. The device is called "Seek Thermal". This device connects to a smartphone via a USB port. Works through special software. Capable of detecting heat signatures at a distance of up to 600 meters. This range is only available in the absence of extraneous thermal radiation, interference and vibrations in the air. Hunters can use this gadget to search for wounded animals, nests or nests of large birds. The main purpose of the device is to monitor temperature fluctuations in household appliances and energy metering devices.
Read also: Meat pies, 62 recipes with photos
Also, many smartphones are equipped with a built-in temperature measurement capability similar to a thermal imager. This function is available through the built-in matrix. Such programs do not allow scanning terrain over long distances.
Scope of application of a homemade thermal imager
Is it possible to use a thermal imager made in this way for home needs? Quite. Would such a thermal imager be suitable for construction or, for example, hunting? Quite possibly. In any case, lovers of outdoor recreation will definitely like this device. With its help, you can control the approach of animals to your camp at night, as well as search for lost group members in fog or clouds of dust.
If you have an unnecessary DSLR, about $40 for an IR filter, and the desire and ability to disassemble the camera, then this option is certainly worth trying.
How to make a thermal imager from a digital camera with your own hands
Making a thermal imager from an old camera is quite simple, since you don’t actually have to upgrade the device. The matrix of photographic equipment is initially capable of perceiving infrared radiation.
The camera for making a thermal imager is taken digital; too old models do not have the required matrix
But since such a function is not needed to take pictures, a thermal filter that reflects or absorbs the IR spectrum is installed in the device at the factory. As a result, on the camera screen the user sees only what the human eye already perceives. Thus, to turn the device into a thermal imager, you just need to remove the IR plug.
Advice! Many manuals recommend installing a visible spectrum filter in the free space in the camera. It does not affect the actual functionality of the thermal imager, but helps maintain focusing ability.
Preparation of materials and tools
To make a thermal imager from an old camera, you will need to prepare some tools and supplies:
- digital photographic equipment with a liquid crystal display, the so-called point-and-shoot camera, must be in working order;
- infrared LEDs with a power of 2-5 W, two pieces;
- radiators for cooling LEDs;
- on and off button;
- voltage increase or decrease module;
- AA battery 1.5 V;
- small tweezers;
- painting knife;
- a screwdriver with interchangeable bits for very small screws;
- soldering iron;
- glue gun
Consumables and tools are cheap and available and can be purchased on the radio market or via the Internet.
How to convert a camera into a thermal imager
Converting a camera into a thermal imager is not particularly difficult if you follow a proven algorithm:
- Unscrew all visible screws on the camera, and then carefully remove the cover covering the back panel and the edges of the liquid crystal display. After this, the screen itself is dismantled by unlocking it from the holding frame, and the electronic cables are disconnected from the internal board.
Cables hold the parts of the camera together; without disconnecting them, you cannot disassemble the device. - Remove the front cover from the device and remove the microphone wire. The flash's high voltage capacitor must be handled with care. Its contacts must be closed with a tester or voltmeter without touching the element with your hands.
The high-voltage capacitor on the board is capable of delivering quite a shock when touched. - The required photosensitive matrix is located next to the camera lens. To get to it, you need to unscrew the holding screws with a screwdriver and remove the entire unit. After this, the infrared filter is carefully lifted by the edge with tweezers and separated from the matrix.
The IR filter will appear slightly greenish when exposed to light. - In place of the dismantled filter, a simple thin glass or transparent film is installed. This step can be skipped, since the homemade device will perceive IR radiation in any case. But the video about a do-it-yourself thermal imager from a camera still recommends installing a filter if you want to preserve the autofocus function. Without glass or film, this option will suffer.
A homemade transparent filter can be cut from a protective film for a smartphone screen - Then you can begin reassembling the homemade thermal imager from the camera. The block with the photosensitive matrix is installed above the lens in its original place and secured with screws.
You need to tighten the screws as tightly as possible so that the matrix does not “play” - The control board is also installed in place and the screws are secured. Insert the flash capacitor into the desired compartment and restore the broken contacts with a soldering iron.
When reassembling, you need to be extremely careful and not leave “extra” parts. - The electronic board cables are connected to the appropriate connectors, after which the mounting frame and LCD screen are returned to their place.
Before reinstalling the case, you need to make sure that no cables or other spare parts are forgotten. - The front and back covers are mounted in place, after which the last remaining screws are tightened and the device is checked for functionality. Then you can move on to the next stage - you need to organize a backlight for the thermal imager. To do this, connect a resistor to the prepared AA battery and reduce the voltage to 1.7 V.
Initial battery voltage is too high - 2.8 V - The LEDs are coated with heat-conducting paste and soldered to the radiators along the contacts. You need to make sure that the light bulbs are pressed tightly to the surface, otherwise they will overheat during operation. The camera is disassembled again and the back cover is removed to install a button in the free space to turn the infrared illumination on and off.
The button can be taken without locking - this will help save battery power - At the last stage, wires are laid inside the case that will connect the button, backlight and power. Heatsinks with attached infrared LEDs are glued to the front cover of the thermal imager on the sides of the lens. Cover the top with a plastic plug with holes made for light bulbs. The housing is finally assembled, and the wires brought out are attached to an external resistor.
To prevent the resistor from hanging on the wires, it can be glued to the end wall or bottom of the thermal imager
It should be noted that a homemade thermal imager based on an old camera will not have high sensitivity. It will not provide a bright and contrasting color image, and it will not be possible to use it to measure temperature. But a home device will be able to provide a clear image in complete darkness, and the thermal imager will also detect the infrared glow of fairly powerful objects located nearby.
How to measure a person's temperature
Measuring human body temperature is probably one of the most important functions of a thermal imager. After all, people’s lives and health depend on it. Therefore, such a device must have great accuracy. Their error is no more than 0.5 °C. And the measurement is made from a distance of 1 to 1.5 m, which is safe for a medical worker if a person is infected.
Medical thermal imagers have a fairly large amount of built-in memory and can store up to 100,000 thermal images with data from specific people. And the tripod included in the kit allows you to install them, for example, at the entrance of an enterprise.
IR close
The matrices of digital cameras and video cameras perceive a much wider range of light waves than the human eye. They are affected by both ultraviolet and infrared rays. Moreover, the sensitivity of widely used charge-coupled device ( CCD) matrices in the IR range is so high that equipment manufacturers are forced to introduce special filters into the optical paths of their cameras to avoid image distortion.
This feature of CCD matrices was the first to be used in consumer electronics at the end of the last century by Sony, which introduced the NightShot night shooting mode in its camcorders. The company's engineers came up with a lever that moves the glass inside the lens to the side. In the summer of 1998, “sensational” articles appeared in the Western press that the NightShot mode allowed the camera owner to see through clothing. A scandal broke out, which only fueled public interest in the night shooting mode. It is not surprising that other video camera manufacturers, Panasonic and JVC, soon introduced similar modes after Sony.
Today, many experienced computer users have external web cameras lying around on their mezzanines and in closets, which were popular at the beginning of the last decade and connected to the computer via a USB port. It is easy to convert such a camera into an infrared one if you replace the built-in IR filter with a visible light filter. The easiest way to use the latter is to use black fragments of developed photographic film.
Please note that the resulting homemade IR will not replace an industrial thermal imager, which is used to inspect country houses for heat leaks (see “Energovector” No. 6/2013, p. 11). It will operate in the range of near-infrared waves (length 0.75-1.4 microns), used in night vision devices and which does not allow one to see the temperature difference of objects by their own thermal radiation. For example, a glass of cold water on its screen will look the same as a glass of boiling water. A homemade IR camera will work in reflected light, and will detect its own IR radiation only from very hot substances - such as a candle flame, an incandescent lamp filament, or plasma in the bulb of a gas-discharge lamp.
Older webcams usually have a simple manual focus lens. To adjust it for sharpness, you need to rotate the rim around the camera’s “eye” (the entire lens rotates with it, moving with the help of a helicoid). The IR filter, which is a reddish square piece of glass about a millimeter thick, is most often attached to the lens behind all the lenses, but it can also be between them. We recommend that after removing this piece of glass, replace it with a couple of pieces of black photographic film, carefully cut out with scissors. If you plan to continue to use the webcam for its main purpose, then it is better for you to tape the film to the camera from the outside so that it can be removed at any time. Be careful and careful: the plastic lenses of the web camera can be easily scratched.
In principle, you can convert a digital camera to near-infrared, resulting in a much better night vision device, but two problems will inevitably arise. Firstly, a camera will be much more difficult to disassemble and then reassemble correctly than a Web camera. Secondly, after removing the IR filter, the camera’s working distance will change, as a result of which it will no longer focus at infinity. However, for those who use old Soviet Helios and Jupiter lenses on models with interchangeable optics, the latter will not present a big problem, since the working distances of such lenses can be adjusted using adjustment rings.
To remake a web camera, in addition to itself, you will need: a screwdriver, scissors, tape, tweezers and a black piece of developed film. Lens cleaning products won't hurt either. It is more convenient to use a homemade product with a laptop than with a desktop computer.
Please note that an old webcam found somewhere on the mezzanine may not be compatible with modern operating systems Windows 7, 8 and 10. Therefore, we advise you to first connect it to your computer and configure it, and only then redo it.
Next, follow the instructions in the photos. Good luck!
Source: Energovector
How to convert a camera into a thermal imager
In fact, you won’t have to redo anything special. Initially, the camera matrix perceives infrared radiation. Another thing is that manufacturers install so-called thermal filters , which reflect or absorb infrared radiation falling on their surface.
In another way, this filter is called a thermal mirror, in the bourgeois version - “hot mirror” . As a result, the spectrum perceived by the camera matrix becomes approximately identical to what the human eye sees.
If you remove the IR filter from the camera, it will begin to work as a thermal imager. a visible spectrum filter instead . As practice shows, it does not play a special role and has virtually no effect on the operation of the device.
In addition to the camera, the following can serve as test subjects (or victims - depending on how the process goes) for the manufacture of a miracle device:
- smartphone;
- camcorder;
- Webcam;
- IR sensor.
I won’t describe the technology for converting them, since that’s a completely different story. And the technology for modification is more complicated, and the costs are an order of magnitude greater.
Electronic thermometer
Modern thermometers measure temperature using approximately the same principle. The difference is the heating of the infrared beam itself. As a result, not a temperature spot of different colors appears on the device’s display, but simply a number indicating the temperature characteristic.
In order to provide such a thermometer with an additional display and thermal imager function, an Arduino controller is connected to it. Now it is possible to connect an additional display and the ability to visually monitor the temperature trace. Such a device will have one significant drawback. Thermometers cannot measure over long distances. Such a device may be useful in everyday life, but not for hunting.
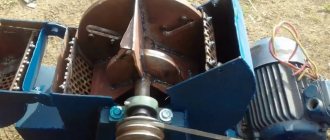
DIY thermal imager from a webcam
One option for such an assembly is to use a working webcam and an MLX90614 temperature sensor designed to scan an object. Its only drawback is the very low scanning speed. However, against the backdrop of significant savings in money, this problem is not of decisive importance.
Additionally you will need: an Arduino board, two servos with housings, a tripod, 4.7 kOhm resistors - 2 pcs., a laser pointer. The source of the original image is the webcam, which also functions as a viewfinder.
With the help of two servos, movement is carried out in horizontal and vertical directions. The lower horizontal drive is mounted on a tripod, and a laser pointer is also installed here. A webcam and temperature sensor are attached to the vertical servo drive. Arduino sensors are connected using a special circuit. Next, when the thermal imager from the camera is completely assembled with your own hands, the entire structure is placed in a common housing and secured to a tripod. After this, you can begin scanning the selected area. In this case, the laser pointer serves as a target designator during shooting.
Options for adapting other devices
You can find many options for converting standard photo and video cameras, as well as other devices, so that they can perform the functions of a thermal imager. It is impossible to achieve an ideal replacement, since in this case manufacturers would make this option basic for the equipment. The maximum that can be achieved by modifying the camera is a night shooting mode at a distance of up to 2 meters.
Digital camera
Despite some similarities in design, it is very problematic to make a full-fledged thermal imager from a digital camera. Removing the filter operating in the IR range will not bring the desired result. The negative consequences of such an operation are rapid failure of the matrix and an increase in the level of color noise.
Additionally, you may encounter the following problems:
- for the operation of a special matrix, a special cooling system is required, which is not available in household appliances;
- The sensitivity of the matrix in the device is not designed to perceive the infrared range. That is, it needs to be replaced with the appropriate one;
- The device software will not allow you to correctly process the resulting image - you will need to re-flash it.
If you take into account all these nuances, you will end up with a not very high-quality thermal imager. Its range will be minimal, and the high image error will not allow normal hunting.
Web camera
An alternative would be to make a device that records the thermal radiation of animals and birds from a Web camera.
To remodel, you need to purchase a special kit, which includes the following elements:
- Arduino board for image transmission;
- two servomotors required for vertical and horizontal displacement of the camera;
- temperature sensor MLX90614;
- camera and laser pointer (for use as a thermal imaging sight for hunting).
Once assembled, the device will be able to detect thermal radiation at a distance of up to 30 meters. You can also try to make binoculars with a thermal imager for hunting using Web cameras.
Infrared thermometer
You can make your own device using an Arduino board and an infrared thermometer. To do this, you need to take a good infrared thermometer, since it is known that it can measure temperature at some distance, and connect it to the LEDs from the flashlight via the Arduino board.
For this purpose, the flashlight should be taken from high-quality products. If you buy a cheap model, then the thermal imager will turn out the same. Arduino board is a device designed for building simple circuits in robotics and automation. Used by non-specialists in these fields.
Program the board so that the light of the flashlight changes depending on the temperature of the object.
Let's assume that cold objects will be blue, living objects will be red, and neutral objects will be green. Thus, when pointing the device, different objects will have the corresponding color. You can connect a digital display to the device, obtaining a picture with a quality no worse than that of expensive models of ready-made thermal imagers.
So, it’s quite possible to make a hunting thermal imager yourself. And if the cost of the device in stores is from 19,000 rubles, a homemade device will cost you from 2 to 5 thousand. The final cost is determined by the components.
For example, the cost of an Arduino board is from 150 rubles, it depends on the quality; for an LED flashlight you will have to spend from 500 to 2,000 rubles, and a decent display can be purchased for 1000–1500 rubles.
Homemade scanning thermal imager from an IR sensor
LED operating principle: parameters and characteristics
Infrared heaters: harm and benefit
Wi-Fi CCTV Camera
CCTV Cameras
CCTV cameras with motion sensor and recording
CCTV camera for TV
Video: DIY thermal scanner
In conclusion, we can say that a number of modern standard gadgets can easily be converted into thermal imagers - after making minimal changes to the design. And as a result, without requiring huge additional investments, they significantly expand the time and weather range of conditions under which even homemade thermal imagers can detect the desired prey. Although, when driving at night, the use of such homemade devices as night vision devices in cars is still not recommended (and those created based on web cameras are prohibited).
- Author: Marianna Pavley
I have been successfully working as a copywriter and content manager for 5 years. Rate this article: (26 votes, average: 2.7 out of 5)
Settings
After installing the software on the controller, you need to turn on the assembled device and configure it. 3 dots should appear on the computer screen: one dot should be in the center of the screen, and one in the corner.
The additional point is a laser beam. It is this that needs to be combined with the central point. Calibration completed.
This device is very bulky due to the use of a tripod. But it can easily be installed on a car or a rigid base, for example, on the roof of a house. The cord for connecting to a computer can be extended or purchased ready-made. The main feature of this device is that there is a large scope for modernization. This thermal imager can easily be used as a burglar or fire alarm. The only drawback of the device lies in the slowness of data transfer. This is due to the frequency of interaction between the controller and the webcam.
Advantages and disadvantages
The advantages of a self-made device include:
- simple production;
- can be made from cheap scrap materials, which is economically beneficial;
- no need to use aggressive substances. A liquid of water and alcohol can be used as a measurement;
- easy application;
- long service life.
But there are several disadvantages:
- electronic versions have a complex manufacturing scheme;
- for products with an electronic or digital device, it is necessary to purchase special boards and circuits;
- Sometimes products may show inaccurate measurements.
Homemade thermometers are a great way to save money on a new device. A DIY device will last much longer than cheap measuring devices.
Necessity for hunting
A thermal imager is a multifunctional device, but, in addition to being used as stationary equipment (for monitoring various industrial processes), its portable and portable version is most useful. The above fully applies to the use of the device for hunting - moreover, it is desirable to design the device in the form of a shock-resistant and lightweight monoblock, providing a high range of visible visibility (on professional models it is 1.5 km and has a protection level of over IP54). If the device is assembled using digital rather than analog optics (which makes it difficult to distinguish a hot fire from cold snow at a distance of 100 meters), the hunter will have the opportunity to find an animal or bird in the most unfavorable conditions for ordinary human vision. These include darkness, thick fog, rain, and even thickets that camouflage animals that are frozen and not moving.