MDF panels
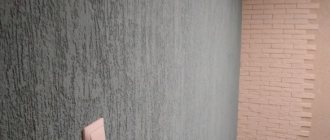
MDF panels (not to be confused with PVC) are chipboards pressed at high temperatures with a decorative coating in the form of wood texture, granite texture or God knows what other material, of which, by the way, there are a great many to choose from.
The dimensions of MDF are usually the following: – thickness 5-7 mm – length 2600-2700 mm – width 150-900 mm
Well, according to tradition, at the beginning of the article we will consider the positive and negative qualities of the material.
- This finishing material has a number of positive properties:
- Good flexibility - I can give an example from my experience; I personally bent a panel with a radius of 1.4 m, with a length of 2.7 m, this was enough for half a circle. At the same time, no cracks, breaks, wrinkles, or bulges appeared on the MDF.
- Good thermal insulation. This is certainly not penoplex, but it adds its own drop to the thermal insulation
- An additional plus for sound insulation
- Considered an environmentally friendly material
- Thanks to the decorative material of the MDF coating, the panels allow for wet (moderate) cleaning
- Easy installation and a variety of ways to attach to walls with any coating
- Ease of processing: cut with hand and power tools (jigsaw, hacksaw
- During installation I always worked alone, without any difficulties
- High installation speed
- Relatively low cost
- Due to its dimensions, it can be installed to the full height without joining, and the tongue-and-groove shape of the edges makes it very easy to join them in the longitudinal direction
- Of the negative properties:
- The material is very sensitive to moisture; you can wipe it with a slightly damp cloth, but nothing more. Use in the toilet and especially the bathroom is extremely undesirable
- If it is necessary to join the ends of the MDF panel , you will have to cover the joint with an overhead corner or use an H-shaped plastic profile, which reveals the joint location
- The material is flammable as it is based on wood
- not the most practical material in terms of repairs (you can’t just replace one panel in the wall, you’ll have to disassemble everything from the corner)
Well, there are definitely more pros than cons, so let’s move on.
MDF panels are a fairly versatile material for interior decoration. We are considering the use of this material specifically in the interior decoration of a private house or apartment.
- Premises in which it is advisable to use MDF panels:
- hallway
- corridor
- hall
- living room
- restroom
- bedroom
- Walk-in closet
- ceilings
I would like to say the following about the choice of material:
Do not try to choose the cheapest panels, as they will definitely ruin the entire look, regardless of the quality of installation.
Before purchasing, calculate the required amount of MDF in advance, because paying for the delivery of 2-3 planks is very unprofitable.
Wide panels are more expensive, but calculate the cost per square meter and compare the cost. In addition, the speed of finishing a wall with wide panels increases significantly, and the design turns out to be more solid and interesting.
When purchasing, check the quality of the shipped MDF; if these are separate panels, then inspect them for scratches and wrinkled corners, as well as breakage of the joining grooves and ridges. If the panel is attached as a whole, then these indicators are very critical, but if it is cut off, then at your discretion these jambs can be scrapped, although with a good imagination you can make something from the scraps.
Before purchasing, you need to decide on the method of installing MDF to the wall and purchase the necessary fasteners. Next, I will describe the installation methods, materials and tools used:
Fastening MDF panels to plasterboard partitions, walls or putty coatings
First, plasterboard partitions must be plastered and primed; this is done so that in the event of dismantling, the finishing does not come off along with the cardboard.
Perhaps one of the easiest installation methods. All you need here are liquid nails and a gun for them. Nails are applied to the panel in accordance with the instructions indicated on the packaging, as a rule, it is wavy or dotted. After applying the adhesive, the MDF panel must be carefully applied to the wall, pressed tightly, and then torn off and allowed the nails to set. Then return the panel to its place. The next panel is attached in exactly the same way. Flexible corners made of the same MDF are placed on the corners.
Fastening MDF panels to smooth concrete, plastered or uneven walls
For this type of fastening we will need wooden blocks. You can use a frame made of a metal profile as for plasterboard, but, in my opinion, this is a more expensive method.
The bars must be 20 mm thick and 50 mm wide. On uneven walls, using a building level or plumb line, determine the required thickness of the block. Wooden slats (bars) are attached horizontally every 40 cm, using dowels or self-tapping screws. If the distance is greater, then there is a high probability of the MDF panel under slight pressure. There are special clamps (brackets) for fastening MDF on sale. Although I prefer them to simply fasten them with a self-tapping screw with a press washer, or with staples using a construction stapler.
You can also attach the panel to the metal frame using a self-tapping screw with a press washer.
As I already wrote, all work can be done alone without anyone’s help. At the end of the article, I would like to say that the use of MDF panels is a good, economical, fast and practical option for interior decoration of a house. But for a person with a good imagination, this is not just a finishing material, but a constructor that can be used not only in the longitudinal and transverse directions, and not only independently, but in combination with other materials.
Kinds
MDF panels differ in technical characteristics, types of finishes and sizes.
Manufacturers offer 3 types of panels:
Whole pressed
Slabs that are homogeneous in structure and do not have a decorative coating. They have good sound insulation performance and are affordable. In finishing works they are used for painting. After applying the paint, moisture resistance increases.
Laminated
Such panels are lined with a moisture-resistant film on which a decorative pattern is applied. The technical parameters of this material are much higher, due to the insulating layer from moisture and temperature changes.
Moisture resistant
Panels characterized by the highest fraction density, which prevents moisture or steam from penetrating inside. The material belongs to a high price category.
Based on the type of decorative cladding, panels are divided into the following types:
Veneered
The most expensive type, a thin cut of natural wood – veneer – is used for cladding. The finish is glued to the outside using a vacuum, glue or by pressing under high temperatures.
Another option is to apply veneer using fine-line technology. Thin sections of wood are laid on top of each other at a special angle with the addition of binders, and then pressed. The surface is smooth, silky with a beautiful pattern of interlacing wood fibers.
Embossed (3D panels)
This is a new trend in the production of MDF panels, with the help of which the surface is given a certain relief, the material is visually aged, golden or silver highlights are introduced into the texture of the picture, a three-dimensional picture and even a photo are placed.
Glossy
They look stylish, respectable and seem to be illuminated from within. A similar effect is achieved by laminating with a high-gloss transparent film.
Painted
The effect of deep color is achieved by applying a special paint to the panel, which smoothes out all the unevenness, spreading across the canvas. Painted panels can be matte, glossy or have a “mother-of-pearl effect”.
The design of MDF panels exceeds the wildest assumptions.
Modern technologies make it possible to imitate any natural material:
natural stone and brick, which allows you to imitate real masonry without creating a load on the base;
photo printing capable of reproducing any image, including imitation of frescoes and mosaics;
types of wood of any shade;
relief pattern with 3D effect;
metal is an indispensable material in high-tech or loft style rooms.
According to the size and shape of the release, they are distinguished:
sheet panels
tiles
clapboard or rail
A special position is occupied by the original look - perforated panels. These are slabs with slotted patterns applied to them. The material is mainly used for finishing ceilings and installing partitions to separate zones within one room.
Installation instructions for sheet panels
INSTALLATION OF MDF PANELS
Installation of sheet panels based on MDF (installation should begin from one of the upper corners, pressing the panel against the corner and the ceiling):
a – sheathing slats and ceiling (wall) are drilled in one pass;
b – the edge of the panel opposite from the corner must be carefully aligned vertically
c – to prevent the panel from “sliding”, a temporary wooden support is placed under it;
d – you can more accurately adjust the edge of the panel to the edge of the corner by measuring the distance from the edge of the panel to the edge of the corner at 3-4 points
d – transferring the measurement results to the panel, they are connected by a line along which the product is cut;
e – panels are easily sawed with a jigsaw or hacksaw, planed with a plane;
g – the gap between the panel and the floor is sealed with a strip of the required width. The horizontal joint of the panels in the lower zone is less noticeable. If the “appendage” is small, then the baseboard will almost completely cover it;
h – the “factory” edges of the panels are so smooth that their vertical joint is noticeable only from a very close distance.
Installation of sheet panels based on MDF (installation should begin from one of the upper corners, pressing the panel against the corner and the ceiling):
a – it is better to apply the glue in zigzag lines; b – the edge of the panel opposite from the corner must be carefully aligned vertically; c – to prevent the panel from “sliding”, a temporary wooden support is placed under it; d – you can more accurately adjust the edge of the panel to the edge of the corner by measuring the distance from the edge of the panel to the edge of the corner at 3-4 points; d – transferring the measurement results to the panel, they are connected by a line along which the product is cut; e – panels are easily sawed with a jigsaw or hacksaw, planed with a plane; g – the gap between the panel and the floor is sealed with a strip of the required width. The horizontal joint of the panels in the lower zone is less noticeable. If the “appendage” is small, then the baseboard will almost completely cover it; h – the “factory” edges of the panels are so smooth that their vertical joint is noticeable only from a very close distance
Sheet wall panels at an affordable price create magnificent interiors for residential office and industrial premises. Their installation does not require special preparation. The panels can be easily installed by a home craftsman who has basic skills and follows these instructions.
Panel size: 244 x 122 cm.
Scope of application: intended for installation in interior spaces only. Moisture-resistant panels made from special moisture-resistant MDF with a marble-like melamine coating and tiles are used to decorate rooms with high humidity: kitchens, bathrooms, showers, etc., as well as shops, cafes, offices. Panels based on MDF or plywood, imitating various types of wood (oak, walnut, birch, pine, cypress, ash, beech), natural stone, brick, are used only in dry rooms. The sales consultant will answer all your questions about the use of wall sheet panels.
Preparing to install wall panels Place the panels in the room where they will be installed so as to provide air access to all their surfaces. The panels must be kept for 24 hours before installation if they are installed in a room located above ground level, and 48 hours if in a basement. Before starting work, carefully inspect all the places where the panels will be installed, mark all the places where the panels will be installed, mark the position of cabinets, fittings, soap dishes, towel racks, electrical outlets, etc.
Cutting wall panels Panels are cut with a hacksaw from the front side, and with a circular saw - from the back. The size of the panels should be 1 cm less than the distance from the floor to the ceiling to leave a gap for expansion.
Preparing the wall surface The wall surfaces on which the panels are installed must be level, clean, smooth and dry. Surfaces must be cleaned with sandpaper. Panels must be installed on continuous solid surfaces. The better the surface is leveled, the less glue is consumed.
Gaps and filling When installing panels, provide a gap of 2-3 mm between the panels for thermal expansion, filled with silicone sealant. Joints and edges (external and internal corners, connecting panels to each other, window and door openings, floors, ceilings) should be finished with moldings - plastic profiles covering the edges of the panels.
Gluing Installation of panels begins from the inner corner. Thoroughly clean the back surface of the panel from dirt and grease. To glue the panels, it is recommended to use Titebona Heavy Duty universal construction adhesive (yellow tube). The adhesive must be applied to the entire back surface of the panels. If moldings are used, they must first be installed in place and filled with Tites Bath&Kitchen silicone sealant. Then set the panels in place, pressing them firmly against the wall. Tap the entire surface of the panel. Excess sealant is removed with a soft, clean cloth. Spacers can be used to ensure adhesion. When installing panels without moldings, allow the adhesive to dry before applying sealant. Undried adhesive may change the color of the sealant. When installing panels that look like wood, brick, or stone, they can be additionally secured with nails or screws.
Rules of care
MDF panels are not particularly dirty, so it is enough to periodically wipe them with a slightly damp cloth. If stubborn stains appear, detergents can be used.
To avoid damaging the top layer, it is important to adhere to the following rules:
- Do not use aggressive chemicals or abrasives. This is especially important when caring for veneer panels.
- Lacquered veneer is wiped with a damp cloth without adding soap.
- Waxed or oiled veneer is periodically treated with special products to care for natural wood. The oil or wax coating is renewed every few years.
If the top coating of the film peels off during operation, it can be removed using fine-grained sandpaper. Any of the damaged slabs can be easily replaced with a new one.
How to join MDF panels on the ceiling if there is not enough length
Until relatively recently, we had no idea what we could do with the ceiling other than whitewash it. Well, paint it with water-based emulsion. If you want something “fun”, you can cover it with wallpaper. With the introduction of new, interesting building materials into our lives, the number of good and different ways to decorate the ceiling has increased. The arsenal of design solutions includes suspended, suspended, mineral, glass, mirror, stained glass, plasterboard, wood paneled ceilings...
Ceiling cladding with polyvinyl chloride panels offers a decent price-quality ratio. At a relatively low cost, the ceiling looks unusual and “European-quality repair”.
In the quest for originality, one should not overstep into kitsch. It is better to choose PVC panels in calm, neutral pastel colors. It doesn’t irritate the eye and visually increases the volume of the room. Which, given the usually low ceilings in an apartment in a multi-storey building, is not at all out of place.
An important advantage of this type of finishing is that, despite the seeming complexity of the work, an inexperienced amateur builder is quite capable of coping with the installation of a plastic ceiling with his own hands. So you can save on inviting professional finishers.
Finishing nuances: processing joints and corners
A universal corner is used for finishing corners. It consists of two plates made of chipboard and connected on the front side with a film.
The strips can bend both inward and outward, which allows the element to be used to decorate any corners.
- The corner is cut to the required length. Docking, if the top edge is being decorated, is done at an angle of 45 degrees.
- It is recommended to apply glue to the glue in two stages: light pressing so that the composition is distributed both over the cladding and on the surface of the corner, and then firmly with pressure.
- Remains of glue, if they do appear, are cut off with a painting knife after complete hardening. They are difficult to remove with cleaning agent or solvent.
Joints are finished in exactly the same way, if such a need arises. However, in this case it is necessary to carefully select the element by color.
Finishing MDF with boards is not a job of a high level of complexity and requires not so much experience as careful execution.
From an aesthetic point of view, it is not recommended to decorate both the ceiling and the walls of the room with slabs at the same time. Styles that involve such a solution are not implemented in city apartments. But for a balcony or loggia this is a completely acceptable option.
Don't confuse ceiling panels with wall panels!
Building materials stores offer a very wide selection of PVC panels. They are of different lengths and widths, they come in varnish, glossy, matte, wood or marble. It's up to your taste; the main thing is not to confuse them with wall ones.
The modern market offers many varieties of ceiling panels. All that remains is to choose exactly what is suitable for your interior.
The difference is in weight. Plastic wall panels are heavier and stiffer. Ceiling ones are much lighter, which simplifies the work. Their fragility necessitates careful handling: a dent can be left even by hand, not with a tool.
FAQ
Is it possible to cover MDF walls on a balcony with cold glazing?
It is possible if the humidity level does not exceed 80%. It is better to choose moisture-resistant material.
I want to cover a country house with MDF panels that is not used in winter. Will there be any problems with the material?
If the area is not very damp, high-quality air exchange is organized in the rooms and MDF is mounted on clamps, there will be no problems.
I decorated the walls in the apartment with MDF panels, but after 3 months they came in waves. What is the reason and how to fix it?
Incorrect installation. The panels cannot be mounted close to each other (tenon/groove connection). Each successive panel should not be inserted into the groove of the previous one all the way. The gap should be about 1 cm. Then it is closed with a folding strip. Only in this case the panels will not move even in the presence of significant humidity. Try reducing the distance between the base joists by first removing the panels and stacking them to straighten them.
We bought MDF, but after removing the packaging a strong smell was discovered. Is it possible to use such material, how long will it take for the smell to dissipate?
This can happen for years. But the smell isn't the worst thing. It may indicate the presence of formaldehyde and phenol in the panels. MDF if the varnish or resin with which it was glued may contain harmful substances such as phenols or formaldehyde. These substances belong to the second hazard class according to GOST 12.2.007-84. Therefore, it is easier to go to the store and return the low-quality goods. If the seller refuses to accept, contact your city's consumer protection service.
More about the benefits of plastic panels
The finishing material is strong, durable, plastic, has good sound insulation, is moisture resistant, does not fade in the sun, and is easy to clean. Oddly enough, thanks to special additives, it is environmentally friendly, resistant to high temperatures, does not burn and does not emit unpleasant odors. Therefore, you can replace the usual electrical wiring with circuits that allow you to install LEDs, halogen, and spotlights.
Finishing the ceiling with plastic panels makes it possible not to pay attention to the unevenness of the ceiling surface. If pipes or wiring are visible, the panels will reliably disguise them. True, they will eat up to one and a half centimeters of the height of the room.
Common Mistakes
Installation without taking into account the characteristics of the material often leads to negative results.
Most often, inexperienced craftsmen make the following mistakes when joining panels:
- Incorrect installation method chosen. This leads to difficulties in fastening and loss of decorative finish:
- Fastening panels without gaps. Leads to deformation of the material due to changes in temperature and humidity.
- Wrong choice of material for height. The result is inaccurate joining and spoils the appearance of the finish.
How much to take in meters and pieces: calculation of the required amount of materials
The thickness of plastic panels is usually 5–10 millimeters, width – from 25 cm (standard) to 50 cm.
Length – from 2.7 meters (standard) to 3 meters. The components are three meters long.
To calculate the required number of panels, you need to divide the ceiling area (the sides are measured and multiplied by each other) by the area of one panel indicated on the package. We will add 15 percent for the cuts with which we will deliver the missing amount; round up to the nearest whole number.
- We calculate the number of metal profiles for installation. This is more complicated. We draw on paper a proportionally reduced diagram of the ceiling. We draw parallel ones along one wall. We take into account that the profiles should be 60 centimeters apart from each other. We estimate how much is needed for the whole room.
- You will need even more rigid profiles that will go around the perimeter.
- The number of screws that will fasten the panels and dowels that will secure the profiles is calculated taking into account the number of both plus the reserve.
If desired, you can replace the profiles with wooden beams, and the screws with staples. This will reduce the cost of the process and simplify the process of assembling plastic panels. But in this case they will not stand like new for decades.
- And finally, the ceiling plinth. We divide the perimeter of the ceiling into three (the length of the segment is three meters) - this is the required amount of plinth.
As for tools and other materials, you need a hammer drill or drill, a screwdriver, a hacksaw, a knife, metal scissors, a miter box, liquid nails, and a rag.
Options for joining planks
Option #1
Connection of plastic and MDF panels:
- H-shaped PVC profile. Most often, joining along the length of plastic and MDF linings is done using H-shaped PVC profiles, as in the photo below. In this version, the planks are simply inserted into the profile on both sides. The downside is that such a profile is visible, and in the case of MDF it also differs in texture.
The H-shaped profile is considered universal, but it is visible
- Thin straight and corner strips. Manufacturers of MDF panels produce thin strips that are glued to the connection line; these strips can be straight or angular.
- T-shaped moldings . They are inserted into the gap between the panels.
T-shaped moldings for hiding the joints between MDF panels are very easy to use
Option No. 2
A decorative overlay at the joint is considered the simplest way to connect wooden cladding along the length. You simply fit 2 rows of planks and nail a piece of wood on top. The configuration and dimensions of the slats can be any, and most importantly, there is no need to adjust the slats too precisely; the slats will cover the entire defect.
Ceiling installation
The technology for finishing the ceiling with PVC panels includes several stages:
Step one. Using a level, we mark the places for attaching rigid profiles, which should go along the perimeter. They must be installed exactly horizontally. We fasten the profile tightly to the wall so as not to leave any gaps or cracks.
Step two. Using self-tapping screws, we install transverse profiles - the same ones that will hold the ceiling panels.
Step three. We mount a profile similar to the English “L” on the profiles around the perimeter.
Ceiling sheathing for PVC panels can be made from either metal profiles or wood. But this option may not be suitable for the bathroom or other wet areas.
If your ceiling repair option involves installing special lighting or masking communications, it’s time to do this before you start directly installing PVC panels.
Step four. Using a hacksaw or metal scissors, carefully cut the panels along the length of the ceiling. Laying the first panel should not become a pancake clump. We fasten it as close as possible to the corner to the transverse profiles with self-tapping screws. The following are mounted in the grooves that are located on the previous panel; We attach it to the frame.
Step five , the most difficult and requiring special care, is the installation of the last panel. It usually needs to be cut to width, and then carefully inserted into the plank on the opposite wall.
Step six . We apply liquid nails to the ceiling plinth. Press tightly to the ceiling for a few seconds. Use a rag to remove excess glue.
Fastening the lining to the sheathing
To install MDF panels on metal or wooden sheathing, clamps are used - special devices that are put on the lower chamfer of the tongue and groove and screwed (nailed) to the sheathing. It should be noted that fastening the clamps with self-tapping screws is much easier, and it will hold better. Each clamp requires either one screw or two nails.
Video description
The video explains how to glue plastic decorative corners:
This material is also used to make decorative profiles. In the process of its creation, two strips of the same size are fastened together with adhesive film. It is applied from the front side. Its color and pattern matches the color and pattern of MDF. Such products can be used both for decorating external corners and for framing internal ones. The degree of angle is not important.
Note! It is undesirable to use corners made of MDF in the interiors of rooms with high humidity.
Scope of use
Corners are the most problematic place. When carrying out repairs, it is difficult to decorate them beautifully. The wallpaper pasted on them peels up and comes off after some time. When furniture is brought into rooms or rearranged, hard large elements often become damaged, resulting in a sloppy appearance. All this can be prevented if you purchase decorative corners for the walls and install them at the finishing stage. They will completely cover the ends, allow you to form a smooth transition from one material to another, and cover up some of the sins of the painter’s poor quality work.
In addition to a purely technical function, corners carry an aesthetic load. If you cover the perimeter of the window opening with a white profile, the window will look better. This technique is often used when, according to design requirements, the window is not covered with curtains, but is decorated with blinds. In this case, the color of the corner should match the color of the wall trim. When contrast is used, the profile acts as a separate decorative element. It immediately catches the eye and becomes an original part of the interior.
Designers love to use decorative corners for the outer framing of doorways. This becomes especially relevant when the thickness of the wall is greater than the width of the door frame. This difference is completely covered by the extensions, and then corner elements are placed on top of them, the color of which completely matches the color of the door.
External wall corners, arched openings, ledges and niches need additional protection. Installing corners will prevent the risk of damage from an accidental impact. It is relevant when the walls are simply plastered or covered with wallpaper. In addition, it is easier to clean and remove hand marks. If the corners are covered with a plastic profile, it will be easier to keep clean.
Corners can be used to cover the ends of a wall trimmed with ceramic tiles or wall panels. Often the edges of such materials are not sanded, so the edge looks unattractive. Installing a profile helps to completely hide such a defect.
Another area of application is decorating the external corners of structures assembled using plasterboard. Today, the technology of creating open shelves and racks from this material is actively used. Joints covered with a profile look more aesthetically pleasing.
Using decorative corners, you can make frames for large mirrors, cover skirting boards, and any joints that take the shape of a corner. There are profiles for plaster, models for ceramic tiles, profile products for bathtubs, and furniture.
Tools for finishing work
In order to install wood fiber panels on the partition frame, you should prepare:
- plumb line or level;
- hand saw;
- cord;
- drill;
- grinder;
- roulette;
- screwdriver;
- chalk or graphite;
- wooden beam or aluminum profile for the frame.
In order to increase the noise reduction ability of the wall, you should also use thermal tape, which is located between the frame elements and the remaining surfaces of the room - the ceiling, walls and floor.
Fitting sizes, possible colors
Polyurethane wall panels
Accessories and components for MDF panels should provide an optimal set that lies within the budget range and provides maximum benefit to the consumer. The sizes and types of components correspond to their purpose.
Standard products are available in various sizes. Examples of the most common product sizes:
- The planks have large, medium and short lengths, and their cross-sectional profile corresponds to the purpose of a particular product. The dimensions considered average are 4x22x2700 mm;
- The most common sizes of universal corners are 20x20x2700 mm.
The planks can be used in the same color scheme as the panels or in a contrasting color to create a unique room decor. The products are popular due to the wide variety of colors and high quality.
For information. Customized sizes are available based on different thicknesses.