How to raise the pallet higher?
As a rule, if there is no blockage, the water drains slowly due to the fact that the angle of inclination of the sewer outlet is not maintained. It is recommended to install it so that the height changes by at least 3 cm for each linear meter. But it is not always possible to provide such a bias. Therefore, all that remains is to raise the shower stall higher.
Leg height adjustment
Depending on the situation and the distance of the shower from the drain, a rise to a height of several to 10 cm or more will be required.
To do this, it is not necessary to disassemble the structure . If the shower cabin is installed using a metal frame, legs will be screwed into it, the height of which can be easily adjusted.
Legs or studs are metal rods that are threaded. One end is fixed in the cab frame, and the other in a plastic or rubber stand on the floor.
The size of the stud is changed with a wrench. Rotating counterclockwise will make the leg taller, and turning clockwise, on the contrary, will shorten it. Using this method, you can raise the shower stall by 3-5 centimeters.
To increase the lifting height, paving slabs or wood are also used. They can be placed under the legs. Together with adjusting the height of the legs, this method will allow you to raise the booth by 9-11 cm.
Dry hardwood timber is suitable. To prevent fungus from developing in the bathroom from wood contact with moisture, the timber is treated with antiseptics and covered with drying oil.
Increase the length of the studs
Unfortunately, adjusting the legs on the shower frame is not always enough. Sometimes you need to raise the booth to a height of more than 10 cm for good drainage, how to do this? There is a solution - completely replace the leg studs.
To do this you will need:
- purchase a stud with the same thread and diameter;
- measure the required length,
- cut equal parts with a hacksaw
- replace the old legs with new ones, screwing them with one end into the base of the frame and the other into a plastic or rubber support.
In this case, a void is formed between the floor and the pallet. It will make cleaning under the cabin easier, but may not fit into the overall design concept. If desired, the gap can be decorated.
It's quite simple. The only thing worth considering is that the longer the studs are, the less load they will be able to withstand . Therefore, it is not recommended that such a leg be longer than 15-17 cm.
Second step
Turn the pallet upside down and place the frame on the bottom of the pallet. Install long studs along the edges of the tray.
Screw them into special inserts along the edges of the pallet, having previously screwed 2 M12 nuts onto each (1 nut will be used as a lock nut for fixing the stud in the installation location on the pallet, 1 nut will fix the frame).
DO NOT TIGHTEN THE NUTS AND LOCKNUTS UNTIL THE PAN IS ASSEMBLED .
THE FINAL TURNING OF THE LOCKNUTS OCCURS AFTER THE FRAME IS FIXED ON THE PALLET.
What should be the correct drain for a shower stall?
Today, a shower stall has ceased to be something unusual and outlandish. Many are happy to give up baths in favor of this creation of engineering. When installing it, you need to pay special attention to the drain. Stores offer a huge selection of shower drains. Before you buy anything, you should decide what exactly you need.
If proper attention is not paid to the arrangement of the drain, this can be a source of some problems in the future.
How to drain
There are various ways to drain water from the cabin. The choice of one option or another depends on the design features of the shower stall:
- If the cabin is raised above the floor, then water drainage does not raise any questions. The siphon and pipes are installed between the floor and the bottom of the cabin. When installing a very low pan, special attention must be paid to how the siphon passes water. This is important, as there is a high probability of blockages.
- If the cabin does not have a tray, you will need to install a drain or channel to drain water. The installation technology in this case will be somewhat different.
The drain differs from the canal in appearance. The channels are elongated, and the ladders are shaped like a square or circle. To organize drainage, the easiest way is to install a siphon under the pan.
Video on topic
Shower drains come in different designs: ordinary ones, which look like a round or square mesh in the floor, like a tray. There are more modern models - wall-mounted. A shower tray and a wall drain are necessary if you are making a cabin with a large flow of water. In this case, the conventional design may not cope with the drainage and more efficient models are required. And there can be two drain devices in the tray. Features of their installation in a video from one of the manufacturers.
One of the ways to waterproof a shower stall
And another type of waterproofing
Use of bricks and hard materials
If you are faced with the question of how to raise a bathtub above the floor level to a considerable height, then installation on solid materials would be a suitable version. The advantages of this method include:
- increasing the area of racks;
- sustainability;
- eliminating structural deformation;
- installation of plumbing fixtures at any height;
- creating the desired slope.
Basically, this method involves the construction of supports made of brick and other materials that have sufficient strength. Brick stands are constructed using mortar. This allows you to give them stability and strength.
As an addition, walls are used that surround the plumbing around the perimeter. This method makes it possible to perform reliable installation of the bathtub, regardless of its weight. At the same time, it looks quite aesthetically pleasing. The space under the plumbing is completely hidden behind the brick wall.
Important! If materials with low moisture resistance are used for installation, then additional insulation work must be performed. This will protect the supporting elements from the negative effects of high humidity.
Construction and design tips
Building a shower stall from ceramic tiles yourself is not difficult. The main thing is to follow the construction advice and not use unsuitable materials that are not resistant to moisture and water.
- Waterproof the area under the tray or shower, regardless of the type of cabin - open or closed.
- It is better to use large impact-resistant ceramic tiles that will not deform over time.
- Use sealant for installation and fastening of the siphon, pipes to the sewer and drainage system.
- Do not build a shower wall close to the ceiling - you need free space for steam and moisture to escape.
- Provide reliable ventilation, preferably automatic.
- Use an additional drain around the perimeter of the shower exit.
- Use lightweight doors made of tempered glass or safe accordion plastic.
- Make the level of inclination of the water drain under the siphon 2-3% below the floor level.
The design of the cabin depends on the flight of fancy and the availability of finances.
Tile is combined with wood, so you can use a combination of tiled walls and wood along the sides. Glass and ceramics are design classics. There are no restrictions or combinations of styles. A glass door (double or single) with large colored tiles looks great. If you use a ceramic wall at a height of 1.20 m from the floor, and then frosted glass sides, this will be an unusual and extraordinary design option.
A shower stall is a place for relaxation and rest after a hard day at work or for receiving an adrenaline rush in the morning. Therefore, such an issue as installing a shower is approached thoroughly. Making your own ceramic booth is easy with detailed instructions and tips from experts.
Features of constructing a podium for a shower stall
For the normal operation of this product, it is important to supply water at the required temperature and quickly drain the sewer. In most bathrooms it is located above the floor level, which makes it difficult to install a shower stall.
Important! The sewer pipe along its entire length must be located at a slope . This is necessary so that the water drains quickly without lingering.
In cases where the pipe is installed incorrectly, leaks and blockages appear , which makes hygiene procedures impossible. It is to create an inclination of the sewer pipe that a stand is needed.
The height of the podium depends on the following parameters :
- The location of the cabin in the room: the farther it is from the drain riser, the higher the podium should be; it must be raised at the rate of 5 cm for each meter of distance .
- The distance from the working surface of the stand to the drain must be at least 7 cm . Otherwise, constant blockages and stagnation of water are inevitable.
- It is necessary to take into account the height of the entire structure in order to carry out the subsequent installation of the cabin without problems.
Reference! The podium must be durable to withstand not only the heavy structure, but also the load of the person undergoing the procedure. The optimal height of the stand is from 10 to 20 cm .
Is it worth collecting at all?
In most cases, the game is not worth the trouble. You can save money somewhere in the country by taking one pallet and nothing more. If this is acceptable, then the price difference will indeed be significant. Another option is when the delivery conditions are not satisfactory. Typically, an out-of-town seller will quickly begin to raise the bar. As a result, saving becomes unprofitable. More is spent on travel.
Another example is the inability to bring the product onto the floor. Modern new buildings have a freight elevator, but not Khrushchev-era buildings. Then it may turn out that assembling separately is more acceptable:
- A fully functional shower cabin weighs from 50 kg and above.
- The weight of the shower enclosure ranges around 30 kg.
It is not difficult to see that the entire product as a whole is not transportable alone, while individually the components can be carried by the average man. This is a compelling argument when there is no desire to pay additional loaders. That’s when you have to divide the shower corner into its components.
And here it turns out that the corner is often sold without a mixer. No, it is clear that a double-wall fence is devoid of this small, but expensive, detail, however, complete structures are supplied in a minimal configuration. This means that you will have to buy the mixer separately.
It is not difficult to deduce the rule of expediency of purchasing a shower enclosure based on its components. Here are some options:
- You already have a mixer, and there is no need to spend extra money.
- Difficulties with the delivery of bulky goods.
- There is a ready-made tile backsplash on one or two walls.
Installation of a shower cabin
Builders' problems
The trouble is that dealers do not indicate installation dimensions. Therefore, it is difficult for a person unfamiliar with the topic to understand what exactly they are offering to buy. There are no sectional drawings, side or bottom photos. Dealers only advertise appearance. But only installers know how many problems a shower cabin can cause during its installation.
Yes, there are some standard projects, but you can find weak points in each. And then it turns out that the unlucky buyers of the shower stall begin to flood the neighbors. This is the weak point of any design - there is no leakage control.
Choosing an installation location
For large apartments and private houses there are no problems with choosing a location. The main requirements for placement are compliance with the interior design, the possibility of supplying communications. Installed, in addition to bathrooms, in other rooms. When designing a house, they provide for the possibility of installing a cabin.
DIY shower cabin project.
It is more difficult to choose a place in small apartments. Apart from the bathroom, there is nowhere else to install it, and even then it is a small area. The bathtub is removed, otherwise it will not be possible to install a shower. There is more space left for a washing machine, washbasin, and changing clothes. For rational placement, a drawing is made indicating the dimensions of the room and equipment.
What to make from
The materials for its manufacture are simple and affordable . These are brick, wood and concrete. Each has its own characteristics, which must be studied before starting construction work, and choose the appropriate one that meets your requirements.
Brick
Advantages:
- lasting;
- not afraid of humidity;
- economical;
- long service life.
Flaws:
- It is difficult to implement, since it is necessary to maintain the geometry of the form and the level of the surface in order to avoid distortions.
Peculiarities:
With the subsequent installation of the cabin, it is necessary to wait 2-3 days for the cement mixture to harden. To make it you will need: brick, cement, sand, water, marker.
Tree
Advantages:
- Ecologically pure.
- Safe for humans.
Flaws:
- Sensitive to humidity.
- Requires annual painting to increase service life .
Peculiarities:
You will need sealant, dry wooden blocks, a tape measure, a dark marker, and plastic panels. Before use, the wood is treated with a special agent to prevent mold and rot.
Concrete
Advantages:
- The construction is durable .
- Not subject to deformation.
- Long service life .
- The shape is varied, monolithic.
Flaws:
- High cost .
- Difficulty of execution.
- Long production time ( up to 4 weeks ).
Peculiarities:
Necessary materials: sand, crushed stone, cement, water 35°, formwork agent to give shape, reinforcement to prevent cracks from appearing in the product.
The main raw materials used in construction work, their advantages and disadvantages, allow you to choose the best option .
Sloping floor
Some people deliberately make the floor at an angle so that water drains better. This is done using a rule, which is a straight metal bar, pointed on one side. It is necessary to mark the lowest point, which will be near the ladder.
And the highest point, which is located at a height of about 5 cm from the horizontal surface. Next, the screed is laid out where there should be more of it, that is, near the sides.
Then the rule is taken and drawn along the circle. One end of the rule should be at the lowest point, and the other end at the highest. They need to be drawn around like a compass.
Installation of a tray for a shower cabin
This option has some features, namely that such work can be done quite quickly and cheaply. However, to do this you need to know exactly how high you are going to raise the shower stall. To correctly calculate this parameter, you will need an ordinary drain corrugation. It is installed in place and connected to a pallet, which is placed in the place where its final installation is planned. Make sure that the length of the corrugation is optimal, without tension and without bending.
Next, you will need the help of at least two more people. One should pour water into the pan, and the other two should lift it gradually. It is necessary to note at what height from the floor the most efficient outflow of water from the pan with a characteristic sound will be ensured. This height should not be too high, but at the same time sufficient.
Diagram of one of the shower tray options
In any case, this height needs to be calculated, and not made up out of your head. Most often, the best option is a 15-centimeter rise. The use of such a height is also supported by the fact that the height of the foam concrete block is exactly 15 cm. This is what we will use as the material for constructing the pallet. If in your case this height is excessive, then you can select smaller blocks. Otherwise, the missing height can be added with bricks.
Diagram of one of the shower tray options
Tips for use
To wash and wipe the shower stall, it is advisable to use liquid detergent and a soft cloth. Do not use products that contain ammonia, acetone and organic solvents. There are also special products that are designed to polish shower cabins and give them shine.
Often, water causes a white coating to form, which settles on the doors. It can be removed by first soaking a soft cloth in slightly concentrated lemon juice.
Metal parts should also only be wiped with a soft cotton cloth. Never use a hard cloth.
Glass panels and doors should be wiped with a cloth previously soaked in a special detergent. Sliding doors are often removed from the frame before washing. Do not use special scrapers for cleaning.
Not only the doors, but also the tray should be kept clean. Do not allow the drain to become clogged. Watch out for foreign objects that might get in there.
To clean the whirlpool system, you need to fill the bathtub, add liquid detergent to it and leave it for 5 minutes, then turn on the shower. Then, after the procedure has been completed, everything should be repeated in the same sequence, only without chemicals.
To install a shower in a wooden private house, certain conditions must be met. There must be high-quality waterproofing, and the water supply must be carried out by a professional craftsman according to a special scheme that eliminates leaks.
To learn how to assemble a shower cabin, see the following video.
Raising to your feet
Often, factory bathtubs come with specialized legs that are attached specifically to the plumbing system. But their length may not always be enough. What to do if the factory legs for the bathtub are quite short? It's quite simple: you should purchase new, longer screws.
At home, you collect 1 leg, and then with it, as an example, you go to a nearby plumbing supply store, or to the market. There you search for and purchase screws with the length and thread size that suits you. Then, upon returning home, you simply replace the purchased screws with factory ones and install them on the bathtub.
When purchasing, attention should be paid to the quality of the product. Do not forget about the load that the legs will hold - this is a bathtub filled with water in which a person is sitting
For excellent durability of the bath, and the safety of your loved ones, you should select only products from trusted companies.
This option will give you the opportunity to raise not only ordinary bathtubs, but also unusual models with artistic legs. Raising the bathtub this way is not difficult, and the new screws will be virtually invisible.
Layout of a land plot of 6 acres for building a house
6 acres is the traditional size of land plots allocated for personal needs. And now many plots are of this size. At first glance, they are quite small. And yet they allow you to place everything you need for living and recreation. For the best placement of all objects, planning will be required.
What to consider?
will not be flooded by groundwater.
In addition, the windows will offer a more beautiful view of the site. Often a terrace or veranda is added to the house for summer recreation.
It is necessary to provide space for outbuildings such as a barn. If you have a car, you will need parking or a garage for it.
The garden area includes open beds and greenhouses. Garden - trees and shrubs planted separately or nearby.
Don't forget about places to relax. Depending on personal preferences, a bathhouse, gazebo, or outdoor swing are suitable for this. If there are children in the family, it is necessary to provide a playground for them.
If it is not possible to install a bathroom in the house, they make an outdoor toilet. It, like sheds, is best located in the rear of the site.
How to get sick leave at a clinic - all the answers to this question are in our material!
Business trips made on weekends are paid according to a special scheme. You can read more about this in our article.
What is more profitable for working pensioners in 2021: working or retiring? Our material will help answer this question.
How to compose?
First of all, you need to decide what exactly will be located on this site. Then you need to think about the location of these objects. In this case, you need to take into account:
- Rules for the relative position of buildings and other things.
- The shape and topography of the earth, as well as its location relative to the cardinal directions.
- Wind rose and location of groundwater.
- Layout of neighboring areas.
It is necessary to take into account where and what is located among your neighbors in order to:
- The house and large trees did not cast shadows on light-loving plantings or recreation areas.
- There was no unpleasant proximity, for example, to a toilet or poultry house.
It is useful to know the plans for construction and arrangement. After the site plan has been created, you need to think about the order of work.
These include:
- Construction of a fence.
- Construction of wells, sewerage, etc.
- Leveling and/or raising the soil.
- Construction of a house and other buildings.
- Planting plants.
- Creating tracks.
- Etc.
Similar principles apply to larger plots, up to 15 acres. But they will have larger zones.
https://youtube.com/watch?v=N2eRZueiTrU
Types of pallets
Some pallets are designed to be installed directly on the floor. This assumes that the drain hole is in the specified location, flush with the surface. All that remains is to install the shower stall, connect it to the water supply and start using it. Ideally, everything should be the same as on the site stroyshopper.ru, where there is often a drawing. As a result, the buyer immediately understands how the pallet should be installed. But here, too, not everything is so smooth. Let’s say it’s not clear with the Kolpa-san Flamenco 90×90 pallet whether the support frame is included in the kit.
Deep pallets
Let us explain what we are talking about. The mentioned Kolpa-san Flamenco 90×90 deep tray. Therefore it cannot be placed directly on the floor. This is a common situation. Deep trays resemble a bathtub, but without legs. Therefore, a frame is required for installation. So it’s not clear whether the dealer is giving us the one shown on the drawing. However, this can be easily inquired over the phone.
Shower with low tray
The next case with deep trays occurs when the product is part of a shower stall. In this case, the manufacturer has to resort to the following kind of trick. A deep tray in the form of a bathtub looks the same as a regular bathtub - ugly. To make the product more attractive, there is a decorative fence along the base. Physically, it is either part of the pallet and made of the same material, or it is a completely separate removable frame. But in any case, if there is a deep tray, there is a frame and legs for it. These are very rarely placed on a foundation.
And although a deep tray can be quite heavy, installation is still very quick. Horizontal installation is carried out according to the building level by adjusting the height of each leg separately. But if there is a base, problems arise with entering the sewer. If you are your own boss and can design the sewer system as you want, then no special problems arise. But there are situations when the plan for a new building has already been outlined and all that remains is to implement it.
In this case, the situation is often such that the sewer pipe runs along the wall, and there is no way to change anything. The base is a real obstacle to communication; it is impossible to start a siphon. And according to the terms of the warranty service, nothing can be cut. So builders begin to think about the foundation. The second option is to move the shower stall slightly away from the wall. Modern sewer pipes are not very thick; there are 32 mm varieties. The installation height of the shower stall depends only on the imagination of the builder. Because the foundation can be made from various materials.
Advice! The operating and installation instructions for Arcus shower enclosures are available online in pdf format. It is recommended that you familiarize yourself with this material as an example of excellent documentation. The deep pan is given in section with all the rules for its installation. Horizontal alignment is achieved by adjusting the four legs around the perimeter.
Low (small) pallets
Small pallets are placed on the floor from time to time, as are tall ones, some are even equipped with legs, but for the most part a foundation is still required. The problem with low pallets is this. The bottom has a shape close to a plane, therefore, it is easily deformed. Here is a sample list of materials from which shower trays are made:
- Acrylic.
- ABS plastic.
- Steel.
- Fake diamond.
- Fiberglass.
- Ceramics.
Each of these materials has its own characteristics, but from an installation point of view they can be divided into only two groups:
- Solid (ceramics, artificial stone).
- Thin-walled (all others).
Depending on the version, installation is carried out.
Solid shower tray
Solid low pallets
Solid low pallets are a slab (completely flat) with a hole for drainage and a shallow recess in the central part with a border around the perimeter. An individual mansion, where the sewage system is embedded in the floor, is ideal for installing such products. Then the slab is simply placed on the floor, and the installation of the shower tray is considered complete. The height of the entire product in this case does not change and corresponds to that indicated on the website.
The ideal case is described above, but what should someone who wants to enjoy a marble tray in their cozy apartment do? The sewerage system has already been drained, what should I do? In almost all cases, you will have to build a foundation, at least from foam concrete. Here every master acts in whatever way he pleases. The height of the shower stall is replenished with bricks. The dimensions of the base are taken such that sewer and water pipes pass inside. Usually a height above the floor of about 4 cm is enough, but bricks usually have even larger dimensions.
Many people have questions about how the water pipes ended up on the floor. Let's explain. The cabin is usually placed in a corner, and if communications go outside, then bringing them into the base is the only acceptable solution so as not to move the cabin away from the wall.
The next problem with low pans is that leaks are difficult to control. You can easily flood your neighbors, and if you manage to detect a problem, you need to disassemble the entire structure:
- Remove doors.
- Remove the corner.
- Raise the pallet.
Cabin with deep tray
Examination
After the installation of the shower is completed, one of the most important stages begins - checking its operation.
- To do this, inspect the joints, fastenings and holes again.
- Go into the shower and stomp around - this is how your stability is tested. There should be no extraneous sounds or swaying.
- Check the doors to see how easily and tightly they close.
- If everything works properly, you can turn on the water and leave it for 10-15 minutes. If you notice even a small leak, fix it. Otherwise, in the future the hole will become larger, and, consequently, the influx of water.
After the problems are eliminated, within a day - the time for the silicone composition to completely dry - you can use the shower.
Sequence of work on arranging a shower room with your own hands
For a standard apartment building built from reinforced concrete slabs, we offer the following algorithm for creating a shower room with your own hands from tiles.
- Removal of remnants of old cladding, plumbing, communications. The walls, floor and ceiling must be stripped down to bare reinforced concrete, pipes and electrical wiring must be eliminated. There are only places left for inserting sewerage and water supply, as well as the electrical cable outlet. An old cast iron or steel bathtub may need to be cut to remove it (unless you plan to remove the partition between the bathroom and the hallway).
- Communications layout. Wiring consists of laying water supply and sewerage pipes and bringing out electrical cables to the required points. When installing ventilation and heated floors, these systems are also installed until the surfaces are leveled and finished. If the main walls are thick (for example, brick), you can make recesses in them for laying pipes and cables.
- Leveling the surfaces of walls and ceilings. In order to be able to arrange a hidden installation of communications and at the same time be able to reach them in case of problems, it is worth using drywall for leveling. The use of screed is a cheaper, but also more labor-intensive option for arranging a room. The floor is leveled using a screed or flooring along the joists. The second option is more convenient, since it allows you to lay communications under the flooring and does not require waiting for a thick layer of cement-sand mixture to harden. A special feature of leveling with plasterboard (walls and ceiling) and flooring on joists (floor) is the possibility of installing heat and sound insulation using any insulation suitable for indoor work. Drywall and decking boards are used only waterproof.
- The shower tray is installed and waterproofed (the illustration below shows bitumen-based coating waterproofing before and after installing the tray). When installing, it is important to follow the rules for the slope of the pipes from the shower drain to the insertion into the main sewer pipe, as well as the slope of the floor of the tray towards the drain of the shower stall.
- Waterproofing of the walls adjacent to the pallet is created with a reserve of area on the sides and upwards so that flying splashes do not affect the condition of the surfaces. The diagram below shows how far the shower waterproofing should extend in relation to the different types of plumbing fixtures installed. Particular attention is paid to the joints between vertical and horizontal surfaces.
- Fastenings for plumbing fixtures are installed (for an externally installed faucet these are water pipe outlets, for a model of a hidden type of installation - a working unit in a wall niche with an outlet for control elements and water dispensing points) or the fixtures themselves, additional structural elements are installed. This could be a built-in countertop or shelf, niches, additional partitions, etc.
- Finishing is in progress. For ceramic tiles, laying with a special glue is used, and cross-separators are used to maintain the same distance between the parts. After the glue has set and the finishing of the cladding is completed, the seams are rubbed down. Other finishing options (painting, decorative plaster, wallpapering, paneling) are carried out according to the recommendations for each type of design.
- Sliding (hinged) shower doors, plumbing and lighting fixtures, fittings, external ventilation elements, lighting, etc. are installed.
Construction of the podium
How can you raise the cabin higher than 10 cm? The answer is simple - install the structure on the podium. Before its construction, the level of rise is measured, which will be sufficient for the rapid outflow of water.
The corrugated pipe is connected at one end to the sewer system, and at the other to the drain pan installed in the required location in the bathroom. The corrugation should not sag or be too tight. Water is poured into the shower tray and raised, monitoring the height at which the water will flow out at the optimal speed. A suitable height is measured and a podium is erected at its level.
There are several most commonly used materials for podium construction :
- bricks are moisture resistant and easy to use. Many design ideas are feasible with them;
- foam blocks - durable, budget-friendly and water-resistant, the height of one block is 15 cm - the optimal level of the podium in most cases;
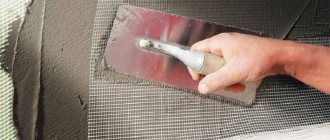
- wood - durable and strong, to prevent the appearance of fungus, the wood is coated with antiseptics and then painted or drying oil;
- concrete is strong, durable and moisture resistant, the main drawback is that it will take more than 10 days for the podium to harden.
Instructions
It is optimal if the podium for the booth is strictly in accordance with the dimensions of the pallet, so as not to hide excess space. Therefore, for convenience, a special template is made.
The best way to make a template is to lay the pallet on the chosen material and trace it.
Taking into account the repeated use of the template, it is worth choosing a more durable base, for example, plywood. It will not lose its shape and will not wrinkle when used. It is important that the final dimensions of the podium fit the dimensions of the shower room.
STEP 1. The finished template is placed in the place where the cabin is planned to be installed and traced along the contour. Then it is removed, and the area inside the contour is primed.
STEP 2. Prepare the adhesive solution: 30% assembly + 70% tile adhesive + water. Dilute it to the consistency of liquid sour cream. This mixture hardens very quickly, so the amount of the resulting solution should be small , but sufficient for use within 5-10 minutes.
If desired or unsure of your own speed of work, the glue can be replaced with cement mortar. But it should be noted that final drying will require at least five days.
STEP 3. After the applied primer has dried, the space inside the contour is covered with glue and foam blocks are laid on it, leaving space for connecting the shower drain and sewer pipe.
STEP 4. Place a template on top of the foam blocks. Using it as a guide, cover the walls of the podium with a thicker glue solution (it will be obtained by reducing or completely eliminating water). Then, using a level, level them.
STEP 5. When the glue on the sides is completely dry, remove the template and cover the upper part of the podium with the solution. Then it is leveled (in this case, the finished edges will serve as beacons).
STEP 6 . Lastly, the completely dried podium is covered with tiled or ceramic tiles. In order for the tile to fit the shape, it is laid out on the podium, a template is placed on top and traced along the contour. Then the tiles are cut along the intended line. When gluing tiles, it is important to leave space for communications.
STEP 7. The seams between the tiles are rubbed and unstitched. The shower cabin can be installed the next day after finishing work.
When forming a podium, it is important to carefully check the quality of the connection between the pipe and the drain. In cases where its height is large, for ease of use, you can form a step to it using the same principle.
Design
The bathroom is considered a special room in an apartment (house), because it not only begins the morning, but also the evening, where after a hard day of work everyone wants to freshen up and relax by taking a shower. Tile showers save space and give the room a modern look. As a rule, most homeowners prefer to create tiled cubicles with a drain in the floor; they are ideal for styles such as minimalism and hi-tech.
In this case, the walls, ceiling and floor are decorated with glossy tiles. Options with a glass door and a curtain look interesting.
If you line the walls with matte tiles, you can get a stylish shower room . It is best to decorate floors with relief tiles imitating natural stone (on its surface you can see cracks, small kinks and irregularities characteristic of natural material); wood-effect floor tiles also look unusual. The decoration of the shower room, which combines regular tiles with mosaics, also looks interesting. It can be laid out in the form of patterns or thematic compositions. The mirror mosaic looks especially chic.
concrete-effect tiles to decorate their showers . For those who love everything unusual and extraordinary, tiles with imitation fish scales will be the right choice. It is distinguished by a soft overflow and visually expands the dimensions of the shower. It is important to choose light shades.
Today you can also find tiles on sale that look like large pebbles. It is resistant to moisture and brings a seaside atmosphere to the bathroom environment. This tile can be combined with other decorative materials. Finishing with tiles with a pattern also looks no less stylish, while the images on it can either completely occupy the entire surface or be made in the form of small drawings.
This cladding option will help revive a monochromatic and dull design.
Climbing without a podium
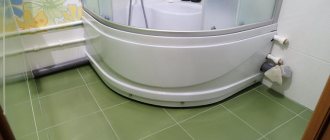
If a plumbing fixture without a stand functions poorly , for example, water stagnates in the pan and does not drain well, it is possible to change the situation by lifting it. In this case, you cannot do without helpers :
- While tilting the cabin, place bricks under the gap .
- Using a building level, determine the level position of the structure.
Important! Check how the sewer drain works. If there is no stagnation of water, the height is chosen correctly .
- Fill the gap between the floor and the cabin with bricks, and seal the gaps with polyurethane foam .
Heating type suitable for garage
Having taken all the necessary measures to prevent heat loss from the room, we can think about organizing its heating. If the building is not insulated enough, then we will heat the street, but the effect we need will not be achieved. Of course, we don’t need the same warmth as in an apartment, but a temperature of +5 °C is our goal.
Next, we will consider the most suitable heating systems that can be used in a garage. And let’s look at their main advantages.
Water heating system
When using a water heating system, the coolant is water. It circulates in a closed circuit, which includes a boiler, pump, pipes and heating radiators.
In a simplified way, the heating process looks like this: heat is generated using a boiler, water is heated, and then, with the help of a pump, it moves through pipes to heating radiators. Here the water gives off the received heat, warming up the room, after which it returns to the boiler again, closing the circle of its circulation.
Water heating of a garage can be profitable, but only if it combines a garage and a cottage or a group of permanent buildings
The advantages of water heating for a garage are:
- Long service life. Indeed, if the system is installed in compliance with all the rules, and it is operated carefully, it can serve properly for a very long time.
- Maintainability. Each element included in the circuit, if it suddenly fails, can be dismantled and replaced.
- Safety. Water heating is highly safe and environmentally friendly.
As we can see, the advantages of this method are significant, but water heating in garages is used very rarely. Most often this happens if the garage is part of a single heating system with a residential cottage. Such heating is also used in garage cooperatives if the heated objects include several permanent buildings united into a single network.
When the garage is located far from centralized heating, the costs of equipment and insulation of the heating system make it unprofitable. In addition, the water in the system will have to be replaced with antifreeze.
The greatest effect from the use of water garage heating can be achieved in buildings made of brick or solid concrete blocks. This type of heating is not used in structures made from metal profiles or other lightweight materials.
Air heating system
For air heating, different devices are used: heat guns, curtains and special fans that force heated air into the room.
The operating principle of all of these devices is the same: the air is heated by a heater built into the device and distributed by a fan, which is also located inside the product.
The use of air heating for a garage will allow you to quickly heat rooms of different sizes. If you direct the air flow towards the car, you can quickly remove all the moisture even underneath it. Some of the air devices consume electricity when connected to a regular household network. Others use other types of fuel to heat the air.
The main advantage of such a heat gun is the rapid heating of the room, which can be achieved using this effective device
An example of an air heating device is the same heat gun. It must be turned on when visiting the garage. It warms up the room in a matter of minutes. The durable casing of this device contains a powerful fan, with the help of which the heat from the heating element is distributed throughout the room. But it should be borne in mind that in the absence of the owner, the garage will freeze.
The advantages of air heating are:
- The room can be heated very quickly.
- The room temperature will be maintained at the desired level.
- Air heating devices are easy to use.
Significant disadvantages include the fact that the air flows created can raise dust in the room. In this case, regular cleaning cannot be avoided. In addition, we have already considered the disadvantages of devices powered by electricity.