The main, but far from the only, reason for a clogged shower drain is hair. Falling into lumps, they become overgrown with other contaminants, forming dense, impenetrable blockages. Pet hair, dust, components of soap, shower gels and other cosmetics, and sediments due to poor quality water purification aggravate the situation even more. If you do not carry out preventive cleaning of the drainage system, sooner or later you will inevitably face the problem of drainage clogging. What methods and means can be used to remove an already formed blockage in the shower stall?
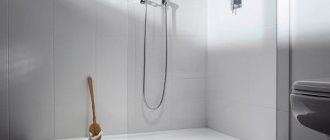
How to clean a drain in a shower stall?
How to properly clean the drain in a shower stall with your own hands?
The drain is not such a complex product, it is simple in its design, like a nail, it is difficult to install, the screed must be correct, plus the drainage angle, plus a smart tiler who knows that the drain should be just below the level of the tiles.
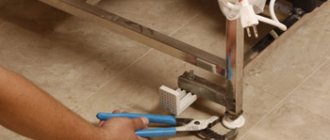
You can go from simple to complex. You need to remove the ladder grate, it can be easily removed, if not, then bend the wire with a hook at the end, insert it into the hole or slot of the ladder grate and pull it towards you (up).
The grate has been removed, there is a kind of jumper in front of us, if you pull it towards you, you can pull the drain out of the sewer pipe. True, sometimes the elastic band “sticks” and it’s difficult to pull the ladder out; try swinging it from side to side and pulling it up at the same time.
Normal drains are equipped with so-called traps; when you remove the grate, clean them; hair and all that usually collect there, and they clog the drain. You can use a short wire, but if the traps are clogged, then most often a finger is enough.
A more difficult option is cleaning the pipes that lead to the ladder. It is not possible to disassemble them, they are under a coupler, all that remains is to work with a special cable, there are cables with a brace at the end, and there are ones for a drill.
The cable can be inserted both into the pipe that goes under the drain, and into the pipe that connects to the drain pipe of the drain.
I don’t recommend pouring any chemicals; you can simply “kill” all the plastic pipes and end up with expensive repairs, including removing the screed and making a new one.
Well, the last option, maybe you will be lucky. The drain has been cleaned, now we go to the farthest point of the general sewer system, for example, to the kitchen, open the hot water tap and pour for an hour, boiling water dissolves the fat in the pipes, don’t worry about the pipes, they can withstand this temperature.
Source
Answers from experts
Elina Linberg:
Increase the diameter of the sewer pipe. You most likely have a 50mm pipe, replace it with at least 75
Evil Hare:
wash quickly, and at the same time you’ll save on soap
snout:
This means there is an incorrect connection or there is a blockage somewhere.... call a specialist
Nikolai:
clean the sewer.
Julia:
Do you mean that water rises from the drain in the shower stall when the machine drains the water? If so, unclog your shower drain. To start with, use a plunger.
Vsesvet Bright-faced:
Submitting a basin means the laundry has to reach for water. But seriously, how did it happen that the machine goes into the shower stall. The wiring is done incorrectly or the drain is clogged (the situation is not completely clear)
Guy from the Future...:
If the shower after the washing machine is connected to the sewer, then there is a blockage between the shower and the sewer riser; if before, then there is a blockage between the washing machine and the riser. . It happens that the blockage may be on the floor below, but in this case, your neighbor’s water from above would flow into your shower...
Andrey Dragunsky:
There may even be a counter-slope of the pipe running from the riser to the nearest device (machine or booth). If the plumbers’ hands are clumsy, or the old pipe has sagged, I’ve seen this happen to a friend. It immediately becomes clogged with sand.
Mikhail Karpov:
The reason for the low drain rate is unknown. If a pipe or sump tank is clogged, clean it.
If the difference between the outlet to the sewer and the shower drain is small, raise the cabin, or lower the outlet to the sewer (which is more difficult)
Perhaps the diameter of the drain pipe is small (although usually those included in the kit are enough for your eyes.
Anonymous:
Yes, you can clean the drain.
Vitalban1:
raise the cabin by 5 cm, replace the pipes with 50 cm - possible blockages - a mole there
Yura:
Haven’t tried to clean it or install a thicker pipe Another option is to pour less water
Lenux:
I can't advise you without seeing the plums
Dinislam:
Same problem. Disassemble and clean. Tighten the screw legs (raise the pallet.) But there will be a gap between the floor and the pallet. Remove the decorative cover with the cup from the drain.
I'm going to make a 50-70 cm podium out of brick and cover it with tiles. Then make a normal drain from pipe 50 or install a siphon of normal height. It’s a very small and unthought-out native stock.
Try using a plunger or a piece of wire or a curved brush to clean it. The cable may break the corrugation.
How to clean a shower drain video instructions
How to properly clean the drain in a shower stall with your own hands?
The drain is not such a complex product, it is simple in its design, like a nail, it is difficult to install, the screed must be correct, plus the drainage angle, plus a smart tiler who knows that the drain should be just below the level of the tiles.
You can go from simple to complex. You need to remove the ladder grate, it can be easily removed, if not, then bend the wire with a hook at the end, insert it into the hole or slot of the ladder grate and pull it towards you (up).
The grate has been removed, there is a kind of jumper in front of us, if you pull it towards you, you can pull the drain out of the sewer pipe. True, sometimes the elastic band “sticks” and it’s difficult to pull the ladder out; try swinging it from side to side and pulling it up at the same time.
Normal drains are equipped with so-called traps; when you remove the grate, clean them; hair and all that usually collect there, and they clog the drain. You can use a short wire, but if the traps are clogged, then most often a finger is enough.
A more difficult option is cleaning the pipes that lead to the ladder. It is not possible to disassemble them, they are under a coupler, all that remains is to work with a special cable, there are cables with a brace at the end, and there are ones for a drill.
The cable can be inserted both into the pipe that goes under the drain, and into the pipe that connects to the drain pipe of the drain.
I don’t recommend pouring any chemicals; you can simply “kill” all the plastic pipes and end up with expensive repairs, including removing the screed and making a new one.
Well, the last option, maybe you will be lucky. The drain has been cleaned, now we go to the farthest point of the general sewer system, for example, to the kitchen, open the hot water tap and pour for an hour, boiling water dissolves the fat in the pipes, don’t worry about the pipes, they can withstand this temperature.
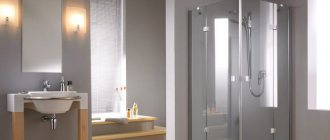
When independently arranging hygienic premises in a country house, in a house, in an apartment, we most often strive not to save money, but to remodel the space to suit personal requirements. That’s why we often choose not ready-made proposals, but install a shower drain in the floor under the tiles and build a unique shower stall. With all the desire to achieve an ideal result, not all of us know how this work is done. Do you agree?
We will share with you all the subtleties and nuances of installing a shower without the usual tray and standard designs. We will tell you about the types of plumbing drains, guidelines for their selection and the materials required to implement the idea.
The article we presented contains all the answers to the questions of independent craftsmen and customers of construction team services. The process of constructing a shower with your own hands is described in detail. Diagrams, photos and video selections will greatly facilitate familiarization with the information.
Structural characteristics and purpose
The shower drain belongs to the category of complex plumbing devices, and is fixed directly to the pipeline through a special floor hole. This design includes:
- funnel-shaped water inlet or housing;
- siphon, responsible for creating an effective hydraulic seal;
- a flange through which the waterproofing membrane part is sealed;
- a grate that prevents clogging and failure of the sewer system;
- outlet coupling part connected to the drain part of the sewer system.
Drain drain assembly diagram
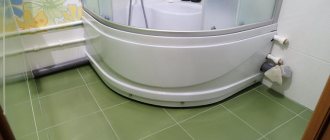
During operation of the drain ladder, the entire device must be securely fixed, and the removable part is represented only by a lattice cover. Most shower drain devices are installed in the floor, but some models are built directly into the wall.
Decorative drain gratings
Despite their apparent simplicity, drainage structures have a wide range of functionality:
- transport the water flow to the sewer riser;
- provide optimal tightness of the joint with the floor;
- carry out primary filtration of wastewater and prevent sewer clogging.
The built-in hydraulic seal prevents all unpleasant sewer odors from entering the room.
Advice from the “Kulibins” and “Mendeleevs” ↑
Our compatriots have always been distinguished by their ingenuity. They know how to find the simplest, cheapest and most reliable ways to solve problems. How to clean a shower stall using traditional methods? You can make a homemade cable actually from garbage - from an old plastic bottle, or you can make a caustic cleaning mixture from soda and vinegar.
Folk sewer cleaning method
DIY plastic cable ↑
If it is not possible to buy a cable at a hardware store, you can easily make it yourself from an ordinary plastic bottle. The best part is that it will clean your drains much more gently than rough metal products. Using such a homemade product, you do not risk damaging the siphon, and to make it you only need a bottle and scissors.
Trays with built-in siphon
Many samples of products called shower cabins have been developed, and there are no less options for their installation. However, this diversity comes down to the following options:
- A tray with a high pedestal, which has an inspection hatch that gives free access to the siphon. In a booth with this design, you don’t have to disassemble the tray to remove the siphon.
- The same option, but without a hatch. If it is necessary to replace the siphon, you will have to remove the decorative panel (aka apron, screen) or tile trim.
The available option involves fixing such a panel with latches, but a design with rigid fastening with self-tapping screws is also possible.
- And finally, the most inconvenient option for locating the siphon is to install it in a non-removable part of the pallet, which means you will have to remove the base (pedestal).
To facilitate this procedure, before purchasing, find out from the seller the details regarding replacing the siphon in a shower stall of this type. You will also need to understand the types of siphons to be replaced.
Correct use of household chemicals
Cleaning the shower siphon using household chemicals is not recommended, but sometimes this is the only way to get rid of the problem. In order not to harm the equipment, you need to carefully choose a cleaning agent, studying its composition, and find exactly the liquid or gel that is intended to remove blockages in pipes. It is strictly forbidden to use compositions for removing blockages in toilet bowls that have an aggressive composition to clean the siphon of the shower stall. Toilet fluids can not only corrode rubber gaskets, but also damage the acrylic pan.
Drain care
The rules for operating a siphon are ensuring a constant temperature in the room, cleaning pipes and monitoring the temperature of drained water:
- hot water above 50 degrees will damage and deform the plastic siphon;
- if the room temperature is below 0 and water remains inside the system, the pipes will freeze and burst;
- Do not clean pipes with non-specific products that contain toxins. They will not wash out completely, and for this reason the person taking the shower runs the risk of inhaling toxic fumes;
- If the system is a pipe or bottle type in a house where there is no constant heating (dacha), then before wintering you need to first “mothball” the drain by unscrewing the siphon, pouring water out of it and covering it with a rag.
How to disassemble the siphon for cleaning
Sometimes additional cleaning of the siphon is required. To do this, you do not need to have professional skills, follow the recommendations:
- place a container under the siphon into which the water will drain;
- rinse the pipes with warm water and soapy water;
- Unscrew the nut from the outlet from the pallet, holding the bottom;
- lift the unscrewed side as high as possible so that the remaining water flows into the sewer;
- if it is a bottle type, then you can unscrew only the lower part of the trap - the bottle located at the bottom. If the siphon is a pipe type, unscrew the second nut connecting the device and the sewer outlet;
- clean and wash the pipe under running water;
- install the siphon in its original place.
It is easy to identify a malfunction of the siphon - if it is clogged, the water drains more slowly and you will notice the smell of the sewer. If any part of the device is deformed, then a leak forms, water stands under the tray, and a wet spot is visible after taking a shower.
Choosing a high-quality and reliable siphon for a shower stall is not a problem, knowing what to look for. Recommendations for choosing the required system should be considered individually, since the design of the tray, as well as the overflow itself, is different. Therefore, when purchasing a booth, you must immediately decide on the choice of siphon.
Cleaning glass doors
Most hydroboxes are presented with glass walls, which, with frequent contact with water, lose their original appearance. Glass models can be safely washed using special products to remove dirt from the mirror or glass. They need to be sprayed over the surface of the product, wiped with a sponge and wiped dry. You can use a special scraper to clean the glass cabin. It has a thick elastic band on one side and a sponge on the other.
A homemade solution is excellent for cleaning glass. Dilute 5 drops of ammonia in a glass of water. This product is perfect for removing soap stains. Some housewives also add 100 ml of glycerin, which helps protect the surface of the cabin from moisture.
Mirror
Many showers come with built-in mirrors, which require proper care to keep them clean and looking great. To eliminate stains on a mirror, you can use several methods:
- Apply lemon juice to the surface of the mirror, leave for 10 minutes and thoroughly wipe the surface with a soft cloth.
- You can mix water and ammonia in equal proportions. This product is ideal for polishing mirrors. You can use crumpled newspapers to rub the surface and remove streaks.
- Alcohol-containing products help deal with black stains. You can create a solution of water and vodka in a ratio of 10: 1. You need to moisten a cloth with this product and wipe the mirror. Crumpled newspaper will help eliminate stains.
Product installation rules
So, the shower drain is mounted so that its surface does not rise above the floor covering. SNiP provides for an optimal slope height, which is 1 cm for every meter of area.
If the floor is located on cold ground, it will require additional insulation. This will help avoid cracking and deformation of concrete due to sudden changes in temperature.
The slope is made by changing the thickness of the concrete screeds
Please note that during installation of the ladder you need to pay attention to the aesthetic design of the floor. That is, the product should be removed from the walls so that the distance is a multiple of the size of the purchased cladding
In this case, the thickness of the seams is taken into account.
Work sequence
So, a drain in the shower is the optimal solution for designing a drain. You can install it yourself. This process involves the following sequence of work:
Using special guides, a slope is formed in the floor
Pay attention to the waterproofing, which is partially laid on the walls to create a kind of trough
You can do this work yourself. If you take into account all the above nuances, your shower will not only be beautiful, but also practical.
How to install a shower drain in a floor under tiles - installation guide
Where is the best place to place the device?
The drain in the bathroom can be anywhere. Therefore, before choosing a ladder, you need to decide where exactly it will be installed. There are three installation options:
- Center. However, it may have a slight bias in one direction or the other.
- Corner. This option has its advantages. For example, it is practically invisible, and the slope should not be large. SNiP provides for its implementation in two planes. This ensures that water flows exactly to the corner where the drain is installed.
- Near the wall. In this case, the slope needs to be made only in one plane. This device looks great in the shower, passes used water well, and practically does not clog.
How to clean a shower drain in difficult cases
If a blockage has formed in the depths of the pipe, or you have not cleaned the siphon for a very long time, or the contamination is heavily compressed, then it is almost impossible to do without a plumbing cable. Keep in mind that a plumbing cable is suitable for cleaning metal pipes; if the pipes are made of plastic, then it is better to abandon this tool, as there is a possibility of damage. The essence of the method is to mechanically push debris into the pipe or remove it. The greatest efficiency when cleaning with a cable can be achieved if you involve an assistant. So, the sequence of actions is as follows:
DIY drain installation
Installing a water drainage system into a sewer involves sequentially completing the tasks of installing pipes, a siphon and a drainage system.
Shower channel
The installation of the siphon to the shower tray is carried out before the base is leveled to the floor. The upper part of the drainage fittings is attached to the inside of the pan, fixed with a bolt in the center (pre-treat with sealant).
- The drain grate is covered with tape to prevent damage.
- Degrease the surface.
- The channel is attached to the floor with brackets.
- The drainage body made of metal is grounded.
- The tray is leveled.
- One edge of the hose is connected to the channel pipe.
- The second edge is attached to the sewer.
- Water leakage is checked.
- The space is filled with cement mixture and finished with tiles.
Drainage drain
Installation is carried out using a channel-type siphon. You can additionally install a drain in front of the installed shower stall to avoid leakage beyond the required limits, but such a system is rarely used.
- The location where the pipe is inserted into the water outlet pipe is determined, and a line is drawn from it to the siphon installation point.
- If the decorative elements are the same size as the ceramic elements, a flange is installed instead of 1 tile. If the ceramic squares are huge, you need to attach the ladder at the junction of the two elements.
- The drain outlet cuts into the sewer, pre-coating the joints with silicone.
How to clear a drain if the blockage is not very strong
Is water draining slowly from the cabin pan? Is there an unpleasant odor in the room? This means your drain is clogged, but the problem has not yet become serious. However, you need to start solving it now, otherwise very soon the drain will become completely clogged.
The first thing you should do is treat the drain using traditional home remedies. Pour half a glass of soda into the drain, pour in the same amount of vinegar and wait an hour and a half. Then rinse the drain hole with a powerful stream of hot water. This method helps to cope with small blockages that have recently formed. By the way, it would not be amiss to carry out such cleaning as a preventive measure so that the drain does not become clogged.
Best answers
Pavel N:
Pour in Mole, it will dissolve your hair
Dovahkiin:
This cap is threaded. You just unscrew it and that's it. And then with a plunger.
Zhanna Korabut:
We had this thing in our shower, it unscrews, under it there is a regular drain, twist it, select the hair + Mole
Tane4ka:
Nowadays these are everywhere on modern plums. She stupidly wriggles out. Unscrew it, and there is a ball of your hair. I have the same problem at home, my daughter has braids. We unscrewed it once and don’t install it again.
Vladimir Petrov:
First, work with a plunger, then use tweezers to remove all the hair. And then pour baking soda into the drain and fill it with vinegar. Wait about five minutes and pour hot water over everything
Zaretskii Kostya:
Why do you need to twist and remove something? Does the water leave at least a little or not? If so, pour out a couple of bottles of “Mole” all night and rinse with hot water in the morning. If it doesn’t help completely in one go, repeat it the second night and that’s it. Or immediately buy some drug that’s cooler than “Mole.” The main thing here is that you don’t skimp on the amount you pour, and everything will work out.
Zhandos Zhandosov:
I do not even know
irina sichkova:
I found an interesting thing, similar to a plunger, only more serious, it’s called a “pneumatic plunger”, kerntool, I watched a review on YouTube, now I want to buy one for myself and I advise you to try it
Igor Chekerda:
Try pouring mole, but it’s not certain that it will help. Mole against fat. Most likely mechanical cleaning is needed. You probably won't be able to do it on your own. I recommend plumbers from santehnik-home /ustranenie-zasorov/. They do it in good faith.
Types of ladders, their features and differences
Drain devices of this type differ in appearance, internal structure and height. Decorative grilles are the only visible part, and, of course, first of all we evaluate their shape, and it can be round and oval, square and rectangular, in the form of a triangle or a long tray.
Gratings for drains are made of different materials. The most durable, high-quality and affordable - made of matte or polished stainless steel. Tempered glass, chrome, and brass are also used. Less durable, but cheaper - plastic. Plastic will serve its intended purpose well, but compared to stainless steel it will look too poor.
As a rule, a grate is chosen based on one’s own taste... But you should take a more thorough and objective look at the variety of drains depending on the type of water intake device. The classification here is:
The most powerful in terms of the volume of wastewater received are linear drains. They are adjustable in length, their capacity can be easily calculated in accordance with water flow. Indispensable in showers where several people wash at the same time, and when using modern “tropical shower” style shower heads.
Review of prices for different equipment models
The table provides a reference overview of prices for domestically produced models based on the results of monitoring offers from online construction stores.
| Type of equipment | Material | Average price, rubles |
| Horizontal with water seal | stainless steel | 2900 |
| plastic | 2200 | |
| Vertical with water seal | stainless steel | 4900 |
| plastic | 3700 |
Video: cleaning with soda and vinegar ↑
To unclog your shower stall, use any of the methods listed above. To ensure that such problems arise as rarely as possible in the future, install a special fine mesh over the drain hole. This cheap device prevents debris from entering the siphon and protects the nervous system of the owners. For prevention, you can also clean the siphon once every 2-3 months or use special chemicals.
User comments
You are not right. I am assured. I suggest it to discuss. Write to me in PM.
—- jinsiy olatni Vena | uyda olatni va tasirchanligini oshirish uchun qanday Qanday sizning jinsiy olatni kattalashtirish uchun | aslida qancha
Types of drain devices
Most siphon samples that come with a shower cabin differ in design and the principle of operation it determines. Let's consider each of these signs separately.
According to the operating principle
There are three types of siphons:
- The simplest design used in the trays of budget shower cabins. This is a drain hole with a plastic or rubber stopper that prevents water from flowing out and allows it to drain if needed.
- Models with simple design and mechanical (manual) control.
- Automatic devices, which will not be easy to change - this requires professional skills.
The advantage of the simplest shower siphon is its relatively low price. In this case, the issue of ease of use is not given importance. In the second case, there is a special handle on the wall of the booth; when you turn it, the state of the drain hole changes.
This design of the siphon is suitable for people with limited mobility.
Manually operated devices are often equipped with a combined hydraulic valve that operates in the drain system for several pipes at once (in the bathroom and kitchen, for example).
The category of automatic siphon devices includes devices known under the English name “click-clack” (in Russian - latch, crack). It is explained by the fact that the plug located under the drain is constantly located under the drain hole, and it also plays the role of a switch for the “open” or “closed” states.
Automatic control is carried out by pressing the plug with your foot, as a result of which the outlet hole opens slightly and the water drains. When pressed again, it is fixed in the lower position, closing the drain.
Differences in design
Depending on the design of the hydraulic shutter mechanism, all known types of siphons are divided into “bottleneck” type products, as well as devices shaped like the letters “U” and “S”. Bottle siphons are traditionally used when installed on kitchen sinks.
The debris in them settles at the bottom of the collection container, which is then easily unscrewed and cleaned. Its use in a bathroom stall is only permissible if there is enough free space under the tray.
To update the siphon, you just need to access the removable drive, remove it and install a new one.
How to deal with a serious blockage
The most well-known and well-proven way to deal with severe blockages is to use a plunger. First, place the plunger firmly against the drain hole, then make 10-15 vigorous up and down movements. Cleaning the shower siphon will be more effective if the edges of the plunger are pre-lubricated with Vaseline - this will ensure greater tightness. As a rule, even serious blockages can be removed using a plunger, but in the most advanced cases you will need to use a plumbing cable.
Source
Basic operating rules
To keep the shower stall clean and fresh, there are a number of rules:
- After taking a shower, rinse the walls and tray first with hot, then cool water to completely clean the shower stall from soap stains.
- Clean the walls of the box from moisture with a rubber scraper.
- Use a soft cloth to wipe the entire cabin dry.
- Clean the shower weekly with special gels.
- Clean your plumbing fixtures thoroughly every month, brushing every hard-to-reach area.
- Metal parts are washed and thoroughly dried each time after use.
Such regular maintenance will ensure that the cabin retains its original, radiant appearance. However, if the plumbing fixture is in a state of disrepair and has acquired an unpresentable appearance, prevention will no longer help: a more serious impact on the pollution will be required.
How to clean a shower drain
How to properly clean the drain in a shower stall with your own hands?
The drain is not such a complex product, it is simple in its design, like a nail, it is difficult to install, the screed must be correct, plus the drainage angle, plus a smart tiler who knows that the drain should be just below the level of the tiles.
You can go from simple to complex. You need to remove the ladder grate, it can be easily removed, if not, then bend the wire with a hook at the end, insert it into the hole or slot of the ladder grate and pull it towards you (up).
The grate has been removed, there is a kind of jumper in front of us, if you pull it towards you, you can pull the drain out of the sewer pipe. True, sometimes the elastic band “sticks” and it’s difficult to pull the ladder out; try swinging it from side to side and pulling it up at the same time.
Normal drains are equipped with so-called traps; when you remove the grate, clean them; hair and all that usually collect there, and they clog the drain. You can use a short wire, but if the traps are clogged, then most often a finger is enough.
Video description
How to properly apply insulation, watch the video:
Installation of floor slope and waterproofing
The finished insulation with the drain body is covered with a reinforcing mesh for the screed. To drain water, it is important to mark the slope for drainage. Therefore, special beacons are installed, which are sold in any hardware store. Sometimes, the ladder is already equipped with guide strips that are adjustable in length. They are assembled in the form of a frame, which simplifies the process of pouring the screed at a certain angle to the drain.
After installing the beacons and taking the necessary measurements, the floor is filled with a solution of cement and sand. The drain hole must be completely covered with solution; only the top, the flange, remains visible on the surface.
It is easiest to make a slope towards the tray drain due to its direction of drainage in one direction. To a point drain, the slope is usually made from 4 sides, which is technically more difficult. The screed is dried for 3-4 days. A waterproofing substrate is spread over the dried surface; isoplast is usually used. In this case, it is necessary to cut a hole for the outer hole and secure the material along the edges with screws.
Types of ladders, their features and differences
Drain devices of this type differ in appearance, internal structure and height. Decorative grilles are the only visible part, and, of course, first of all we evaluate their shape, and it can be round and oval, square and rectangular, in the form of a triangle or a long tray.
Gratings for drains are made of different materials. The most durable, high-quality and affordable - made of matte or polished stainless steel. Tempered glass, chrome, and brass are also used. Less durable, but cheaper - plastic. Plastic will serve its intended purpose well, but compared to stainless steel it will look too poor.
As a rule, a grate is chosen based on one’s own taste... But you should take a more thorough and objective look at the variety of drains depending on the type of water intake device. The classification here is:
The most powerful in terms of the volume of wastewater received are linear drains. They are adjustable in length, their capacity can be easily calculated in accordance with water flow. Indispensable in showers where several people wash at the same time, and when using modern “tropical shower” style shower heads.
The shower drain kit includes the following main elements:
Now about the material from which the ladder itself is made. Cast iron is installed exclusively in industrial facilities, public swimming pools, and bathhouses. Cons: difficult to install due to heavy weight. Pros: durability, increased throughput.
Stainless steel is a material that meets the requirements for premises with strict sanitary and hygienic standards (hospitals, kindergartens, canteens). Steel products are easy to clean and maintain.
At home, it is quite possible to use plastic ; the choice of material is not so important, although stainless steel, of course, is preferable. It is anti-corrosion, durable, reliable.
And finally, when choosing a ladder, we take into account its height, which varies between 55-180 mm. This determines how much the floor level needs to be raised. You should not try to minimize this characteristic, since high ladders have better throughput.
The industry produces models with adjustable neck heights; they can be easily adjusted to the existing thickness of the screed. Modern models of shower drains are designed for water temperatures up to +80-85 °C; the grates can withstand weights of up to 300 kilograms or more.
Installation of a drain system
The design of the shower drain system is associated with raising the floor level in the bathroom. To ensure the movement of wastewater towards the drain, the floor surface is made inclined by 15 cm or more. Floor installation will include the following steps:
- laying a layer of polystyrene foam 4-5 cm thick. It will provide noise and heat insulation;
- making a rough screed from a concrete mixture 4-5 cm thick;
- flooring of a sealed membrane made of floating waterproofing;
- making a screed from a concrete mixture to create a slope in the direction of the drain hole;
- laying ceramic tiles on an adhesive solution.
If you plan to cladding the walls, then for better waterproofing it is done after laying the tiles on the floor.
Installation diagram of a linear shower drain
As a result, the plumbing fixtures are built into the floor. The level of the grating should be lower than the level of laying the tiles. If the drainage system is installed in a room located above the basement, then the drainpipe is laid into the basement to the sewer pipe through the ceiling. For bathrooms that are located above living areas, installation is more difficult. The drainpipe must be laid in the floor. However, not all interfloor ceilings will be able to withstand the additional load.
Installed shower drain in section
Preparing for work
Before installing the plumbing drain, you need to calculate the thickness of all layers of the floor. The height of the equipment will determine the lowest point of the sloped floor surface. The recommended difference in floor level is 1-2 cm per 1 m of surface. If you perform installation with a smaller slope, the water will not have time to drain, and stagnation will form.
When choosing a place where you will install a plumbing drain yourself, you need to take into account the size of the floor tiles. The distance of the grate from the shower walls should be a multiple of the dimensions of the tiles, taking into account the tile joints. Floor tiles are laid from the center to the walls. This installation will minimize the amount of cut tiles; there will be only whole tiles in the center of the floor.
Thermal insulation and rough screed
To begin installing the drain system, connect the drain to the sewer with your own hands, adjust the height of the device and the level of inclination of the drain pipe. It is important to ensure reliable sealing of the joints with silicone sealant.
Then, polystyrene foam boards with a density of 35 kg/m2 are installed around the equipment on a concrete base. Expanded polystyrene provides noise and heat insulation. In addition, the insulator will prevent the occurrence of deformation processes in the screed during the interaction of low base temperatures and high temperatures of heated water. For a warm concrete base, the insulation layer does not need to be installed.
If the design of the ladder does not provide mechanisms for adjusting its height, use available materials
A cement-sand mixture screed is poured on top of the polystyrene foam. The thickness of the screed varies according to the height of the drainage equipment. The solution is carefully distributed around the outside of the equipment and the flange. The screed is leveled flush with the flange. As a result of pouring the rough screed, a durable surface is obtained that will well distribute the resulting mechanical loads.
Floor waterproofing
As a waterproofing material, you can choose the floating insulating material “isoplast”. The canvas is reinforced with fiberglass, elastic and can withstand mechanical loads well. Installation of adjacent panels is carried out overlapping. The joints are heated with a burner to soften them, then sealed hermetically. The isoplast pressed into the flange will act as a reliable seal.
When laying the material near the shower walls, an overlap is made on the wall to the level of the second screed. The edges of the canvases are heated and firmly glued. As a result of laying isoplast, a reliable waterproof membrane is obtained.
A siphon with a grille is installed inside the device body. A tight connection is ensured by an O-ring. When assembled, only one part of the plumbing equipment remains removable - the grate.
Waterproofing the drain is one of the most important requirements for its installation.
Finishing screed and finishing
A special feature of making an inclined screed for a plumbing drain is the absence of guides along which the cement mixture is distributed. They can be replaced with thin blocks of wood, but after drying they are dismantled. It is recommended to use guides made of plastic polymer; after the screed has dried, they will be used as expansion joints.
The guides are beveled similar to the angle of the floor. The width of the guide elements near the siphon should be lower than the height of the siphon by an amount equal to the thickness of the floor tiles. The joints at the corners are sealed with sealing tape for waterproofing. The grooves from the dismantled guides are sealed with mortar.
Floor membrane flooring
Pouring a screed with a slope
After the concrete mixture has dried, the final stage of installing the drain begins - laying the floor tiles. The lining material for the shower floor should not absorb water. For ordinary tiles, the allowed water absorption rate when completely immersed in water is equal to 11% of its own weight, for shower floor tiles no more than 1.5%.
It is recommended to choose ceramic tiles with a corrugated surface; glossy products are very slippery when wet. The tiles are laid using a special contact adhesive. After hardening, it forms a durable and strong adhesion of the tile to the floor. Moisture-resistant grouts are used to seal tile joints.
Ready shower drain
The plumbing drain is actively used for various premises. A drain system installed in accordance with all installation rules is safe for use. The equipment's water seal will eliminate the possibility of unpleasant odors entering the room.
Siphon and outlet pipe arrangement
The purpose of the siphon is to prevent the penetration of unpleasant odors from sewer pipes into the bathroom. This function is performed by a water seal located inside the siphon. But if you don't use the shower regularly, the drain gradually dries out and odors begin to seep through.
In this case, the drain system must be equipped not only with a hydraulic valve, but also with a “dry” valve. Its reliability will increase many times over, since in the drain with a “dry” shutter there are several dampers that block the drain under their own weight. The dampers are opened by a flow of drain water and then closed again.
In non-residential cold rooms, drains must also be equipped with a mechanical shutter that does not freeze in the cold and has a special drainage ring. If the waterproofing breaks, water returns to the drain through the holes in this ring.
Shower drains also differ in the cross-section of the sewer pipe to which they are connected. It has a vertical or horizontal outlet. The diameters of the pipe and the sewer pipe must match one another.
If the drain is vertical, then the cross-section will be 110 mm. This option is suitable for country houses and cottages; in this case, the sewerage system is connected from below.
The second option, where the connection to the sewer pipe is lateral (horizontal), is considered more universal, and for apartments in multi-storey buildings - the only possible one. For domestic purposes, in this case, a diameter of 40-50 mm is sufficient.
Shower drain installation
- Water seal (dry seal) – siphons that block sewer odors;
- The decorative (also known as protective) grille is located level with the floor;
- Protective ring;
- The pressure flange ensures the tightness of the drain with waterproofing;
- Device body.
It is easier to install a shower when building a house. If you have to install it in an already finished house, you will have to first redo the floors at the installation site.
You should get a kind of five-layer cake:
- Thermal insulation;
- Floor reinforcement layer;
- Waterproofing layer;
- Second layer of reinforcement;
- Floor tiles.
Basic criteria for choosing a ladder
Since drains come in a wide range of products, it makes sense to list which parameters and in what order you should focus on.
The first step is to determine whether the exit to the sewer will be directed horizontally or vertically. A drain with a horizontal outlet pipe has a smaller height and is used if there is a limitation on the thickness of the screed.
A device with a vertical outlet can only be connected to a sewer pipe located low enough.
The second step is choosing the gangway capacity. According to this characteristic, the “fork” is 0.4-2.0 l/per second. The larger the diameter of the outlet pipe, the higher the throughput of the ladder.
The third step is to choose between a water seal and a “dry” seal. The decision depends on how often the shower stall will be used.
A water seal implies the presence of a certain amount of water in the drain at all times, and a “dry” seal will protect against unpleasant odors and when the drainage channel dries out. It is useful not only in cases where the shower is rarely turned on, but also when integrating a drain into a “warm floor”.
And only at the fourth step does the turn come to the appearance of the drain - or rather, its outer part (drain grate). It is important that it harmoniously combines with the overall design of the room, the size and color of the tiles.
Fifth step - we finally think about whether it is worth purchasing a cheaper non-height-adjustable ladder or whether it is better to pay extra for an adjustable model. Accuracy of installation, separation of installation operations into dirty and clean, high accuracy of joining with the level of floor tiles - these are the advantages of height-adjustable drains.
What types of ladders are there?
Before installing the device on the bathroom drain, you need to understand the types of these products. It should be noted that they can differ not only in design, but also in shape, and even in height. For example, in stores you can find shower drains in the shape of a circle, rectangle, and also square. As for the design, we can distinguish linear, point and wall products. The first type can be used around the edges of the bathroom or in corners.
Point devices are considered the most common. The fact is that they can be placed anywhere in the shower stall.
If you decide to lay tiles on the floor, you can purchase a vertical or horizontal drain.
On the left is horizontal, on the right is a vertical drain for the shower.
But here you should pay attention to the direction of the pipe that approaches the sewer drain on the floor. The simplest energy SAVER!
The simplest energy SAVER!
A tricky way to almost NOT PAY for light.
Find out details
As for the water seal, it can be:
- Ordinary. Its peculiarity is that it is formed directly in the siphon. However, if the shower does not turn on for a long time and the water dries out, the unpleasant odor will return to the room.
- Dry. This device is the most acceptable. The dry type of water seal has the main advantage: it is able to completely isolate the sewer from the room.
An important parameter in choosing a ladder is its height. This value determines whether the shower floor will need to be raised. At the same time, a higher product height can provide better throughput. The best option would be a ladder that can be adjusted.
Installation instructions step by step
If the house is just being built, there are no complications regarding how to drain the shower. The concrete floor monolith allows for the installation of a vertical sewer drain. And in a high-rise apartment, the thickness of the screed is not enough even for a horizontal outlet, so the floor level will need to be raised by 10-15 cm.
And in houses that are in use, you first have to completely remove the old covering and remove the debris. Only the sewer pipe should remain on the exposed base. Most likely, it is cast iron, and its service life has long expired. It is best to replace such a pipe with a new plastic one, into which the pipe from the drain will be routed.
Assembling the drain unit
Before installation, you should calculate the location of the drain hole so that no difficulties arise during laying the tiles. Decorative elements of some drains have the same dimensions as the tiles. If the hole is positioned correctly, the grate will replace one of the tiles.
The outlet cuts into the sewer pipe; all joints and connections must be coated with plumbing sealant. If thermal insulation is required, then polystyrene foam can be laid on the concrete base of the floor, cutting out the contours of the structural parts of the plumbing on it.
As an option, you can make a warm floor by laying a special heating cable. Due to the small area and limited operating time, energy consumption will be insignificant.
Open the door without tools
In such a situation, when there is nothing suitable at hand to help you get out of the room, you can try to open the door by force. If it opens outward, then put your shoulder to the area near the opening, rest your feet, for more pressure, but at the same time hold on to the jamb with your hands, otherwise, if the door is opened sharply, there is a risk of injury. It is advisable to place something soft under the shoulder, any folded fabric.
You can try to disassemble the door by removing the trim.
If the door has decorative glass inserts, then you can simply remove them by first removing the retaining beads. If it is impossible to remove them, then simply break the glass, while observing the necessary safety measures.
Folk remedies
You can effectively clean your shower stall using other means:
- Alcohol. Mix water and alcohol in a ratio of 1 part alcohol to 4 parts water. You can use vodka, but the proportion will be 1 to 2. Dampen a rag in this solution and wipe the dirty surfaces. Then, simply wipe with a damp cloth and wipe dry.
- Lemon acid. Excellent for removing soap scum and lime deposits. Add 20 grams of citric acid to a glass of water (200 ml) (this is a full standard package). Stir the solution well and pour into a spray bottle. Use it to apply the solution to contaminated areas and leave for 15-20 minutes. After this time, rinse off the composition and wipe the surface. Fresh lemon juice can easily replace the acid.
- Soda. The operating algorithm is exactly the same. Even the amount of soda per glass is the same - 20 grams.
- Vinegar. You can immediately pour the prepared 9% vinegar solution into the spray bottle, and then proceed according to the above scheme. It is not recommended to use a more concentrated composition. It is not harmful to glass surfaces, but it can harm metal parts and other materials. You should be especially careful when handling vinegar and citric acid if your shower walls are made of plastic.
To treat your shower stall with folk remedies, you will practically not have to buy anything, because at least one of these substances can be found in any home.
Prevention measures
We must take care in advance to avoid ending up in such a situation. For this:
- Provide spare keys for all doors with tags indicating which door they open, put them in a box or bag and put them in some secluded place that cannot be locked with a key (mezzanine in the hallway, top shelf in the closet, closet in the hallway).
- Install locks in the apartment that provide the possibility of emergency opening from the outside (usually with a pin or plate).
- If locking on the doors is needed only from pets or against drafts, then it is advisable to limit yourself to installing conventional latch handles. On installed handle locks, the twist latch can be disabled. To do this, you need to unscrew the handle with the lock and shorten or remove the plate connecting the lock to the latch.
Siphons for shower stalls with tray
Cabin manufacturers often use exclusive engineering solutions on pallets that are difficult to classify into any common siphon categories.
Most models can be divided according to two principles:
- by mechanism of action;
- by type of construction.
The features of their device should be understood in more detail.
Classification of siphons by mechanism of action
Differences in the principles of the operating mechanism divide existing siphons into 3 main groups.
The first group is simple siphons. They are included in most cheap shower cabins on the domestic market. The operating principle of these siphons is simple: the drain hole is plugged from above with a plug, after which water begins to collect in the pan. When the plug is removed, the water goes down the drain.
The elementary design ensures the low cost of these devices. Their operation is dangerous, because when opening/closing the hole you can slip and injure yourself.
The second group is manually controlled siphons. In this design, a control knob is mounted on the wall, and when turned, the drain hole is adjusted.
This mechanism of action is especially convenient for people with disabilities who find it difficult to bend down to manually close the hole with a plug.
The third group is the click-clack system. In such siphons, the plug is permanently located above the drain hole and at the same time acts as a switch for the “open”/“closed” positions.
When you press the plug with your foot for the first time, it rises slightly and the drain hole opens, and when you press it again, the plug is fixed in the closed position and does not allow water to drain.
Structural classification of siphons
Depending on the engineering features of the water seal mechanism, siphons are divided into 3 types.
The first type is bottle siphons. In apartments they are installed everywhere on kitchen sinks. This type of siphon received its name because of its oblong appearance. Debris is deposited at the “bottom” of the bottle, which is easy to unscrew and clean from dirt.
The water seal is provided by the internal arrangement of the siphon, which also prevents large objects from entering the side corrugated drainage system.
The disadvantage of such a siphon is its bulkiness and length, so installing it on a shower stall requires a large gap between the floor and the tray.
The second type is classic pipe siphons. Among systems for draining water from shower stalls, the most common are siphons in the form of the letters U and S. The formation of a hydraulic seal occurs directly in the pipe bend.
Such siphons are characterized by reliability and durability, and their compact modifications are used in most budget shower stalls.
Pallet washing
The cabin trays are not noticeable until you actually take a shower. Therefore, they are often ignored in the process of daily care. As a result, a hard coating forms on them and mold develops.
In order to wash the pallet well, you need to know the features of working with the material from which it is made.
Acrylic
Such products are easily scratched, which eliminates the use of powder products and hard brushes. The best option is to use special products for acrylic.
If the situation is not very bad, wipe the surface with a weak solution of citric acid (instead of 20 grams per glass, use 10). It will remove both plaque and mold.
In cases where the contamination is firmly embedded in the surface, a repair kit for acrylic will help. Its main elements: fine sandpaper and a special restoring compound. The procedure is as follows:
- Sandpaper is used to process a contaminated area, for example one in which limescale or mold is firmly ingrained;
- The cleaned area is treated with a restoring paste;
- After it dries, the shower can be used again.
What can you do if the interior door slams and you can’t open it using the handle?
At first glance, a comical situation - the lock inside the apartment latches and does not open - can turn out to be a serious problem if there is a small child left in the room or access to the bathroom is blocked. There are several ways to open an interior door if it slams shut.
Indoor doors are not subject to such strict requirements as entrance doors. However, they are also equipped with locks and latches. First of all, this is the door to the toilet and bathroom. Often, locks are installed at the entrance to the bedroom, office, kitchen and balcony, especially if there are small children or animals in the house. And although such locks are not as complex as those at the entrance to an apartment, opening them without a key can be difficult. But before you knock down the door, you should try to unlock the lock.
Materials for shower waterproofing
The choice of material for insulation depends on the chosen technology. There are 4 types.
- Penetrating waterproofing device. The layer of concrete screed on the floor or wall is thoroughly moistened, after which a layer of a special insulating composition is applied by spraying it. After drying, this material forms a surface that is impervious to moisture.
Penetrating waterproofing - Insulation based on bituminous material. All of them need protection from physical impact and damage, because... not resistant to wear. Therefore, layers of such material require laying a concrete screed on top of them.
- Insulation based on polymer-cement mixtures. It is based on polymer mastics that react with concrete and form a polymer-cement surface to some depth. Mastics make this layer more durable than in the case of other types of penetrating insulation. And most importantly, it also becomes elastic.
- Waterproofing through painting.
Waterproofing through painting
Unlike the polymer-cement method, it does not change the properties of the concrete itself (i.e., the paint tends to “peel off” over time), but shower waterproofing performed in this way is the cheapest and most technologically advanced (it is quite possible to carry out this work do it yourself).