When the plaster has been applied to the surface and the walls have received preliminary leveling, all that remains is to apply the finishing layer with a putty mixture in order to prepare for wallpapering, painting or other decoration.
Find out further in the article what you need to do this as correctly as possible and without resorting to the services of workers.
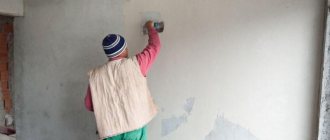
In the photo - a wall ready for wallpaper after puttying and applying primer
Why putty the walls after plastering?
Special polymer and stabilizing additives are introduced into putty mixtures based on gypsum or cement-sand compositions, making the solution more plastic and slowing down its setting. Thanks to this, the putty is applied in a very thin layer, creating a perfectly flat and smooth surface.
After the plaster has dried, it is not necessary to putty the walls only before laying tiles or gluing thick wallpaper. Small defects underneath will simply not be visible, so the surface is only primed. In other cases, especially when painting or finishing with thin wallpaper, you cannot do without plaster. After all, it is capable of not only smoothing out the smallest cracks, but also:
- prevent the plaster from falling off over time;
- significantly improve the adhesion (adhesion) of walls to wallpaper and other finishing materials, they will hold more firmly and will not peel off;
- reduce the consumption of wallpaper glue and paint.
Content:
- The structure of plaster, its features and the main errors that occur during drying
- How to dry plaster or putty in the room being treated?
- Drying plaster and walls with a dehumidifier - a real example
- conclusions
Everyone finds a certain method for solving the issue, but we will discuss all possible methods and decide how to dry the walls correctly and in what sequence to do it. But first you need to understand the main thing - it is possible, and even necessary, to dry the walls during repairs, and it is advisable to do this at every stage of construction or finishing.
After what time can putty be applied?
Cement-sand leveling mixtures take quite a long time to fully gain strength - 4 weeks.
But there is no need to wait this long after plastering. Cement gains 70% of its strength in a week. This is quite enough for applying putty and subsequent finishing, including heavy tiles. For example, Knauf Unterputz cement facade plaster 20 mm thick dries within 7-10 days. Gypsum compositions set in 40-60 minutes and dry completely in about a week . For example, the popular Knauf Rotband, applied to the walls with a layer of 15-20 mm, can be puttyed after 7 days. In a humid room or low temperatures, the drying time may increase to 10-14 days.
Drying time also depends on the thickness of the layer, as well as the temperature and humidity in the room. Using construction hair dryers or creating drafts to speed up the process is not advisable - significant cracks can form on the surface if it dries unevenly, and over time the plaster will begin to peel off.
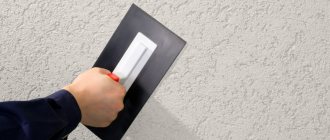
After drying, before puttingtying, the plaster must be sanded - using a special grater with a fine mesh or sandpaper, the wall is processed in a circular motion. In this way, small deposits of the dried mixture, traces of a spatula, and places where layers were applied are removed.
Puttying under wallpaper
For the purpose of further wallpapering, the putty is initially carried out with a wide spatula, covering with each subsequent layer up to ¼ of the previous one. The resulting “sausages” are not ground. Holding the spatula at an angle of 21-30 o, maintain constant pressure, which will help distribute the material in an even layer from 2 to 4 mm. The smaller the angle of inclination, the more it leads to the formation of a thick layer, the more it leads to the formation of a thin layer. However, the dependence is typical for variations in the specified degree interval; when going beyond its limits, bumps and breaks form on the surface.
The next step is drying the layer, removing beads with a jointer and abrasive and checking the smoothness using a building code and a torch. The resulting defects are eliminated: protrusions - with abrasive, recesses - with additional lubrication. It is possible that an inexperienced master can approach the wall up to 5 times until the surface becomes perfect.
At the end of the manipulations and long hardening, they go over the wall with a jointer with a mesh size range of 80-120 (with an increase in the number, the abrasive grain decreases). Initially, the entire surface is worked with circular movements, after which, loosening the grip, movements are criss-cross in order to remove the contours of circular manipulations.
Then the wall is again checked according to the building rules with the lantern. If there are no lingering reflections from the rule, the surface is ready, after a day the walls are primed and you can start gluing.
Do I need to prime the walls?
Many people believe that pre-priming walls is just an unnecessary waste of money. However, if you want the future decorative coating to look perfect and last as long as possible, then the walls must be primed before puttying.
Primer that penetrates deep into pores:
- protects the surface from peeling;
- promotes more uniform penetration of putty, adhesives and dyes.
Primer solutions are also an excellent antiseptic that protects walls from fungus.
In addition, they prevent moisture, which contributes to its development, from penetrating too deeply into the walls. The choice of primers is quite large on the construction market, and manufacturers offer special types for each type of surface. To cover walls after plastering, it is better to use acrylic, polystyrene or perchlorovinyl mixtures of deep penetration or universal compositions of medium porosity.
The walls must first be treated with a wet sponge to remove the smallest dust particles. You can prime with either a roller or a brush - a roller distributes the mixture more evenly, and a brush is more convenient to apply it in hard-to-reach places. Also, for convenience and speed, hand sprayers are used.
Puttying begins only after the primer has dried. The time for complete fixation is always indicated on the packaging and can vary from 5 to 15 hours.
Procedure for plastering using beacons
Before starting the process, the dry gypsum mixture is diluted according to the instructions so that it is enough for about 20 minutes of work. After 25–30 minutes, the gypsum solution will begin to set and can no longer be used.
USEFUL INFORMATION: How to choose wallpaper for the living room: interior design
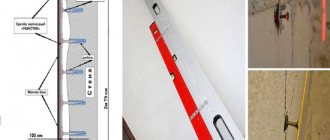
If you need to level a wall with defects without deviations from the vertical and horizontal plane, you need to perform the following steps:
- The recesses are filled with plaster in excess, extending beyond the boundaries of the marked areas.
- The solution is stretched using a rule that is placed in a vertical position. Thus, the recesses are filled with plaster, and on the ledges its layer remains minimal. If the solution is not enough, it needs to be added.
- The actions are repeated until the next corner.
- After the solution has set, a clean 45-centimeter spatula is used to cut off the sagging and correct any unevenness.
- A new solution is diluted, slightly more liquid than for the first layer, applied to the wall and stretched over the surface, but in a different direction, the rule is kept horizontal.
If there is a slope in a corner or in the area of the ceiling or floor plinth, you can proceed as follows:
- Apply the solution to a small area of the sunken part of the wall.
- Based on the rule on the main flat plane of the wall, stretch it along the mortar, cutting off the excess.
- Wait until the tubercle of solution dries. This way you will get a kind of beacon on which you can rely when leveling the problem area. If the area of the wall that will be leveled is large, several such beacons can be made from the solution.
The technology with control beacons made of plaster is used when one part of the wall is flat, and the other has deviations in level, or when the main plane of the wall does not require adjustment in level, and the corners are “sunk”.
What is the best way to putty?
Basic requirements for compositions for interior decoration:
- high plasticity;
- ease of application;
- ideal smoothness of the created surface;
- affordable price.
Gypsum-based compositions are ideal for puttying inside the house . A feature of gypsum materials is their rapid setting (40-60 minutes), ease of application and subsequent grouting.
The requirements for facade putty are completely different. First of all, they must:
- be frost-resistant;
- easily withstand temperature changes;
- have high strength;
- resist precipitation and high humidity.
For finishing facades and rooms with high humidity, it is better not to use gypsum putties without covering them with waterproofing. Therefore, cement or acrylic mixtures are used for external plastering work. Cement ones are resistant to destruction when wet, while acrylic ones do not let moisture inside at all.
Features and Recommendations
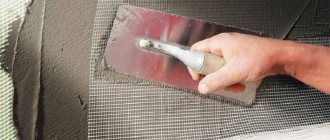
Fillers are also added to the plaster mixture with cement, which increase the elasticity of the composition and its adhesion to surfaces. After adding these fillers, you do not need to install the polymer mesh. These fillers:
- plasticizers type C-3 or liquid soap;
- PVA glue;
- non-metal fibers are thin fibers, for example, polypropylene, fiberglass, carbon.
It is required to add 2-3% of the C-3 plasticizer from the total mass of cement-based plaster; 10-20% PVA glue.
That is, you should first prime the surfaces, plaster them, apply PVA glue, and then you can glue the wallpaper.
Consumption per 1 m2 for plaster
The consumption of the putty mixture depends not only on the thickness of the applied layer, but also on the type and density of the composition. You can find out the exact number on the packaging:
- heavy and dense cement putties for facade and interior decoration are used the least economically: with a layer thickness of 1 mm they will need 1.2-1.5 kg/m2 of plastered wall;
- the consumption rate of gypsum putty on plaster will be 0.8-0.1 kg per 1m2;
- Polymer-based putty is considered the most economical - consumption per 1 m2 is only 600 g.
The better the walls are leveled with plaster, the smaller the layer of putty is needed after it. Much depends on the manufacturer:
- "Wide." Compositions for interior work of this brand are used very economically: on average, with a thickness of 1 mm per 1 sq. m will require only 0.68 kg; the only drawback is that the company packages its products in very large containers, which is not always convenient;
- Vetonit sells both facade plaster and mixtures for interior work; in the first case, the consumption will be 1.2-1.5 kg, and for finishing the premises you will need 1.2 kg; The company also produces high-strength oil-adhesive compositions, but they are per square meter. m will need up to 3 kg;
- Knauf products for interior work, made on the basis of resinous substances, are of very high quality, but not very economical: it will take 1.7 kg to finish a square meter.
Advice! Unlike plaster, which can be applied in a thicker layer, the starting putty layer should be no more than 3 mm, and the finishing layer should be no more than 1 mm. If re-correction of the surface is required, it must be thoroughly dried, and only then a new layer must be applied.
Plaster
Gypsum putty is gypsum powder mixed with a certain amount of dry additives. They demonstrate high environmental friendliness, which is why they are used specifically in interior design. This material is not suitable for outdoor use due to its low resistance to precipitation. The dry mixture must be diluted in water. Manufacturers supply putties of this type in three types:
- Fugue - does not shrink and was invented for decorating the seams of plasterboard structures;
- starting – characterized by coarse grinding. If there is a need to align the wall “along the beacons,” you can use this type. As it dries, it is also almost not subject to shrinkage;
- finishing – finely dispersed mixture. It allows you to make a layer from 0.5 to 2-3 mm. Shows decent shrinkage as it dries.