Home |Construction |How to make concrete fence posts with your own hands?
Date: March 1, 2017
Comments: 1
Owners of summer cottages and private houses, ensuring the safety of their own territory, install enclosing structures - fences - around the perimeter. Their basis, along with metal, brick, asbestos-cement pipes and wood, are concrete posts for fastening fence sections. You can, of course, buy ready-made columns, but it is more profitable to make them yourself.
It’s easy to make concrete support posts for your fence with your own hands. This will save financial resources and create a reliable foundation for the fence that fully complies with the developer’s plans.
By making concrete fence posts yourself, you can individually determine the profile and dimensions of the products and install embedded elements in the required places, which is important when constructing non-standard fences.
The article provides information about the stages of making concrete pillars with your own hands, design features, and manufacturing technology.
Before you start making concrete pillars, you should definitely decide for yourself whether this particular type of support is right for you.
Types of technologies
To make concrete pillars with your own hands, the following production technologies are used:
- Manufacturing in reusable structures in a separate site with subsequent removal of supports after hardening and installation of it in the enclosing structure, according to the developed scheme.
- Filling with concrete mortar individual shapes of the required cross-section (round, square, rectangular, etc.), pre-installed at the installation site of the supports along the perimeter of the fence.
Price
You can buy ready-made elements in construction stores, special open areas or through Internet sites. As a rule, the stands display product samples with different textures and color options. The products themselves, delivered to the customer, are packaged in film and placed on pallets.
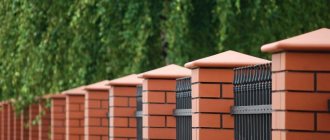
Country house fence
Many retail outlets offer delivery to the installation site and recommend craftsmen to carry it out. The cost of individual collections of elements with covers is presented in the following list:
- “Stone” size 380x380x200 mm – 510 rubles; cover – 580 rub.
- “Britannia” size 380x380x200 mm – 510 rubles; cover – 480 rub.
- “Slate” size 330x330x200 mm – 610 rubles; cover – 480 rub.
- “Cobblestone” 330x190x190 mm – 305 rubles; cover – 305 rub.
- “Chopped brick” 330x190x190 mm – 510 rubles; cover – 380 rub.
Considering the considerable cost of the product, before you buy it, you should make sure that it is certified and has a guarantee. A careful external inspection will help identify defective specimens. If the shortcomings are systemic (chips, unclear texture), then it is better to contact another seller or manufacturer.
Main stages of manufacturing
Regardless of the specifics of the manufacturing technology, the set of measures according to which concrete pillars are made includes the following steps:
- assembly of formwork, the quality of which determines the presentation of the resulting products;
- production of a reinforcement frame that ensures the strength of the elements;
- preparation of a cement mixture, the strength of which after hardening determines the performance characteristics of the supports;
- filling with a solution, after hardening, ready-made fence posts can be removed.
It is worth remembering that the service life directly depends on the quality of the material used in the manufacture of supports
Alternative manufacturing methods allow you to pour a concrete pillar with your own hands directly on the site where it will be used in the enclosing structure. Let us dwell in detail on the features of the stages of work.
Advantages and disadvantages of concrete pillars
There are many options for installing a fence. You can use ordinary wooden poles, metal or brick supports. More interesting solutions are also used - for example, gabions. One way or another, the fence should organically fit into the design of the site and serve you for many years. Therefore, the more reliable the materials you select, the longer the fence will not require repairs.
Pros of concrete pillars
- Strength Concrete is one of the most durable materials in construction. It is not without reason that multi-storey buildings and complex engineering structures such as dams, bridges and so on are built from it.
- Ability to withstand heavy loads Concrete can maintain its structure under pressure of 400 kg per square centimeter. Of course, this applies to high-end brands that are not used in the average garden. But less durable concrete can easily withstand the weight of any fence fabric - be it chain-link mesh, polycarbonate, boards, corrugated sheets or other material.
- Wear resistance In principle, any materials sooner or later become unusable. The only question is how much time will pass before that. Take a look at the old Soviet concrete buildings? Yes, somewhere they have lost their aesthetics, but they still perform their functions. A properly made wooden fence will serve you for 20 years. Metal is more reliable, but it also has a weak point - it is susceptible to corrosion. For the first five years, metal supports will stand quietly in any climatic conditions. But then they will begin to “rot.” The rate of rusting can reach half a millimeter per year. That is, with a column thickness of 3 mm, corrosion will destroy it within 6-7 years. In this sense, concrete is much more reliable. It does not rust or rot, insect pests do not grow in it, it tolerates heat and cold well, and is not afraid of fire. In fact, if the concrete was prepared according to the correct recipe, its service life will be at least 50-70 years.
- Possibility of decorative design Concrete can be given almost any shape - round, square, with protrusions or recesses. In addition, finished poles can be further decorated by applying decorative plaster, epoxy, acrylic, rubber or polyurethane paint. If you are embarrassed by the look of bare concrete, you can cover it with decorative panels or line it with stone.
Cons of concrete pillars
Although there are not many disadvantages of concrete, they do exist.
- Heavy weight of structures. Concrete density reaches 2,500 kg/m3. One pillar will weigh from 80 to 100 kg or even more (this depends on the composition of the mixture). Working with concrete pillars alone is difficult.
- The importance of maintaining proportions When preparing the solution, it is very important to correctly measure all components. After all, if, for example, you overdo it with water, the pillar will turn out to be fragile. And if you pour too much cement, the mixture will not compact well and voids will remain inside. Later in the article we will present the proportions of concrete for fence posts. With their help, you can prepare a solution of the desired consistency.
- Long setting time Concrete gains strength in 28 days. Only after this is it able to withstand the design loads and not collapse. Of course, the pillars can be installed earlier (without installing a fence on them), but even here you will have to wait. The concrete will take 2-3 days to set, during which time it should not experience any stress.
Our own concrete production and laboratory, as well as a large fleet of equipment guarantee high quality products and accurate delivery times
Concrete - production and delivery
Concrete pumps - rent
Read more about us here
7 904 179–31–56
Valentin Yurievich Shvets
Director of BetonStroy
Manufacturing of formwork
High-quality formwork allows you to ensure the presentation of products and guarantee their strength characteristics, provided that the appropriate cement mortar is used and the correct reinforcement is used. When thinking about formwork for fences and posts, pay attention to the following points:
- The choice of material intended for assembling the form. The material can be metal, wood, plastic and specially impregnated thick cardboard. When deciding on the material, remember that the structure must remain strong when poured and not deform.
- Production of formwork corresponding to the dimensions of the products. The structure must be rigid. It is advisable to weld sheet metal, and connect wooden blanks with screws or self-tapping screws.
Concrete supports have only one drawback - the need to create a foundation for their installation, without which the fence can bend and collapse
The design features of the formwork should allow easy removal of the finished product. This is ensured by the trapezoidal cross-section of the structure, poured on a separate site and the use of planed boards. To make it easier to remove concrete fence posts, use plastic film placed before pouring the concrete mass.
Forms made of wood and metal can be used repeatedly, are quickly assembled and easily dismantled. They allow you to reproduce the required geometry of the supporting elements of the fence.
When making formwork designed to form permanently installed fence posts, pay attention to the strength of the section located at the bottom of the column and supporting the weight of the concrete mass.
Circular support elements, poured on site, can be formed in disposable cardboard forms, reinforced on the outside with a wooden frame or steel mesh for reinforcement.
The formwork, poured with concrete at the installation site, takes up increased loads in the lower part and is distinguished by a vertical position when pouring. A vertically located, unstable structure requires the installation of reliable supports. When ensuring that a vertically positioned structure is stationary, avoid bending it, as it is susceptible to bending loads.
Having made concrete fence posts with your own hands once, you can do it at any time as needed
Zero cycle and laying the foundation
Installation of a fence made of decorative blocks begins traditionally - with marking and planning the perimeter of the site.
Having marked the routes for the passage of the spans, the places where the pillars will be installed (including for gates and gates), they proceed to earthworks.
The depth of the underground part of the pillars and its type are determined by the bearing capacity of the soil. Usually it is done below the soil freezing level by 20-30 cm in order to eliminate the influence of soil heaving on the fence support.
Methods for fixing the base of a post in the groundSource dacha.help
For moist heaving soils, the depth of the trench under the span can be the same as for the pillar. In other cases, a shallow foundation is usually installed, assuming that the weight of the span structure is sufficient to compensate for minor heaving - the standard size is in the range of 40-60 cm.
The trench is made slightly wider than the corresponding size of the block for the pillar, so that the formwork for a monolithic strip foundation fits there.
A cushion of sand and crushed stone is made along the bottom of the trench, formwork is installed and the foundation is reinforced, making reinforcement outlets for installing the lower rows of concrete blocks for the spans.
Reinforcement of the pillar can be done in two ways - by installing a profile pipe in the center or by extending the rod to the entire height of the fence.
Methods for reinforcing a fence postSource kamtehnopark.ru
Then the foundation is concreted. After the initial maturation of the concrete, the formwork is removed, and after reaching the design strength, the installation of pillar and span blocks begins.
Reinforcement
Concrete columns for the enclosing structure will be strong if you take a responsible approach to the manufacture of the reinforcement frame. Concrete pillars absorb compressive loads and bending forces. That is why a frame made of steel reinforcement is needed.
Structurally, it represents a spatial system, the basis of which is the following elements:
- four longitudinally located rods with a diameter of 12-18 mm, corresponding to the length of the future post;
- transverse elements with a diameter of 8-10 mm, located at intervals of 100-150 mm, fixed to the longitudinal rods with binding wire or welding.
When installing the reinforcement cage, ensure a fixed distance of 2-2.5 cm from the steel bars to the walls. This will protect the reinforcement elements from the destructive effects of corrosion.
Creating forms yourself
However, a person himself is capable of making similar forms. To speed up the process, you will need a multi-position matrix. With its help, you can cast four pillars at a time.
The matrix will require boards with the following parameters:
- 3x 25 x 250 cm (9 pieces);
- 3x 25 x 100 cm (2 pieces).
You will also need the following from the list:
- wood screws,
- a tool for screwing them in (a screwdriver, but a screwdriver is better),
- metal plates (8 pieces),
- sheets of tin,
- used oil,
- concrete composition,
- fittings
The following is a diagram of such a matrix:
The action plan is:
- Six boards 250 cm long and three boards 100 cm long are covered with tin on one side. The three remaining boards are upholstered on both sides.
- The formwork is assembled using screws. Nails are not suitable here, because they are very difficult to remove.
- The matrix is treated with waste oil.
- The reinforcement is tied and laid.
- The concrete composition is poured. He meticulously equalizes the entire form.
- An equal distance is measured on both sides, and metal plates are installed. The frame will be attached to them.
- The matrix is covered with damp burlap. This mold must be wetted for seven days.
Preparation of concrete solution
Preparing concrete composition for pillars is a critical operation performed after installing the reinforcement cage. The quality of the mixture and increased strength characteristics of concrete products will be ensured by the following components:
- Portland cement grade M500.
- Pre-sifted river sand.
To make the pillars as strong as possible, use only high-quality cement
- Small crushed stone up to 10 mm in size.
- Water.
The optimal ratio of crushed stone, sand and cement is 2:2:1. When preparing concrete, mix the ingredients using a concrete mixer. This will ensure a uniform consistency of the mixture. Having prepared the solution, you can start pouring.
Do-it-yourself block production
Making fence blocks with your own hands is a fairly simple process, as it may seem at first.
Several types of molds for pouring pillar blocks
To produce blocks you will need the following materials:
- Cement;
- Sand and gravel;
- Slag;
- Expanded clay;
- Plasticizers;
- Various additives: quartz, marble chips, glass;
- Coloring pigments.
To make the concrete block durable, in addition to high-quality raw materials, you will need additional devices:
- The concrete mixer will ensure thorough mixing of the components;
- A vibrating table is necessary to remove voids and create a high block density;
- The production of concrete products is impossible without the presence of various forms.
Preparation of concrete composition
At the first stage, you need to decide on the choice of mixture for concrete blocks: depending on the quality of the raw materials, you can get decorative products or an unattractive cinder block.
This is what the finished blocks of a set of fence posts look like
One of the popular compositions for the production of decorative blocks includes:
- Cement not lower than grade 400 with sifted sand in a ratio of 1:2;
- SP-1 is a plasticizer that enhances the elasticity and frost resistance of the composition;
- Decorating additives: marble chips, glass;
- Water. Add a little at a time, the mixture should be only slightly moistened;
- Color can be added to white cement if desired.
The composition with the addition of slag is mixed according to the following calculation: seven parts of coal slag are mixed with two parts of expanded clay sand. Two parts of gravel with a fraction of no more than 15 mm and one part of cement are added. The composition should not be liquid.
Molds for making fence blocks
You can make the molds yourself or buy them ready-made. The shape for the block can vary from simple to textured.
An example of a homemade mold for making blocks
Forms made of plastic and polyvinyl chloride are not durable, but only in them can you get a truly beautiful texture and complex relief. The ABS plastic mold is much stronger and can last up to 300 pouring cycles.
The steel mold will ensure the ideal geometry of the product. These forms are strong and durable. The cost of molds depends on the manufacturer and material. A plastic mold can be purchased for 150 rubles. a piece. The price for steel molds for 24–48 blocks can reach up to 60,000 rubles.
If desired, you can make a mold for a concrete block yourself using boards, plywood, or sheet steel. The rectangular shape must have no bottom; it is placed on a flat surface covered with polyethylene and cement is poured.
To obtain voids, pipes or glass bottles are installed in the mold. To make blocks with a decorative pattern, inserts are placed in the mold, which will provide a pattern on the surface of the concrete.
Basic recommendations for making concrete blocks
- It is best to place the mold at a slight angle, this will allow excess water to drain;
- Forming tools should repel moisture and easily separate from the concrete mass;
- Fence posts use smaller blocks than fence spans;
- The solution must be compacted well; in the absence of a vibrating table, improvised means are used to bayonet the concrete;
- The stand under the mold must be covered with polyethylene or sprinkled with sand;
- It is better to remove the product from the mold before it hardens too much. In this case, there is less chance of damaging the block;
- Before use, the blocks are thoroughly dried for two days on one side and the same on the other.
Filling with solution
Pouring concrete is the final stage of making pillars with your own hands. Complete the forms in the following sequence:
- Apply a lubricant to the inner surface, which allows you to later remove the finished product;
- place the reinforcement frame in the mold;
- fill the formwork with concrete solution;
- compact the mass by placing the filled formwork on a vibrating table. It is allowed, using reinforcement, to remove air inclusions and compact the form using a hammer drill;
- ensure that the concrete can be hydrated throughout the day;
- Carefully remove the post to dry.
The use of ready-made fence posts is possible after hardening for 2-3 weeks. Remember the need to daily moisten hardening concrete and install embedded parts before pouring the solution into the formwork. It is also necessary to clean reusable molds from any remaining mixture for reuse.
Backfill materials
Let's figure out what to use to ram fence posts. The best bulk material is granite or gravel crushed stone with a fraction of 20–40 and a strength (crudibility) of M600 (for tall structures it is advisable to use M1000).
Table of crushed stone grades by crushability
It is worth paying attention before butting to the content of needle-shaped or flat stones (flakiness). According to SNiP this figure should be 5–15%
A large number of irregularly shaped grains will prevent high-quality compaction of the backfill and the butting of pillars. To compact it (uncling), sand, fine gravel or screenings are additionally used.
When installing fence supports for temporary buildings or low fences, it is permissible to use:
- crushed pieces of concrete: the disadvantage of this type of backfill is the impossibility of using fragments of the same size and shape, as a result of which significant voids can form in the soil;
- gravel, a product of natural weathering of rock; The disadvantages of this material include low frost resistance and strength;
- crushed brick: structures made from it will last only a few years, and then collapse under the influence of negative temperatures and moisture;
slag: has low frost resistance, some of its types have too high a degree of moisture absorption.
Schemes for butting a rack for crushed stone fencing and concreting
New to the building materials market are liquid polymer aggregates used to strengthen the soil. They are quite durable, do not rot, are insoluble in water and are able to seep into the smallest voids. However, the cost of polymer masses is quite high, plus special equipment is required to work with them.
It is not difficult to calculate the required amount of crushed stone for butting pillars. You can use an online calculator for this. You will need to enter three values – the height of the hole for the fence post, its radius or diameter. The result is then multiplied by the number of fence posts. The resulting figure must also be multiplied by a compaction factor of 1.3.
The photo shows a fence made of corrugated sheets of a private house.
Backfilling with crushed stone
Required Tools
To install support posts with your own hands you will need:
- regular building level and tape measure;
- twine;
- garden auger;
- sledgehammer for driving pipes into the ground;
- shovel-selection for backfilling;
crowbar or bayonet shovel for compaction.
The photo below shows the pole before butting.
Installing a profile pipe before attaching the corrugated sheet
Features of alternative manufacturing technology
In a number of situations, it is advisable to manufacture supporting elements for the enclosing structure at the installation sites along the perimeter of the future fence. For these purposes, builders use sliding formwork, the elements of which are parts of a steel pipe cut along the longitudinal axis, with a diameter of about 1 meter. The components of the form are equipped with brackets with holes that allow you to fix the structural elements. Carry out the process of pouring support elements for the fence with your own hands according to the following algorithm:
- Lubricate the surfaces of the sliding mold with a special emulsion.
- Connect the mold elements using fastening brackets.
- Install the formwork in a pre-prepared pit, controlling the verticality with a level.
- Place the reinforcement frame into the mold.
High-quality formwork is the key to creating smooth and strong concrete pillars - Fill the slipform with concrete mortar.
- Compact the mass using an in-depth concrete vibrator or vibratory pressing.
- Ensure that the form does not move for 2-3 days.
- Loosen the tightening bolts.
- Move the sliding form up 75% of its length, ensuring that the bottom portion is secured to the pre-cast concrete column.
- Repeat the operations until the vertical support is completely formed.
Developers also use PVC pipes of increased diameter and asbestos cement formwork as a form for the construction of support posts. The technology makes it possible to cast supports of round, square, rectangular and rhombic cross-sections.
Round supports
To do this, you will need a piece of pipe about one meter long, which will act as formwork. It must first be cut into two parts with a grinder and “ears” with holes for bolts must be welded to each of them. They are necessary to connect two parts of the formwork. The reinforcement frame will be mounted in the pit where it is planned to install the support.
After this, the pit is filled with concrete to the level of the ground surface, and the support is made using the sliding formwork method. The pipe should be lubricated with machine oil to simplify the process of subsequent disassembly and installed on the ground. Having leveled its position in a vertical plane, all that remains is to pour the solution and leave for several days.
After the concrete has hardened, the bolts must be loosened slightly and the formwork must be moved up three-quarters, and then filled again with mortar. This process must be repeated until the support reaches the required height.
Causes of destruction
Sketch of the correct design of the structure
Often we can see destroyed fences that seemed to have such a strong structure. The whole trouble most often begins with the supporting elements. The supporting part of the fence can collapse for several reasons:
- non-compliance with installation rules, for example, small depth;
- the design of the support element pit does not correspond to the characteristics of the soil;
- the use of low-quality material in the manufacture of a product or in the construction of a foundation.
All such shortcomings will reveal themselves after the first wintering of the structure, so you shouldn’t take risks. It is better to consult with specialists, play it safe several times, than later be disappointed in the fencing structure and regret the money wasted.
Well, if all the work was done efficiently, in compliance with all standards and rules, then such a fencing structure will last for decades, especially if it is provided with decent care.
Popular manufacturers, pole prices
Among the domestic companies it is worth highlighting the following:
Prices from domestic manufacturers are approximately in the same range, so here are the average figures:
If you buy textured supports, their price will be 30-40% higher than regular ones.
If the owners are not afraid of the laboriousness of making poles themselves in conditions of limited resources, they can make the poles themselves. If there is little time for construction, it is better to buy ready-made supports.
Types of concreting
When a fence, even from the simplest materials, rests on a solid foundation, it always looks dignified and presentable. Let's look at the most common technologies for concreting fence posts.
Partial concreting
This method is used when performing work on stable soils and under low loads. The essence of the method is as follows:
Sometimes the second method of partial concreting is used, in which the solution is poured into the lower part of the pit, and the top is covered with crushed stone or gravel with careful compaction.
If the presence of a ground part of the foundation is implied, then before concreting the fence post, it is necessary to install formwork for a kind of plinth.
Spot concreting
Dry concreting of pillars
Full concreting
This method is used not only when working with asbestos-cement pipes. It can be used as a basis for installing metal, profile or concrete racks.
Application
The spread of the trend with decorative pillars began several centuries ago, and in order to get a rough idea of architectural traditions, just look at the design of palaces in St. Petersburg or Paris.
The classic combination of metal and stone has been borrowed by modern builders for fencing government buildings and luxury mansions.
Installation at the dacha
The modern construction industry, which has mastered dozens of new materials, has expanded the concept of decorative fence posts. Brick and natural stone remain the classic option for any type of fence.
But concrete, mesh structures with crushed stone, and plastic appeared, which decorate the most primitive options. There are multiple price lists with numerous examples that give an idea of what decorative blocks for fence posts are.
Variety of options
The use of pillars has expanded the scope of demand, but has not limited it, and on modern construction sites you can find many unconventional options for using decorative pillars - from an enclosed atrium and veranda to a large balcony, observation deck, canopy in front of the house, equipped for decorative purposes.
The differentiation of the scope of use of pillars, pillars and columns has led to the need for a targeted choice made taking into account all components.
Fence of a private house
The criteria for selecting the necessary style components were:
- design options and methods of its installation, construction and stability;
- manufacturing material, in which there are possibilities for stylization, replacing natural decorative stone with no less expressive fakes made of plastic;
- durable frame devices, giving the chance to use lighter and cheaper raw materials without loss of visualization and strength;
- dimensions, parameters and configurations to create a unique or standard constant of the same familiar brick fence;
- additional decorative elements (balls and cones, lamps, combinations with metal elements, stucco or its imitation);
- color scheme (contrasting, similar in color perception and tone, combined, imitating geometric or abstract patterns);
- modification of shape (parallelograms, rounded outlines, cones, columns with pedestals or pedestals).
Storage of finished racks