What is this. History of the creation of the material
The material first appeared back in 1941, when the DOW CHEMICAL company (USA) patented a fundamentally new product with high thermal insulation properties and moisture resistance. The production of the material was put on stream, but initially it was manufactured only for the needs of the Navy.
Due to its resistance to wet environments, Penoplex has been used for the production of life rafts. After some time, the material began to be used in refrigeration units. Penoplex occupied its rightful niche only in 1950, when it began to be used in construction. It is curious that in the US construction market the material is known under the brand name STROYFOAM.
Penoplex is a Russian brand that appeared only in 1988.
What is Penoplex? Essentially, it is foamed polystyrene, which is produced on extrusion machines. In its structure, the material resembles polystyrene foam, which is familiar to many, but has a denser structure and, accordingly, better characteristics.
General requirements
What characteristics should a modern safe and high-quality insulation have?
Ease. The insulation should not weigh down the building structure.
Durability and reliability. Properly chosen material will definitely become a reliable support for the entire house.
Safety. Mandatory requirement
It is important that the selected material fully complies with all sanitary standards and is non-toxic.
Easy to install. Installing insulation should not be difficult.
Low thermal conductivity
This is the main characteristic of the material, since its main functional purpose is to retain heat in the house.
Density. The higher the density of the material, the better it will protect your home from winter cold.
In the video - insulation for the floor in a wooden house:
What is Penoplex made of? Compound
We have before us a completely artificial material, which is made from chemical components mixed in certain proportions. The technology involves using a temperature of 140 degrees, which causes the ingredients to melt and foam, forming porophores. If we talk about specifics, the following materials are used in production:
- Polystyrene.
- Ground perlite.
- Lemon acid.
- Tetrabromoparaxylene.
- Barium or zinc stearate.
- Bicarbonate of soda.
The use of such components in certain proportions forms a strong cellular-porous structure filled with gas.
Calculation of consumption Penoplex insulation (1185x585x40 mm/9 sheets / 6.1 m2 / 0.25 m3)
Fast and inexpensive delivery, as well as unloading and lifting to the apartment on any floor.
Expert advice, assistance in selecting materials and calculating the required quantity.
Return within one month or extended return period until the end of the repair * for only 5% of the cost of materials.
All materials are stored in dry warehouses, have certificates and quality passports.
Cost of unloading and lifting
If there is a working freight elevator, the cost of unloading 1 ton of cargo, taking into account the lift to the apartment, is 1,200? regardless of floor.
In the absence of a freight elevator, the cost of lifting 1 ton of cargo to one floor is 1,200?.
The cost of simple unloading of vehicles without lifting to the floor is 1,200 rubles per ton.
Advantages and disadvantages of heat-insulating material
Like any building material, this insulation has its strengths and weaknesses. The fine balance of price and quality makes it competitive and distinguishes it from numerous analogues. Let us immediately note that it is not worth singing odes of praise to Penoplex: despite many undeniable advantages, there are also disadvantages. If you conduct an impartial analysis of the characteristics, you will get the following picture.
Pros:
- High thermal insulation performance.
- Absolutely neutral to humid environments.
- Convenient installation.
- Easy to process.
- Multifunctionality.
- Durability (subject to certain conditions).
- Soundproof.
Minuses:
- Low fire safety of unmodified material.
- Low vapor permeability.
- Sensitive to aggressive substances: gasoline, acetone, oil paint.
- Unstable to ultraviolet light. Destroys in direct sunlight.
Thermal insulation methods
Insulation of the floor in a wooden house can be done using two methods - using joists and a rough base.
The first method is used to insulate wooden or concrete floors. Any of the above materials can be used as insulation. The entire load is evenly distributed on the surface of the logs, so the strength and density of the material used is not important. When insulating the floor using joists, you should take into account the fact that the height of the room will decrease by about 10 cm due to raising the floor. Floor insulation methods
The second method requires a more durable and rigid material as insulation to eliminate the possibility of it settling under the influence of loads. The role of the rough foundation can be performed by wooden flooring, concrete screed or tightly compacted soil. Installation of the thermal insulation layer can be carried out under the floor covering. The result of the work done will depend on the correctness of the actions performed and the quality of the insulation used.
Floor insulation on a rough base
Types and technical characteristics of thermal insulation board
It is worth noting that the material has different densities, which determines the scope of its application. Usually the manufacturer indicates this data on the packaging, significantly simplifying life for inexperienced builders. So, according to their characteristics and scope of application, the following types of extruded polystyrene can be found on the market:
- For roofing . This material is suitable for increasing the thermal insulation of roofs and is used in commercial and residential buildings. The density of this category varies between 28-33 kg/m3 .
- For walls . Suitable for insulating facades and interior spaces. Here the density indicators are 25-32 kg/m3 .
- For the foundation . The density of the material varies between 29-33 kg/m3 , area of application: initial stages of construction, arrangement of basements.
- "Comfort" . Here the density indicators look like this: 25-35 kg/m3 , due to its characteristics, the material is the optimal solution for multi-storey buildings (apartments, balconies, loggias).
- Type "45" . This category is the densest on the market: 35-47 kg/m3 . The area of application of the material is to improve the properties of a runway or road surface in conditions of extremely low temperatures.
Considering that the cost of a material directly depends on its density and thermal insulation, knowledge of these features will help you purchase the right material and save money.
If we talk about technical characteristics, Penoplex has the following parameters:
| Physical and mechanical properties | Those. norms | Unit change | Penoplex – Roofing | Penoplex-Wall | Penoplex-Foundation | Penoplex-Comfort | Penoplex-Type 45 |
| Average density | GOST 17177-94 | kg/m3 | from 28.0 to 33.0 | from 25.0 to 32.0 | from 29.0 to 33.0 | from 25.0 to 35.0 | from 40.1 to 47.0 |
| Compressive strength at 10% linear deformation, not less | GOST 17177-94 | MPa | 0,25 | 0,20 | 0,27 | 0,20 | 0,50 |
| Water absorption in 24 hours, no more | GOST 17177-94 | % by volume | 0,4 | 0,4 | 0,4 | 0,4 | 0,2 |
| Flammability group | Federal Law 123 (TR on TVET) | group | G3 | G3 | G4 | G4 | G4 |
| Thermal conductivity coefficient at (25+5)С | GOST 7076-99 | W/m∙єS | 0,032 | 0,032 | 0,032 | 0,032 | 0,032 |
It is worth noting that the material achieved such high performance thanks to fully insulated cells, whose diameter is 0.1/0.3 mm.
How much brickwork does extruded polystyrene replace?
The answer to this question lies in the thickness of the insulation boards. It looks like this:
- Penoplex 20 mm thick = 370 mm brickwork.
- Penoplex 30 mm = brickwork 750 mm.
- Penoplex 47 mm = brickwork 925 mm.
Accordingly, an insulation board can replace a brick wall that is twice as thick as the insulation itself.
Features of insulation by logs
How to properly insulate a rough foundation along the joists? During the installation of the thermal insulator, the following scheme must be observed:
- The rough base is lined with boards that must be attached to the joists;
- To prevent moisture from getting under the coating, lay a layer of vapor barrier;
- Then the base is insulated with polystyrene foam, mineral wool or other materials.
If you need to make high-quality thermal insulation of a room above a non-residential and unheated room, then it is better to use mineral wool with a thickness of more than 40 mm as insulation. In this case, the “pie” made from a vapor barrier and mineral wool will retain heat in the room, preventing heat exchange between the cold basement and the first floor.
Dimensions of insulation boards
Penoplex is produced in the form of slabs, with the following external parameters: length - 1,200/2,400 mm, width - 600 mm. Thanks to its porous structure, the material has a relatively low weight even with impressive dimensions, and is easy to process.
| Dimensions, mm | Type (density) | |||
| Penoplex C (25-32 kg/m3) | Penoplex K (28-33 kg/m3) | Penoplex F (29-33 kg/m3) | Penoplex 45 (35-47 kg/m3) | |
| width | 600 | 600 | 600 | 600 |
| length | 1200 | 1200 | 1200 | 2400 |
| thickness | 20; 30; 40; 50; 60; 80; 100 | 20, 30, 40, 50, 60, 80, 100 | 20; 30; 40; 50; 60; 80; 100 | 40, 50, 60, 80, 100 |
When performing interior work, you need to take into account that the space will be reduced by the thickness of the insulation + finishing coating.
| Slab thickness (mm) | Number of slabs per package (pcs.) |
| 20 | 18 |
| 30 | 12 |
| 40 | 9 |
| 50 | 7 |
| 100 | 4 |
The key indicator of thermal insulation is the thickness of the slab. Depending on the installation conditions, the recommended material thickness looks like this:
Let's conduct a comparative analysis with other popular insulation materials that are found on the domestic construction market.
Screed in a frame house
You cannot make a screed in a frame house on stilts or posts on the ground. There is only one way out - to make a wooden floor, lay plywood or OSB (in this case this material is also possible) on the joists in two layers. Pour screed onto this base. But this is possible if:
- The foundation is designed taking into account the load from the screed.
- The logs were also calculated taking into account this mass.
If you didn’t plan on screeding the foundation, it’s better not to risk it. Moreover, there are options to make a warm floor without screed. Electric can be laid on plywood. There are also options for water without a screed.
Insulating the floor in a frame house is one of the key tasks
With insulation between the joists
In this case, you can make a screed in a frame house. But according to what scheme? What should the floor pie be like? You can do it according to the first option. As a flooring, use waterproof plywood in two layers, and spread a layer of film or other more reliable material for waterproofing on it, tie a reinforcing belt and then pour the screed.
How to make a water heated floor in a frame house - one of the options
A few words about the above diagram. There are no membranes labeled in it, although there are (blue) in the picture. One should be at the bottom - a vapor-permeable wind barrier. The second is on top of the insulation. In general, the screed itself is a good waterproofing material. But the presence of waterproofing on top of the insulation in this embodiment is desirable so that the solution does not flow into the insulation. And so that the moisture remains in the solution and does not flow down the seams between the insulation boards. The diagram does not yet indicate the rough flooring on which the reinforcement is laid. In general, the diagram is not ideal, but it shows the general structure of a concrete floor in a frame house.
Is it necessary or not to use insulation in this pie? In general, it depends on the climate and the thickness of the insulation that is laid between your joists. But if you are heating the floor, it is advisable to lay another layer of thermal insulation. In this case, EPS will perform better - it is the best option for screeding. Then reinforcement is placed on the insulation, underfloor heating pipes or a heating cable are tied to it, and then the screed is poured.
Available analogues. What is the difference? Which is better and warmer?
- Penoplex or Mineral wool
If you compare these materials, you must take into account their scope of application. For example, mineral wool is definitely not suitable for a foundation or basement: it absorbs moisture well, which leads to weight gain. Accordingly, the insulation slides down, exposing the walls. To avoid these problems, you will have to install additional moisture insulation, and this proportionally increases costs.
However, in terms of heat and sound insulation, Penoplex loses to mineral wool, although the latter material looks more difficult in terms of installation.
- Penoplex or Foam plastic
Both materials do not absorb moisture, so they are equally suitable for insulating basements. Thermal conductivity indicators are better for Penoplex, but only slightly. It is worth noting that polystyrene foam can be classified as an eternal material, and the service life of Penoplex declared by the manufacturer is 50 years .
Therefore, for internal and external insulation, both materials can be used with equal efficiency, but if service life plays a decisive role, it is better to give preference to polystyrene foam.
- Technoplex or Penoplex
These are two materials that are almost identical in their properties. Here you can observe the same indicators of mechanical strength and bending resistance: 250 kPa and 0.4 MPa , respectively.
If we talk about resistance to sub-zero temperatures, then Technoplex looks warmer - the operating temperature of the material: -70 degrees Celsius , however, such temperatures are difficult to meet in most regions of Russia. The thermal conductivity of the insulation is the same: 0.031 W/mK , but Technoplex is more resistant to humid environments.
- Styrex or Penoplex
There are no fundamental differences between these materials, so they have an identical scope of application. Here we can highlight the following difference: Stirex is more resistant to bending deformation, but is more expensive to purchase. In addition, Stirex is more suitable for insulating rooms where there is a significant difference between external and internal temperatures.
- Izolon or Penoplex
Thanks to its structure, Izolon is ideal for insulating floors and roofs, increasing the thermal and sound insulation of rooms. However, for walls it is better to use Penoplex as a material that is more convenient to install.
Thickness calculation
Standards vary depending on the climate. Typically, three values are indicated for all regions, and the second is for overlaps. The temperature degree of resistance of the material will be calculated in this way - R=h/λ, where h is the thickness of the material, and λ is the temperature coefficient. It turns out that by rearranging the values, you can derive a formula with thickness h=R*λ. But the floor is not made of insulation. To obtain this value, you need to calculate the thermal loss resistance of all installed materials, subtract it from the norm, and leave the rest for the insulating material. The simplest example. The floor is lined with a board with a thickness of 2.5 cm at the bottom and 3 cm at the top. As a result, there is 5.5 cm of wood. Specify the type of wood, find the heat loss coefficient and calculate the value of Rder.
Three questions that concern buyers most
Fire safety. Is the insulation burning or not?
The answer to this question is clear: yes, it burns. Perhaps it is this feature that prevents the widespread spread of Penoplex. However, on the building materials market, there are products marked “G1” and “NG”, which means low-flammable and non-flammable material.
In this case, antiperen is used - a substance that prevents the spread of fire. It is worth noting that it is spread, not fire. Of course, for Penoplex to ignite, a fairly high temperature will be required, however, the essence is the same: the material is flammable!
Do mice chew insulation boards?
The material does not contain natural substances and therefore cannot attract rodents. However, this feature does not prevent mice and rats from chewing the insulation, making nests there and breeding offspring. To avoid these problems, a fine mesh is installed over the insulation.
By the way, Penoplex does not attract insects and is neutral to the appearance of mold and mildew.
Is polystyrene foam harmful to health?
In principle, Penoplex is an environmentally friendly material, provided that the material is created without violating production technology. However, given that we are talking about an artificial material, chemical components can evaporate under the influence of certain factors, for example, prolonged exposure to direct sunlight. Therefore, Penoplex is not found on the walls in its pure form and is always covered with finishing materials.
In addition, when the material burns, it releases acid vapors, carbon dioxide and other dangerous substances, including hydrogen chloride. Accordingly, in the event of a fire, there is a direct threat to human life.
Hexobromocyclododecane, which is a bioaccumulative toxin and is currently permitted in our country, but has been prohibited for use in the European Union since 2015, can be used as a flame retardant.
Floor insulation.
The modern choice of building materials allows residents of the first floors (and not only the first) to insulate the floor as efficiently as possible, based on the capabilities of their wallet:
1. Foam plastic for floor insulation.
Polystyrene foam has some of the best thermal insulation properties. Plus - reasonable price and durability. Perfect for laying on various initial surfaces - concrete, wood and others.
2. Penoplex for floor insulation.
Has low thermal conductivity, high sound insulation properties, and a fairly long service life
3. Expanded clay for floor insulation.
Bulk material is one of the most profitable for floor insulation, both in price and quality. Flexible in use - can be added directly to the fill, when screeding the floor, can be used as bedding
4. Mineral wool for floor insulation.
The material is sold in rolls or plates. It has high heat and sound insulation properties. Resistant to chemicals and does not melt at high temperatures.
5. Gypsum fiber sheets for floor insulation.
Convenient for installation. Has fire-resistant characteristics.
To calculate a warm, water-based floor, you can use the heated floor calculator.
Floor insulation. Preparatory work.
If you still need to insulate the floor, you should first determine the scale of the work. If you have a cold basement underneath, then you may have to insulate the floors not only on the apartment side, but also on the basement side. The choice of material and method of floor insulation must be approached very responsibly, weighing the pros and cons. Eliminating errors can result in serious physical and material costs.
Be sure to inspect the basement under the apartment. Particular attention is paid to floors. If there are beginning signs of wear (concrete crumbling, the presence of potholes or erosions), do not be lazy to eliminate these defects. Most often, polyurethane foam or cement mortar is sufficient for this. The concrete basement slab itself can be covered with polystyrene foam or polystyrene foam.
Attention! Before starting work, be sure to notify the building authorities about this; it is possible that the use of the materials you have chosen is not compatible with communications located in the basement.
How to insulate a concrete floor.
If the height of the room is not a limiting factor, then the concrete floors in the apartment are insulated according to the following scheme:
1. Place a waterproofing film on the cleaned original coating
2. Install a frame of bars with a thickness equal to the thickness of the layer of material chosen as insulation
3. Laying the insulation itself into the cells of the frame
4. Cover the heat insulator with vapor barrier film
5. We install the subfloor - it can be plywood, kragis, OSB board, fiberboard sheets, etc.
6. Laying the finishing surface - linoleum, laminate, ceramic tiles, etc.
There are less labor-intensive ways to insulate a concrete floor . For example, gypsum fiber sheets. In this case, work is carried out in the following order:
1. Mandatory - removal of the previous coating
2. Cleaning the surface from possible defects - cracks, gouges, etc.
3. Laying waterproofing
4. Laying gypsum fiber - strengthened with adhesive mastic - applied in several layers so that the joints do not coincide
5. Prime and putty GVL
6. Laying the main floor
In recent years, one of the most popular methods of insulating a concrete floor has been the “warm floor” system. Installing it is quite simple:
1. Prepare the base, lay the material - insulation
2. Apply a layer of aluminum foil
3. Install the electrical cable
4. Installation of the final coating
If the height of the ceiling still limits your options, then you can always insulate yourself with isolon - a more advanced analogue of foam rubber. Everything is simple here - we correct the defects of the old floor, install a heat insulator and you can immediately lay the finishing coating.
Features of insulation of wooden floors.
First, we dismantle the existing coating. If the condition of the boards is quite “alive” and does not require replacement, we recommend numbering the boards so that they can be put back in their places when reinstalled. Check the space under the boards for defects and, if found, eliminate them. Then, we lay stone wool between the joists and assemble the floor.
In pre- and post-war houses, the space between the joists was often filled with soil or debris. The procedure for insulating such a floor :
1. Remove the floor covering
2. Cover the space between the joists with waterproofing material
3. Pour expanded clay on top of the waterproofing material
4. Cover with a vapor barrier
5. Lay polystyrene foam or mineral wool
6. We mount a beam on top of the logs, onto which we attach the floor boards
If your floor design does not include logs, then the floor insulation technology will be as follows:
1. Clean the surface of the dirt floor from debris
2. If the soil has become deformed over time, it is recommended to put it in order
3. Perform waterproofing - you can use roofing felt
4. Apply a layer of sand and gravel mixture
5. Expanded clay layer
6. Install reinforcing mesh
7. Fill the expanded clay with a thin layer of cement. Wait until the cement “sets”
8. Perform the main screed
9. Lay a vapor barrier
10. Install the subfloor
11. Install plank covering
Use of polyurethane foam for high-quality thermal insulation.
All the methods that we have described require serious physical, time and material costs. If this is not an option for you, spray polyurethane foam may be an alternative.
Advantages of polyurethane foam for floor insulation:
- Height 10 cm, provides fairly low thermal conductivity
- Steam and moisture resistant. Accordingly, the costs for vapor barrier membranes are eliminated
- Guaranteed service life of the material is about 60 years
- High sound insulation performance
- Highly environmentally friendly, safe for use in residential areas
- Does not rot, does not spread mold and/or mildew
- Not attractive to mice or rats
Coating with polyurethane foam takes very little time. The finishing screed can be installed almost immediately after spraying.
Where is Penoplex made? Reliable manufacturers you can trust
Penoplex is produced in Russia, so the material is sold in an affordable price segment. If we talk about brand representative offices, you can pay attention to the following cities:
- Kirishi . The production line has been operating since 1998, specializing in the production of standard size insulation. Currently, there are four lines involved. Total capacity up to 600,000 m3 annually.
- Perm branch . The plant was launched in 2005. Now, this is the most productive enterprise, supplying the market with about 650,000 m3 annually.
- Novosibirsk . The enterprise was launched for residents of the Siberian region of the country, specializing in the production of Penoplex with increased thermal insulation and water resistance.
- Taganrog . The plant produces about 500,000 m3 of insulation annually and, accordingly, fully supplies the residents of the Southern and Central regions with products.
It is worth noting that the products of these branches are subject to mandatory certification and undergo multi-stage quality control at all stages of production.
Share the post “Standard sizes of Penoplex. Types and characteristics. Comparison with analogues." by copying the link: https://kaksdelatsvoimirukami.ru/standartnye-razmery-penopleksa/
Calculation of consumption Penoplex insulation (1185x585x50 mm/7 sheets/4.85 m2/0.24 m3)
Fast and inexpensive delivery, as well as unloading and lifting to the apartment on any floor.
Expert advice, assistance in selecting materials and calculating the required quantity.
Return within one month or extended return period until the end of the repair * for only 5% of the cost of materials.
All materials are stored in dry warehouses, have certificates and quality passports.
Cost of unloading and lifting
If there is a working freight elevator, the cost of unloading 1 ton of cargo, taking into account the lift to the apartment, is 1,200? regardless of floor.
In the absence of a freight elevator, the cost of lifting 1 ton of cargo to one floor is 1,200?.
The cost of simple unloading of vehicles without lifting to the floor is 1,200 rubles per ton.
Fastening sheets
Installing penoplex on a prepared surface is the process of planting sheets on the wall.
To do this, apply the selected type of glue to the back side of the material:
- The composition can be applied to sheets pointwise (beacon method), continuous or strip method. For continuous application, the glue is placed in zigzag lines at a distance of 1 - 2 cm from each other. When stripping, make a line around the perimeter and in the center of the slab. The glue is applied spotwise in two or three rows at a distance of 50–60 cm from each other, with 25–30 cm between dots. The spot application method is used most often. Liquid glue is applied with a spatula with a width of 10-20 cm.
- A few minutes after applying the adhesive, the plate is pressed to the surface and held for a few seconds. When the glue is completely dry, the joints are sealed with foam. You can fill them with glue, but it will be more expensive.
- When the mounting adhesive has completely dried, the insulation is secured with special dowels for reliability. This will prevent the insulation from peeling off during finishing and operation.
Finishing
The final stage of insulation with Penoplex is puttying. Apply the putty slowly, layer by layer, ensuring even distribution.
After the first layer, a metal or plastic reinforcing mesh is attached.
The first layer of putty is about 10 mm, the second and subsequent ones can be thinner. It is advisable to apply the third layer by spray, no more than 0.5 cm thick.
First we count, then we insulate
The parameters necessary for making the right decision are defined at the beginning of the article and do not cause difficulties in calculations. The only catch is the thickness of the penoplex slabs. What should it be like? It is impossible to act at random in resolving such an issue. But there’s nothing difficult about it either. A page in a notebook, a pen, or a calculator will help you calculate the thickness.
We determine the required heat transfer resistance of the building envelope. You can find it in table 1b of SNiP II-3-79, having previously calculated the degree-day in a particular case, multiplying the number of days of the heating period by the room temperature.
For the sake of simplicity, we will assume the furnace firing duration is 180 days and the room temperature is 20 degrees Celsius. We get the number 3600. Using the table, we find the required coefficient for walls equal to 2.8, for floors – 3.7 (only part of the table is presented here to understand the order of calculations).
The best brands of adhesives for Penoplex
The best results when installing this insulation are demonstrated by the following brands of adhesives:
Tytan
This universal adhesive is produced in Poland by Selena. To work with insulation, it is better to use the Professional Styro 753 series. The composition is resistant to the influence of precipitation and is heat-resistant, so thermal insulation can be carried out outside. The product ensures maximum adherence of the insulation to the base.
Ceresit ST 84
Foam for insulation. Can be used for outdoor work. Withstands temperature changes from -10 to +40 C. Hardens quickly. In summer it hardens in 2-4 hours. Can be applied with a mounting gun.
Ceresit ST 83
Available in bulk form. The complete drying time for the material is 3 days at positive air temperatures. Easy to apply with a notched trowel. Consumption – 6 kg per sq. m. Non-frost resistant.
Ceresit ST 85
Composition for gluing and reinforcing penoplex. Operating temperature +5…+30 C. Available in bulk form. After diluting with water, the composition should sit for 2 hours. When gluing in the usual way, the consumption is 6 kg per sq. m., when reinforced - 5 kg per sq. m.
Moment
Fixes penoplex to any base. The moment is also used to create a reinforcing mesh. The composition has good adhesive characteristics, is frost- and moisture-resistant, elastic, does not require shrinkage, and can withstand temperature changes.
Master termol
The cement-sand composition makes it easy to attach penoplex to concrete, cement and lime bases. Provides good adhesion to polystyrene foam. Very elastic composition, immune to frost.
Profline 3K-45
This adhesive contains components that increase the level of adhesion of penoplex to any base. Can be used on plastered, cement and concrete substrates. The adhesive seam is not susceptible to moisture, cold, or mechanical damage.
Penoplex Fastfix
Penoplex Fastfix is a specialized adhesive foam for thermal insulation work. You can attach slabs to concrete, porcelain slabs, plasterboard, aerated concrete and brick. Penoplex Fastfix 750 ml is available in the form of an aerosol of the appropriate volume. The glue has good adhesive characteristics in relation to most building materials: wood, plaster, expanded clay concrete blocks, cork substrate, cellulose, metal. But not suitable for foil materials. This composition does not provide the necessary adhesion to polyethylene, Teflon and silicone surfaces.
Which glue is not suitable
There are a number of adhesives that cannot be used for installing Penoplex for various reasons:
- Waterproofing mastics are not used indoors because they are harmful to health.
- products based on gasoline, methylbenzene, acetone, methanal and xylene will dissolve the material.
- Polyesters, coke tar, and petroleum products can spoil penoplex.
Installation methods
Methods for fastening and preparing surfaces have been developed for different surfaces and operating conditions. Penoplex is attached with adhesives or with dowels.
Disc dowels
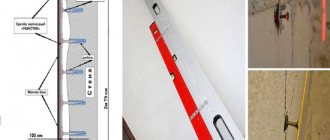
A popular fastener for penoplex is special dowels with a large diameter round head. Typically, this installation method is used to cover uneven surfaces and large areas.
To work you need to prepare:
Boer
hammer drill
hammer
Operating procedure:
- Using a hammer drill, holes are drilled with a 50 mm recess at the base. Their diameter should be such that the anchor fits into it without effort. Otherwise it may bend and break.
- The resulting holes are cleaned with compressed air. Then they are filled with construction foam and plastic umbrellas are inserted.
- The rod is inserted into the umbrella until it stops. The rest of the part is hammered in so that the head is flush with the foam. If plastic rods are used, do not apply too much force. This may cause the nail to become deformed. If fiberglass dowels are used, then it is inserted into the hole assembled.
- The mushroom plates should be buried in the insulation. They should not be allowed to protrude above the surface. It is important to control the horizontal position of the tool when drilling holes so that the dowel does not become oblique and one side sticks out above the surface. To ensure that they all have the same depth, a marker is made on the drill using insulating tape.
- For 1 sheet of penoplex you need 5 dowels. You can fix adjacent sheets with 1 dowel.
- The last stage is sealing the dowels. At the end of the work, there are quite deep holes in which the caps remain. To prevent voids from forming in their place during subsequent facing work, the holes are sealed with an adhesive mixture using a paint spatula. The evenness of the surface is checked with a level or square.
- After installing the dowels, the surface is plastered or the curtain wall is installed.
With the construction of the sheathing
This method involves the construction of a special frame. Thermal insulation can also be secured between wood planks or aluminum profiles. Giving preference to this method, it is better to select penoplex sheets of such dimensions that will correspond to the distance between the components of the sheathing. In this case, it will be possible to significantly reduce the amount of waste.
During installation, the sheets are placed in the spaces between the sheathing elements, after which the perimeter is sealed using polyurethane foam. This simultaneously ensures that the material is attached to the wall.
A finishing finish is installed on top of the penoplex, which can be:
block house or clapboard
siding
plasterboard sheets
wall MDF or plastic panels
For adhesive
For better results when decorating exteriors, craftsmen advise combining fastening with disc dowels with other methods of installing insulation.
But for interior work, it is quite enough to fix the penoplex with an adhesive composition, since these surfaces do not bear special loads.
Surface preparation
Regardless of the chosen method of installing the material, the first stage of work is surface preparation. It should be smooth and clean.
Preparation operations:
Remove all dirt, old finishes, and peeling areas.
If there is mold on the surface, the area is treated with a wire brush and washed with an antiseptic composition. Then dry thoroughly.
After this, alignment is performed. Plastering is used for concrete. The solution is selected individually for the surface material. The insulation can be attached when the plaster has dried.
Metal parts that are planned to be covered with slabs are treated with anti-corrosion compounds.

