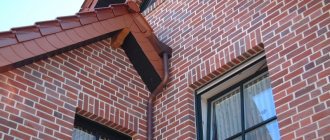
A beautiful brick window or door arch will decorate any interior room. The masonry technology is simple, but still requires certain skills. Therefore, it is better for the arched opening to be designed and covered by a master. However, if you carefully study the instructions and take into account all the important nuances, draw up a project, then you can lay out the arch in a semicircle with your own hands.
Types of brick arches
A brick arch is a decorative element, so it is often used to decorate openings in residential premises. But before you build beautiful arched openings in houses and apartments, it is useful to study information about what types of arches exist. The most common varieties are:
- Wedge-shaped. Lovers of Gothic style interiors often resort to the wedge shape. In this case, the bricklaying should form a wedge arched vault, the upper point of the tip is fixed with a special building element.
- Romance. In this situation, the opening must be laid out in a rectangular shape, and the corner part must be semicircular.
- Bulbous. An admirer of oriental-themed interiors can make this type of arch in their own home. In this case, the bricks are laid in such a way as to form a vault in the shape of a truncated cone.
- Classic. This semicircular arch can be framed with decorative pillars if desired. To make the design look harmonious, it is important to adjust the size of the semicircle to ½ the width of the main opening.
- Modern. Externally, the opening looks like an arc.
- Porta. A simple design laid out in the shape of a rectangle.
- Ellipse. Such an arch is round on the arch and can have different widths.
Masonry work
Creating an arch is not much different from ordinary masonry. Difficulties can only be expressed in the calculation and production of smooth formwork. If the structure is cold, then it is best to use a solution prepared taking into account the increased proportion. It involves combining 2.5 parts of sand with part of cement. If we are talking about a barbecue or oven, you should use a clay solution.
When creating an arch under a brick, you must lay out products on both sides of the formwork at the same time. It is important to use the thickness limiters of the lower layer. The plane must coincide with the plane of the supports, while the seams are filled with mortar. The circles can be removed only after 21 days from the date of completion of the work.
Advantages and disadvantages
Despite the fact that semicircular arched window and door ceilings are considered an interesting interior solution, they have their pros and cons, which are important to consider before starting construction.
The main advantages of such structures are as follows:
- Unique atmosphere in the house. The vaults of an entrance or interior door laid out in a semicircle create a special, pleasant atmosphere that will be felt by the owners of the room and their guests.
- Simple design and installation. Even without construction experience, after carefully studying the construction diagram, you will be able to build a red brick door arch in your house yourself.
- Reliability of the design. The arch is a monolithic structure that can withstand increased loads.
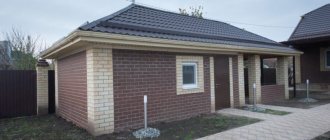
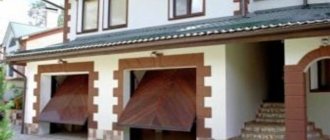
- Versatility. You can fold an arch not only inside the house. It is often used to frame entrance gates, gates, and window openings. Even the hole in the stove can be lined with brick in the shape of an arched arc, which is also an original solution and a beautiful addition to the overall interior of the room.
However, this structure also has disadvantages, for example:
- A semicircular arch requires the creation of a unified interior style, which includes specific cladding of walls, windows, and floors. The implementation of these ideas will require significant expenditures of labor, materials and finances, which not everyone can afford.
- Strict, step-by-step adherence to masonry technology. If you incorrectly calculate the dimensions or form a brick vault not according to the design, there is a high risk that the structure will not hold up and will fall apart.
Brick finishing
The finishing of the arch with brick is carried out after smoothing out the irregularities with sandpaper. Treated areas must be primed and covered with putty. Then an adhesive solution is prepared, which has a cement-sand base. You can also use liquid nails to lay decorative bricks.
The work is carried out from the bottom up, it is necessary to follow from the corner of the wall opening. A distance of 5 mm is maintained between bricks. The edges are sanded with a file. Once the solution has dried, you can create the seams. To do this, use grout of the desired color. A construction syringe is filled with it. You can also use a rubber spatula. The grout is rubbed into the seams, but the composition should not get on the front of the stone.
Step-by-step instructions for building an arched opening
Design and drawings
If the decision to lay a brick arch is final, first of all you need to draw up a template with which you can evaluate the shape and dimensions of the future structure. To create a template, it is recommended to measure:
- thickness of supporting structures;
- distance of the top point relative to the ceiling;
- wall height;
- required opening width.
When these parameters become known, an initial sketch of the future template is created, which is made from chipboard. For drawing:
- an arc with optimal bend is drawn;
- the optimal radius of the structure is set, taking into account the width of the opening underneath it.
If the masonry of a brick arch is complicated, and the number of bends and levels is non-standard, each element should be calculated and drawn separately. Afterwards, when preparing the sketch, all the elements are added together. It is important to pay attention to the fact that the size of the template should be smaller than the actual parameters of the arch. This will help remove the layout from the opening without additional effort.
Calculation of material and design parameters
Before you start modeling the sketch, it is worth measuring the wall, the height of the ceiling and the desired width of the opening. The calculation of a brick arch is carried out as follows:
- the radius of the semicircle is determined, as well as the width;
- Using a compass, the required radius is drawn.
The calculation of the arch and its dimensions is carried out using the following formula:
- R=L2+H2/2H, where R is radius, L is ½ chord, H is height.
Arched doorway masonry
When all the parameters become known, the wooden sketch is installed, followed by the brickwork itself. The distribution of bricks is carried out from below, while the laying is carried out on both sides of the future arch. In order not to violate the distance between the supports, a board of the required length is placed, which is supported on the pillars and moves as they increase. Afterwards, it is necessary to install a beam on both sides of the structure, which will serve as a support.
When laying out columns, it is worth considering that the number of rows laid out to form an arch should not be even. It is important to carefully fill all seams and jumpers with mortar, otherwise the structure will be unreliable. Having reached the central arch, you need to install a “locking” brick, with which you can fix the entire lintel of the opening. When the structure is completely laid out, the wooden template is removed. To finish the arch, you can use decorative plaster that imitates red brick. If the arched structure is erected on the street, for example, over a gate, plaster for external use is selected for cladding.
GardenWeb
Laying arches and vaults
The ceiling in the wall is called an arch or arched lintel, and the ceiling arranged between the walls is called a vault.
The number of bricks in the arch and rows in the vault should be odd. Middle, odd, interlocking brick. An even number also occurs, although very rarely; in this case, two bricks are used as lock bricks. The bricks on which the lintel rests are called heels; they are given the desired shape by appropriate processing.
The space covered by the lintel is called the span. It must be remembered that when laying any lintel, all seams between the laid bricks are always directed to one point or center, from which the curve of the arch or vault is described.
The height at which a vault or arch rises is called the riser. Arches can be high or low.
Any jumper begins with laying the heels, which are made according to the template. Since the height of the arch or vault varies, the angle of the heel also changes. You cannot use one heel shape for all arches and vaults.
In some cases, a simplified triangular vault is made by laying the brick flat and then continuing to lay the walls, which will firmly press the heels to the underlying rows of masonry.
If such a vault is erected without continuing the masonry, then the laid heels cannot always firmly hold the bricks of the triangular vault, since they will not be firmly pressed from above with sufficient force to their bed. This can lead to the heels being shifted by the arch thrust, and it can collapse.
To prevent this from happening, the heels placed under the arch must be pulled together or compressed with square, rectangular, corner or T-steel bars and tied with a wire harness. The harness must be inside the masonry. Instead of wire, you can use strip steel, fastening it to the corners with riveting.
When laying flat vaults, sometimes it is also necessary to use bars to tighten the heels, hiding strands or other types of ties inside the masonry, or bringing them out.
To firmly clamp the supporting bricks hanging from the wall, the masonry is placed above the row to be overlapped by at least four rows. In general, the more rows, the better, since it prevents the ceiling from tipping over into the oven.
Vaults can be high or steep, flat or flat. The semicircular arch is high, it is equal to half a circle. The steeper the arch, the more it can withstand the load.
To lay out a correct and durable vault, it is carried out using formwork. The bricks of the vault must fit firmly against each other and rest on the walls of the firebox. Therefore, the last or top row of walls is laid out from specially hewn bricks.
To get circles and heel patterns, you need to draw a vault of the desired shape, but in such a way that it fits an odd number of rows of masonry.
The vault is built on a sheet of paper, cardboard, plywood or on two boards - wide and narrow, knocked down at right angles. The wide board should be 30-50 mm larger than the height of the arch.
Let's consider building a vault on two boards. This is convenient because the circle shape remains on the wide board, which only needs to be cut out.
First, an axis is drawn in the middle of the narrow board (indicated by a dotted line), but so that it also intersects the wide board. From the bottom edge of the wide board, at a distance of 30-50 mm, draw a straight line A-B and mark the width of the arch on it, but so that the axis is strictly in the middle. The edges are marked with the letters B and D. On the axis from the line A-B, the lifting arrow of the arch is measured upward and designated by the letter D. After this, the center O is experimentally selected so that the curve drawn from it, forming the arch, passes through points B and D and the top point of the arch lifting boom. In this way, the shape of the circle and the heel is obtained, according to which a template is subsequently made for marking the heels on the brick and checking it after hewing.
Having made two circles, you can begin constructing the formwork. In the span of the vault, racks are installed, but not directly on the laid boards or under, but on wedges (two for each rack). Wedges are used to level the formwork, but they also make it easier to remove after laying the vault.
Purlins are placed on the racks, and circles are placed on them. Boards are laid on the circles to create cladding. They are lightly nailed to the circles. You should not nail it down too hard, as this will make disassembly difficult. Having arranged the formwork, it is checked again and leveled by removing or knocking out wedges.
Risks of breakdown
A brick arched opening may break if constructed incorrectly and the calculations are not followed. If the radius of the structure is large, the load increases several times. As a result, cracks form first, so the opening gradually collapses. The reasons why arched windows sag are the same - incorrectly calculated opening width. Also, the structure collapses if the foundation of the house is unstable; in this situation, the structure needs to be strengthened along the entire perimeter, because even a reliably built arch will not withstand such a load.
Stretch ceiling in the shape of a dome
The material allows you to quickly assemble complex structures. The film is made in different colors and textures, and photo printing is applied. Images of the sky, architectural objects, reproductions of frescoes or mosaics look good.
The dome is made up of several petal parts. First, a frame is assembled from arched profiles, secured to the rough ceiling and walls. Then the film cut to size is heated and stretched. The seams between the sections are thin and noticeable only from a close distance. This ceiling is not afraid of moisture, does not collect dust and is easy to clean.
Domes and arches are combined with other types of structures: half-columns, waves, etc. The cost depends on the complexity and size of the project. It is important to correctly calculate the dimensions and location of the frame parts and cut the fabric. The construction of the tension dome will have to be entrusted to professionals.
Installation of formwork
Even if the weight of the bricks is supposed to be small and the arch is at a height, we strongly recommend installing the formwork on vertical posts. They can be fixed to the supports with dowels in the seam, and an additional support can be placed in the middle. Be sure to make spacers for the racks.
As a rule, the arch is laid out simultaneously with the plane, so the place of the “heel” (the supporting platform of the arch arch) is determined by the level of the row of masonry. Its height must be known in advance (within tolerance).
If you decide to make a beam (segmental) jumper, you will have to additionally lay out stops for the heel. To do this, the brick is cut in place. The shape of the trim is in accordance with the position of the first brick of the vault. The formwork is installed so that the beginning of the arch falls on the plane of the heel.
Laying the arch and trimming the heel, video
The vaults of a regular arch start with a brick lying horizontally, then rise, gradually changing the angle of inclination. Therefore, the formwork should be installed after laying the first brick in the support. The beginning of the vault will be on it (on the first brick).
Common Mistakes
The arch must distribute the load from the center to the columns; an incorrectly built structure can crack and sometimes fall apart. The most common mistakes made during installation are:
- the load will be distributed unevenly if the very wide opening does not have sufficient height;
- You cannot replace the template with metal corners; chipboard, unlike metal, promotes natural shrinkage of the entire structure;
- untimely dismantling of the template can swell from the moisture of the solution and partially destroy the structure;
- a weak foundation creates a risk of subsidence of the structure, which leads to its destruction;
- Large radii should be calculated especially carefully, since such structures experience special loads.
Masonry
Making masonry with your own hands is easy if you follow certain recommendations. The bricks are laid from the edges to the middle. They should be placed according to the marks on the template. You can control the quality of the arch when there are three bricks left for laying.
The solution should be applied in a wedge shape. To maintain the symmetry of the second row, a cord is used.
It is worth cleaning the solution after it has set. To do this, use a damp brush.
Articles on the topic
Finishing a brick building - internal, external, instructions, advice from masons
Insulation of a brick facade - thermal insulation, thermal panels, instructions, advice from masons
How to brick a window opening - options, instructions, advice from masons
Foundation for a brick house - strip, monolithic, slab, instructions, advice from masons
Brick foundation for a wooden house - types, instructions, advice from masons
Brick ceiling - how to make, options, strengthening, instructions, advice from masons
Expansion joint in a brick multi-storey building, instructions, advice from masons
How to rebuild a brick house - options, techniques, instructions, advice from masons
Reviews ()
Peculiarities
Buttresses were used in the construction of such ceilings in ancient buildings.
In vaulted structures, in order to make a ceiling in a brick house, an impressive height of the premises is required. Load-bearing walls must provide structural strength and support for the ceiling. In ancient buildings, buttresses were used to provide additional strength. It is impossible to lay bricks on the ceiling in flat floors, since fracture loads are constantly being tested. Therefore, such a solution is only possible in vaulted ceilings. The design does not work on bending, but on compression.
Vaulted structures today
Nowadays, when decorating interior spaces, designers also use vaulted ceilings. No, they do not arrange them with the obligatory construction of buttresses and flying buttresses - these are rather interior decorations. Such labor-intensive, complex in configuration, and, importantly, expensive structures are rarely built today, at least in civil engineering.
Modern materials make it possible to install vaulted and arched ceilings in rooms, giving them a unique design and comfort quickly, and without special time and financial costs. And it is impossible to simply install a vaulted ceiling in an already completed building without completely redoing it. But you can make a light and beautiful false ceiling.Subsequence
In general, the procedure is different for all types of arches, but the main stages of this event can be identified:
- creating a project;
- building a template element;
- its installation;
- masonry;
- removing the template;
- finishing.
It is worth noting that the template element can be made either from wooden blocks or from chipboard. Dimensions are determined in advance. And the attractiveness of the brickwork depends on the quality of the template.