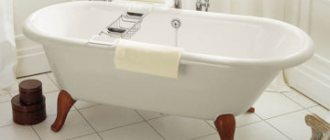
We all love to soak in a hot bath. But have you ever thought about doing this in your garden while enjoying the sunset or the starry sky? But this is a great idea! This is not difficult, but it does take time as you will have to wait a few days for the foundation to harden and the plaster to dry. So, a DIY bath. Go!
Bathroom heating (forgot about PS 
In general, the situation. Stalinka. I did renovations everywhere. I forgot about the heated towel rail in the bathroom. I remembered when I moved in and it was hellishly cold in the bathroom. Both on the floor and in the air.
4 sq. meters, combined bathroom. It’s too late to redo anything with the pipes. That leaves the option of something electric.
Do you have any tips on how to heat a room inexpensively? Preferably a 24-hour option.3
There is a wall, 40 cm wide, probably a meter high, where you can hang a heated towel rail. But are they even designed to heat rooms? Please advise something.
11/17/2011 at 14:19
There are special electric heated towel rails. Sold at any large plumbing store. You can also look it up on the Internet using the search function.
11/17/2011 at 17:52
ayya wrote: There are special electric heated towel rails. Sold at any large plumbing store. You can also look it up on the Internet using the search function.
Yes, I know. This is exactly what I had in mind when I wrote about the 40cm wall. A search on the forum for electronic information did not turn up much. Maybe someone can answer a couple of questions:
- Will they heat the room? Compared to the usual water letter m for example.
- How to calculate how much money he will eat?
- Any recommendations for choosing?
- Which company is better?
As far as I understand, there are no other electrical appliances for heating a bathroom?
11/17/2011 at 18:04
They will eat money. And quite a lot. Why suffer all your life? Hand over the repairs - it will be cheaper. Taking into account the operation of the hood, you will heat the exhaust air - monkey work
11/17/2011 at 18:40
ayya, these special PSs have a thermal power of usually 60 watts. Exactly 0.6 square meters
Ap4u, “cheap” and “heated with electricity” are mutually exclusive concepts.
11/17/2011 at 18:51
MaKon wrote: Ap4u, “cheap” and “heated with electricity” are mutually exclusive concepts.
Absolutely right. Ap4u, Before repairs, try heating with an infrared ceiling with a thermostat. 600 watts. At the dacha in the outbuilding I use this and the floor warms my head
11/18/2011 at 05:19
There is no option to redo the repair.
So now I'm faced with a choice:
- Or just get used to the fact that the bathroom is 10 degrees cooler.
- Or heat it with something electric.
Therefore, I ask for help again. Regarding the option with electronic heated towel rails - who can answer the questions? And maybe there are some other heaters for bathrooms?
“infrared ceiling with thermostat” - what is this? But right away, the ceiling is suspended
11/18/2011 at 10:16 am
Ap4u wrote: Regarding the option with electronic heated towel rails - who can answer the questions?
MaKon wrote: these special substations usually have a thermal power of 60 watts. Exactly 0.6 square meters
Ap4u wrote: “infrared ceiling with thermostat” - what is that?
11/18/2011 at 11:55
In the bathroom there is a Trugor 60*80 electric heated towel rail and a small piece of warm floor, area 4.2 sq.m. Warm!
11/18/2011 at 11:55
There ARE options. Moreover, at least SEVERAL, from which you can certainly choose ONE acceptable one. :yu Only you DO NOT see them (and this is normal, because you are not an expert).
In my opinion, you are complicating everything by refusing to install normal heating. Indeed, you will definitely go broke on electric heating. And this ruin will be lifelong. And the Spartan conditions of severe cold are complete darkness. In a month you will howl again.
Just imagine: The shower is warm or even very warm. You feel good, very good. Bliss. And then you turn off the water and find yourself all wet in the refrigerator. The buzz will immediately disappear. By the time you get out of the bathroom and dry yourself/get dressed, you will freeze completely. The feeling of pleasure will suddenly be replaced by anger. After this, only the unpleasant sensations of discomfort from taking a previously beloved shower or bath will remain in your memory. As a result, after some time, hygiene procedures will be firmly associated with terrible torture. And that's still good. Here's a more gloomy prognosis: you'll end up with pneumonia. Which will eventually become chronic. Do you need this?
It’s the 21st century, and you’re almost driving yourself into a dugout. Stop Experimenting. Do it normally.
You should show a specialist your bathroom and how the risers run. You may have to dust it, but not so much as to make a new finish. There is NO need to make grooves in the wall for heating pipes, because they run along the wall and heat the room. The only thing you have to do is drill holes in the wall for the pipes to lead from the riser to the bathroom. When the pipes are laid, all that remains is to take out the garbage and seal the cracks around the pipes. For example, if you have tiles on the wall, you will only have to change a couple of tiles. It's NOT difficult at all. If it's painted, touch it up. It's also simple. If it’s oilcloth or wallpaper, then it’s even easier - before drilling, cut it and move it to the side, then fill the hole and glue the oilcloth in place, and cut off the excess along the contour of the pipe.
Professionals digest the heating risers and change the radiators in the finished living room, so that the wallpaper is intact and clean. And you are afraid that you will have to renovate your bathroom again. But installing heating pipes is not so scary. Theoretically, I can assume that you will have to drill through the walls. But don't tear it down. And for this there is both a head and tools. And a normal specialist will do the job well and accurately. The floor can be covered with cardboard and oilcloth so as not to be damaged by a piece of cement that has fallen off the wall. Walls and plumbing can be covered with film. Particularly valuable items can be wrapped in a blanket and covered with film to protect them from damage. You can also pay the plumber a little (or more) for the jewelry of the work. So, for the money, he will do everything even more accurately.
In general, here's what you need to do: 1. Draw a diagram of the apartment, take a photo of the bathroom and post it here. 2. Based on your diagrams, they will recommend something here. You soberly evaluate all the options and come to some conclusion. 3. Find a professional who will do THIS for you. 4. Moreover, once again discuss different options with a specialist. And come to the most optimal one (first of all, for you, since you have to live in it; secondly, the most acceptable in terms of implementation, i.e., the one that will suit the specialist). 5. You worry a little (or a lot) in the midst of the process, when thunder rumbles and dust stands in a column (i.e. the plumber is working). 6. And then the rest of the time you enjoy the comfort of a warm bathroom.
Operating rules
Remember, wooden hot tubs are extremely capricious and do not perform well without prolonged use. So periodically warm up the hot tub completely.
In summer, you can leave 5-10 cm of water in the bowl to avoid drying out. In winter, it is not recommended to leave water. It is better to maintain the density of the boards, in order to avoid destruction by ice, to use a layer of clean snow in a covering of 15-20 cm.
To better preserve the font, change the water every 3-4 days. The heating temperature of the hot tub should not exceed 40 ˚С.
Types of fonts and their design
Of the existing options for constructing a container for outdoor bathing with heated water, only two schemes are available for making with your own hands:
- Wooden fonts of oval or elongated shape;
- Round oak baths with straight vertical walls.
Both options are quite popular and are often built for a bathhouse, both in carpentry workshops and handicrafts, in a garage or in a country house.
Small-sized sauna bowl without heating
The manufacturing method may seem overly complicated, but this is not entirely true. The only complicated part is cutting the profile at the ends of the planks and mounting grooves; both operations will have to be done on a router. You can do everything else for the font and heating the water yourself.
The heating inside the bath is electric.
You can, of course, buy a plastic box for a lot of money, dig it into the ground and pass off a half-pool-half-tank for water as a real, classic, home-made font with a stove.
How to make a font
Of the two options for a wooden bathing pool, it is best to choose a round option, similar to the Japanese ofuro bathhouse.
Classic model of a Japanese bath heated by a submersible oven
There may be many reasons for such a decision; here are just a few of the most important:
- Heating of water in the round font container is faster and more uniform;
- The round body is simpler and more convenient to carry on site; you can roll the container from home to bathhouse alone;
- The barrel provides good stability even on uneven ground; strong heating or even overheating of water does not lead to leaks;
- The main thing is that the tightening hoops compress the planks of the walls of a round structure almost evenly, which cannot be said about collapse fonts.
A huge number of elongated and oval baths begin to leak at the first serious heating of the water in the bathhouse. The problem is that such structures are made glued; the body of the font is actually assembled using sealant and polyurethane glue from 3-4 glued sections, one example is in the video:
Due to uneven compression, the wood “shrinks” differently, and after heating the poured water in a bathhouse, a leak may appear. To repair such a font, you will need to disassemble the body into boards.
Therefore, if you build a wooden font with your own hands, then it is better to have a round one; it looks more stylish than a long wooden “trough” with heated water.
Drawing of the font and materials for its manufacture
The best materials to use are oak or Siberian cedar pine; their wood is not afraid of heat and water, and in the latter case the pine also emits a pleasant resinous aroma. Natural Canadian cedar can also be used if funds allow. In addition, if ordinary pine and oak darken from water and heating, then Canadian cedar remains red throughout the entire period of using the font in the bathhouse.
Cedar font
You should not try to make wooden bathhouses from larch. The material is very caustic, cracks easily, and in addition, produces a huge number of splinters, even after grinding and polishing the surface.
A drawing of a round font is shown below; water heating in a bath can be done using an electric heating element from a washing machine. If you place a font in the courtyard of a bathhouse, then heating is easier and more convenient to organize using a stainless steel metal stove.
Preparation of components
The design of a wooden barrel of a heated font for a bath consists of identical boards or slats, 90-120 cm high, mounted on a rigid panel bottom. This scheme uses straight walls, without bending or tilting. Therefore, such a font is easier to assemble than a regular cognac barrel, and most importantly, with any method of heating water in a bathhouse, the risk of the hoop loosening is minimal.
The groove is precisely adjusted to the thickness of the bottom
First of all, it is necessary to glue the bottom; it is assembled from several identical panels, glued and tightened on the conductor using clamps. The optimal diameter is 1.2-1.5 m, with a board thickness of at least 30 mm.
The second stage is cutting blanks for wall planks. In each part of the font, along the end surface you will need to cut a cylindrical tenon and a counter groove of the same shape and size.
In order to connect the walls of the font with the bottom, you will need to cut a transverse groove on each workpiece. It can only be done on a machine with a special ring or disk cutter according to a pre-selected template. It is impossible to cut arbitrarily with a circular saw or grinder, otherwise after assembly, even with a slight heating of the water, the joints on the bottom of the font will leak.
Installation stages
Before starting to assemble the font, all parts are subjected to final finishing:
- The surface on both sides is sanded with an emery wheel and polished with felt until smooth;
- All burrs are removed manually, using a block of sandpaper, and sharp edges are rounded and leveled.
Usually, the first heating of the water in the bathhouse “reveals” all potential splinters well, so before installing the barrel in the bathhouse, the adjustment procedure will need to be repeated.
The next step is to assemble the bottom of the barrel; two support beams are placed on the back surface of the bottom of the font
The bottom is fixed, the wall parts are pressed into the mounting grooves using a rubber hammer.
Recommendations
Self-construction of a font cannot be called prohibitively difficult. All that is required from the master is diligence, patience and consistency of actions. If this is your first time encountering such work, it is advisable to keep detailed step-by-step instructions on hand, as well as listen to some useful recommendations.
When choosing a suitable shape for a future homemade font, you should not stop only at round or oval designs. The tank can have a square, rectangular or even angular shape. Choose an option that seems most convenient to you and will not look cumbersome. To build a font, one must take into account the fact that its dimensions depend on the number of people who will use it at the same time. If desired, the tank can be supplemented with various useful components: benches, stairs, a special filter for water purification, a heating mechanism and even hydromassage. When constructing a high-quality and durable concrete font, it is recommended to finish its walls with a material that has water-resistant properties. This can be ceramic tiles of a suitable design or a film coating. To make descending into the container as convenient as possible, it is advisable to install a strong iron ladder or bring monolithic steps to the edge for descent and immersion. Before starting preparatory work, it is recommended in all cases to make detailed drawings of the future structure. They must indicate all the dimensional parameters and features of the planned tank. Having a font design at hand will make it much easier to make it error-free. When preparing a trench for the subsequent installation of a concrete font, you can dig it, making a slight slope towards the drainage pit and lay a pipe into it. Many users prefer this type of drainage system. When making a concrete font, the solution begins to be poured from the bottom. Here it is recommended to resort to additional processing of the solution using a special submersible vibrator. This stage should not be neglected, since it increases the water-repellent characteristics of concrete. For many craftsmen, making a font from concrete mortar seems too complicated and time-consuming. In this case, reinforced concrete rings may be a way out of the situation. It is quite possible to make a font out of them. Such materials turn out to be no less reliable and durable. If making a full-fledged font seems like an unnecessary undertaking to you, you can get by with a simpler option - install a large ladle for pouring. This simple device is placed on the wall in a bathhouse and a rope is attached to the container. As soon as the user pulls it, the ladle or fixed bucket turns over and water pours onto the person. More recessed fonts look much more impressive. To make them even more original, you can install backlighting
Such designs never go unnoticed. However, it must be borne in mind that it will be almost impossible to move them from one place to another. If you decide to build a good wooden font, it is very important to pay due attention to the quality of the materials you choose. Please note that there are no signs of rot on the wood, attacks by insects devouring natural material, mold or mildew. There should also be no dents or cracks on the wood - such parts are not allowed to be used for the construction of tanks. The most striking and attractive finish for a concrete font is mosaic tiles
If you want to decorate a bathhouse or area (in the case of an outdoor tank) with a stylish and expensive-looking tank, it is advisable to use a mosaic for this. True, such high-quality finishing material may not have the most affordable price tag.
Independently making a high-quality font from natural wood, concrete or suitable available materials rarely takes a lot of free time. The master must have in stock all the necessary tools and instructions for making the tank.
To learn how to assemble a font with your own hands, watch the following video.
Heated ice bath from a Eurocube - we make a sauna and an ice hole in the yard
On a hot summer day, in the courtyard of a country house or dacha, an inflatable or stationary pool helps to relax, and on a cold winter day, a plunge pool. Moreover, you can build two types of fonts at the same time - ice and heated. To save money and effort on building a hot tub, we suggest you make a practical option from a Eurocube (plastic container), equipping it with a convenient and simple heating system.
The classic version of the font is made of wood. The design of such a font is a large wooden barrel (oval, angular, round), which is tightened around the perimeter with steel hoops. Previously, wooden construction was considered inconvenient to use. The water in it had to be collected manually for hours, and then drained. Modern options are free of medieval inconveniences; they are equipped with an automatic pump for filling and draining water, as well as hydromassage and a heating system.
Did you know that in Rus' it was customary to bathe in ice holes or frozen vat barrels, which served as a font. Before plunging into ice water, our ancestors steamed in a bathhouse. But the tradition of steaming in a heated hot barrel came from Japan. The procedure was divided into two stages. First, a person sat in a barrel of hot sawdust (ofuro) for a long time until he began to sweat profusely, and then took bath procedures in a wooden container with hot water (furako).
The Japanese idea of furako became the basis for the construction of modern heated swimming pools. Most often, such models are represented by an external heat generator and are installed in an open area. To prevent the wooden structure from leaking, a closed assembly system is used, and steel rings are placed on top of the barrel, which are adjusted using a wrench when the threaded rods become loose. Oak, beech, cedar, and larch are used as the base.
Made from different materials
You can make your own font from different materials. In this case, you need to study the assembly processes, as they have different nuances.
Made from concrete
The most difficult to manufacture containers for cold water in the bathhouse. To carry out construction work, you need to prepare consumables and tools:
- shovel, bayonet shovel;
- boards, slats for formwork;
- hammer, nails;
- compact concrete mixer, buckets;
- fittings, binding wire.
If a drain is installed, you will need a plastic pipe.
Manufacturing process:
- Dig a pit of the required depth, level its walls and bottom.
- If a liquid drainage system is used by pumping water through a pump, there is no need to drain. If there is no pump, it is necessary to install a drain by burying a plastic pipe underground, one end of which should be led out through the bottom of the font.
- Pour a layer of sand 10–15 cm thick onto the bottom of the pit.
- Tie a mesh of reinforcement and secure it 5 cm above the sand level.
- Put together formwork from boards and install it inside the pit.
- Fix reinforcing frames from reinforcement into the formwork.
- Mix the cement mortar and pour it into the formwork.
- Wait 7 days and carefully dismantle the boards.
- When the formwork is dismantled, you need to level the floors and walls of the font. You can use plaster for this.
- Coat concrete surfaces with waterproofing solutions. The optimal number of layers is 3.
Before using the container, all that remains is to complete the decorative finishing.
Made of brick and concrete
Construction works:
- Make a separate foundation for the font. It is better to install a monolithic concrete plate.
- After making the base, you can begin laying the walls of the brick water tank. They should be 90–120 cm above the floor.
- Wait until the walls dry, cover them from the inside with 3 layers of waterproofing.
When laying bricks, you need to place each row so that the seams on adjacent rows do not coincide. Every 2 rows it is necessary to make a strapping of metal wire or thin reinforcement.
If the brickwork is done with high quality, the seams are well sealed, you don’t have to do the external finishing of the font.
Made from fiberglass and polypropylene
Making plastic bath tubs from polypropylene and fiberglass yourself is more difficult than buying a finished product. This is due to manufacturing difficulties. This will require expensive equipment.
Made of metal
Homemade metal fonts are less popular, but have a right to exist. To make them you will need:
- metal sheets (from 5 to 10 mm), corners;
- shut-off valve, steel pipe;
- welding machine, grinder.
Manufacturing process:
- Use a grinder to cut metal sheets to the required sizes to make an open box.
- Weld the sheets. Strengthen the edges with metal corners.
- At the bottom of the box, cut a hole for attaching a metal pipe with a shut-off valve.
A metal font requires a reliable concrete base.
Made of wood
Wood is most often used to make hot tubs. Materials and tools:
- tongue and groove boards with an unusual semicircular groove;
- wood glue;
- self-tapping screws, bolts;
- metal strips for strapping;
- wooden slats, bars, boards for making steps;
- wood protective compounds.
Manufacturing:
- Lay out and adjust the tongue and groove boards so that there are no gaps between them.
- Cover the tenons with wood glue and connect the boards into a circle.
- Tighten the structure from the bottom, top, and middle with metal strips. Press the metal strips onto the boards and secure with bolts.
- Make the bottom out of floorboards and glue them together.
The wood must be coated in advance with a special anti-corrosion compound so that it does not rot from prolonged exposure to moisture. The water drain can be made at the bottom of the barrel by making a hole in the boards and securing the drain valve.
Treatment
The durability of the font depends on the correct processing of the material from which it is made. Means for protection:
- wood - waterproof antiseptics;
- metal - anti-corrosion compounds;
- concrete - waterproofing mixtures.
Without protective compounds, metals quickly deteriorate when exposed to moisture.
Decoration
You can use different materials for decoration:
- concrete structures - ceramic tiles, porcelain stoneware;
- wooden barrels - paints and varnishes, hand carving;
- metal boxes - forged elements.
Materials
There are many options for making heated hot tubs, so one or another material is used depending not only on the appearance of the product, but also on its characteristics. The classic outdoor bathtub is a wooden structure whose appearance resembles a barrel or vat with high sides. It is absolutely safe for both people and the environment, but is very specific in operation. The cedar hot tub with electric heating is especially popular. The material used is impregnated with natural oils and wax, which can significantly increase the life of the device and make the procedure of its use more comfortable.
Good swimming pools are also made from oak, ash and larch
When purchasing a wooden hot tub, it is important to remember the need to regularly clean the gaps between the slats. The joints should be checked, caulked, and sealed, and the body should be additionally tightened and cleaned of dirt.
A plastic outdoor hot tub is lined with either plastic sheets used to build terraces or natural oak planks. Reliable material has a long service life. The inside of the pool is made of polypropylene plastic, which retains heat well. Strong walls are quite difficult to damage. Moreover, the font can be left outside under a canopy to wait out the winter season, and nothing will happen to it. Taking care of the plastic model is not difficult at all.
You don’t have to worry about the possibility of corrosion even with regular use of the mini-pool. It should be added that touching the walls even with open parts of the body is pleasant due to their smoothness and comfortable temperature. The weight of a plastic font ranges from 100 to 150 kilograms, which makes it possible to easily carry and install it in any place. The disadvantage of such a font is sensitivity to too high temperatures.
A stainless steel font, despite its high price, is not particularly convenient to use. The shelf life of the device reaches several decades. A significant advantage of stainless steel products is the ability to withstand temperature changes up to thermal shock. A cast iron bowl is difficult to install and quite problematic to maintain. To avoid corrosion of cast iron, the product must be cleaned and washed on a regular basis. This model is suitable for true connoisseurs of outdoor recreation, because once the hot tub is heated, you can spend almost an hour and a half in it without any problems.
It is worth mentioning that a metal outdoor font can be heated even with an open fire or a fire, although it is safer to install a stove under the bottom.
There are also fonts made of composite and ceramics. Their characteristic feature is the treatment of the inside with a special substance that prevents corrosion or salt deposition. Many craftsmen are able to build a font from a concrete ring.
Do-it-yourself wooden font, how to check the quality
The pain point of all wooden barrels - hot tubs - is the build quality of the body. In a good mini-sauna there should be no leaks even if the new bath has just been brought from the salon and freed from packaging. By the way, a sign of a good manufacturer is the transportation, storage and installation of the barrel in a bathhouse only in packaged form.
When assembling, many craftsmen use dry powder to grout the joints of wine barrels, no glue. After first filling the font container with water and heating it in the bathhouse, the glue peels off at the joints, like dextrin for wallpapering.
The first thing to do after assembly is to settle the barrel. Before tackling the hoops, it will be useful to roll the walls of the font on edge, illuminate them with a flashlight and look at the joints in the light. If a thin, barely noticeable light stripe flashes somewhere, you will need to lightly tap it with a rubber mallet or mallet.
At the final stage, the barrel is sent to the bathhouse and rinsed several times with boiling water to warm up the walls, and only after half an hour can the hoops be fully tightened, after which it is considered that the font can be used.
DIY heated font
If you do not take into account the electric heating method, then two types of stoves can be used to heat a bathhouse:
- An attached heater with a built-in heat exchanger; you can use a standard metal stove, designed for a bathhouse volume of no more than 10 m3. To heat 250-300 liters of water, the thermal power must be at least 10 kW;
- Submersible metal stove with a high chimney and top loading. Such heating is often used for mobile portable bathhouse models; you can buy a ready-made one or make it yourself.
Comfortable relaxation in a barrel sauna is not always associated with a protruding and smoking chimney pipe, even if you cannot do without heating. In this case, the owners prefer to load the stove body with rubble stone and heat the font long before the start of water procedures. In this way, you can ensure heating of water in the bathhouse for one hour, even in the autumn cold.
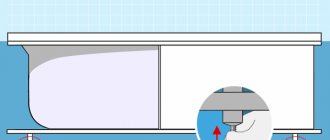
Heating the bath with an attached stove
The second way to heat water is more convenient. In order to connect a stove with a heat exchanger, two to four fittings are installed in the wall of the font, through which hot water enters the bathhouse - barrel and drains back into the coil. Such heating can provide the bathhouse with heat for 3-5 hours.
Wooden shape
The shape is determined by the manufacturing technology. Serial manufacturers use two methods. This is an assembly of vertical boards (rivets) and an assembly of horizontal bars with crossing seams as in brickwork.
Assembly from staves is a classic cooperage technology with low material costs. Now this technology is the most popular. The option with assembly from horizontal layers is taken from the wooden fleet technology. The wall thickness with this method can exceed 10 cm.
The consumption of materials is significant, but for complex-shaped bathtubs this technology provides the necessary strength. The product is massive and durable. The appearance of such a font is very specific.
Sprinkler device
Unfortunately, it is impossible to fit into such a font, but it will do its job adequately if the owners of the bathhouse are “running out of time,” and it is imperative to complete the procedure according to all the rules in order to finally cheer up.
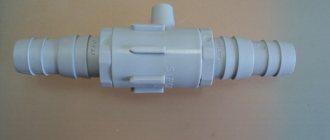
This is a wooden bucket equipped with a float system, familiar to everyone. It is located at the top of the container, inside. Its pipe is connected through the wall to a flexible hose, and it is connected to a storage tank or water supply. Anyone who has at least once examined the “insides” of a toilet tank is familiar with the operation of this simple device. As the float rises, it blocks the flow of water, and vice versa. If there is no running water, then the font is filled manually.
You can make a wooden container with your own hands, but does it make much sense? If the owner does not have the skills, then a purchased product for constructing a dousing font is a good and quick alternative. Installation is simple and anyone can do it.
When you want to do absolutely everything without the interference of foreign objects, the first thing you do is find a drawing. Then templates for a mini-font are cut out of cardboard, and the elements of the future bucket are cut out from them. 10x100 mm boards are used for them. The parts are fastened to the bottom, connected together with rims made of steel tape, its thickness is 2 mm, width - 50. For rivets, use five-piece wire.
Preparing for achievements
To install a small structure, you need to prepare:
- timber 40x40 mm;
- flexible hose;
- drill;
- sandpaper;
- hacksaw;
- float system;
- plane;
- roulette;
- screws, bolts, dowels;
- level;
- cord (strong).
“Creation” of the bucket and installation
A dousing font usually has its rightful place in a bathhouse: it is a washing area with water supply and drainage. The first step is to determine its position on the wall. In this case, they look for the longest member of the family, put him against the wall and force him to raise his hands. Then measure the distance from the floor to the fingertips, and add the height of the bucket to this figure.
- Using a level, make marks for installation on the wall. 150-200 mm retreat from them, mark the point for inserting the water supply pipe. After installation, its end is connected to the hose. If there is no running water, then this step is ignored.
- The brackets are made from timber. Blanks are made with a length of 400 and 600 mm, from which two right-angled triangles are assembled: the ends of the long side are filed at an angle of 45°. The elements are fastened with self-tapping screws, then processed with a plane and sanded.
- The same board is nailed to the outside of both corners, its length is about 800 mm. These planks are connected by 3 crossbars of such length that the middle part of the font fits between them. Holes for bolts are drilled at the sharp corner of each bracket.
- Holes are also made in the opposite (in the same middle part) ends of the bucket. The container is checked by inserting it between the brackets. A small hole is drilled at the very top of the front of the mini-font for the cord, threaded through it and tied.
- A pipe is inserted into the eye of the dousing bucket, which is immediately fixed. Holes are made in the marks on the wall, then in the frame of the structure. Next, they do a fitting and check the correct horizontal position.
The last steps are to fix the shower font on the wall and attach the hose to the pipe.
Making a bath font with your own hands is quite simple when it comes to the inch-shaped shower design. It is a little more difficult to make a large wooden bowl, but with a concrete eternal “tub” you will have to do your best.
Numerous videos will show you examples of work and their possible difficulties. One of them fits comfortably here:
FURNACE FOR font
When we say a stove for a bath or a barrel for a sauna, we mean the heart of the product. Which manufacturer should you prefer and why?
The most common way to heat water in a sauna barrel is to use a wood stove. Depending on the method of use, the oven can be internal or external. How these two options differ from each other, and which solution should be given preference, we will try to describe in this article.
Internal wood-burning stove for hot tub with vertical loading (forced convection)
An internal hot tub stove is designed for installation inside a hot tub with a stove and heating water through direct contact with the hot walls of the stove. As a rule, such a hot tub stove is separated inside the hot tub by a protective wooden fence. The advantages of this design include only the low cost and simplicity of the process of its implementation in relation to an external stove for a font. Internal hot tub stoves are characterized by the following disadvantages:
- reduction of the internal useful volume of the font;
- continuous penetration of impurities into the water from the stove and chimney;
- inconvenience of servicing the furnace, difficulty in cleaning ash, etc.
External hot tub oven with horizontal loading (free convection)
This is the classic and most practical option for installing a hot tub stove. The distance from the font to the stove, as a rule, should be up to 40 cm so that the water circulates independently. Water is heated by transferring heat from the furnace to the water through an internal heat exchange process. The water in the furnace is supplied to the bottom, and the heated water leaves the furnace at the top and is then supplied to the font. But depending on where in the font the water is taken, and where the water is returned to the font, and also what is the distance between the inlet and outlet openings of the font stove - the temperature of the water in the font can vary significantly!
The only drawback is the higher price compared to an indoor oven, but this is justified by the positive aspects of using this type of oven:
- using 100% of the volume inside the font;
- combustion products do not enter the water;
- ease of installation, use, etc.
In addition to the criteria of price and furnace power, you should understand the process of heating water in the font, on which not only the efficiency of the water heating process depends, but also the pleasure of bathing without the need to use additional tools such as shovels, a circulation pump, etc. The consumer will pay attention for implementation, which does not require additional effort, as well as for the factor of the natural water heating process, which ensures the most uniform heating of the water inside the font. There are a large number of low-efficiency wood stoves available on the market that require more wood fuel and waste the energy generated down the chimney without heating the water.
For a deeper understanding, we present detailed information about the physics of the water heating process in various hot tubs: the Finnish company SpaDealers Oy and others.
External stove for SpaDealers Vilpra hot tub (water temperature difference approx. 6 °C)
Material
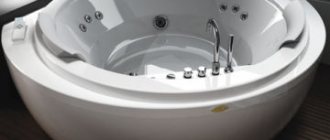
The bath tank can be made of various materials
Each structure has its own characteristics and therefore it is important to make the right choice. Classifications of fonts depending on the material include the following types:
- wooden products are classic and practical. Suitable species for the font include oak, cedar and larch. They are strong, durable and have a beneficial effect on the human body;
- plastic or metal models are a simple and convenient option. Ready-made containers have different shapes and sizes, complemented by built-in seats, ladders and shelves. For bathtubs, durable and safe plastic is used, which is resistant to various influences;
- the concrete stationary type is reliable, but requires very careful organization, for example, preparing a pit. Installing a hot tub is similar to installing a small swimming pool.
Advantages and disadvantages of materials
The main features of each material from which you can create a bath font are expressed in advantages and disadvantages. Preliminary acquaintance with such characteristics of structures allows you to choose the optimal material.
| Material | pros | Minuses |
| Tree | Environmental friendliness and safety, durability and reliability, pleasant structure and convenient operation, the ability to create a stylish design in the bathhouse, a variety of shapes | Difficult installation, the need to use only high-quality material, careful maintenance is required, equipment is required for functionality |
| Plastic | Practicality and easy care, durability and reliability, simple installation, variety of options, possibility of beautiful exterior finishing | Deepening requires a carefully designed system; low-quality containers are short-lived, |
| Metal | Durability and reliability, a variety of models, the ability to create beautiful external cladding, the possibility of recessing | The need to protect the metal from corrosion, the structure is uncomfortable to the touch, rapid heating of the surface |
| Concrete | Reliability and safety, durability and convenience, the ability to create a tank of any shape and size, functionality | Complex installation and labor-intensive design, careful maintenance of the tank is required, the need to create a pit and supply communications |
How to choose material for a font?
When choosing a material, you need to take into account factors such as financial capabilities, area of the bathhouse and space for the font, frequency of use and number of users. For example, for a spacious and reliable bathhouse, concrete structures are optimal, allowing you to comfortably take water treatments. For a small bathhouse, the optimal solution is to pour wooden fixtures or small plastic containers that can be deepened or installed in an open place.
Ready-made models are fully equipped
When choosing wood, the quality of the material is taken into account. The presence of rot, dents and cracks indicates that the wood is not suitable for making a container. Only high-quality boards can ensure the reliability and durability of the hot tub.
Finished plastic models must be made of durable and fairly thick material. The wall thickness must be at least 8 mm, and the parameters of large containers are even more significant. Calculating the wall thickness is also important when making an in-depth concrete tank. To finish such a font, ceramic tiles or special polymer compounds are used.
Calculation of the amount of material
When calculating the amount of material, take into account the dimensions of the font. For an oval-shaped wooden tank you will need durable and high-quality boards, as well as a shield to create the bottom. In this case, boards with a cross-section of 20x120 mm are optimal, which allows the elements to be milled correctly. The length of the board depends on the height of the structure, for example, 100 cm.
Using the drawing you can easily calculate the material
The number of boards depends on the size of the oval. You need to measure the oval along the contour in centimeters, and divide the resulting parameter by the width of one board, also in centimeters. For example, the size of the oval along the contour is 300 cm, and the width of one panel will be 10 cm. It turns out that about 30 boards are needed to make a font. And also to make a wooden container you will need the following materials:
- tongue and groove boards 40 mm thick;
- boards 150x40 mm;
- drain siphon or polypropylene pipe;
- bars with a cross section of 40x40 mm for legs;
- PVA glue;
- metal clamps and bolts.
To make a wooden font, it is worth mastering the technology of work, since the product should not allow water to pass through. A good result is ensured by the use of sealant, which is used to seal small cracks.