For owners of private houses who want to quickly, beautifully and relatively inexpensively decorate the facade of their home, siding is the best solution.
The material is easy to use, light weight, installation is simple and can be done independently.
The result of such finishing is very effective from both an aesthetic and functional point of view - the so-called a ventilated facade capable of removing water vapor and condensation from the wall pie; the cladding does not have a tight mechanical connection with the wall material, which eliminates the possibility of deformation or destruction due to temperature changes in size .
In addition, there are every opportunity to disguise any flaws in the walls - unevenness, curvature, the presence of any flaws or other shortcomings.
Siding is produced in various types; according to the material used, it is divided into two main groups:
- Metal;
- Plastic (vinyl, acrylic, etc.).
Let's consider metal siding under timber as a material with specific surface properties and finishing capabilities.
Metal siding under timber
Metal siding under timber is a facing material consisting of strips connected into one continuous sheet, the surface of which imitates a wall made of timber.
This is achieved by applying a longitudinal profile relief that repeats the shape of a high-quality assembled timber . In addition, a special protective polymer coating is applied to the metal surface of the panel, protecting the material from corrosion.
Using photo offset printing, a pattern is applied to it that imitates the texture of wood and gives the panels a completely realistic look. The result is a cladding that replicates the wood so closely that you can only tell the difference upon closer inspection.
The advantages of metal siding under timber include::
- Light weight of the panels, which does not create excessive load on the walls;
- Strength, the possibility of plastic deformation without destruction;
- Easy to assemble, self-installation possible;
- Lack of response to atmospheric manifestations, sunlight or wind loads;
- Low coefficient of thermal expansion in comparison with vinyl analogues;
- Environmentally friendly material that does not emit any harmful substances;
- Attractive appearance, choice of colors.
House with metal siding under eurobeam logs
The disadvantages of metal siding include:
- High price;
- Heats up in the sun;
- If the integrity of the protective coating is damaged (in cut areas, on scratches), the surface rusts;
- When struck or pressed with sufficient force, marks remain that do not occur on vinyl siding due to the elasticity of the material;
- Replacing one strip requires removing all the previous ones.
The existing disadvantages are inherent in all types of metal siding, but with proper use there are usually no consequences from them..
Types of profiled beams
Profiled timber can be glued or natural moisture. These varieties differ in manufacturing method and technical characteristics. For example, in the production of laminated veneer lumber, carefully dried boards are used, which can be of various types. They are glued together until the required profile section is formed. This technology provided this profiled building material with:
- increased accuracy of geometric parameters,
- lightness,
- the possibility of simple implementation of internal (hidden) placement of communications,
- presentable appearance.
To produce profiled timber with natural humidity, coniferous wood (spruce, cedar, pine) is used. The process of its manufacture involves processing a single log using milling and other woodworking equipment. The result is a building material that provides:
- reduction of production costs,
- uniform shrinkage of the frame,
- reduction in the cost of finishing work,
- environmental friendliness.
The main advantages of metal siding under timber compared to other types of material
In addition to metal, other types of siding are also available :
- Vinyl;
- Wood;
- Cement;
- Acrylic.
The most common types of siding considered are metal and vinyl siding..
All the advantages of metal siding under the beam lie in the specific features of the material.
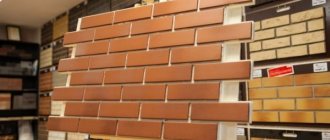
Metal siding is divided into the following types:
- Under the tree;
- Ship plank;
- Under a stone;
- Under the brick;
- Under a log.
Metal compares favorably with other types of siding material in the following ways::
- Plasticity . A sharp blow or pressure that breaks vinyl siding will cause a dent, but not a fracture;
- The ability to change shape without destruction , lack of material memory. This refers to the ability of metal parts to undergo some shape correction without returning to their previous state. They can be easily bent to the required configuration, while the vinyl elements will be under stress or break;
- Much lower coefficient of thermal expansion than vinyl panels;
- Does not emit odorous substances , as happens with vinyl siding in the first months of operation;
- Does not break under loads during frosts.
Metal siding under l beam
What is better to choose: imitation or natural wood
Even if we take into account that imitation timber is a specially processed and prepared board, it has a huge number of differences from siding.
- Natural wood is considered a completely safe material. Vinyl or metal panels also do not harm human health.
- Siding has a lower cost. It does not need to be treated with special solutions all the time, unlike natural wood.
- Installation of a structure made of natural material is more complex and requires more time. The main advantages of wood are that it retains both heat in the room and the necessary climatic conditions well.
Specifications
Metal siding under the timber has the following technical characteristics:
- Length - 0.8-8 m ;
- Width - 22.6-36 cm ;
- Total width - 26-39 cm ;
- Panel profile height - 12-15 mm ;
- Thickness - 0.8-1.1 mm ;
- Temperature range - 50 +60 degrees ;
- Multilayer protective coating (galvanization and polymer protective layer);
- Anti-hurricane lock, which prevents the panels from falling off in strong winds.
The given characteristics are common to all types of siding, average indicators. Depending on the manufacturer, the characteristics of the panels may be changed in one direction or another, but there are no critical fluctuations in parameters.
Specifications
Board processing
The main features of false beams are the special technological shape of the front and back sides. In the process of creating panels, it is important not only to ensure ideal geometry accuracy, which according to GOST should have deviations of no more than 1 mm, but also to give them the desired profile.
- Front surface. The outer side of the false beam is flat. However, on its edges there is a chamfer cut at an angle of 45 degrees. The edges can be made either straight or rounded.
- Backside. The back of the panel is equipped with special channels that protect the skin from waterlogging and deformation. When making false beams yourself, you need to cut one wide or 2-3 narrow recesses for the entire length of the lamella.
Popular manufacturing companies
There are many siding manufacturers in the world.
The most famous manufacturers include:
- Mitten;
- Variform;
- Elixir;
- Vytes;
- Gentek;
- Kaycan;
- Foundry and many others.
From domestic:
- Dock;
- Grand Line.
The list of manufacturers can be continued for a long time, but there is little point in this, since all products on today’s market are of high quality, since they must meet certification requirements.
Little-known companies that are forced to save on production are of lower quality . It is better not to purchase such products, since with a very long service life of the cladding (50 years or more), the lack of a quality guarantee is not attractive.
One of the manufacturing companies
Results
Do not forget that you should order kits only from well-known and time-tested companies. Do not forget that different companies have different prices for construction. So, an order from a popular company will be much more expensive than from a less popular company, but the quality of the work will be the same.
Don’t forget that when choosing a log house, you should carefully inspect it and notice all the details. Before purchasing, study all the characteristics and evaluate the quality. The finished product can be placed and finishing work can begin immediately.
A log house made of profiled timber is good housing for both seasonal and year-round use. All houses made from this material are very beautiful and attract everyone's attention.
Equipment
Metal siding requires additional elements to design corners, slopes of window or door openings and other necessary details.
Without them, the cladding will look sloppy, all connections will look makeshift and unattractive . Such elements are called additions; they are produced together with the main panels, finished with the same compositions, which makes them absolutely corresponding design details.
The siding package includes:
- Start and finish bar;
- H-profile for connection along the length;
- External and internal corner strips;
- Soffits;
- Platbands, J-platbands;
- Moldings;
- Window slopes, near-window profiles.
ATTENTION!
Each manufacturer strives to present the finishing set as fully as possible, so in some cases other types of additions may be present.
Equipment
Examples of houses
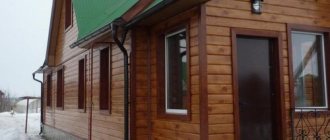
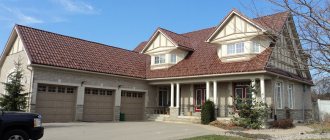
Decorating private houses with metal siding panels that imitate natural wood will make it possible to harmoniously fit buildings into the nature that surrounds them. A successful combination of light colors with a dark roof highlights the features of the building and helps to correctly place accents.
In addition to residential buildings, siding that imitates timber becomes a good option for finishing the facade of a bathhouse. The noble darkness of the colors adds originality to the object, emphasizing its color and beauty.
The warmth of the colors of the metal siding, which covers the façade of the building, adds luxury to the exterior design and recreates the atmosphere of a country house.
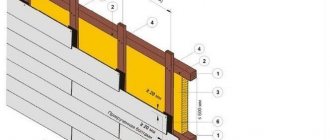
Preparation of lathing and insulation of walls
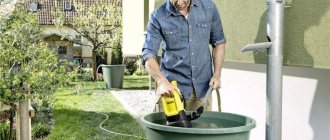
Before directly installing the siding, it is necessary to install the sheathing, which will serve as a support for the panels. In addition, external wall insulation is often carried out, which helps save thermal energy and improves the microclimate inside the house .
To carry out these operations, which are most often carried out in parallel, it is necessary to install sheathing on the walls - strips corresponding in thickness to the size of the insulation.
The best option for external wall insulation is stone wool slabs with a thickness of 50 mm . Thus, horizontal rows of sheathing are installed, between which the insulation is attached.
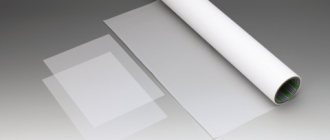
After this, a layer of waterproof membrane is attached to the surface of the installed insulation, which facilitates the release of steam from the inside, but does not allow moisture to penetrate from the outside .
Then a vertical layer of counter-lattice is installed, which will serve as a support for the siding panels and at the same time provide a ventilation gap for free air exchange in the space between the sheathing and the wall pie . The thickness of the counter-lattice must meet the requirements for ventilated facades and be at least 40 mm.
Wood can be used as a material for sheathing, but experts strongly recommend using plasterboard guides, which are easier to adjust to obtain a flat plane necessary for installation work.
Lathing and siding insulation
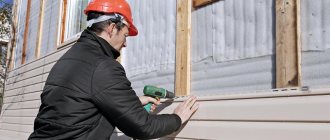
How to cover a log house with metal siding
Installation work is a simple process, but it still differs in certain features. The specifics of wall finishing using metal and wood frames are slightly different, so each option should be considered separately.
It is prohibited to install siding panels directly on walls. This will significantly impair ventilation and promote the formation of mold and mildew.
Tools
To complete the finishing work you will need:
- hammer;
- hacksaw for cutting metal;
- construction tape, chalk for marking;
- level – water or laser;
- glasses for eye protection.
To speed up the work, it is recommended to use an electric saw.
Special tools required:
- Puason hammer drill for expanding fastening holes for nails on siding panels;
- a dismantling tool with which you carefully remove panels to adjust their level.
Preparing the walls
Before starting work, you must carefully inspect the walls. To do this, all elements protruding above their surfaces are dismantled, the wall is cleaned of dirt, and damaged and peeling areas of the outer finishing layer are removed. To protect the façade from mold formation, its surface is treated with antiseptic compounds.
The walls are pre-marked for the installation of sheathing, the interval between the elements of which should be thirty to forty centimeters. If the object is located in a region with difficult climatic conditions, the step between the slats is no more than twenty centimeters.
Creating a wooden sheathing
This method of constructing a frame is simpler, and if you are doing the finishing yourself, it is recommended to use it. To install the lathing, you will need wood whose moisture level does not exceed fifteen percent.
Before work begins, the slats are treated with a protective agent. After this, the bars are adjusted to the dimensions of the walls. According to the markings we applied, dowels are used to fix the brackets onto which the timber is fastened with self-tapping screws.
If insulation of the facade is not planned, brackets may not be installed. The bars, packed along the plane of the walls, are leveled with wooden wedges.
Creating a frame from a metal profile
As a rule, metal guides are used for this, the shape of which in cross-section resembles the letter “P”. Such elements are fixed with brackets - perforated hangers made of stainless steel material. According to the markings, holes are made in the walls for dowels, with the help of which the brackets are fixed.
We begin to mount the profile. It is best to start the process from both end sections of the object in order to create reference points along which the entire frame plane will be aligned.
It is recommended to place paronite gaskets or other insulating material under the hangers to avoid the formation of “cold bridges” and improve thermal insulation properties.
Having leveled and fixed a couple of outer profiles, we stretch the cord along them and install the remaining slats. The quality of work is checked with a laser level.
Setting the starting bar (starting strip)
The starting strip is installed strictly horizontally at the bottom line of installation of the panels. You need to select the lowest point, draw a horizontal line along the perimeter of the house 40 mm above this point (necessarily horizontal, which is checked by level).
Then, the top edge of the starting bar is attached to the line. The self-tapping screws are located exactly in the center of the oblong holes; they should not be tightened tightly; the material must be allowed to move due to thermal expansion .
For the same reason, the next plank is not attached end-to-end, but at a distance of 6-10 mm from the previous one, so that when expanding, the panels mounted on it do not begin to bulge.
Setting the starting bar
How to clean a surface from dried glue?
It makes sense to remove excess glue from the surface of the wood either while it is completely fresh or when it has completely hardened. If you rush to sand a damp area of wood, you will most likely end up with an even greater aesthetic defect when the fibers deformed by sanding dry. The hardened glue is cleaned by hand sanding (along the fibers) or cut with a chisel.
Before applying decorative finishing, check to see if there are any stained areas on the product. Otherwise, traces of dried glue will appear under the finishing compound. To more effectively detect defects, wipe the surface of the wood with a cloth soaked in white spirit.
Arrangement of obtuse and acute angles
Sharp or obtuse angles can occur in the presence of decorating architectural elements, for example bay windows . To create an obtuse angle, you should lean the corner profile against it and, pressing it, slightly move the profile flanges until the desired configuration is obtained.
Then the installation is carried out according to standard methods.
An acute corner is formed by squeezing the corner profile from the sides to achieve the desired shape . Then install the profile in its proper place.
CAREFULLY!
In order not to destroy the protective polymer coating, operations to bend the profile are carried out carefully, without too sharp bends. Destruction of the coating will cause rapid corrosion and render the part unusable.
Setting obtuse angles
Installation of an acute angle
A little about the possibilities
The proposed external material can be untreated, it can be treated with antiseptics and impregnations, stains and varnishes in the factory. In addition, the treated material does not fade in the sun; after installation, it will not be necessary to approach it for several years. Naturally, the price of this lining will be higher than the untreated one.
The texture and palette of the material can be any.
Advice! When purchasing such a board, make sure that they are all from the same batch. Boards from different batches may have not only different colors, but also different texture patterns. If you still had to buy additional material, try to either lay it on one wall, or mix lining from different packages.
Advantages and disadvantages
Of course, there is a difference between a timber and a board. Some things are better in timber, some in boards.
Let's start with the positive:
- cladding assumes any house, stone, wood, adobe;
- The tenon+groove connection allows you to not only easily assemble the construction set, but also withstand a good load;
- the material is dried. The difference between timber and boards is that the lining will not crack like timber, which is quite important when using it;
- decorative factor. Correctly selected material will create a very beautiful texture;
- lining is made from all types of wood. From cheap pine and spruce to more expensive oak, cedar and hornbeam.
Installing lining yourself is extremely rare. Although the material is quite easy to install, it requires insulation;
Installation of vertical strips - corners and H-shaped connector
Corner strips have two types of design - complex and ordinary. Complex corner profiles have special recesses into which the ends of the panels are inserted.
They are installed strictly vertically along a plumb line, fastenings with self-tapping screws are made in increments of 0.2-0.3 m . Installation of complex corner profiles is carried out after installation of the starting strip.
Simple corners are installed after installing the panels. It is much easier to work with them, since they simply cover the joint of the planes. Such corners are fastened with self-tapping screws or rivets. Experts recommend that everyone who independently installs siding on their home use this type of corner .
The joint of the panels along the length can be made with a simple overlap, but the connection with an H-profile, which has recesses on opposite sides for installing the ends of the panels into them, looks more aesthetically pleasing. The H-profile allows you to design the connection more accurately, on one vertical line, which improves the appearance of the house.
It is also installed immediately after installing the starting strip; the vertical is checked with a plumb line.
Installation of vertical strips - corners and H-shaped connector
Expenses should be taken into account at the project stage
It is profitable to order a ready-made standard project for the construction of a cottage from timber with reference to the region. It is up to the designer to select from savings on the network and adapt the technical design to the request. What are the advantages of the project:
- Get a detailed cost estimate for materials, components, and work costs;
- Issues of material shortages or sale of remaining surplus will not arise;
- Detailed drawings and subassemblies will lead you out of the maze of errors;
- Transport costs are optimized;
- Laying pipes and cables will not cause any difficulties;
- The maximum cost of a standard project is 20 thousand rubles.
But the implementation of the idea depends on the need to hire a team of qualified carpenters. The level of responsibility, skill of specialists and the seriousness of hidden defects will become clear during the first wintering.
What should an ordinary person, inexperienced in construction, decide to build a warm house from profiled timber with his own hands? Order a house kit from a local house-building plant and save a significant amount of money with this step and speed up your move-in date.
Essentially, a house kit is a kit for the builder. The profiled timber is cut to size, the dovetail type connecting locks are made without gaps using precise factory equipment, which eliminates the appearance of cold bridges.
In the attached video, craftsmen use a chainsaw for this purpose. But are they capable of reproducing the precision of a machine production line? It can be seen that the cuts were made approximately, with a margin. Will they definitely caulk or foam the inconsistencies in the cuts? Doubt encourages self-building. And the cost of the work will amount to no less than factory processing.
Video:
Do-it-yourself house made of profiled timber
The benefits of purchasing a house kit made from profiled timber
A technological worker has replaced a carpenter - that’s what machining means.
The developer is limited in time, looking for an opportunity to reduce the cost of building a timber house. Let’s look point by point at whether the costs of cutting and sampling are reasonable:
- You receive chamber-dried wood with 10–16% humidity in sealed bags;
- End processing with film-forming stabilizer INDULINE. This means that the main channel for moisture absorption is blocked, the web of cracks will not disfigure the cut;
- Each part is numbered, the instructions indicate the location of assembly;
- Adjustments and modifications are excluded, time is spent only on the process of assembling the house;
- Check prices at wholesale stores per cubic meter of long profiled timber. It turns out that the cost of a similar unit of a house kit is the same or up to 10% more expensive - this is where the benefit is hidden;
- A set of timber for a house with an area of 120 m2 will cost approximately 650,000 rubles, for 190 m2 – approximately 950,000 rubles;
- The average assembly cost will be 25% of the cost of the timber. Manage the reserve fund at your own discretion;
- The thickness of the log house will be offered according to the climatic zone: the common size of timber 150 x 150 mm is suitable for Voronezh. In Siberia, wall thicknesses less than 220–250 mm are unacceptable;
- Installation will speed up twice;
- The material is 100% treated with antiseptic and fire retardant.
100% complete from base to ridge, this is the construction service
Video:
Ready-made house kits from the manufacturer
How to go around windows and doorways with siding
The technology for designing window and door openings is almost the same, only ebb sills are additionally installed on the windows. For the installation of slopes, platbands, J-planks or, for large depths, a set of short pieces of panel are used .
To install all the elements, a sheathing of wooden or (better) galvanized metal strips is pre-installed. Installation of extensions is carried out based on the installation depth of the window or door.
For blocks installed in the same plane as the panels, platbands are used . In other cases, a J-profile or pieces of panels cut to length are used. To install, first a finishing strip is attached around the perimeter of the box, and the corner joint is formed with a regular corner.
Installation of window openings
Advantages of I-beams
I-beams are a type of wooden floors. During the manufacturing process, they acquire a T-shape on both sides. That is why this beam got its name I-beam. In order to make such a building material at home, it is necessary to use laminated veneer lumber. Due to its size, this beam has very light weight and excellent strength characteristics. I-beams are the optimal material for the construction of low-rise structures.
Such wooden floors ensure the lightness of the entire structure. In addition, they will help save quite a significant amount of money and precious time.
Almost all people who have used floors of this type note the visible advantages of such beams:
- eliminating the audibility effect that is usually inherent in wooden floors;
- there is practically no deformation, which is inevitable over time;
- thanks to the dimensions, which are clearly fixed, extremely convenient to use;
- has a high degree of strength;
- perfect for completely different surfaces, such as ceilings, floors or walls;
- very reasonable price;
- There are almost completely no various reactions to water, therefore, such an overlap does not rot;
- this material has low mass;
- high degree of wear resistance;
- reduced wood consumption;
- when applied, additional costs are almost completely minimized.
And these are not all the characteristic features that can be emphasized by reading the reviews of a large number of people.
Many people who decide to build a structure from wooden floors prefer to purchase materials produced in a factory. But few people know how this process occurs. Initially, a milling machine is used in production; with its help, the necessary trench is made, as well as grinding.
After this, the product is sent for OSB cutting, this allows you to most accurately cut parts with the required parameters. The next step is gluing the resulting parts. Finally, a specialized press is used. Agree, if you wish, you can complete this process yourself without much difficulty.
It is quite possible to make this building material yourself. To do this you need to prepare:
- special timber;
- roulette;
- a good circular saw;
- high-quality wood glue;
- oriented strand board or OSB;
- channel;
- clamps;
- sandpaper.
In addition, if you decide to make such a beam on your own, then it is important to strictly follow all the stages and sequences of performing this work:
- Carefully select the required bars and perform the calculation. It is important to take a fairly large beam, thanks to this you can ensure the reliability and strength of the structure being built.
- Next, you need to cut out the upper and lower parts from these bars, provide them with a special groove that will run through the center of the product.
- To make these wooden floors, it is best to use a powerful circular saw; this will allow you to complete the work with the highest quality and efficiency.
- Properly set the desired depth of the groove, most often it is ten percent of the total length of the oriented strand board; if you follow this simple rule, then it is possible to achieve ideal fixation.
- It is extremely important that the furrow does not have any serious defects, this will significantly save time and avoid difficulties in the future.
- Cut the beams and also sand them.
- Apply special glue to the trench, then immerse the slab in it.
- Clearly fix the stiffener.
- After the 8th point, start pressing the I-beam.
- Pressing usually occurs using a special press, but you can also use a channel. This procedure will help to compress the resulting beam well.
- Leave the resulting wooden beam for some time for the glue to dry completely.
We suggest you read: How to calculate the angle of a roof
It takes approximately half an hour to complete this work, but if you are making a large number of wooden I-beams, then over time the whole process will take no more than 10-15 minutes.
An I-beam, like a wooden floor, has a considerable number of advantages over other materials; in addition, each person can save money and easily make it themselves, which significantly reduces material costs for construction.
Floors between floors, basements or attics are structurally arranged according to two schemes - a beamless floor (based on the use of a monolithic slab), and a beam floor (wooden floor beams are used). They make ceilings to separate interfloor spaces, as well as to separate rooms from the basement and attic. Beams can be made from various materials, such as wood, cast-in-situ reinforced concrete or metal purlins.
Flooring device on wooden beams
Installation of finishing strips
The finishing strip completes the paneling, covering the top edge of the panel. To install, the last panel is cut to the required width and the edge is tucked under the curl of the finishing strip.
The presence of such an element protects the canvas from rainwater entering from above . Installation of the finishing strip is carried out simultaneously with the installation of the top panel.
IMPORTANT!
All self-tapping screws are loosely tightened so that the parts can move with temperature changes in size. To avoid corrosion, self-tapping screws must have a protective coating (galvanized) , with a head diameter of at least 1 cm.
Installation of finishing strips
Care
You can wash wood siding with water using soft brushes. Detergents should be gentle and not contain aggressive components. Even the simplest detergent should not remain on the surface of decorative panels for more than 10 minutes.
Additional elements
The water stream is directed from bottom to top, and not vice versa. Wood siding must be carefully protected from solvents. Scratches and chips should be painted over with paint that matches the tone. You can pre-prime the area.
If a significant area is damaged, it is better to replace it with a new one, carefully choosing the shade.
The installation of the fence is shown in the video below.