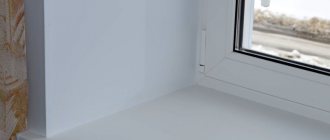
The technology of lap siding was known to our ancestors many centuries ago. True, in those days it was called much simpler - covering external walls with unedged or edged boards. Currently, lumber manufacturing technologies have significantly improved, special impregnations have appeared to protect wood from pests and putrefactive processes, and varnishes and paints with unique performance properties are used to finish external surfaces. The performance characteristics and appearance of the boards have improved significantly, which makes it possible to give facades a new look.
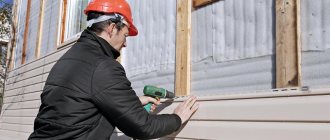
How to install lap siding (in this case, fiber cement)
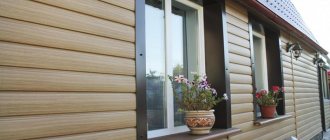
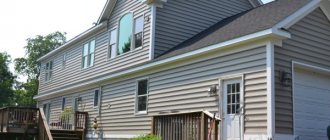
Overlapping vinyl siding
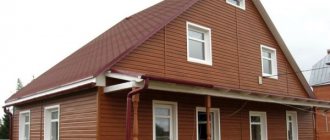
Lap siding
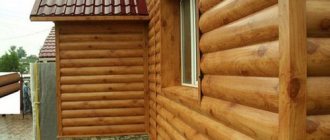
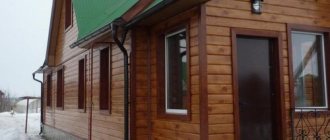
Traditional wood shiplap siding
For Russia, the traditional wooden material for cladding is edged boards or, at best, lining.
In America, a different approach was used to protect the facade - the walls were sheathed with special lumber, similar to clapboard, but not having a rectangular profile, but a wedge-shaped one. It is no coincidence that the profile of wood siding is wedge-shaped. It performs the following functions:
- A neat, beautiful surface - it seems that the planks are stacked on top of each other. If desired, they can be painted in any color or simply varnished.
- Reliable protection of walls from environmental influences. The tight fit of the panels protects from dust and wind, and due to the slope, water flows down the siding.
- Another function is to reduce the load on the wall. Wooden siding is lighter; it does not require massive sheathing; fastening is carried out using self-tapping screws.
The main disadvantage of the “American” is the need for additional processing. To extend the life of wooden siding, it should be treated with an antiseptic, varnish or paint.
Types of material
There are many types of siding made from different materials and for different purposes:
- from artificial materials - vinyl, acrylic, PVC;
- made of wood - lining (traditional or euro), “American”, planken;
- made of metal - aluminum, galvanized steel, anodized or coated with polyester, pural;
- from cement - fiber cement and asbestos cement.
The first two types of materials are used for cladding walls; metal and cement types of siding are universal - they can successfully withstand increased loads in the basement of buildings and are used for cladding facades and interiors.
There is no single standard for the sizes of lamellas, as well as a method of fastening. Each manufacturer has its own size range, type and design of supporting profiles and guides.
To fasten lightweight panels - vinyl, acrylic, wood - wooden beams are most often used, although manufacturers often have special profiles. Metal siding and heavier panels made of fiber and asbestos cement are mounted on metal profiles.
All types of siding cope with the main task - protecting walls from bad weather, they differ only in durability: if cheap types of vinyl siding will last 3-7 years without changing color, and the lining will have to be dismantled after 2-5 years for impregnation with an antiseptic and protective painting, then metal , fiber cement and expensive types of acrylic panels can last up to 25 years.
Gable trim
The house looks aesthetically pleasing only if the siding is perfectly vertical (if, of course, this particular cladding option is chosen). To ensure accurate geometry, J-profiles (optionally, internal corner profiles) are pre-installed along the entire perimeter of the gable. Using a plumb line and a tapping cord, draw a strictly vertical line from the ridge, which will be the axis of symmetry. Laying usually starts from the center, using an H-profile or a pair of symmetrically located starting elements. As an option - laying from the corners to the middle (Fig. 51).
To save time and increase the accuracy of installation, a template is made that follows the angles of the roof. To make a template, use a couple of pieces of siding, exactly as described in the section on covering gables with horizontal siding.
Rice. 51. Sheathing gables with vertical Deke siding: a – finding the vertical axis of symmetry; b – making a template; c – installation “from the center” d – transition from horizontal to vertical siding; 1 – J-profile; 2 – roof; 3 – roof; 4 – plumb line; 5 – template; 6 – a piece of siding attached to the slope; 7 – vertical lining; 8 – apron made of galvanized iron; 9 – starting element; 10 – edging; 11 – siding.
Installing siding from the corner First, the installation location of the first siding panel is determined. To do this, you need to measure distances along the bottom line of the pediment that are multiples of the width of the vertical panel. The measurement is taken from the chalk vertical line to the corner. The process is repeated until the distance from the corner of the J-profile is less than the width of the panel. This point is marked with a marker and a vertical line is drawn parallel to the original axis. This line will mark the location of the edge of the first untrimmed panel. The remaining distance to the edge is measured and the siding is cut.
Installing siding from the center The first operation is the installation of the H-profile, into the gutters of which the starting profiles are inserted, after which the rest of the installation is carried out.
During the installation of vinyl siding, at least every 3 panels, it is necessary to check the verticality of the installation, and when installing from a corner, you must also measure the distance to the center center line. The latter is necessary to ensure that when the installation reaches the top of the gable, the center of the panel will be in line with it. If deviations appear, it is necessary to make adjustments, for which the panels are shifted within the castle.
At the points where vertical siding enters the gutters of J-elements or internal corner profiles, Stroymet specialists recommend leaving a temperature gap, which is in the range of 1–3 mm in the upper part, and 1–6 mm in the lower part. When switching from horizontal to vertical installation, an edging profile is used (Fig. 51d).
- Color range and assortment
- Equipment and tools
- The need for additional elements, soffits
- Basic rules for installing siding
- Setting the starting profile and angles
- Installation of window and door frames
- Installation of H-profiles and siding panels
- Installation of J-profile
- Installation of horizontal and vertical siding
- Installation of soffits and J-bevel
- Arched window frames
- Vinyl siding care
Home > Installation Instructions > Siding Docke >
Preparatory stage
We decide on the amount of material. To correctly calculate the components of the future facade, you need to know what shapes there are and the produced dimensional standards for guides and panels.
- Vinyl panel. It is a polyvinyl chloride strip with a length of 3 m to 3.85 m and a width of 203-254 mm. When calculating the usable area, approximately 15 mm of the panel width, which is occupied by technological holes for fastening, is not taken into account.
There are two ways to count the number of stripes:
- First, we measure the total area of the building's facade, minus the area of door and window openings, and divide the resulting value by the total area of one vinyl panel.
- The second method is more labor-intensive, but economical. We draw up a sketch of the building, all the walls of the facade separately. We draw each panel on the drawing, based on its dimensions, and place the scraps in those places where they will fit in size. We add 5 percent to the final result and get the desired value.
- External and internal corners. The standard length of the element is 3 m. The quantity is calculated by measuring and summing the dimensions of the internal and external corners of the house, followed by dividing by the length of the selected model.
- Starting strip - used to start finishing. The required length corresponds to the perimeter of the building.
- Finishing - its quantity is calculated from the lengths: for a window strip = two heights and one width for windows (if they are recessed into the wall after finishing with siding), for a wind board = the length of the roof eaves + the length of the slopes on the side of the gables, if the wind board there is wide (in rare cases) and the length of the ends of the lining of those walls with panels that do not have pediments.
- J-profile is a universal and most popular profile. Used to complete the installation of panels around the perimeter of window and door openings, lining roof overhangs, and also as a finish on the gables of a building. The quantity is determined by measuring the lengths of the planes to be faced.
- H-connector. Serves for joining the main panels along the length. Gives the connection appropriate rigidity and decorates the joint. Purchased in quantities based on the size of the connecting seams.
- Window strip - necessary for finishing windows that will be recessed into the wall after finishing the facade. Calculated based on 1 width and 2 heights of windows + it is necessary to take into account the distance for trimming and connecting them at the corners, this for standard parts is: for pieces of planks in height + 7.5 cm in length to the piece and 15 cm in width for a piece.
What is a classic "American"
Unlike traditional Russian or Eurolining, the classic American one has a wedge-shaped shape, which facilitates installation: thanks to the profile, a constant angle of inclination of the front surface of the panel is maintained, and the amount of overlap does not affect the angle of inclination. In the upper part of the lamella there is a narrowed tenon, in the lower wide part there is a groove corresponding to the tenon. During installation, the tenon of the lower board is inserted into the groove of the upper one, thereby preventing water from flowing into the joint.
American lining is made from ordinary naturally dried and heat-treated wood; they differ in size. The width of the lamellas made of heat-treated wood is 8.5 cm, the thickness in the thickest part is 1.8 cm, the length of the panels made of coniferous wood is up to 3 m, from birch - up to 2 m. The lamellas made of raw wood without heat treatment have a thickness of 2 .8 or 4.5 cm, width 14 or 19 cm, length up to 6 m.
Installation of the “American” is carried out with nails or self-tapping screws on a wooden frame made of 4.0 x 5.0 cm timber in increments of 50 cm. Installation can be carried out either from the bottom up or from the top down.
The advantage of American products is their extended service life, waste-free production, and ease of installation. The downside is that the layout is only horizontal.
Common mistakes when installing vinyl siding:
Installation of siding without sheathing directly on the wall.
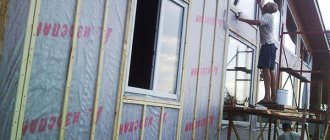
In America they do this; they simply attach the panels to OSB boards, which are used to cover frame houses. But in Russia the climate is different; for example, in areas with a humid climate, this definitely cannot be done. There should be a ventilated gap of about 20-30 mm between the siding and the wall, through which condensation will be removed through the soffit in the roof. It is also very rare that the walls of a house are not perfectly smooth, so lathing is necessary.
Curved subsystem (frame) for siding.
The main task of the frame is to level out the unevenness of the building walls and provide a ventilated gap. Therefore, the frame for the siding must be perfectly smooth, since after installation of the siding all irregularities will be easily noticeable.
Wooden frame without antiseptic.
Siding can be installed on a metal or wooden frame. If you are installing a wooden frame, then you must treat all the bars with an antiseptic to prevent the growth of mold and mildew.
Large panel mounting distance.
A self-tapping screw or nail is installed every 300-400 mm, always in the center of the hole. Increasing the fastening distance can cause siding to sag and deteriorate the appearance of the facade.
Fully screwed screws or driven nails.
Vinyl siding expands when heated. To avoid deformation of the siding during linear expansion, oval slots are provided on each panel in the upper part. Therefore, it is necessary to fasten it strictly in the middle of the oval hole and not tighten the self-tapping screw completely (do not drive the nail all the way in), so that the siding panel moves freely in the horizontal plane. Then waves will not form on the facade in the summer.
Use regular screws and nails.
It is imperative to use galvanized screws (nails), since the fasteners should not be subject to corrosion. When using ordinary self-tapping screws (nails), over time, rusty streaks appear on the facade and subsequently the panels may collapse.
The locks between the panels are not latched.
There are so-called locks on each panel at the bottom. When installing panels, each subsequent panel is locked with a lock to the previous one or to the starting strip. At the same time, a characteristic click is heard. If the lock is not fully latched, then when heated by the sun, the connection opens and the panels move apart. If you make such a mistake, you will have to disassemble part of the facade to eliminate it.
Installation of panels close to planks and corners.
When siding panels are inserted into additional elements, it is imperative to leave a gap for thermal expansion: 5-6 mm in summer and 9-10 mm in winter. If there is no room for contraction or expansion, then your panels may “lead” as the temperature changes. Therefore, it is necessary to take into account the temperature and climatic conditions of the area during installation.
Installation of siding without a connecting strip (H profile).
The siding is mounted without a connecting strip (H profile), with an overlap. After 2-3 years, cracks may appear at the junction and the planks may diverge. Therefore, it is better to avoid various advice from installers who claim that this type of installation is acceptable.
Incorrect calculation of the number of panels and additional elements.
Before purchasing material, think thoroughly about the design project and make a drawing of the house, indicating ALL dimensions on the wall (windows, doors, pipes, protruding elements, etc.). Better yet, order a design project for your home from some company. What is the drawing for? If your supplier calculates the material consumption without visiting the site, then he will calculate it according to your drawn diagram and all errors will lead to excessive or insufficient purchase of material. So take this seriously.
When counting material, add + 10%, do not count “back to back”. For what? Otherwise, you will completely ruin 1-3 bars, and you will have to go after them again. The panels may no longer be from your batch, and as a result there will be a “different tone” in color, i.e. new planks may be slightly lighter or darker in shade.
Now you know the main mistakes when installing siding, I think this will help you during construction. We wish you a pleasant renovation and a beautiful facade for your home!
Comparison table: which profile to use for siding?
For a more clear comparison, we have summarized the advantages of different types of lathing in a common table.
| Wooden sheathing | Metal sheathing | Plastic fastening system | |
| Strength | Average strength | The most durable option | The strength is less, but sufficient to ensure high-quality fastening of the siding. |
| Water resistance | Absorbs moisture. And this threatens the appearance of mold, mildew and cracks after drying. | Resistant to water provided the protective zinc layer is intact. If it is damaged, the profiles will rust. | Waterproof profiles. |
| Resistance to mold and mildew | Not stable. Requires treatment with protective compounds. | Stable | Stable |
| Fire safety | Combustible material | Non-flammable material | It does not support combustion - that is, it goes out on its own if it is not exposed to a direct source of fire. |
| Installation speed | Installs quite quickly. | Installs quite quickly. | It takes a little longer to install than its analogues. |
| Easy installation for beginners | All planks must be made and adjusted by hand. It is important to carefully study the installation instructions to avoid making mistakes. | Quite easy to install. But you need to carefully study the installation instructions so as not to make mistakes. | Quite convenient to use. Helps to avoid common mistakes that affect the durability of the facade. |
| Can be used on a plinth | Not recommended | Yes | Yes |
| Life time | Depends on the quality of the wood. As a rule, does not exceed 15 years. | 25-30 years, provided that the protective zinc layer is not damaged. | 25-30 years old. |
| Price | The cheapest | Most expensive | Average. Depends on the siding chosen and the configuration of the house. |
So, each material has its own characteristics. What profile for siding can be called optimal? Much depends on the preferences of the individual installer.
If you want to save money and you have a sufficient amount of quality wood, you can install wooden sheathing.
The metal frame is the most durable, but also the most expensive. Does it make sense to overpay? Question.
The plastic sheathing requires some getting used to. But it fully matches the panels and helps to avoid unpleasant mistakes. Therefore, for a beginner, perhaps, it can be considered optimal. By the way, if the siding is installed with errors, it is removed from the manufacturer's warranty. This also needs to be known and taken into account.
Overlapping installation
As is known, vinyl sading has a fairly large coefficient of linear expansion, which is highly dependent on temperature. As can be seen in the video showing incorrectly installed facades, this property causes the panels to diverge at the joint, which will certainly lead to water or snow getting under the facade cladding with the formation of places of high humidity that negatively affect the “health” of the load-bearing wall of the building.
To avoid this problem, the panels are joined with an overlap of at least 25 mm and a thermal gap between the locking strips of 6 to 20 mm, depending on the outside temperature at the time of installation. Compliance with this condition, together with the movable fastening, will avoid thermal deformation and divergence of the locking connection between the rows.
When making overlapped siding connections, you should remember that the bottom or top rows of cladding must overlap the joint, so you should not connect the rows on top of each other, except in cases where the siding is fixed to sheathing strips specially mounted at the place where the panels overlap.
When installing siding in areas of window or door openings, overlapping joints should be avoided to ensure the tightness and strength of the cladding, and the joints should be moved to another location on the façade.
Another factor that must be taken into account in the case where the siding is overlapped and such connections are quite numerous over the entire area of the facade is the direction of illumination that prevails during the day. In order to properly hide the seam, the installation of the top panel formed during joining should be carried out from the shadow side in relation to the bottom.
Then the sunlight directed at the joint will not cast a shadow from the joint, which ensures its camouflage on the surface of the facade. With the correct direction of light, the overlapping siding joint is practically invisible in a photo with maximum magnification, and even more so when viewing the surface of the facade from a certain distance.
It is also necessary to overlap siding in cases where panels are installed in places where cables or pipelines exit, the dismantling of which is associated with certain difficulties, and sometimes is simply impossible. The parts of the facades with outgoing pipelines shown in the photo are lined with vinyl panels using an overlap joint.
If external objects hit the horizontal strip, it is from this place that the cladding should begin, cutting out the siding to the required depth to maintain thermal gaps. The cutout of the top panel is mirrored, which allows you to hide the joint and lead the pipe or cable through a neat oval hole, which can be covered with a decorative element.
Conclusion
If you watch how to join lap siding in a video detailing all the intricacies of this complex technological operation, you can use this knowledge when doing the work yourself or to monitor the actions of the builders so that the end result is a high-quality, durable and beautiful finish.
Useful tips and tricks for tiling beginners
Recommendations for beginning craftsmen on how to perform the work:
- Exterior finishing elements to protect against water should be installed from bottom to top or from left to right.
- Panels made of metal or vinyl are installed using fasteners with a thermal gap that compensates for changes in the size of parts depending on the temperature of the material. When using galvanized nails, a gap of 1 mm is required between the edge of the head and the surface of the part. During installation, fasteners are placed in the center of the oval holes.
- When installing a layer of vinyl siding, do not drill holes in the panels. Screws or nails are installed into the sheathing at a right angle; when tilted, the mobility of the coating layer relative to the base is disrupted.
- After installing every 3 finishing panels on the sheathing, check the position of the upper edge of the part with a level. Deviations of siding from the horizon are not allowed.
- The lock between the panels should ensure tight contact between the parts; excessive force should not be applied during installation.
- There is no need to seal the joints between the planks with sealants or other materials, since different coefficients of thermal expansion lead to warping of the finish and make disassembling the structure difficult.
- Between the construction of a house made of logs or timber and the procedure for installing the frame and layer of siding, at least 5-7 months must pass for the walls to shrink.
The strength and tightness of the finish, which can last up to 50 years without repairs (if vinyl panels are used), depend on compliance with installation technology and careful work. It should be remembered that thermal gaps are required between the elements. Violation of the rule leads to warping or destruction of the panels and frame. If the home owner does not have the skills to conduct construction work, it is recommended to invite a team of installers, which will reduce the cost of finishing the house with siding.
Laying technology
Installation of siding begins with the creation of sheathing, laying insulation, and vapor barrier. The pitch between the vertical bars is maintained at 50–65 cm. The horizontal bars are calculated based on the size of the material.
If the rules are followed, the seams are difficult to notice
Stage 1. Sequence of actions
- The starting bar is placed above the ebb/foundation. Fixation is done with self-tapping screws in the center of the fasteners. The screws do not tighten flush, leaving free play for the material to expand.
- If there are complex/internal corners, start working from these places, installing the corner profile, corner elements to hold the panels. A special overlay will be used for external corners.
- The issue with the direction of the lining is being resolved, that is, move towards the seam: first, the lower bar covering it.
- The alternation of joints is determined. Calculate so that the offset is made through two panels.
- To perform proper alternation, some elements will be trimmed to length.
- Checkerboard docking must be performed symmetrically.
- The fastening lock is cut to the depth of the joint. The front part is not affected.
The principle of installing overlapping siding
Stage 2. Installation of the first panel
The process of attaching siding begins with installing the starting profile. Next, the lower part of the first panel is inserted into the profile, and the upper edge is fixed to the sheathing with screws/nails. Start fastening from the middle, gradually moving towards the edges.
In the place of fastening with fittings, leave 6 mm for “walking/expansion” of the material. If work is carried out during the cold period, the gap should be larger (10–12 mm).
Temperature clearances are calculated when installing fasteners/starter molding
Stage 3. Installation of the attachment part
The overlay panel is aligned horizontally, adjusted to match the cutouts and attached over the first plank with an overlap.
Reinforce under long sections to eliminate sagging. Nail a piece of block/board in the right place directly to the wall.
Carry out the fastening slowly, carefully adjusting each part, then the joints will be less noticeable. The finishing strip is installed before installing the last row
Stage 4. After installation
A sealant will help prevent the penetration of dust/moisture in the areas of the linings. Choose a special type of siding; it is elastic and absorbs the “walking” of the planks by 50%, for example Tytan, Weather Master.
Seal the panel seams with sealant.
Using the overlay installation method, you can easily choose the desired color of siding panels, do the work yourself, and save money. If you follow the rules, the seams will be invisible.
How to connect siding without a connecting strip?
Connecting panels without a connecting strip. (photo No. 4)
The connecting strip ensures the tightness of the joints and also gives a neat appearance to the facade. Technologically, this is the optimal solution that ensures the integrity of the finish.
However, in some cases, siding can be connected without an H-profile. This method also has a number of advantages:
Saving on materials.
On the one hand, there are no connecting strips - there are no costs for them. On the other hand, the savings may be questionable. After all, the consumption of the panels themselves will increase.
Aesthetic appeal.
The connecting strip is not always identical in color to the siding. In such cases, it attracts even more attention.
But it’s worth considering that installing overlapping panels also has a number of disadvantages (besides the fact that this method is not airtight):
1. From a certain angle, the gap between the panels becomes visible.
Lap-jointed siding on the front of a house. (photo No. 5)
2. As the temperature fluctuates, the cracks will become more or less noticeable.
3. If the installation technology is violated, the panels may move in waves.
To minimize these disadvantages, you need to follow several rules.
1. Siding connections along the length should be made not in one line, but in a checkerboard pattern.
The panels must be connected in a checkerboard pattern. (photo No. 6)
In the illuminated area, the joints are more visible than in the shadow. Therefore, the overlap must be done in such a way that light does not fall on the joint.
The joint should be as far as possible from the openings. First of all, doors, since strong vibration when it slams shut can cause the gap to widen and the panels to become deformed.
Secrets of siding durability
How to choose a material price-quality At first glance, installing overlapping siding is not difficult.
And installation of siding, unlike more expensive alternative materials, can be done with your own hands (see How to work with siding: learn with us). However, the quality of such amateur activities, as a rule, leaves much to be desired. Some tips:
- By turning to professionals, you are guaranteed to have an attractive appearance for your home for many years to come. The compiled estimate for future work will allow you to take into account all the subtleties and nuances that you may not be aware of.
- If we compare the installation of metal siding, then the installation price is about 350-400 rubles, and the service life is half that of regular vinyl.
- The cost of installing basement siding is not much higher than installing vinyl siding. But the cost of the base panels themselves is about a thousand per square meter (for reference, a square meter of ordinary siding costs about 200-300 rubles).
Façade siding is expensive, but the appearance of the home is significantly better than homes finished with conventional herringbone siding. And in order to choose the right material, the video in this article will help you.
Installation of siding panels around objects
If there is any element on the facade of the house that cannot be dismantled, if the obstacle is small, the siding during installation is cut to the appropriate size, taking into account a temperature gap of 6 mm. If it is necessary to bypass a large protruding element, then frame bars are attached around the perimeter, a finishing profile is mounted, then ordinary panels are mounted.
Fastening around the perimeter of openings
To fasten the frames around the openings, bars are packed along the perimeter of the inner and outer parts of the opening. A finishing or j-shaped profile is attached inside the opening, into which the opening framing profile is inserted, pre-cut to the required length and width. The window profile is attached with self-tapping screws to the facade frame of the opening. On the upper and lower frame strips, tongues or ears are cut on the sides, which after installation are folded onto the side panels.
Adviсe
- Do not cut a large volume of profile based on preliminary calculations. Errors may occur. Therefore, it is better to prepare the material in parts, for each section separately.
- or screw screws through the siding panel Use only designated holes.
- When fastening panels , use nylon washers - they will provide resistance in strong winds.
Finishing with siding is the second life of a house, which has retained its strength and received a new aesthetic appearance.
Starting profile: install it correctly
Siding installation consists of several stages and includes the installation of many components, including starting and corner profiles, moldings and much more. This process occurs along the lines of walls, windows and roofing.
Installation of Deke siding consists of several key points:
- Choice of technology;
- Setting up a starting profile;
- Installation of external and internal corners;
- Covering corners other than rectangular.
How to choose the right technology?
First, determine the type of base (Fig. 15). It can be sunken, protruding and even. The first is that the base “sinks” into the wall, which slightly overhangs it. The second - the wall is narrower, the third - they have the same width. Facade cladding with a flat and sinking base is carried out using the same technology, with a protruding base - using a slightly different one.
Sometimes the base can change its appearance, turning from protruding to sinking. This transformation is possible due to the thickness of the sheathing. If you have retained the protruding plinth, then you need to install a vinyl molding under the starting panel. In this case, the base can be left untouched and covered with base siding.
Rice. 15. Types of socles: a - sinking; b - smooth; c - protruding (aligned with the wall by the sheathing); g - protruding with ebb along the top of the sheathing; 1 - wall; 2 - sheathing; 3 - base; 4 – vinyl deck; 5 - cement screed
Docke siding starter profiles are used not only along the bottom of the wall of a building. Starter strips successfully cover the roof gable, which is especially important with an attic covered with siding and open facades. They are ideal for installation on roof gables and at the beginning of subsequent floors when a design or engineering project requires a visual separation of the cladding. Installation is carried out along the bottom line of the wall.
Lathing for basement siding
If this type of cladding is planned to be used according to its name, that is, for cladding the base or under-pile space, it would be better if the siding sheathing is positioned horizontally. This refers to situations where the distance between the top and bottom of the plinth is within 20-50 cm. In the case of covering large surfaces, such as walls or gables, it is better to use the vertical arrangement of the slats.
For basement siding, it is more preferable to use a metal profile, at least when it comes to the lower part of the structure. However, cases of using wood also occur due to the well-known positive qualities of this material.
The method and procedure for installing siding depend on the presence of insulation Source megapolis-sc.ru
Methods for arranging the structure depend on the specific situation and are determined locally, preferably by a specialist who will be directly involved in the installation.
How to avoid mistakes: 7 rules
Direct connection of panels, without a connecting strip, has its own characteristics. A guarantee of a good result is provided by following certain rules:
Installation is carried out only at positive air temperatures, not lower than 10 °C.
Otherwise, large gaps will be difficult to set correctly.
The overlap of panels must be strictly observed in the interval of 20–30 mm.
The top panel must be clearly aligned horizontally, achieving a single continuation of the bottom part.
Trimming of nail strips/panel locks is mandatory.
As a result, the required distance is formed, allowing for an even overlay and compensation for expansion moments.
The staggered arrangement helps to level out the overlap areas.
A stop is placed under the end of the interior siding panel.
A timber or board is stuffed, eliminating the possibility of deflection.
To reduce the visibility of the seam, no physical effort should be made.
Bending the end, pressing, or pulling on the lock will damage the material.
Try to remove joints from doors and corners. Start laying from these areas, this way the overlay will be placed at a certain distance
This is especially important in areas of doorways, where the wall vibrates when slammed shut.
Lathing for corrugated sheets
In a situation with corrugated sheeting, the choice of material for the sheathing depends more on the purpose of the future structure. For example, if you plan to build a fence, and especially a gate, it is better to pay attention to a square metal pipe. If it is a roof frame, a wooden beam will be more preferable.
The pitch of the sheathing under the corrugated sheet depends on the requirements for the future structure and the thickness of the metal. The standard distance is 20-30 cm (for roofing), while the fastening step on each profile depends on its cross-section and is usually 40-50 cm. A distance of 30-40 cm between each batten will be sufficient even for relatively thin corrugated sheeting ( 0.35 mm).
If the material is used as a covering for walls or arranging a fence, you need to use thicker grades of corrugated sheeting (0.5 mm). The distance between the beam or profile, as well as the step for fastening, in this case will be 50-60 cm.
Siding is one of the most popular types of facade finishing
PVC siding is a polymer panel that is mounted on a special sheathing. It is very light and thin. The thickness of the panel, as a rule, is about 1 mm (with the exception of foam siding up to 14 mm thick).
Siding is easy to install and is suitable for finishing almost any house up to 3 floors high, regardless of the type of foundation. A wide selection of colors allows you to experiment with facade design. Separately, it is worth highlighting the foam siding, which is installed in a herringbone pattern and imitates the appearance and texture of wooden trim, as well as a block house that follows the shape of a log house facade.
How to connect siding to a façade panel?
I have decorated a huge number of houses in Moscow and the Moscow region. Of course, with polymer materials. Most of it is lined with siding, the smaller part is lined with stone or brick façade panels. Recently, owners of country estates have increasingly begun to ask me whether it is possible to combine these two materials simultaneously on the facade? In this article I will reflect on this topic.
Basement siding and regular siding - is it possible to combine
First of all, I note that this question is difficult to answer unambiguously. Of course, everything can be combined on the facade - even metal and wood. Another thing is, will it be appropriate? For ease of reflection, let's talk about this on two levels:
- combination in the context of installation or connection of facade panels and siding on one wall
- combination as highlighting some features of the building by facade panels when using siding as the main material - that is, let's consider this issue from a design point of view.
Is it possible to combine a façade panel and siding?
You will not be able to connect the facade panel with the siding for the simple reason that they have completely different locking principles. Each subsequent, upper, row of facade panels under the stone is mounted by joining with the lower row. To dock, you need to press on the panel. Siding, on the other hand, is installed by “tensioning,” that is, moving upward until it clicks when the panels are connected with locks.
But don’t be sad, because finishing elements for regular and basement siding imply their use for joining dissimilar materials together. Thus, if you want to visually highlight the base of the building with a facade panel, and decorate the main part of the wall with siding, just use this scheme.
Horizontal joining of the basement under the stone and D4.5:
It's quite simple:
- First, we install two J-profiles on the “imaginary” plinth to secure the panel. Their distance should be equal to the height of the panel.
- The pencil case is inserted into the resulting “pocket” - that is, both the lower and upper parts fit into the grooves of the J profile. There is no need to screw it in with self-tapping screws. They will hold on securely anyway. Thus, we highlighted the basement of the house using a facade panel.
- Directly above the top J=profile we install the starting strip (or starting profile) for regular siding.
- We insert the siding panel into it using gentle (!) tension. and screw the top part.
As you can see, everything is quite simple. This way you can easily learn how to join not only siding and facade panels, but also completely different types of materials. Now let's consider the second installation option - vertical docking. There is nothing complicated here either. Look at the diagram:
So, we see a wall, one part of which is finished with vinyl siding, and the other part is covered with polypropylene panels to look like stone.
- We install strips for mounting facade panels. As you may have guessed, this is our favorite J-profile. It will be at the bottom as a start and on the left as an end strip.
- We screw the initial profile for regular siding at the bottom.
- On the right we fix the J-profile for siding (due to the different thickness of the panels for stone and opal wood, their J-profiles differ in size).
- We mount the panels on the facade, inserting them into the edges of the planks.
This work does not take much time for a professional siding installer. If you do not have sufficient experience, look at the diagrams carefully and remember the logic that I have reflected.
Combination of siding and facade panels (photo)
As I wrote above, the second aspect of our topic today is the aesthetic side of the combination of PVC siding and facade panels. Here, as they say, it comes down to taste and color. There are two completely opposite opinions:
- In no case should they be combined, since this is not customary in traditional construction.
- they must be combined, because this will emphasize the individuality of the building and its geometry.
Well, I am an adherent of the second point of view. Indeed, the trend of recent years in absolutely any area affecting aesthetics is to use the principle of eclecticism, that is, combination.
Thus, to realize your idea, you just need to look through the photographs found in search engines for a query that duplicates the subtitle of this part, or simply come to a retail outlet and attach two samples to each other. If you like it, go for it!
Well, let me remind you that the key to the durability of the facade, no matter how you want to see it, is proper installation. If you are ready to entrust siding to the professionals, call us! We will do everything very cool and beautiful. You will find prices for siding work in the “Price” section.
When to overlap siding
Overlapping panels at each other at the edges is used for certain purposes:
- Reduced material consumption. This is explained by the fact that the parts do not need such extensive trimming as when installing an H-profile.
- Creating a single visual plane. The coating has no separation. This result can only be achieved with correct and precise docking. But the effect will be observed only from the selected side, most often the street.
- Achieving better decorativeness. The fact is that not all manufacturers produce a complete list of additional elements of the desired shade; often components are only one or two colors (white or brown). Accordingly, the joining area stands out sharply against the background of the overall surface texture.
Reduced costs. Self-installation reduces the cost of an additional profile. If the labor of hired specialists is used, then the cost of installing the joining strip and adjusting the panels to the required size is deducted. But invited specialists must have appropriate qualifications.
You can also use the overlap technique if the necessary products are not available. Although siding (especially vinyl) is widely available, it is not always possible to purchase additional siding. And sometimes it is not practical to go to another city to get the necessary element.
This method also has some disadvantages:
- A significant drawback is that a noticeable joint is formed at the junction points. If everything looks beautiful from the direction of installation, then from the opposite direction it may look completely different. Upon closer inspection, the gaps appear to be quite large. After the coating shrinks, they become less noticeable, but do not disappear.
- When the house is located near the roadway, the joints can fill with dust and dirt.
- Violation of the installation technology will lead to heaving of the connecting sections.
Attention! When choosing between using a special profile and overlapping installation, you need to weigh the pros and cons, as well as evaluate your own capabilities
Questions and answers
Let's look at frequently asked questions regarding shiplap siding.
How big should the overlap be?
One of the advantages of this method of wall finishing is that each master chooses the amount of overlap individually. Due to this, you can accurately adjust the position of the rows according to the height of the window openings; there is no need to cut them to width. Any trimming worsens the appearance of wall surfaces. But the amount of overlap must be selected not only according to this parameter - much depends on the method of fixing the boards. If you want to make the carnations invisible, then two conditions must be met.
- The nail heads of the previous row should be covered by the next board.
- The fastening should keep the lumber from warping.
Based on such requirements, practice shows that the boards should overlap by about a third of the width; one nail holds two at once. But an increase in overlap automatically leads to an increase in material consumption, and accordingly, the cost of work increases.
The amount of overlap is selected individually
On a note! There is one more important point. If you have an “American” one, then increasing the overlap does not affect the angle; if the board is flat, then the greater the overlap, the farther the second end goes from the wall.
How to attach nails - in a row or in a checkerboard pattern?
A very difficult question with no clear answer. Each method has its own advantages and disadvantages. But practitioners still advise driving nails across the entire width of the boards in a checkerboard pattern. In this case, one row of hardware will be noticeable, but the likelihood of warping is almost completely eliminated. For the visible row, studs made of stainless alloys are used, and for the closed row, ordinary ones can be used.
It is recommended to drive nails across the entire width of the boards in a checkerboard pattern.
Is it possible to close internal and external corners without gaps?
It is possible, but not always advisable. Why?
- It is very difficult. Each board should be placed against the end of the lamellas and their locations should be accurately recorded; the pattern will be in the form of a herringbone. Subsequently, excess material is carefully removed, the position is checked and final adjustment is carried out. The cut areas must be sanded and impregnated with antiseptics at least twice. The same manipulations should be done with the second board. As practice shows, the time to finish one corner increases several times.
- The gaps between the decorative corners and horizontal boards serve as additional ventilation holes. For all lumber, optimal relative humidity levels are very important - wet structures are quickly damaged by various diseases and rot.
Siding installation
Which corner finishing is better - close to the boards or corner boards covering the slats?
We prefer the second option for several reasons.
- Work becomes much easier. Deviations in length of a few centimeters do not create problems during finishing decorative finishing. The boards can be cut not individually, but in batches, which greatly speeds up the sheathing process. In addition, there is no need to carry the board to the machine several times for accurate measurements and final adjustments.
- The ends of the boards are well blown with air - the risk of rot is reduced, the elements do not need to be treated with antiseptics.
Sheathing a house with overlapping siding
How to replace a damaged board?
For example, let's look at the most difficult option - the boards are fixed with two rows of nails. To do the job, you need a nail puller that has a flat blade on one side.
- Insert the flat end of the nail puller into the gap between the intact and damaged boards; the tool should be located as close to the nail as possible.
- Gently press down on the tool until the head protrudes a few millimeters above the surface of the board. Take out the nail puller and tap the board near the nail with a hammer, this will make it easier for the head to come out.
- Grab the head with the opposite curved side of the nail puller and pull it out. These manipulations must be done on the damaged boards covering it. To avoid damaging the surfaces, be sure to place wooden spacers between the nail puller and the sheathing boards.
Replacing a damaged board is not difficult
Visible nails are pulled out in this way. As for the invisible ones, you will have to bite them with wire cutters. Lift the entire board until there is a gap wide enough to allow the pliers to get to the nail. Depending on the circumstances, it may be necessary to undermine two or more entire boards - this will make it possible to increase the gap without the risk of cracking entire lamellas.
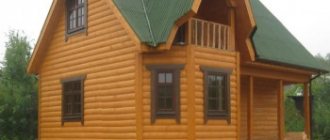
Traditional wood panels
Traditional wooden siding, when faced with an overlap, requires preliminary marking on the mounted frame to maintain a constant angle of inclination of the panels. Installation is carried out from the bottom up, starting from the base strip, the thickness of which will determine the angle of inclination of the lamellas.
A 25x25 mm block is mounted along the bottom edge of the wall, then the first panel is installed so that it hangs slightly below the block. The lining can be fastened with nails or self-tapping screws; the main thing during installation is to prevent deformation of the lamella: as soon as it begins to bend, the fastening pressure must be loosened.
The next panel is installed with an overlap, the size of which is determined for aesthetic reasons. Then measure the distance on the frame block from the top of the bottom panel to the top of the next one. This value must be constant throughout the entire cladding. The resulting size is marked on each beam of the supporting frame, and all subsequent cladding strips are mounted according to the marks.
Why use the overlap method
Advantages
This method has a number of significant advantages, thanks to which it has gained popularity. Advantages of using overlap when installing siding:
- When installing end-to-end using an H-profile, the siding panels must be trimmed. Overlapping cladding avoids significant losses of materials.
- The H-profile used when installing panels end-to-end always catches the eye. The overlap method, if the rules are followed, on the contrary, allows you to achieve a perfectly flat surface.
- Often, in building materials stores, H-profile is offered in only a few colors. Overlapping installation allows you to clad the façade in one color scheme.
- Another advantage of this method is its ease of installation. Two operations are excluded: installing the connecting strip and adjusting the panels to the same size. Even using hired workers can save money.
Flaws
In addition to its advantages, any cladding method has disadvantages. The main disadvantages of installing overlapping siding are as follows:
- A joint is formed at the junction of the panels. In the direction of installation, the surface of the facade looks beautiful, but from the opposite direction, it’s the opposite. Upon closer inspection, the joints are noticeable and even after the siding shrinks, they will not disappear.
- If the house is located near the road, the joints will sooner or later fill with dust and dirt. This inevitably entails cleaning them and spending time and effort.
- Violation of the installation technology at least at one of its stages can lead to heaving of the panels. In this case, it will be difficult to call the façade perfectly even.
- Overlapping installation requires care and precision. If you need a beautiful facade, you will have to overpay for a qualified specialist. And independent installation means a significant investment of your own time.
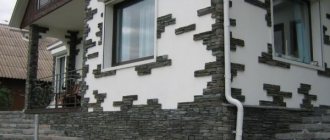
Combining siding and facade panels: designer tips
If you decide to decorate your house with siding and facade panels, pay special attention to how the selected colors and materials will combine with each other. They can be chosen in the same color scheme, complementing each other, or, conversely, create a bright contrasting solution
But don’t forget the basic design rule: no more than 3 colors on one façade.
How does it work in practice? Conventionally, the facade of a house can be divided into the following elements:
- walls (main part of the facade)
- roof
- plinth
- openings (windows and doors)
- gutters
- decorative elements (arches, columns, corners, etc.)
Their colors can be combined, but in such a way that no more than 3 different shades are obtained. One of the most common options:
- First color: the main part of the facade.
- Second color: base, roofing and gutters.
- Third: openings, corners and pediments (as a rule, white is chosen for them).
An example of such finishing of a house with siding and facade panels can be seen in the photo.
The owner of the house in the next photo decided to approach the issue outside the box. The roof and the main part of the facade are made in the same color scheme, with the roof being darker. Gables, gutters, openings and corners are white. And the corner part of the building is decorated with contrasting stone-like facade panels.
The next facade also uses 3 colors. But take a closer look at how many different materials there are! This also gives the house a unique “zest”.
The facade can be the most incredible, but at the same time very harmonious and complete. The following photo is the best proof of this:
The owner of the house did not limit his imagination. Most of the building is finished with stone-like facade panels. Some elements are highlighted with vertical siding in two pastel shades. And above the roof itself, horizontal siding is used. Original? Yes. Harmonious? Very.
Sometimes the three color rule can be broken. Look!
In this house, the openings are painted to match the color of the roof. The gutters, gables and balcony are white. The originality of the facade is given by inserts from facade panels of a lighter shade than the base. The gate, which seems out of place with the overall look, is supported by steps and a walkway in front of the house. Overall it turned out very gentle and original.