It is easy to make a beautiful stove using a detailed order. Laying a stove is much more difficult than building walls, so craftsmen use, in addition to drawings (and more often instead of them), orders, or rather, orderly laying schemes.
They indicate not only the dimensions of the furnace itself and the channels inside it, but also the exact location of each brick. Let's consider the question - brick heating stoves, what they are and how to use them. We also present several stove designs.
Before looking at specific examples, let’s take a short excursion into the theory.
Note. Order is not an unambiguous term. The same word refers to slats installed along the edges of the masonry, on which there are markings and devices for pulling the cord indicating the seams. This arrangement is used for laying a wide variety of structures, not just stoves.
This is also an order, but only a tool
Options for heating stoves 3 by 3 bricks
The simplest option is a heating device with a ducted gas distribution system:
- The ashpit communicates with the room in which the structure is installed.
- Firewood is loaded into the fuel chamber, which passes into the ash pit through the grate.
- Hot gases from fuel combustion rise through a system of channels to the chimney, heating the body of the stove.
- The valves are used to regulate draft.
- Cleanout doors - to remove soot from the channels.
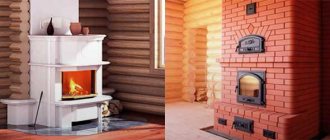
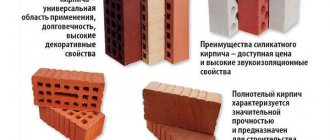
The appearance of the stove can be improved by installing a transparent fireplace door instead of a cast-iron firebox, or by using bricks of different colors in the masonry.
An inexpensive and easy-to-use option is a kitchen stove with a three-channel heating panel. Its operating principle is the same as that of the heating structure; the addition is a cast-iron stove installed directly above the combustion chamber. The device operates in two modes - summer and winter.
The summer one is activated when the lower damper is open - the heat goes directly into the pipe with a direct current. This mode is necessary not only in the warm season, but also during long-term cooking ( more than 2 hours ). The dimensions of the oven at the base are 3x3.5 bricks ( 760x880 mm ), height 22-32 rows ( 1550-2500 mm ).
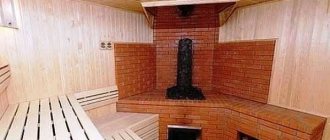
A small heater 3x3 bricks can also be built for a bathhouse with a steam room area of no more than 15 m2. The firebox is fired from the dressing room, which saves space in the steam room. Hot air from the firebox moves along the perimeter of the metal box for stones and comes into direct contact with the stones through the slotted arch.
Selecting a location
3x3 brick stoves are suitable for heating homes with an area of about 30 m2 (usually two rooms ). It is important to rationally position the device so that all walls of the stove transfer heat to the rooms.
When choosing a location for placing the structure, the following requirements are taken into account:
- the possibility of erecting a separate foundation, although some sauna stoves (without heavy equipment) do not require a serious foundation;
- compliance with fire safety measures: distance to the nearest wall - 150 mm , to furniture and interior items - at least 40 cm;
- the ability to provide access to all sides of the furnace;
- It is advisable to place the structure closer to the front door so as not to carry firewood through the house.
Materials
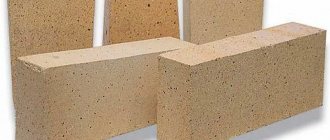
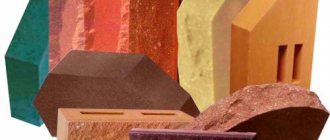
When laying out the body of the furnace, ordinary solid ceramic bricks of the M-150, M-175 grade are used. It should be free of cracks, have an even shape and uniform firing.
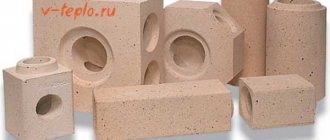
Refractory fireclay bricks are used to lay the firebox. The size should be the same as the ceramic one.
There is no point in laying out the structure entirely from fireclay bricks. First of all, it's expensive. Secondly, due to its high thermal conductivity, the body of the furnace will quickly heat up above 100 degrees , which is unsafe and will lead to dust baking on the walls.
Reference. If it is not possible to purchase fireclay bricks, the firebox can be lined with ordinary ceramic ones, but at 1150 degrees it begins to melt. The quality and heat capacity of such a stove will deteriorate.
An important component of reliable masonry is a properly prepared clay solution: clay + sand + water. The proportions depend on the type of natural clay (oily, normal, lean) and are calculated experimentally. If there is an excess of sand, the structure will not receive the necessary strength - the seams will collapse. Excess clay will cause the oven to settle and crack the seams. In order to save time and effort, beginners are advised to purchase a ready-made fireproof mixture.
For construction you will need:
- doors, latches, grilles;
- kaolin wool, asbestos cord;
- sand, gravel, roofing felt and other materials for the foundation, depending on its type.
Tools
To build a furnace you will need:
- Master OK;
- jointing;
- hammer;
- plumb line, level;
- grinder with diamond wheel;
- abrasive;
- shovel;
- mixer (drill attachment).
Preparing the foundation for a 3x3 furnace
A brick weighs 4 kg , and a cubic meter of masonry, including mortar, weighs 1350 kg . Using these data, you can independently calculate the mass of your stove.
For structures weighing up to 750 kg , a base arranged according to the scheme - clay mortar - asbestos sheet - roofing iron sheet is sufficient.
For heavier structures, a separate foundation is constructed. The gap between the base of the stove and the existing foundation of the house must be at least 5 cm.
The foundation for the stove is wider than the base itself by 5-10 cm on each side, with a depth below the freezing level of the soil. To protect against groundwater, a waterproofing material is laid: roofing felt.
Important! The resulting “foundation - stove - chimney” structure should not intersect with the load-bearing elements of the house: floor beams and floor joists.
Types of furnace foundations
- Brick
A pit is dug to a depth of at least 50 cm (depending on the level of freezing) and leveled.
A sand and gravel cushion is placed at the bottom and compacted. Then a layer of broken bricks/crushed stone/gravel is poured and filled with cement mortar.
Several rows of solid brick or rubble stone are laid on top to a level of approximately 30 cm below floor level. The upper platform is leveled with cement mortar and waterproofed with 2-3 layers of roofing felt.
Requires less materials and excavation work. Optimal for clay and loamy soils. A slab is laid on four piles to serve as a support for the furnace. 4 holes with a diameter of 200 mm are drilled to the required depth 150 mm is poured into the bottom and compacted. Formwork made of roofing felt is inserted, and the holes are filled with concrete. The piles dry out in 10 days. You can use a ready-made reinforced concrete slab of the required size. 2-3 layers are laid on top .
A pit is dug (the same as for a brick one), a sand cushion 15 cm thick , spilled with water, and compacted. Then there is a layer of crushed stone 10 cm thick. Wooden formwork is laid around the perimeter of the pit, waterproofing is laid in 2-3 layers and a reinforcing frame is installed.
Reinforcement is performed crosswise with rods with a diameter of at least 1 cm in increments of 10-15 cm, the reinforcement is fastened with knitting wire. The formwork is filled with mortar to a level of 15 cm below the floor level.
The mixture is prepared in a ratio of 1:3 (cement: sand). After the concrete foundation has “set up”, waterproofing is placed on it and another 2-4 rows of heat-insulating brickwork are made to the zero level of the finished floor.
Ordering, step-by-step laying of a brick stove
For example, consider the arrangement of a simple kitchen stove with a stove and a heating panel with three channels. The entire masonry is made of red ceramic brick grade M-175 , but it is recommended to line the firebox with fireclay bricks.
Important! Fireclay bricks cannot be combined with regular bricks; a layer of kaolin wool must be laid between them. Neglecting this rule will lead to the need to repair the stove every 2-3 years .
A cast iron stove is used for the hob - 720x290 mm.
The bricks for several minutes so that they do not “pull” moisture from the mortar, so the seams will be thinner and stronger. The optimal thickness is no more than 3-5 mm . You can control the size of the seam using metal or wooden strips. From the outside, the seam is processed using jointing. Fireclay bricks do not need to be soaked.
Photo 1. Option for ordering a 3 by 3 brick oven. The diagram includes 29 rows, the installation location of additional elements is indicated.
Row 1 is placed solid.
In the 2nd row , horizontal channels are formed, two cast iron cleaning doors are installed, as well as a blower with a 130x130 mm door.
In the fourth , the first horizontal channel is blocked, thus forming the beginning of two vertical and one descending channel. A grate measuring 240x250 mm . Each metal element must be installed at thermal expansion intervals of 5 mm and wrapped with asbestos cord. Gaps are formed by cutting grooves in the brick with a grinder. The grate should be freely removed/put back in place without disassembling the stove.
In the sixth row, the first smoke valve is installed, which, when open, ensures the operation of the stove in the “summer” version (for long-term cooking), and the combustion door is mounted.
In row 8, the first and second vertical channels are connected, and another cleaning door is installed to remove soot from the channels.
in row 11 . Grooves are cut into the bricks for thermal gaps so that when the slab expands it does not create a load on the brickwork.
Names of brick faces and its incomplete parts
First of all, you need to know what the edges of a brick and its incomplete parts are called.
Designations of faces, edges and partial parts of a brick
Builders have adopted the following names for brick faces, indicated by numbers in the figure under the letter “a”:
- butt edge (butt);
- bed edge (bed), depending on the position in space, can be upper and lower;
- edge of a brick, sometimes called a usher;
- spoon edge (spoon).
The parts of the brick are further indicated by letters:
- full brick;
- three-four (sometimes called nine);
- half;
- four.
Advice. Typically, a brick is split with a mason's hammer, and the blows must be struck not on the bed, but on a spoon, holding the brick on its edge. But it is advisable, if possible, to order a certain number of incomplete bricks directly from the factory or from the seller.
It is generally better not to beat refractory bricks, the price of which is quite high, but to cut them with an appropriate circle to eliminate the possibility of incorrect splitting.
It is better to cut refractory bricks rather than split them
Possible problems and their solutions
Even an experienced craftsman can make mistakes when laying bricks on mortar. Therefore, first perform a dry test laying. This will allow you to once again carefully study the layout sequence and make sure that there are enough prepared materials.
If, nevertheless, a mistake is made while working with the mortar, remove all incorrectly laid bricks, thoroughly clean them and only then lay them again. The clay solution cannot be reused.
Failure to properly bind bricks leads to cracks in the structure. Correct laying - each brick rests on two lower ones, the vertical seams in the rows do not coincide. A small error is permissible only when laying out the internal elements of the oven.
The correct application of the mortar is a thin layer over the entire surface of the brick bed without empty spaces. The brick is placed in the chosen place, moved a little and pressed tightly. The next brick is laid according to a similar principle, but the mortar is applied to the bed and to the butt.
Masonry mortar
Mortar for laying a stove can now be purchased at construction stores, but you can prepare it yourself. A homemade solution will cost you much less, and it also has its advantages.
Previously, masonry was carried out using a mortar made of clay and sand, but it takes a long time to dry, and cracks often appear on it when fired, so I would like to share the recipe for another, more plastic mortar that has good adhesion.
To make the solution you will need sand, cement and ordinary clay, which is extracted when digging pits or wells. It needs to be diluted to the consistency of thick sour cream, and then rubbed through a mesh. This is done in order to get rid of debris and small stones.
The solution is prepared in different proportions - they depend on the fat content of the clay. To determine the best one, you need to prepare ten different options, 20-50 grams each. All mortar options consist of one part of cement and:
- 10 parts clay and 1 part sand;
- 9 parts clay and 2 parts sand;
- 8 parts clay and 3 parts sand, and so on, gradually reducing the amount of clay by 1 unit and, accordingly, increasing the proportion of sand.
Next, the samples are laid out in separate boxes, and you need to wait until they are completely dry. The best of them will be the one that contains more clay and, when dry, will not crack. Inscriptions need to be made on the boxes indicating how many and what ingredients are included in this particular composition.
The composition of the solution has the following advantages:
- it is made from affordable materials;
- it is durable even without firing;
- when heated, the dry solution burns;
- dries very quickly due to the presence of cement in it;
- Once dry, it is much more resistant to moisture than traditional mortar.
Operating the device
After the structure is laid out, it is dried. In summer it will take 2 weeks. If the masonry was carried out in the autumn-winter period, they begin to heat the stove with small wood chips for 30 minutes once or twice a day. For additional ventilation, all cleaning doors and latches are opened (if it rains, they are not opened).
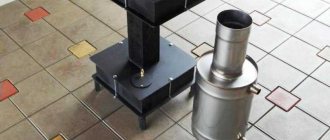
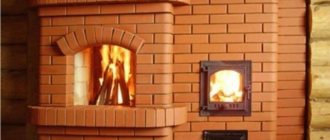
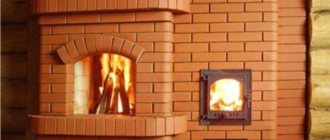
Photo 2. Finished 3 by 3 brick oven. The device is installed near the wall and has a very compact size.
When wet spots disappear from the surface and condensation stops falling on the metal elements, the structure is dry. After this, a control fire is carried out - the furnace is heated at full strength for several hours at maximum draft. If no cracks have formed in the masonry in the area of the firebox (small spiderweb cracks are acceptable), then the stove is ready for use.
Attention! You cannot immediately heat the stove too much - this will cause cracking of the masonry and render the structure unusable even before operation begins.
As a result, the entire construction phase will take an average of 1 month:
- foundation preparation - 10 days;
- laying the stove and chimney - 1-2 days;
- drying of the structure - 14-21 days, depending on the time of year.
After this period, if no shortcomings have been identified, you can start heating the stove at full capacity.
1) Furnaces by I. S. Podgorodnikov.
2) Furnaces discussed in Chapter 21.
3) Heating stove, the diagram of which is shown in the figure
| Rice. 17. Diagram of one of the most technically sophisticated furnaces of the 19th century | |
A. General draft valve B. First lifting well C. Parallel wells D. Cleaning door E. Direct draft suction E. Furnace door G. Grates K. Blower door L. Under fireboxes M. Afterburner chamber
This stove can be easily converted into a cooking and heating stove if the firebox is moved to the side of the stove, equipped with a stove accordingly, and the bottom of the smoke channels is lowered to the floor level.
A feature of this furnace, apparently developed by V. A. Stroganov, is the presence of: a) an afterburning chamber; b) technically competent distribution of the direction and location of the channels, allowing for uniform heating of the entire area of the furnace smoke wells; c) calibrated direct draft suction hole; d) just one cleaning door, allowing you to easily and easily clean all wells; if necessary, through it you can get rid of the overturning of the draft in the furnace; e) grates and furnace hearth, which are arranged at thoughtful slopes, facilitating more efficient combustion of residual fuel than in stoves that have a strictly horizontal arrangement of the grate and furnace hearth. With this arrangement of chimneys, the stove will heat up evenly over its entire heat-releasing area. The draft in such furnaces is always good.
4. A heating stove with horizontal smoke wells (Fig. 18) is good because it does not require strict and clear fixed markings at the chimney outlet. In pre-revolutionary times, such markings could only be made by a senior furnace master. Marking the foundation and laying the first row was never trusted to apprentices. And not at all because it was a “matter of honor.” The reason for such strict subordination was not formality, but the possibility of making a fatal mistake.
| Rice. 18. Sergei Mikhailov’s stove. The location of all technological components of the furnace is given taking into account the recommendations given in this chapter. | |
A. General draft valve B. Stove C. Section of the chimney (front view) D. Fire door E. Exit from the firebox into the first well (hailo) E. Section of the chimney (side view) G. Firebox I. Stove K. Hailo L. Section of the furnace firebox (side view)
The fact is that the senior furnace master had to “keep in his head” the entire furnace. He “saw” all the higher ceilings, directions, the number of future chimneys, etc. All this is true now, but not in relation to stoves with horizontal smoke ducts. Such a stove (Fig. 18) does not require any special design skills, because all the technological difficulties in the chimney “linking” of the stove dimensions move from the horizontal to the vertical plane.
Furnaces with horizontal wells turned out to be undeservedly forgotten. The reason for oblivion is either ignorance or ignorance of the laws described by me in chapters 28 and 29 of this book. There is an opinion that stoves with horizontal wells supposedly quickly become clogged with ash, are more difficult to clean, etc. This is absolutely false. You can get rid of these completely unfounded prejudices by reading the above chapters in more detail.
Now I will limit myself to only a brief listing of the main advantages of a stove with horizontal wells: a) it does not require precise calculations when marking the first row; b) it warms up evenly (the hottest parts of the furnace, which allow for intensive heat removal, are located at the bottom, and the less hot ones gradually move to the upper zone of the heated room); c) cools down evenly (heat from the lower rows of the furnace is gradually transferred to the upper rows. And since the period of intense heat transfer and cooling of the furnace is the same period, measured in several hours, this is another plus of a furnace with horizontally located smoke channels); d) allows for completely trouble-free installation of arched dryers into the furnace masonry (Fig. 19).
It is recommended to place the furnace on a trench hearth (see Fig. 1 and paragraph 11 of Chapter 15).
| Rice. 19. Sergei Mikhailov’s stove with a built-in drying niche, side section (the proportions of the combustion chamber are shown in Fig. 18) |
A. Valve B. Cleaning door C. Dryer D. Cleaning door D. Hilo E. Section of smoke wells, side view
| Rice. 20. Well diagram: summer and winter options, side section |
A. Winter shutter B. Summer shutter C. Hailo
If the customer relied entirely on my choice, I always gave preference to a stove with horizontal wells. “Complaints” about this type of stove were surprisingly monotonous: for any extra log thrown into a burning firebox, you had to pay with unbearable heat in the house.
5. Smoke wells, the diagram of which is shown in Fig. 20, can be useful when laying a heating and cooking stove, taking into account the “summer option”.
6. Oven, horizontal sections of which are shown in Fig. 21, allowed the author of this book to heat it once a day, even during prolonged frosts of 35 degrees. At the same time, the air temperature in the room never dropped below +19°.
The features of this furnace scheme are as follows: a) eight short horizontal wells; b) maximum heat transfer area in the lower part of the furnace (it is recommended to place the furnace on a trench bottom, see Fig. 11, as well as paragraph 11 of Chapter 15); c) significant heat capacity; d) additional valve with a “summer option”; e) a horizontal external “lounger”, on which it is convenient to dry wet shoes, clothes, etc.
A little theory
This section of our article is necessary due to the fact that even a professional builder who has never encountered the laying of a furnace may not understand some specific terms and names of structural elements and details. If we talk in general about self-taught home craftsmen, then they definitely need such an “educational education”, otherwise it will be unclear what they are talking about. Let's start with the device of the furnace.
Furnace structure
First, let's look at the terms and elements of the furnace design, since in order to understand the description of the order, you definitely need to know them. Let us list the parts of the furnace and indicate their purpose. The picture below will allow you to see everything clearly.
Heating stove made of bricks
- The foundation serves as the basis for the structure.
- The walls enclose the remaining elements; their outer surface serves to transfer heat to the air in the room. Also, the wall material accumulates thermal energy in order to release it not immediately while the fire is burning, but gradually, maintaining a comfortable microclimate in the room.
- Firebox or firebox , fuel burns in it, hot flue gases are formed, and part of the heat is transferred by radiation to the walls of the furnace. The lower part is called the hearth, the upper part is called the vault.
The main part of the stove is the firebox
- A grate , a grate on the hearth, through it air is supplied to the combustion zone and ash spills into the ash pan.
Grate
- Ash pit or ash pit , a chamber under the firebox for supplying air to the grate and for collecting ash.
- Cleaning - a hatch opening into the smoke channel allows you to remove the soot accumulated in it without disassembling the furnace structure.
- Smoke channels (smoke circulation, in common parlance, passages) - hot gases circulate through them, and energy is transferred by heat transfer to the walls of the furnace.
- Chimney - serves to release gases that have given up most of their heat into the atmosphere.
- The roof is the upper surface of the furnace.
- The hot-air chamber is a cavity in the furnace volume that is not connected with the channels and the firebox.
- Smoke damper is a plate (gate) that blocks the smoke channel, almost always adjustable, i.e. you can partially block the flow of gases.
- Firebox and ash doors.
Convenient door for the blower with a flap for air passage
- Shants are beams made of various materials used instead of a foundation. If the stove hangs on them, then its lower surface can also give off heat.
How to build the simplest brick oven?
First you need to decide what you want to get from your future stove. If you only need to heat the rooms, and use bottled gas or electricity to cook food, then choose an option without a stove and oven. Anyone who loves soft healing warmth chooses the option with a bed.
For regular cooking of large quantities of food and pet food, a simple oven with a hob will be just right.
We will look at three examples of stoves with step-by-step guidance on how to lay them:
- Simple direct flow;
- With hob;
- Heating.
Let’s say right away that you cannot expect high heat transfer from a simple design devoid of gas circulation. For this reason, such stoves are installed in garages and other small rooms with an area of no more than 16 m2.
Laying the foundation
Before folding the stove, you need to prepare a solid base.
The structure is quite heavy, so placing it directly on floors, even those covered with cement screed, is unacceptable. The foundation of the stove is a separate structure, not in contact with the base of the building. If you are building a brick heater close to the walls or building a corner fireplace, you need to make a retreat of at least 150 mm so that there is a minimum clearance of 10 cm between the foundations. If the floors in the house are screeded, then it is recommended to follow the following step-by-step instructions for installing a stove foundation:
- Dismantle the screed section and dig a pit protruding beyond the dimensions of the stove by 50 mm in each direction. The depth depends on the thickness of the upper layer of subsidence soil.
- Pour a sand cushion 100 mm high and compact it. Fill the hole to the top with rubble stone or broken brick, then fill it with liquid cement mortar.
- After hardening, lay a waterproofing layer of roofing felt and install formwork protruding above the screed, as shown in the drawing.
- Prepare the concrete and pour the foundation slab. For strength, you can lay reinforcement mesh there.
After 3 weeks (the time for the concrete mixture to completely harden), place a sheet of roofing steel on the finished base, and on top - felt impregnated with clay mortar or basalt cardboard. After this, you can begin to lay the body of the furnace.
Scheme of the base structure for wooden floors
To properly lay the foundation of a stove under wooden floors, use the same algorithm, only instead of a concrete slab, lay out the walls of red brick (used) up to the level of the floor covering. Fill the void inside with rubble or crushed stone and concrete on top. Next is a sheet of metal, felt soaked in clay and a solid first row of stove masonry. You can get more information on the topic by watching the video on the topic:
Oven with hob
In the simplest version, this design has small dimensions (width 2 and depth 3 bricks - 78x53 cm). However, even in such a limited area it is possible to place a single-burner stove.
Work goes smoothly when you have everything you need at hand.
Therefore, purchase the following materials and accessories in advance:
- Solid red brick – 107 pcs;
- Blower door – 1 piece;
- Grate – 1 piece;
- Single-burner cast iron stove – 1 piece;
- Fire door – 1 piece;
- Pipe valve – 1 pc.
Fire bricks are not needed for a wood burning stove. Buying it is a waste of money. But red should be chosen carefully, discarding cracked and uneven ones.
Preparation of the solution
The masonry mixture is made by mixing four parts clay with one part water and adding eight parts sifted sand. The normal consistency is determined simply: the solution easily slides off the trowel, leaving no drips on it. When laying, it should not leak out of the seams.
The volume of the mortar is determined based on the amount of brick. With an optimal seam thickness (3-5 mm), one bucket is enough for 50 pieces.
Having prepared the masonry mixture, you can begin laying the foundation. Its width is made 10 cm larger than the width of the oven. The height of the foundation is selected so that the bottom of the first row of bricks is at floor level.
If the underground is deep enough (50-60 cm), then there is no need to dig a hole for the foundation. It is enough to make formwork on the ground with a plan size of 76 x (51 + 10 cm). Two layers of roofing felt are placed on its bottom to protect it from moisture. Having laid the concrete, it is given a week to gain strength, after which they begin laying.
The dimensions of the stove with hob we are considering are 3 x 1.5 bricks (76x39 cm).
Expert advice: lay out each new tier of brick without mortar (dry). After adjusting the bricks to size, you can begin laying.
The first row is placed on a layer of clay mortar (4-5 mm). Having leveled the base, lay out the second one, leaving space for the blower door.
Before installing the door, you need to screw a soft wire to it and put its ends into the seams for better fixation.
To compensate for the thermal expansion of the metal, a gap is left between the door and the brick. Before installation, its frame is wrapped with wet asbestos cord.
The third row is laid by overlapping the seams of the second. At this level, a grate is installed in the firebox.
The fourth row is placed on the edge, observing the ligation of the seams, and the walls of the combustion chamber are formed. Behind it will be the first and only smoke circulation (see section A-A in diagram No. 2). To clean its bottom, a so-called knockout brick is placed in the rear wall without mortar, which is periodically removed to remove ash. Inside the chimney, two stands are made from pieces of brick to support the internal partition.
The stones of the fifth row are placed flat, leaving space for the firebox door. In the back of the stove, in order, we see the walls of two smoke channels. During work, their surface must be thoroughly cleaned with a wet cloth to remove any clay protruding from the seams. This is an important condition for ensuring good traction.
Helpful advice! When focusing on the order drawings, do not forget to look at the two sections of the stove. They will help you better imagine its design and not make mistakes when laying out the bricks.
Having raised the masonry up to the eighth row, they close the furnace door, placing wire in the seams to secure its frame. At the same level, in the back of the fuel chamber, a brick with a beveled end is placed - a smoke tooth. It improves heat output by preventing flue gases from quickly escaping into the chimney.
Having completed the ninth row, an asbestos cord is laid along it on a clay mortar. It is necessary for sealing the joints of a cast iron slab and brick. On the tenth row, the firebox is covered with a hob.
On the eleventh, a smoke valve is installed in the pipe. It is also compacted along the contour with an asbestos cord soaked in clay.
Rows 12 and 13 - formation of the pipe walls. After they are completed, a lightweight sheet metal pipe is placed on the stove, leading to the roof.
What materials do you need to have:
To construct a furnace, you must have the following materials:
red brick in the amount of 800 pcs.;
- sand-lime brick for the firebox 150 pcs.;
- cast iron doors for the firebox 25×21 cm, vent 25×13 cm, 1 pc. and 18×10 -5 pcs.;
- cast iron chimney valve 25×13 cm -2 pcs.;
- hob with two burners size 71×41 - 1 pc.;
- grate for firebox 25×25 cm - 1 pc.;
- oven measuring 31x37x28 cm;
- metal corner 5×5 or 4.5×4.5 cm;
- crushed stone and reinforcement for the foundation;
- steel wire for fastening doors;
- cement, sand, gravel, clay or a special dry mixture for laying fireplaces.
It is best to take all the materials with a small reserve, so that during the work it does not turn out that something is missing.
What does simple mean?
It is further understood that a simple oven, which can be quickly made with your own hands, should satisfy the requirement. requirements:
- A person building such a stove does not need to have a deep understanding of the stove business. Ideally, he doesn't need to understand anything about it at all;
- The stove must operate on low-quality waste fuel with a thermal efficiency (this is analogous to the efficiency of heat engines) of at least 35-40%;
- A brick kiln should not require long-term drying after construction and “accelerating” fireboxes to reach the rated thermal power;
- It should consist of no more than 115-120 bricks, so that all the necessary materials can be brought at one time in the trunk of a car or on a trailer to it;
- Stove fittings (doors, hobs, burners) should be the most common (so that you can use used ones) and/or cheap;
- The masonry of a brick kiln should not contain complex joints, sawn (cut with a grinder) bricks, transitions from red brick to fireclay and steel mortgages.
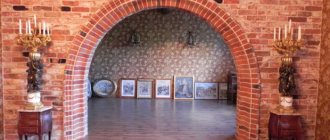
DIY corner fireplace construction
One of the most common modifications is a corner fireplace, which is not only attractive in appearance, but also significantly saves space.
A very original design of this design is when the combustion hole is located symmetrically to the angular axis of the walls in the room. This type of fireplace can be placed either next to an internal or external wall. But when designing it and laying the foundation, you should take into account the location of the pipe. If the stove is located next to an internal wall, then the fireplace chimney should be built slightly higher than the ridges of the roof of the house.
When laying a corner fireplace, be sure to use the order. If you don’t know, ordering is a special arrangement of each of the bricks needed for masonry. Thanks to the ordering, you will be able to calculate the required amount of material and rationally use the available bricks.