Repairs in any room involve a variety of work. This includes wall decoration, floor finishing, and replacement of windows/doors. But in most cases - and this is especially true for secondary housing - various dismantling works are carried out in advance, affecting almost all elements inside the premises. Dismantling the baseboard must be done in order to be able to properly lay the new floor covering, as well as in order to replace old products. The procedure is quite simple, and therefore you can do it yourself.
Dismantling the baseboard
What is a miter box for baseboards
The unusual name of the carpentry tool “miter box” comes from the German word “Stoßlade”, which, literally translated, means tsulaga (press) for miter cutting. In common parlance, a miter box is a tray resembling an inverted letter “P” in shape with paired oblique slits in the side slats located at a certain angle to the central axis.
The size of the cut slots should allow the cutting tool, saw or hacksaw to move freely, but without lateral play.
The classic number of slots is six, three on each side: two for cutting at an angle of 45 degrees (left and right parts) and one for a right angle (some tool models have slots at an angle of 15, 30.60, and 135o or in 15o increments). With the help of such a device, a 45o angle is cut out of the baseboard for precise and beautiful connection of the baguette in the corners.
It is possible to accurately cut down the skirting board without various devices. There are time-tested technologies for this. However, this is difficult and only professionals with extensive experience can do it. For self-taught people, it is better to use a miter box for ceiling plinths, which allows you to get a perfectly accurate connecting angle easily and simply.
Characteristics of skirting boards made of metal
An interesting solution for a modern interior is the installation of metal baseboards. They are great for resin floors, for example, but look equally good in regular interiors if you want to give them a more modern character. These skirting boards are made of anodized aluminum or stainless steel. Anodizing is a process whose purpose is to increase the hardness of aluminum and further protect it from corrosion. These products are usually sold in a natural aluminum color tone, or can be painted in a different color. Steel skirting boards can most often be seen in one of two interpretations: polished stainless (shiny) and matte (satin).
The advantages of metal skirting boards include the fact that they are very durable and are an aesthetic coating that gives the interior an expressive, modern character. Thanks to excellent consumer parameters, products of this type meet high requirements and can be installed in public facilities. On the other hand, metal skirting boards are often expensive. But if you need a reliable baseboard for a bathtub on the floor , then this material will come in handy.
Among aluminum skirting boards you can find different designs and sizes, while all of them are characterized by relatively simple shapes. In the case of steel products, the choice of models is very small - due to the specifics of the material, only very simple structures can be obtained from it. This is also a great baseboard for tile floors.
In what cases is it used?
It is a mistake to think that the device was invented solely for cutting corners on a baguette. The must, on the contrary, came from other areas of carpentry in the decoration of walls and ceilings. This construction tool is actively used for:
- production of door frames;
- installation of door and window frames;
- production of glazing beads for fastening window glass;
- preparing strips for frames for photographs and paintings;
- cutting cable ducts;
- cutting corners at floor and ceiling plinths.
Using a miter box as a device for working with fillets allows you to file down the ends so that they touch at the corners without gaps.
Basic rules for dismantling
You won’t be able to remove the old baseboard with your bare hands, so you should get the necessary tools. The list below is general - some of the devices, depending on the method of attaching the plinth, may not be needed.
Features of dismantling floor skirting boards
What you will need for work:
- nail puller or crowbar;
- screwdriver or screwdriver;
- mallet, spatula;
- putty knife;
- hammer;
- stationery or any other sharp knife;
- wooden wedges or chisels.
Carpentry nail puller
Wooden mallet
wooden mallet
Chisel with protector
Advice! To carry out the work, you should take clothes that you don’t mind. There is not so much debris and dust when dismantling skirting boards, but, nevertheless, they exist. You can also easily ruin clean clothes if you remove a plinth that was previously installed with glue.
The process of dismantling the old baseboard
The most difficult thing is to remove the baseboard secured with nails without damaging the walls and floor. In this case, you will have to put in a lot of effort, since the product is usually installed using powerful and long nails, which are quite difficult to tear out from the base. Here you need to use a small crowbar (crowbar), a chisel or a small spatula.
Attaching skirting boards to parquet floors with nails
Attention! When dismantling a wooden plinth secured with nails, the effort should be great, but sudden movements should not be made.
If the baseboard is screwed with self-tapping screws, then the work will be much easier. In this case, using a screwdriver or screwdriver, the baseboard is simply unscrewed.
Attention! If the product is equipped with a cable channel, then it is important, before starting dismantling work, to remove all wires from it, especially electrical ones. Otherwise, there will be a risk that the person performing the work may receive an electric shock.
A plinth with cable duct is installed at the junction of the wall and floor, giving the finish a finished look
Types of miter box
Miter boxes are classified by type according to three criteria:
- size;
- the material from which the instrument is made;
- designs.
Size
Based on the first feature, there are two standard sizes:
- standard. Designed for working with narrow parts: ceiling plinths, glazing beads, frame strips (for photos and paintings), etc.;
- big. The design of such devices does not differ from standard ones. The only difference is the length and width of the tool, as well as the height of the bars. The corners of the floor plinth, platbands, door frames, etc. are cut into it.
- wood;
- plastic;
- metal, mainly aluminum.
Material
On sale you can find miter boxes made of different materials:
Tree. Wooden models of the tool have good performance characteristics: ease of use and cutting accuracy, which, together with an affordable price, have made this type of device for cutting materials at a given angle the most widespread. Adding advantages to a tool made from boards is the ability to make a miter box for the baseboard with your own hands.
Structurally, wooden tools are made of 3 boards, one of which is the base, the other two are side planks with slots at different angles. They can be dismountable - fastened with self-tapping screws and non-dismountable - the connection of the planks to the base is adhesive with the addition of self-tapping screws for rigidity.
The disadvantages include a short service life - when working with a hacksaw or a saw, the teeth of the cutting tool file down the sides of the slot, as a result of which the groove increases in size. A lateral displacement of 1-2o appears, which immediately affects the quality of the baguette joint in the corners. Therefore, for professional carpenters, tool models made from other materials are preferable. But for doing housework, this is an ideal option.
Plastic. Tools made of plastic, mainly PVC, have a budget price (polyurethane ones are more expensive), a variety of standard sizes and low weight. They are a one-piece construction with slots on the sides. It is used exclusively at home, since the service life is even shorter than that of its wooden counterpart: the slots increase in size much faster, exceeding the permissible standard.
Metal. Miter boxes made of steel or aluminum are tools for professionals. These are durable and easy-to-use products with high cutting precision. The price matches the quality: it is very high.
Design
According to the design features, miter boxes are divided into:
- to simple ones or, as they are also called, ordinary ones. They are templates with predetermined cutting angles. The classic version has three pairs of grooves: for the right and left baguette at 45o and for a cross cut. In some models you can find up to 11 pairs of slots. When working with such a tool, it must be fixed on the workbench using a clamp. The second clamp secures the workpiece, from which you need to cut off a corner according to a given template. Often you have to work without clamps. In this case, the plinth and miter box are held with one hand, and the corner of the fillet is filed with the other. If you work in such conditions carefully and do not rush, you can saw off a corner with the same quality as when using fixing tools;
- rotary _ Such tools are better known as precision miter boxes. It consists of a rotating platform and a disk segment on which degrees are marked, which allows you to cut any angle. A number of models can also be tilted, which makes it possible to cut the part at the end in two planes at once (called universal). It is convenient to work with such a device for a small number of operations - manual sawing is still exhausting.
A miter box for working in two planes at once.
- electric . These are the same rotary tools, but with a circular saw. They are used mainly by professional builders for mass filing of corners, although such a mechanism is also found among household tools.
Methods of fastening skirting boards
All types of skirting boards require a certain method of fastening and can be installed using:
- self-tapping screws (all types);
- nails (wooden, veneered);
- adhesive solutions (all types);
- special mounting fasteners (MDF, plastic, etc.);
- chopiks (wooden).
One way to install a floor plinth
Principle and rules of working with the device
For many owners of an apartment or house who carry out renovations on their own, it is news that there are special devices for cutting the corners of a baguette. Therefore, they are poorly versed in how to use a miter box for baseboards.
The very principle of using the device is extremely simple. Take a baguette and fasten it in a miter box opposite the 45o slot in the same position as it will be glued to the wall. At the same time, it should protrude 1-2 cm beyond the boundaries of the zone in which the corner will be cut, which will make it possible to obtain a smooth, chip-free end. The workpiece is fixed with clamps, and in their absence, it is pressed to the base of the device by hand. There is a little trick here: it is more convenient to cut if the saw is located on the side of the working hand (the grooves in the tool allow this to be done) .
Knowledge of the operating principle does not guarantee accurate and beautiful connection of the baguette in the corners. You also need to know the basic rules of how to cut a ceiling plinth using a miter box.
- The cutting tool must match the material of the fillet. It is best to cut polystyrene foam with a knife with a replaceable blade. Plastic - with a knife, a hacksaw or a grinder with a diamond-coated cutting wheel. Wooden fillet - using a fine-tooth wood saw.
- Baguettes with relief or ornament must be combined according to the pattern.
- To avoid mistakes when determining the direction of the cut, you need to mark in advance with a pencil the line along which the saw will go. There is no need for special precision here: the main thing is to correctly indicate the chosen direction.
- You need to start cutting after checking the quality of fixation of the plinth in the tool: whether it is installed correctly; How securely is it fixed?
Characteristics of skirting boards made from MDF
MDF is a medium-thick board obtained by pressing wood fibers with the addition of bonding adhesives for bonding, which promote hardening under conditions of high pressure and temperature. This material is easy to process and is often used in the production of furniture and elements such as panels, doors and skirting boards. MDF is usually covered with a layer of laminate or veneer.
Skirting boards made from MDF are one of the most common options for interior decoration. The greatest success, of course, is varnished MDF skirting boards. As standard they are available in white, but in most cases, for an additional fee, they can also be varnished in any color from the RAL, NCS or ICA palettes.
Lacquered MDF planks have many advantages. First of all, due to the fact that MDF is a relatively inexpensive material, the final product in the form of a plinth has an attractive price. Thanks to the application of varnish by spraying, the surface of the baseboard acquires a very beautiful appearance, which cannot be achieved at home by painting it with a brush or roller. MDF skirting boards are also characterized by high hardness, which is further enhanced by varnish. Thanks to a wide selection of models, both classic and modern, almost everyone can find a product to suit their taste. If necessary, you can also make a non-standard plinth.
Unfortunately, MDF skirting boards also have a big drawback that negatively affects their durability. Namely, they are not resistant to moisture. The swelling of a standard 16 mm thick MDF board after immersion in water is about 12%. This means that installing this type of skirting board for floors, such as in bathrooms, involves a lot of risk.
Of course, baseboards can be protected from moisture to some extent. Their lower edges are often varnished or laminated. Professional installation is also of great importance - the shape, angles and cuts must be made in such a way as to minimize the risk of swelling. Then the plinth can serve for a long time without any problems.
Skirting boards are also available on the market, made of MDF with increased moisture resistance (with a green tint). They are often mistakenly labeled as waterproof. In fact, their swelling is simply about 30-40% less than that of a standard MDF board, but the risk of swelling when interacting with moisture remains. So, if you are going to choose a baseboard for a bathtub on the floor , it is better to look at other materials.
It is also worth paying attention to the fact that in case of deformation, MDF plinths are very difficult to restore or correct on your own. In case of mechanical damage, the use of corrective varnish will leave behind a mark - the same varnish applied with a spray or brush will result in a slightly different shade.
In addition to varnished MDF skirting boards, there are also solid wood and veneered skirting boards on the market. Wooden skirting boards are not expensive to purchase, but due to their high absorbency, problems may arise when painting them yourself. In turn, veneered skirting boards have a thin layer of natural wood instead of paint and have similar advantages and disadvantages as MDF skirting boards.
Which miter box to choose in the store
When choosing a device, you need to focus on its functionality (at what angle and on what planes to cut the workpiece) and the volume of work performed. Simple, U-shaped tools are purchased if you need to install floor or ceiling plinths on your own; rotary tools are intended for craftsmen. If you need a complex cut in 2 planes, then a non-professional will have to buy a rotary miter box.
When purchasing, you should pay attention to the following characteristics:
- the material from which the device is made;
- base width;
- wall thickness;
- the presence of a cutting tool in the kit;
- number of slots (the more, the better);
- the presence of clamps (fasteners);
- How free is the saw?
You can buy a simple device without a hacksaw for 87-820 rubles. The cost of a rotary miter box starts from 1300 rubles. It is difficult to say how much an electric tool costs, even approximately. The price difference is huge. You can buy a miter saw for either 6 thousand rubles or 25 thousand rubles.
Among the brands stand out:
"Fit 41255". The model is made of durable plastic. There are slots at angles of 22.5, 45, 90 and 135o for vertical cutting and 45o for bevel sawing. The price of the tool starts from 335 rubles.
"Stanley1-20-112." Material: one-piece impact-resistant plastic. Cuts can be made at an angle of 22.5, 45 and 90o vertically and 45o horizontally. Allows you to make very precise cuts. The cost starts from 770 rubles.
"Zubr15375-75". Made from impact-resistant technical thermoplastic resin (ABC plastic), which allows you to maintain the size of the slot for a long time. You can buy it for 220-340 rubles.
"Fit Pro 41321". Professional rotary miter box. The frame can be steel, aluminum or plastic. A saw is included in the kit. Costs from 3500 rubles. up to 6700 rub.
How high should the baseboard be?
If the thickness of the plinth is determined by the width of the seam, then in the case of selecting the height, almost complete arbitrariness is possible. The height mainly depends on what you expect from the baseboard. If it will only serve to cover the seams and should be as inconspicuous as possible, then it can be a narrow baseboard for the floor , and naturally, the height should be kept to a minimum. And if the plinth will perform a decorative function, then it is recommended to choose a higher height. Therefore, it sometimes happens that in very large rooms and houses a narrow skirting board is used for the floor , while in small apartments you can see large, decorative skirting boards.
Most often, however, the plinth is selected taking into account the area and height of the apartment/house. In the case of medium-sized rooms with a standard height, Clients most often choose a height of 5-6 cm for wooden ones, and 8-10 cm for other products (for example, varnished MDF). If you are dealing with high rooms, then most often you choose higher baseboards. When choosing a baseboard, you should pay attention to the installation height of the sockets when they are still at the design stage. It is necessary to plan them to a height so that it allows the fastening of individual skirting boards.
Is it possible and how to do it yourself?
You can postpone a trip to a retail outlet to buy a device if you have the following on hand:
- 3 boards 30-50 cm long. One of them is 15-20 cm wide (base), two for making sides 30-50 mm each (a high side makes it difficult to work with a saw);
- furniture screws with hexagon heads;
- glue;
- cutting tools for woodworking (saw, hacksaw);
- clamps - these can be a vice or clamps;
- a set of hexagonal furniture keys (confirmations);
- electric drill or screwdriver with a set of drills;
- ruler;
- protractor;
- corner;
- construction pencil (marker);
- sandpaper P120.
From the given set of materials and tools, it is not difficult to make a simple device for adjusting the ends of the baguette when connecting them in the corners.
The step-by-step action plan is as follows:
- the bottom of the base and sides are sanded with sandpaper;
- the base is attached in a vice or clamp to the workbench;
- a side board is applied to the side of the base (covers the side edge);
- using measuring instruments, the angle formed by two boards is checked - it should be 90o;
- in 3-4 places the side strip and the base are drilled with a screwdriver (the drill should be 1-2 mm thinner than the self-tapping screws);
- PVA glue is applied to the edge of the base (any type of glue for wooden products can be used);
- the side is screwed to the base with furniture screws;
- a similar operation is carried out on the other side of the miter box;
- Using a ruler, protractor and pencil, marks are made for the slots. There should be 3 of them on each side. One pair for cutting parts at a right angle, the other two pairs at an angle of 45o, for the left and right baguette. The location of the grooves can be arbitrary, but it is more convenient to work if there is a groove in the middle of the device for an angle of 90o, and on the sides at an equal distance for angles of 45o;
- You need to make cuts with a saw all the way to the base.
Using a homemade device will save the family budget with good quality corner cutting.
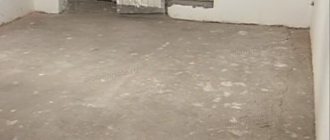
How to attach a plinth if the floor is uneven
The first attempts to make something from the brought slabs. Although there may be some attempts, the material costs money and the right to make mistakes is as much as there is money in your pocket. Train at your own expense, as they say.
Therefore, each board is carefully inspected and tried on; the proverb about measure seven times is in action.
The work itself is not tricky, creative, there are several boards and they need to be selected so that they look beautiful and there is no overspending. All sizing and trimming is done with the minimum possible removal of material, simply sawed off a little here, cut a little there with a chisel.
source
The plinth is a small but very significant element. It is necessary to complete the overall picture when renovating a room, since it is thanks to the plinth that you can beautifully design the joint between the wall and the floor. Also, in this small element you can hide various wires, both electrical and telephony and Internet cables. However, not everyone knows how to attach a plinth.
Depending on the material of manufacture, there are several types of skirting boards:
- wooden;
plastic;
In apartments, as a rule, skirting boards are made of either wood or plastic. MDF is used much less frequently. Metal skirting boards are usually purchased for installation in industrial or office premises. Depending on the type of plinth, there are different ways to install this element.
Wooden plinth can be made from any type of wood, but it is quite expensive - after all, it is a natural and environmentally friendly material. Typically, alder, oak, and larch wood are used for production. It is most often used for edging floors made of parquet boards, parquet, and natural wood floors. It can have either a simple triangular or curly shape. This material also has its own difficulties in working. For example, to cut a piece of a certain size, you will have to use a sawing tool.
MDF skirting boards are made from wood fibers and have a decorative veneer layer on top. This material looks quite presentable and from the outside is indistinguishable from natural wood plinths. But it costs much less, which attracts many. However, MDF requires special working skills - it is quite fragile.
MDF plinth with cable duct
Plastic plinth is the best option for modern apartment renovation. It is not afraid of moisture or sunlight, has a lot of color variations and is suitable for any floor covering. And the presence of plugs and corners will help to decorate the baseboard beautifully and neatly.
Plastic floor skirting boards
On a note! Plastic skirting boards often have special grooves for fixing carpet or linoleum, which will facilitate the task of laying the finishing coating for this type of floor.
The baseboard should be in harmony with the rest of the interior details
There are three main ways to attach skirting boards. The task of each of them is to secure this element as securely as possible in its intended place.
Table. What are the different ways to attach skirting boards to the floor?
Technology for fastening skirting boards with self-tapping screws
In general, all existing methods for attaching skirting boards can be divided into two categories - installation by fastening to the floor and installation to walls. You will have to choose depending on the type of baseboard and the design features of the living space.
Installation of wooden baseboards begins with treating the products themselves with varnish or other means that will protect them from rotting as a result of moisture getting on them. Skirting boards can also be painted after installation. Due to the fact that such a plinth practically does not bend, it is recommended that the bases, that is, both floors and walls, be well leveled with putty before installing it. Wooden plinths are usually attached using self-tapping screws or nails and can be installed either to the wall or to the floor. If necessary, it will be quite difficult to dismantle them without damaging them.
MDF plinths are usually mounted using special brackets (brackets), which are fixed to the walls. And if wooden plinths are simply sawed down for joining in the corners, then special plugs are sold for MDF material. If dismantling is necessary, such skirting boards can be easily removed and then put back in place.
On a note! It is recommended to start installing a plinth made of wood or MDF from the doorway, moving into the depths of the room from left to right.
When forming the corners of such skirting boards, all cuts must be thoroughly sanded and treated with an agent that prevents rot and mold. Without certain skills, working with this type of material is quite difficult.
Plastic skirting boards can have a cable channel, or they can be produced without it. If the product has a place for laying wires, it will be covered with a plug. Thanks to this, all communications can be easily removed and repaired if necessary - you just need to remove this very plug. Once the work is completed, the bar is simply put in place and snaps into place.
On a note! The solid plastic plinth also has special grooves on the reverse side where wires can be laid, but work in this case will be somewhat difficult. There will be no direct access to communications.
Installation of plastic plinth
The standard length of plastic skirting boards is 2.5 m, which ensures ease of transportation and installation. The cross-section of the plinth varies from 15 to 25 mm, and its height can vary - from 30 to 150 mm. Most often, products with a profile height of about 50-60 mm are used for installation in an apartment - they are called universal.
Advice! If the ceilings in the room are quite low, then you should not purchase a high baseboard. It will look ugly.
Table. Recommended baseboard height.
| The technique is not suitable for all rooms. It is used only if the walls are perfectly smooth. Otherwise, there is a risk that the plinth will eventually fall behind the wall or fall off altogether. It is also recommended to use this method only in rooms with 90 degree angles between the walls. The method is simple and allows you to carry out work very quickly. Liquid nails can be used to secure the baseboard. The method is irrational, since it will not allow the plinth to be reused, and there will also be problems with dismantling in the future. It is recommended to use this method for MDF products. | |
| For screws or nails (straight) | In this case, any type of plinth is simply screwed or nailed to the walls using screws or nails. The recesses that appear due to this type of work can be closed with special decorative plugs or choppers - just match them by color. This is not a quick, but the cheapest way to attach a skirting board. And plastic products have a special gutter, which is then closed with a plug - it is in the gutter that the procedure for fastening the product with self-tapping screws is carried out. |
| On brackets or latches | Used for mounting MDF or plastic skirting boards and is suitable for use in any room, even with uneven walls. However, despite the manufacturers' statements, such fasteners are quite fragile and, most likely, it will hardly be possible to re-attach the baseboard to it. However, such brackets themselves are reliable. |
| Ceiling height, m | Height of plinth, mm |
| Up to 2.5 | Up to 70 |
| Until 3 | 70-90 |
| More than 3 | More than 90 |
Tools and supplies needed to install plastic skirting boards
If you go to a good hardware store, you might be surprised at the variety of plastic skirting boards manufacturers offer. They differ not only in size, but also in shape, texture, etc.
For example, skirting boards can be divided into those that are used for installation together with carpet, and those that are universal. The latter can be used with any floor covering, while the former have special grooves. This type of plinth usually has the shape of the letter “L”.
Also, plastic skirting boards can be divided into categories according to the material of manufacture:
- made of PVC foam - a hard, elastic, but rather fragile option, does not have voids inside;
- made of hard PVC - hollow, durable, but quite simple, rarely used in luxury premises;
- made of semi-rigid PVC - resembles a foam baseboard, very flexible, sold in rolls. Looks nice, quite narrow.
Plastic snap-on skirting board
It is not for nothing that plastic skirting boards occupy a leading position in the building materials market. They have a lot of advantages:
- light and quite flexible;
- can be installed using almost any method;
- do not require pre-treatment before installation;
- have a long service life;
- are not afraid of water and ultraviolet radiation;
- do not rot;
- easy to install;
- do not require special care;
- They can have any color and a lot of variations in size.
Installation of plastic plinth with cable channel
Plastic skirting boards are convenient because manufacturers sell a large number of components for them. These are internal and external corners, as well as connectors and plugs. Depending on the color and size of the plinth, they are easy to choose.
Accessories for plastic skirting boards
Corners allow you to make beautiful joints between skirting boards in the corners, and connectors allow you to harmoniously join two separate planks. Plugs are used to cover the edges of the plinth after installation is completed. Corners are internal and external, and caps are left and right. This is important to consider when purchasing material.
How to attach the corners of a plastic floor plinth
Attention! All components for products are purchased separately.
Before you begin installation, you need to make a series of calculations to find out how much skirting board you will need to decorate the room. But it is quite easy to calculate its quantity. The perimeter of the room being renovated is measured without taking into account the width of the doors. Next, the resulting value is divided by the length of one baseboard. Thus, we get the required number of parts. However, it is important to remember that you need to purchase skirting boards with a margin of at least 0.5 meters. This is necessary to compensate for possible errors.
The number of external and internal corners, as well as plugs, is also easy to calculate. The external and internal corners in the room are calculated, and materials are purchased in accordance with the obtained values. There will be enough plugs at the rate of 2 pieces per doorway.
The fasteners are calculated as follows: the perimeter of the room is divided by 50 cm. And the same number of dowels or screws will be needed, but it is better to purchase 10 more pieces in stock.
Calculation of the number of plinths
Advice! In order not to make mistakes when calculating the amount of materials, it is recommended to carry them out (calculations) 2-3 times.
To install a plastic plinth you will need a small set of tools:
- perforator or drill - to create holes in the walls for fasteners;
- screwdriver - for quickly tightening screws (you can get by with a screwdriver);
- tape measure - for taking measurements from walls and measuring plinth cuts;
- marker – for marking;
- metal hacksaw - for cutting baseboards;
- awl – for forming holes in the baseboard for self-tapping screws;
- miter box - convenient for forming corners when cutting;
- sandpaper - for sanding cuts.
What is needed to install the skirting board?
Step 1. Installation begins with taking the necessary measurements and marking the plinth for future cutting. The plinth is cut in accordance with the measurements taken.
Step 2. To make it possible to install the baseboard, the protective strip is removed, under which a place for screwing in self-tapping screws and a cable channel is revealed.
The protective strip is removed
Step 3. A piece of plinth is applied to the place where it will be attached.
A piece of plinth is applied to the installation site
Step 4. The inner corners of the plinth are installed. An inner corner is placed on one of the sections of the plank.
Installing the inner corner
Step 5. A piece of plinth with a corner attached is applied to the wall at the attachment point.
A piece of plinth is applied to the wall
Step 6. Holes for dowels are drilled. You can drill directly through the baseboard.
Step 7. Dowels are inserted into the resulting holes. Next, the plinth is attached using self-tapping screws.
Dowels are inserted into the holes
Fixing the baseboard with self-tapping screws
Step 8. The next part of the plinth is inserted into the previously installed inner corner. The procedure of drilling holes and fastening the plinth with self-tapping screws is repeated.
Installing the next part of the baseboard
Step 9. The cable, if any will be laid inside the baseboard, can be laid step by step already at this step.
Step 10. An outer corner is fixed to the edge of the plinth piece, and the next piece of plinth is inserted. It is being secured.
Installing the outer corner
Step 11. After installing the baseboards and laying the wires, the cable channels are closed with a decorative plug.
The channel is closed with a decorative plug
Step 12. Individual products are connected to each other using special connectors. Plugs are placed on the edges of the plinth in the required places.
Example of connecting two elements
Installing skirting boards using liquid nails is quite simple - this is one of the easiest methods for installing this type of product. You just need to level the walls and you can start working. This installation method is best suited for plasterboard walls. Installation of the plinth is carried out starting from one corner. Liquid nails are applied dropwise to the wall at a distance of about 3-5 cm from each other. It is desirable that the step be the same. Next, the plinth simply adapts to the walls. The glue can also be applied to the product itself. The plinth is pressed against the wall very tightly and is kept pressed for about 60 seconds.
Installing skirting boards is a job that even a beginner in the field of repairs and construction can do. The main thing is to understand the principles of working with these products, and problems will not arise. And it is also important to choose high-quality material – both fastening and base.
Anton Svistunov chief editor
Author of publication 08/15/2017
Did you like the article? Save so you don't lose!
source
Installation of the floor plinth is the final touch in the finishing work, as it gives the interior a complete, refined look. It is known that the most luxurious renovation will become unpresentable if the gaps between the wall and the floor are visible, which the baseboard is intended to hide. In addition, it becomes a real lifesaver, capable of hiding minor defects in the finishing of the floor.
If you are new to finishing work and do not know how to attach plastic skirting boards, do not rush to contact specialists. There is no difficulty in installing skirting boards yourself, and the nuances described below and a detailed overview of the installation will allow you to save on the services of a specialist.
Among the types of skirting boards, plastic is the most popular for many reasons. Polyvinyl chloride is famous for its durability and strength.
The service life of plastic floor planks reaches 100 years. They are resistant to fire and moisture, safe, so they can be installed in any room.
Dimensions and design of plastic skirting boards
Skirting boards are easy to install, cut with a sharp knife, and their cost is not high.
Compared to wood and plaster planks, plastic planks are flexible. They have a huge color palette, which does not limit the choice of color for the interior of the room and allows you to fit into the overall background as much as possible.
An additional advantage is that some models are equipped with a special trench into which the wires are laid.
High-quality installation of skirting boards is not possible without the following components:
- external and internal corners, with the help of which the planks in the corners of the room are connected;
- plugs intended for decorating the edges of the baseboard. They come as a set and are available left and right;
- connections - a part with two grooves, which serves for joining and extending the planks;
- fastenings designed for fixing the plinth to the wall.
How to attach the baseboard to the wall? The planks are mounted with screws, using clips or liquid nails. To fix it with nails and clips, you will need a drill with different drill sizes, a screwdriver, a tape measure, fasteners, a hacksaw and a vacuum cleaner.
How much material and accessories should be taken for it is a good question. It is impossible to determine by eye; precise calculations are needed here.
Before attaching the PVC skirting board, measure the length of the walls. To this number, add 1.5 or 2 m and divide the resulting amount by 2.5 m (length of the bar). Rounding the resulting number up, we get the number of slats.
If you have not yet chosen and purchased a plinth, then we recommend that you read the following article. You might like a thermal baseboard - baseboard heaters come in both electric and water. Sometimes the task of attaching the plinth to the tabletop also arises, but in this case the plinth will no longer be a floor plinth, but a special one, smaller in size, most often aluminum or plastic with silicone inserts.
You need as many plinth corners as there are external and internal corners in the room.
If the wall is more than 2.5 meters, then connections are needed. One connector is needed for every five meters.
Left and right plugs are taken taking into account the number of doors in the room.
Attaching a plastic skirting board to a doorway
Having made the correct calculations and armed with the necessary tools, we proceed to installation. Wooden planks are mounted in the same way as plastic floor plinths are mounted.
Cut the skirting board to the required size using a regular stationery knife
When installing on dowel-nails, attach the plank with the covered corner to one of the corners in the room. It's best to start with the longest wall. Place the corner straight so that there are no distortions during installation.
Mark the mounting location on the wall 5-6 cm from the corner. If the walls are smooth, make marks at a distance of 40 cm from each other. If there are gaps, reduce the fastening pitch.
Drilling a hole in the wall for a dowel
Now make the holes with a hammer drill. Keep in mind that the dowel should go 30 mm into the wall, and if the surface is uneven, use dowel No. 6. Remove the dust and hammer the dowels into the holes. Place the plinth against the wall and transfer the marks you made to it. Then drill the holes. The heads of screws or nails must be completely immersed in the strip. To do this, make recesses with a larger drill.
Screwing the screws into the dowels
Now you can fasten the plinth to the wall with nails. Cover them with color-matched caps. You can glue the plugs to make them more secure.
The planks are installed, already adjusted to the required size. It is better to cut them with a sharp knife or hacksaw, so they will not crack. At the same time, maintain sharp corners. Also, when cutting the outer planks, keep in mind that the plugs will take 3-5 mm. If you use connectors, install them before fastening.
Installing a plastic plinth with a cable channel is no different. Only the channel plug is first removed. Holes are made in it and screws are inserted to secure the baseboard. Then the wire is laid down and closed with a plug.
There is a second option for laying the wire - under the bar above the screws. It is important here not to damage the wire. In the installed plinth, screws are unscrewed ten millimeters. The wire is placed in the resulting gap and carefully pressed with self-tapping screws. When laying the cable, cut out its entry and exit holes.
Do-it-yourself plinth installation is less likely to happen using liquid nails. It is the fastest and easiest. Apply glue to the plank in small dots. The distance between them is 3-5 cm. The plank is pressed against the wall and held for about a minute. An important disadvantage of this method is the inability to remove and reuse.
The clip-on mounting option is not very reliable in terms of connection. Although the installation is quite fast. You need to leave marks on the wall for fastening at a distance of 30-50 cm and make the corresponding holes with a puncher for the dowel-nail. The clips need to be secured in the holes and hooked into special recesses in the bar. This option still has more disadvantages: the high cost of fasteners, and possible problems during re-fastening.
Fastening skirting boards with clips
It’s up to you to decide how best to mount the baseboard.
To summarize, we can say that the connection of the floor planks will be easily fixed if the correct calculations are made. The quality of fastening is influenced by the chosen method of fixing, the accuracy of installation, as well as the type of plinth, color and shape.
The video below clearly shows step-by-step the process of attaching a plastic skirting board: from drilling holes for dowels to installing connecting and other elements.
source
The most important element in decorating the interior of a room is the baseboard. It gives a beautiful appearance to the floor. Skirting boards with a special internal channel help hide cables passing through the apartment, and also ideally cover the connection line between the wall and the floor. To correctly and securely attach a plastic skirting board to the floor, you need to understand how it works.
Many manufacturers produce floor curtain rods from various materials, such as MDF, wood, ceramics or aluminum. The most common are wooden and plastic skirting boards. Attaching plastic material is much easier than wood. It is more reliable to use and also versatile.
One of the advantages of this material is that you can install it yourself. If the plastic strip is properly attached, the installation will be rigid, regardless of where it is installed on the floor or concrete wall.
- The skirting boards are separated for fastening under the carpet in a shape resembling the letter “G”. They help give a beautiful appearance to the room and prevent the carpet from deforming and rolling during use;
- Universal planks can be suitable for various floor coverings, such as laminate, parquet, linoleum.
Nowadays, you can purchase various hollow or non-hollow plastic skirting boards of rigid construction.
The main advantage of this material is that it can be mounted in any room, kitchen, bathroom, corridor, etc. It is durable and flexible due to this, it can be used on any surface. The plinth can be easily cut to the required size. Does not require additional processing.
A large selection of colors, imitation stone, natural wood or metal, as well as different widths will help you purchase a plinth to suit any room interior. Plastic slats can be treated with detergents, as they are not afraid of moisture.
In terms of service life, the installed plastic skirting board on the floor is more reliable. It does not fade in the sun, is not afraid of changes in temperature, is non-toxic, does not burn, so it will last longer than wood.
- When starting work, you should decide how much material you will need. It is necessary to prepare a work plan for high-quality installation of the floor cornice.
- By measuring the perimeter of the room, it is determined how many planks are needed to install for the length of the room. All connecting parts and plugs are selected to match the shape of the plinth.
- All sets of plastic strips come with additional parts necessary for attaching them to the wall.
- If you need to hide the cable, then it is better to take a plinth with a special channel.
- The plastic plinth is installed last, when the repair is completely completed.
- An awl and a hacksaw for metal will help to make holes in the plank. To attach to the floor, you will also need a drill with a set of drills, a screwdriver, a tape measure, a pencil, and a construction corner. A hammer drill will be needed if the wall in the room is concrete or brick.
When installing a plinth, you will definitely need a set of components.
It includes plugs, various connecting parts, corners for indoor and outdoor installation. They come in a variety of shapes, sizes and colors. Without any of these details, the appearance of your floor will be unfinished. In order for the corner joints on the floor to have a beautiful appearance, you need to attach the corners. The internal corner should be fixed in those places where the wall connection goes inward. If the wall connection goes outward, then the corner should be fixed to the outside.
To decorate the edge of the strip near the doorway, caps are used. They are left-handed and right-handed. You will have to purchase them separately, choosing in advance the color that matches the bar, and adjusting them to size yourself.
All short-sized planks are connected to each other using special connecting elements. Small plastic parts with grooves aesthetically cover the parts connected together. Additional materials include specially designed fasteners that secure the baseboard to the floor and wall.
At the beginning of the work, the floor cornices are laid out on the floor to check the shade. Sometimes when purchasing material, the packaging comes across profiles of the same color, but different shades. To make the difference in shades unnoticeable, strips of dark shades are set aside and installed on the opposite side to the light source.
There are many different ways to attach a baseboard to a wall. Self-tapping screws, liquid nails or clips are suitable for this. All these fastening methods will not affect the laying under the cable material.
- Before installing a plastic baseboard using liquid nails, you need to make the wall surface as smooth as possible. Liquid nails are applied at a distance of 5 cm from each other, pressing the material tightly against the wall for approximately 1 minute. The plugs and other connecting parts are installed using the same principle. The cable is laid under the baseboard before starting work.
- Clips will help make the fastening of the material perfectly even. First, markings are made on the surface of the wall, then using screws you need to attach the clips and lay the cable. Then the bar itself is installed. At the end of installation, decorative parts and plugs are put on.
- In rooms with infrequent visits, the fastening can be installed by drilling through the material. The quality of fastening will be a little worse, but this way you can save some money. The main thing here is that the bar lies flat and the fastenings are distributed evenly. To prevent the material from cracking, it is better to make a hole with a drill.
Installation of the plinth
The plinth should be secured to the concrete wall using self-tapping screws screwed into the wall. Using a hammer drill, dowels are inserted into the wall into which screws are screwed.
Specially shaped screws will help attach the plank to the floor. They are made so that the screw heads are buried in the hole and are not visible. The remaining recess is covered with putty to match the color of the wood.
It is difficult to attach the plank to the drywall. Special screws or finishing nails are sold for this purpose. You can use liquid nails if the installation of the baseboard is planned for a long time.
- The main advantage of plastic is its flexibility, it is easy to work with and you can create a variety of shapes.
- The universal plastic material can be used for various jobs and is easy to clean.
- The plastic plinth is durable and reliable in operation, beautiful in appearance.
- Nowadays there are a lot of different wires in apartments, this material will help to hide them unnoticed. If there are a lot of wires, then a plastic skirting board should be purchased with a special channel.
- You need to carefully attach the floor cornice using self-tapping screws, without touching the wires.
- The plastic strip should be installed when the flooring and walls in the room have already been completed.
- The material will be needed to finish the corners, so when purchasing it, take a small supply. The length of the plinth is 2.5 meters, taking this into account, the required quantity is calculated.
- Connecting elements are purchased by counting the number of corners in the room.
- All purchased plastic profiles must come from the same batch so that the shade is the same type and without defective parts.
- When choosing planks, you need to take into account that narrow skirting boards will look good in small rooms with low ceilings. The interior of a large room with high ceilings will look more attractive with planks from 80 mm.
The plinth with a channel for wires is laid on the floor according to the same principle as the rest. The only difference is the laying of the wires inside the strip. The wires can be laid in a channel located above the screws or after installing the structure. The wires are laid into the resulting channel, and the bar is installed in its original place. Additional holes for wires are made at the connection points.
Some types of skirting boards come with a convenient special channel for placing wires. It has a special cover according to the color and design of the floor plinth. Thanks to this cover, you can quickly and easily repair or replace wires with others.
The plastic plinth has a small channel for the cable, so wires that will serve for a long time should be attached under the plinth, and all the rest in the outer channel.
When deciding how to mount the baseboards, you should decide how the wires will be laid in the room, what method and what the floor cornice will be mounted to. By performing the installation carefully, taking into account all the tips, the floor covering will turn out beautiful and neat.
source
How to cut a baseboard using a miter box
There is nothing complicated in the instructions on how to cut a ceiling plinth using a miter box.
1. The plinth is placed in the miter box with its face up, so that the plane in contact with the ceiling lies on the base, and the second is pressed against the side of the device. In this case, the bar should protrude 1-2 cm beyond the cutting line, which is clearly visible in the photo.
2. The fillet is pressed forcefully against the device, and a cutting tool (saw, hacksaw) is inserted into the slot. By the way, in the second photo the location of the plinth is more convenient for left-handed people. For those who are used to sawing with their right hand, you just need to switch to the other side or turn the miter box with the plinth 180o.
3. The end is cut.
4. The second plinth is cut in a mirror image.
5. The cut areas are sanded with fine paper using a cutting tool with a tooth. Naturally, after the knife the grinding operation is not carried out.
You can see in the photo how to properly cut the fillet ends for the internal and external corners.
Removing a baseboard screwed with self-tapping screws
In this case, it is likely that things will go easier. In the same way as in the previous section, you should find all the screw heads. They can be recessed into the baseboard, or they can protrude slightly above the surface. In order to dismantle the plinth, just use a screwdriver or screwdriver to unscrew all the screws, and the product will be easily removed.
Wooden plinth screwed with self-tapping screws
If the screws were driven into the baseboard, which is also not uncommon, then you must act in exactly the same way as when removing a baseboard secured with nails.
Is there a difference in technology for floor and ceiling plinths?
At first glance, there is no difference in cutting corners for ceiling and floor plinths. Indeed, there are none if we are only talking about how to make a corner with a miter box - the sawing technology is the same.
Otherwise, there are and they concern methods for determining the length of scraps for joining in corners. So, at the top, when cutting the end, the upper part of the bar is shortened, at the bottom, on the contrary, the lower part. When joining the plinth at the outer corner, the ceiling plinth increases in size at the top, and the floor plinth at the base.
Characteristics of skirting boards made of PVC
PVC (polyvinyl chloride) is one of the most commonly used plastics in the world. It also found its application in the production of skirting boards.
Plastic floor plinth made from this material is characterized by a large number of advantages. First of all, such products are very easy to install, as a rule, they consist of two elements, of which one is mounted to the wall using mounting dowels, and then the second is connected to it using fasteners. In most cases, such skirting boards have appropriate accessories in the form of corners, plugs and connectors, which greatly simplifies installation (there is no need to cut the strips at an angle). There is also plenty of free space inside to hide wires. Thanks to a very large selection of colors, plastic floor skirting boards can be combined with various color shades. Also, the price of the plinth is very attractive, but you should pay attention to the fact that you must also purchase the appropriate accessories for installation, which can significantly affect the final price.
Like everything else, plastic floor skirting has its drawbacks. Some people think this is a bad decision. These skirting boards may not be in harmony with wooden floors or panels - this is due to the fact that the products often look simply artificial. Ready-made corners, despite the fact that they are easy to install, look much worse than a classic plinth laid at an angle. Plastic floor skirting boards generally fit tightly to the wall, which can be both an advantage and a disadvantage. On the one hand, they adjust to the unevenness of the walls, but on the other hand, they can make these unevenness more noticeable.
Tips for cutting corners using a miter box
Let's supplement the instructions on how to use a miter box with a few simple rules, the implementation of which allows you to correctly cut the corner of the baseboard.
- When starting work, you should not panic if after the first cuts the ends do not fit together perfectly. You need to be prepared for the fact that you will have to adjust the first strips of the plinth more than once.
- Beginners often get confused about the sizes of corner strips. To prevent this from happening, the measurement is done as follows: the length of the fillet for the internal corner starts directly from the adjacent wall, for the external corner - from the edge of the corner plus the width of the baseboard, since the upper corner will protrude into the room.
- Before placing fillets on glue, even if you are absolutely sure of the correct cut, you need to check how accurate the joint is. To do this, attach the touching ends to each other directly in the corner.
- Builders have not yet learned how to make an angle exactly 90o. Therefore, there will always be small gaps. They can be sealed with gypsum putty or sealant.
- If the walls are not blocked (they stand vertically), the moldings can be adjusted at the bottom, even if the angle is acute or obtuse.
Dismantling a wooden plinth nailed to the wall
Removing wooden skirting boards nailed to the wall is considered the most problematic, since during this work there is a considerable risk of damage to the wallpaper and even plaster. Such skirting boards predominate in old houses, so you should proceed with them as follows:
- Insert a spatula between the baseboard and the wall and carefully try to widen the gap with it.
- Then insert a wooden wedge into the widened gap and, lightly tapping it with a hammer, drive it even deeper. At a distance of 30 cm from the wedge, repeat the procedure with a spatula.
- Insert a new wedge into the widened gap and also deepen it.
- After this, drive the first wedge even deeper.
- Working in this way with a couple of wedges, they need to be driven gradually deeper until the nails come out of the wall.
Types of skirting boards and features of their installation
Corners for plinths are a useful thing, but they are not always used, it all depends on the type of plinth:
- wooden - made from a single piece of wood, you can always choose a shade to match the color of the floor. As a rule, they do not have grooves for laying cables, but the wood looks great, and with proper treatment it will last for decades. They require particularly careful joining during installation; decorative corners are not installed on them, so the joints must be fitted just perfectly;
Angles obtained by carefully adjusting the planks
Note! In principle, you can order wooden corners for baseboards on the floor, but there is little point in this. With careful joining, the plinth will look no worse.
- veneered - a wooden base made from cheap types of wood is used, and the top is covered with veneer of valuable wood species. Considering the cost of exotic wood, this is a justifiable move. Special corners are also not used during their installation;
- plastic is the most common type nowadays. The plastic is absolutely insensitive to moisture, quite durable, and the richness of shades will allow you to choose the right one for any type of floor, even for an impressive-looking laminate. And corners for floor plinths will allow you to quickly design external and internal corners, as well as the joints of individual panels.
Plastic plinth will hide all secrets
Note! Most of these products are equipped with a groove for laying cables in it; after installation, this groove is closed with a special strip and becomes completely invisible.
Stucco molding
It is almost impossible to remove the molding without damaging it. The stucco decoration is removed during renovation when the decoration does not fit into the updated design. In all other cases, it is better not to touch the stucco molding.
You can try to remove it by running a sharp knife along the joints several times, gradually pushing the blade deeper and deeper.
Important! If the mixture on which the decor is held crumbles, then perhaps your attempts will be crowned with success.
However, most often, it is not possible to tear off the molded plinth without damaging it, so it is simply beaten off using a chisel and hammer.
Complex cases
Here we are talking, first of all, about wooden products that are secured with nails or strong adhesives. To successfully remove such a profile, you will have to work hard. Start removing the baseboard from the corner or door.
Putty and strong adhesive
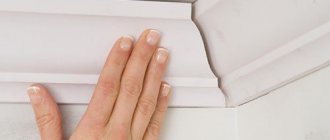
Polyurethane and wooden profiles for floors and ceilings are removed with a mallet and a thin spatula:
- First, run a putty knife along the joint several times to create a small gap.
- Now rest the spatula from below, holding the handle close to the wall.
- Gently tap the trowel handle with a mallet until the tip of the trowel fits between the wall and the lath.
The plinth appears to be cut from the wall.
Nails:
- To begin with, before removing the plinth, unstitch the seams where the profile meets the floor and wall. As a rule, they are filled with varnish and paint.
- Insert the chisel into the gap formed and hammer it in deeper with a hammer.
- Now insert a wooden corner into the widened slot.
- Repeat all manipulations after one meter, gradually tearing off the baseboard.
Important! If manipulations with a chisel are not successful, use a nail puller (crowbar). But do not overdo it so as not to damage the profile.
The force with which you will act on the crowbar is quite large. Therefore, in order not to damage the floor covering, use thin plywood as a backing.
If the wooden profile is to be disposed of, then you can do it even simpler: using a chisel, make a hole near the nail, and then use a nail puller.
Self-tapping screws
To dismantle skirting boards secured with self-tapping screws, it is important to find all their caps. Found it? So, then everything is simple: unscrew them using a screwdriver with reverse or a screwdriver.
Wooden chopsticks
Is the profile fixed with wooden choppers? This mount looks like rounded wooden caps located at the same distance from each other. Wood chips can be removed using a chisel or drilled out.
How to choose
The planks are usually matched to the colors of the large elements located nearby. Often the color of the floor, furniture, doors, and windows is taken into account. The material plays a significant role. For example, wood goes well with any walls and flooring; inexpensive plastic is more suitable for laminate and linoleum.
Match the color of the walls
A plank matched to the color of the walls eliminates or emphasizes the distinction between the latter and the floor. In the first case, preference is given to products that are slightly lighter or darker. Then the surfaces will not completely merge. Sometimes doors, slats, walls are chosen the same color. This solution is more suitable for original styles. A neutral or too bright color of the baseboard emphasizes the boundary between the wall and floor surfaces.
For plain walls, choosing matching skirting boards is an excellent and fresh solution Source i0.wp.com
To match the color of windows and doors
Experts advise buying strips of the same color as window and door frames when they are made of wood. Such elements will help to fit openings of a different color into a balanced interior. For example, in a room with dark walls, light doors will be best combined with slats of a similar color.
If the interior doors contrast in tone with the rest of the interior, a baseboard of similar color will become an excellent “connecting” link in the design Source roomester.ru
Match the color of the floor
According to long-standing traditions, skirting boards are often installed in the same shade as the floor covering. But it is better that it be a little lighter or darker than the last one, it all depends on the color transition to the wall. A combination of similar shades always looks harmonious. Moreover, it does not matter at all whether the plank is combined with the tone of the walls or other structures (windows, doors).
A plinth matched to the color of the floor visually increases the area of the room Source roomester.ru
Features of installing skirting boards
In addition to the baseboard panels themselves, installation will require a number of additional elements, and the installation method largely depends on the design features. Also, during installation, you will have to solve non-standard problems, such as designing a rounded corner or installing a panel at an angle other than 90ᵒ.
What you will need for installation
The floor rectangular plinth looks especially impressive when using corners to design joints at the corners of walls. And if in the case of wood, adjacent panels are usually simply joined very precisely, then when using plastic panels, corners are used to mask the joints.
What tools are needed?
It all depends on the material used to make the products. Materials such as wood, PVC, gypsum, and polystyrene can be used to make skirting boards. The plinth can be with or without corners, with or without decorative elements.
To dismantle a glued or nailed profile yourself, you will need:
- Mallet.
- A flathead screwdriver or chisel.
- Thin spatula or scraper.
- Wooden wedges.
- Nail puller.
- Stationery or shoe knife.
- Hammer.
In conclusion
The use of special corners for the plinth makes installation much easier and makes the joints simply perfect. A small drawback of such decorative elements is that only 90ᵒ angles can be found on sale, but a little ingenuity and “straight” hands will allow you to get around this limitation. The information provided will help, if necessary, to beautifully lay the plinth not only in the corners, but also along a curved surface.
In the video in this article you can find answers to questions about installing non-standard corners.
In the comments to the article you can always ask any question about the installation and selection of skirting boards.
Step-by-step instruction
To beautifully design a corner, you should first use ready-made fittings. Together with plastic floor skirting boards, manufacturers offer ready-made corners with sufficient plasticity. Thanks to this, they can be used to beautifully decorate different angles. The formation of the angle is performed in the following sequence:
- two pieces of plinth are cut to size. The ends are polished. The prepared fragments are inserted into the prepared fitting;
- the formed angle is applied to the place to be designed and carefully moved to the desired position.
- The floor plinth is secured with screws.
The internal corner can be designed in a similar way. If you decide not to use fittings, or there are no suitable ones on sale, you can arrange the pairing as follows:
- Measurements are taken right on the spot. To do this, draw a line right on the plinth along which the excess amount of material will be cut off;
- the excess amount is cut off using the selected tool. This can be either a manual or power tool. The main thing is to be able to use it. If the blade is not sharp enough, there is a risk of the material being crushed, which will certainly affect the appearance of the decorative element;
- elements cut to size are applied to the corner to check the quality of the mating. If there are minor deviations, the markings are reapplied. Excess amount is cut off. The steps are repeated until a tight connection can be achieved.
We invite you to watch a video that describes in detail the procedure for performing the work:
Perhaps this will simplify understanding of the process and allow the planned amount of work to be completed efficiently.