Home / Installation, repair, maintenance / Repair work / How to quickly repair ceilings in an apartment?
No matter how well the ceiling repair is done, nevertheless, after some time it will require updating. Sometimes, a situation may arise that the ceiling needs updating, but there is neither the time nor the funds to do it. A solution can be found in this case too. Such renovation of ceilings in an apartment, as in the photo below, can be done quite quickly, and at the same time the cost will be relatively inexpensive.
Ceiling finishing options for renovations
Depending on the chosen design of the room, the types of ceiling repairs in the apartment may differ significantly. This can be either the simplest and most laconic finishing option, or a complex multi-tiered design. When choosing a specific option, what matters is the height of the room, its area, the number of window openings, as well as the type of lighting that the owners want to install.
The most commonly used options for repairing ceilings in an apartment are:
- painting;
- whitewash;
- pasting with wallpaper or decorative materials;
- suspended structures;
- stretch fabric.
Of course, in each case there are both positive and negative sides. In addition, not every type of finish is acceptable in a particular type of room. The cost of repairing the ceiling on your own, as well as the level of complexity of its implementation and the list of works depends on which option you choose.
Any repair work on ceilings requires preliminary preparation of their surface. If you plan to paint, whitewash or wallpaper, then the surface of the ceiling must be thoroughly cleaned, the peeling coating must be removed, the seams and joints must be primed and sanded. In this case, it is necessary to achieve a perfectly smooth surface. For stretch and suspended ceilings such thorough preparation is not required. It will only be enough to remove the peeling coating so that it does not damage the suspended structures.
Repair process
Any repair is preceded by preparatory work, including the selection of the necessary tools, available devices and protective equipment, the organization of lighting, and the purchase of necessary materials.
Cleaning the ceiling
If we are not talking about a new building, where the ceiling does not contain remnants of the old finish, then you need to start repairing the ceiling with your own hands by cleaning it.
Until recently, the most popular ceiling design options were whitewashing, painting or wallpapering. Removing the remnants of such finishing is very simple. To work, you will need a paint roller with a long rod, which is well moistened with water and wrung out so that it is sufficiently wet, but no water drips. Then they begin to gradually roll the surface of the ceiling with a roller, gradually increasing the pressure. When the water from the roller is absorbed into the ceiling, it must be re-moistened and the same steps repeated on the next section of the ceiling. Thoroughly wet wallpaper or old plaster is cleaned with a spatula down to a layer of putty or concrete.
Please note that if old putty is found under the wallpaper, you need to make sure that it is held firmly. Otherwise, it also needs to be cleaned with a spatula, and then a new layer must be applied.
Installation of tiles on a concrete ceiling
Due to its low cost, quick installation and the ability to quickly repair in case of damage, this finishing method has become very popular. Options with different patterns and textures are sold. Expanded polystyrene tiles are attached with special glue.
Installation of tiles on a concrete ceiling
Before starting work you need to know the following:
- gluing begins from the center of the ceiling;
- immediately assess where large defects are located and calculate the placement of the tiles so that the entire part completely covers the defect;
- Whole tiles will have to be trimmed when the distance to the wall becomes small. Before gluing, markings should be made in advance so that for the most part whole tiles fit. Trimmed options are best placed in places where they are least noticeable (under a curtain, doorway).
Despite the fact that the tiles are glued easily and quickly, one cannot help but note the disadvantages:
- fragility;
- lack of a single canvas, which is not always aesthetically pleasing;
- rarely used in modern interiors;
- not resistant to fungi, mold;
- lags behind at high humidity.
How to remove old paint
In some cases, oil or water-based paints were previously used for minor ceiling repairs. To remove them from the ceiling surface, you will have to work hard. There are two approaches to removing old paint: chemical and mechanical.
Mechanical cleaning involves using a spatula or sandpaper. This creates a large amount of dust, and it takes a lot of time. The chemical method is the use of special reagents; they are sold in any hardware store. After applying the chemical composition to the ceiling surface, it may take about 12 hours for the old paint to soften. The soft loose paint will then be easy to remove.
Any decorations and decorative parts, as well as polystyrene tiles, must be cleaned with a spatula with a metal blade. If a little glue remains on the surface of the ceiling, it must also be thoroughly cleaned. Upon completion of the work, you should have an absolutely clean surface.
If you plan to overhaul the ceilings with your own hands in an apartment where suspended or tension structures were installed, they must be very carefully and carefully dismantled so as not to damage them. If, of course, they are intended to be reused.
Stages of work
- Old material is removed from the ceiling.
- Using dowels, a metal profile or wooden beams are attached at a distance of 40-60 cm from each other.
- Cladding with clapboard using a stapler, nails, screws, self-tapping screws.
- Protective varnish or painting.
Painting a wooden ceiling is necessary not only for beauty, but also to protect it from rotting, odors, indelible stains, and parasites.
To preserve the beautiful wood texture, choose water-based paints or special ones based on aniline.
Before starting work, the wooden surface is sanded using sandpaper and treated with stain or special impregnation to preserve the natural properties of the wood.
This coating is durable if all preparation requirements are met. It is easy to care for. The difficulty lies in installing lighting with such a wooden ceiling finished.
Let's start priming
Before repairing the ceiling, its surface must be primed. They proceed to this stage immediately upon completion of cleaning of the old finish. Priming should begin with seams and joints. In these places, the gypsum or plaster mortar must be held firmly and reliably. If this is not the case, then the joints are cleaned and filled again with gypsum cement mortar or a special building mixture with fiber inclusions. When the solution dries a little, the surface is cleaned, leveled and left until the mixture dries completely. Only after this can priming begin.
A deep penetration primer is used so that the materials for repairing the ceiling, which will be applied later, firmly adhere to the surface. The primer can be applied either with a brush or with a roller. It is important to protect your eyes and skin from contact with the primer mixture. When the primer layer is completely dry, you can begin further finishing.
What is the need for repairs?
The need to repair concrete ceilings can be caused by anything. These include natural disasters, prolonged exposure to high humidity or vibration, and manufacturing defects when the thickness of the protective layer on the floor slabs is too small and the reinforcement is exposed. And in general, certain violations may also be committed during the construction of a building.
Damaged finish indicates the need for serious repairs
Possible defects
One way or another, over time, a concrete ceiling may acquire the following defects:
- Its overall structure is loosened, which entails a decrease in the strength of the stone;
- Destruction of the surface layer or its detachment from the reinforcement;
- The appearance of cavities, loose fragments and voids on the concrete surface;
- The formation of not only surface, but also through cracks;
- Corrosion of exposed embedded parts and reinforcement.
Note: When it comes to prefabricated slab floors, this list also includes such defects as the presence of joints, which can be quite wide, differences in the surface of adjacent slabs, as well as spalling of the sealing mortar from technological holes.
We apply plaster and putty with our own hands
If the apartment's rough ceiling consists of concrete slabs, then their surface is not ideal. Therefore, further plastering or puttying is a mandatory stage of repair, especially if further whitewashing, painting or wallpapering is planned. What to choose - plaster or putty - depends on the preferences of the owner and his construction skills.
The plaster has a fairly large mass, and it must be applied in a layer of 2-3 cm. However, plastering work is quite simple to carry out, and further leveling does not cause problems. As for putty, after application it shrinks, so to get an even surface, you need to apply several layers. This requires some skill and time. However, as a result, you can get a perfectly smooth surface with a small mass and a minimum layer.
How to finish the ceiling yourself?
Probably every apartment owner, especially a man, likes to solve household chores on his own. Just finishing the ceiling, think about it. In fact, there may be some problems with this. Painting or whitewashing won't even make you strain, but preliminary leveling of the surface for further processing - here you can stop for a very long time.
You should not level the surface yourself if you do not have experience; use the help of friends and acquaintances. Oil-based and water-based paint are the best options for painting. If you decide to glue wallpaper, then you can’t do without an assistant, because the panel in the glue weighs a lot. If the pasting is done using ceiling tiles, then you can do it yourself. Lightweight material, each component is attached one after another.
Hanging and hemming sheets save a lot of money, but not extra time. Unless you are a master at installing such structures. The only disadvantage of installation is that it will take a long time if you do it yourself. We strongly recommend installing suspended ceilings with professionals. Although, with some patience and skill, you can handle this on your own.
Technology of using plaster
If plaster was chosen for the work, then the following materials and tools will be needed: Betonokontakt primer mixture, dry plaster, for example the Rotband brand, beacons with fasteners, a 1.5 m long rule, a hammer drill and a building level.
The technology for making a ceiling in an apartment using plaster looks like this:
- You need to step back 15-20 cm from the wall and put a mark for the first guide. On the opposite side, at the same distance from the wall, you need to place a second mark for the guide. Between these marks we mark a line using painter's thread.
- Having retreated 1.25 m from the first line, we apply markings for the next guide in the same way.
- Based on preliminary markings, holes are drilled for installing fasteners.
- The guides to the ceiling surface are fixed with self-tapping screws. The horizontal lines are controlled by the building level. If necessary, you can slightly unscrew or screw in the screws to adjust the position of the profile.
- The fixed guide profiles must be additionally fixed with a thick plaster solution and left until completely dry.
- At the final stage, the gaps between the guides are filled with plaster and leveled using the rule.
It is worth noting that repairing walls and ceilings with your own hands in terms of applying plaster is very similar. The only complication when working with the ceiling is that it is not very convenient to work above your head. However, after the plaster solution has completely hardened, the surface becomes smooth, and putty and finishing materials can be freely applied to it.
Preparation of ceiling surfaces for various repair methods
Ceiling repair technologies require appropriate preparation of the base. Not only the aesthetics of the final result, but also the functionality of the finish depends on the quality of the preparatory work, so we will consider methods of preparing the surface in relation to a specific cladding method. Let's start with the work that needs to be done on a concrete ceiling base before any repairs.
Inspection and cleaning of the ceiling
The ceiling plane is tapped with a hammer to identify areas with peeling plaster and putty.
Removing a layer of emulsion paint
If no defective plastered areas are found, and the planned finishing is whitewashing or painting, then proceed to remove the old paint - as a rule, it is a water-based composition, since concrete in residential premises is not coated with oil or enamel.
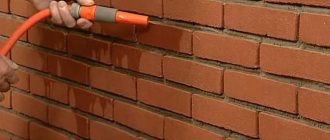
The ceiling is moistened with water several times to saturate the paint to a state where it can be easily removed in layers using a spatula. On the ceiling, wetting is easier to do with a spray gun; in the absence of this device, use a paint roller, preferably a foam roller.
Removing worn plaster
When plaster layers are identified that have lost adhesion to the base, the defective coatings are cut off with a hammer, chisel and spatula. If the plaster remaining on the concrete crumbles when scraped, it also needs to be removed, even if you plan to install suspended ceilings - a fallen fragment of the old finish, even if it does not damage the decorative shell, will be visible on it from the outside. Ideally, it is better to remove all old layers from the floor slabs so that the new leveling coating is uniform in all areas of application.
If there is exposed reinforcement under the exfoliated solution, then it is cleaned of corrosion to bare metal and covered with two layers of a solution of red iron or lead in drying oil.
Important! It is not allowed to cut out exposed reinforcement - it is in a pre-stressed state, and removing even one section will lead to a change in the stress balance in the slab.
Cleaning joints between slabs and cutting cracks
After dismantling the plaster, inspect the quality of the sealing of the longitudinal joints of the slabs and the connections between the walls and the ceiling. As a rule, old filling materials have to be removed to the entire accessible depth of the seam - this is conveniently done using a narrow and long chisel or hammer drill.
Cracks in the concrete slabs are inspected for orientation and prospects for further opening. Longitudinal and diagonal cracks are not dangerous; transverse cracks are best shown to experts from the construction department of the local government. To study the dynamics of damage, control beacons made of paper or gypsum mixture are installed on them, indicating the installation date.
Repair of concrete base
After all worn-out coatings have been removed from the floor slabs, repair and sealing of the ceiling base begins.
Sealing joints between slabs
If the depth of the cracks exceeds 3 cm, then it is better to seal them with polyurethane foam - an elastic and sealing composition that perfectly replaces cement mixtures in this situation.
To do this, the joints are blown with a stream of air or cleaned of dust with a vacuum cleaner, after which their internal surfaces are moistened with water - the adhesion of the polyurethane foam to wet surfaces is higher.
To seal slab joints, it is advisable to use a proven type of foam, which, after hardening, forms a dense, homogeneous, fine-celled mass. The guide nozzle of the foam canister is inserted into the gap until it stops and by pressing the dispenser the seam is filled to 2/3 of the depth.
Important! During operation, the cylinder must be positioned with the bottom up, otherwise gas will come out of it without forming foam.
After a day, excess foam is removed with a stationery knife. If a frame or frameless installation of heat-sound insulation is planned on top of a concrete base, then the foam is cut flush with the surface. If the surface is to be leveled with mixtures, then the excess is trimmed so that 1.5 -2.0 cm remains on top of the cut to the level of the slab - for applying the cement mixture.
If the width and depth of the cracks where the walls meet the ceiling allows, they can also be sealed with polyurethane foam. If the cracks are narrow, they are filled with sealant using a mounting syringe or moisture-resistant cement-based tile adhesive.
Filling potholes in the ceiling
If, when dismantling the old plaster, areas with spot delamination of the concrete of the floor slabs are formed, then they are primed with a latex-based composition and, after drying, the following actions are performed:
- areas with exposed reinforcement, cleaned to metal and coated with red lead solution, are covered with a layer of repair cement mixture, for example, KT Tron, MBR-400, Ceresit CD 25 or Ceresit CD 26;
- potholes more than 3 cm deep without reinforcement are also sealed with a repair mixture to restore the thickness of the protective layer of concrete above the reinforcement;
- sinks less than 3 cm deep are filled and then rubbed with a leveling cement composition.
Waterproofing concrete ceiling
Anyone who has ever repaired a ceiling after a leak will definitely waterproof the ceiling base after completing all the work described above. This can be done most effectively with the help of deep penetration waterproofing compounds, for example, “Penetron”, “VodoStop” or “Lakhta”, which, when they enter defective concrete cavities, seal them and, upon contact with water, initiate crystal formation in their mass with the growth of crystals towards the entry moisture.
After complete curing and drying of the repair cement compositions, the ceiling surface is generously moistened with water (until absorption stops) and, using a brush, roller or spatula, covered with two layers of penetrating waterproofing, which is prepared by mixing the dry mixture with water according to the instructions for use or is sold ready for use. After the insulating coating has dried, the base is suitable for applying any other leveling or insulating mixtures.
Effective ceiling waterproofing can be done in a more cost-effective way - by applying a bitumen-based composition, but the bitumen in the coating imposes restrictions on the subsequent use of leveling mixtures - an additional base of plasterboard or expanded polystyrene will have to be installed on top of such waterproofing.
The production of waterproofing the ceiling base completes the operations that must be performed before performing any finishing of the concrete ceiling surface. Subsequent types of work depend on the operating conditions of the room and the choice of method for decorating the ceiling.
Methods for basic leveling of concrete ceilings
The order in which the ceiling base leveling procedure is performed depends on a number of factors, including the planned functionality of the ceiling finish. For example, if it is necessary to perform thermal insulation, then you should decide what kind of insulation will be used. Installation of rigid types of foam plastic on the ceiling is possible in a frameless manner, but the concrete base should not have differences in height of more than 5 mm - the foam sheets will repeat the defects in the surface profile, and the finishing will have to be done after unwanted additional leveling, which will significantly make it heavier.
If you choose a soft material (one of the types of wool) as insulation, then in most cases to install it you will have to install a frame with an additional outer shell. But at the same time, the frame method of insulation eliminates the need to further level the ceiling - an additional base mounted on the frame in a horizontal plane will hide defects in the concrete surface.
Important! Stone (basalt) wool is produced in varying degrees of rigidity, and its more rigid varieties still allow the installation of insulation in a frameless manner, followed by plastering over a reinforcing mesh.
If there is no need to insulate and soundproof the ceiling (if this is done effectively enough on apartment floors), you can proceed to leveling the ceiling base using one of the following methods.
Leveling a concrete ceiling by plastering
Plaster is a time-tested and relatively inexpensive method of leveling concrete and brick bases for finishing. If the ceiling slabs in a room have significant differences in height (up to 5 cm), then one of the ways to bring them to a common horizontal level is plastering with cement-sand mortar.
Without the skills to perform this type of work, especially finishing ceilings, you should not undertake it yourself, especially on a large area. You can pour cement-sand mortar with your own hands and, after it sets, rub small-sized potholes in the plaster. Plastering the entire surface of the ceiling should be entrusted to professionals, having previously waterproofed the concrete base with a penetrating mixture. At the same time, it is useful to know the technology of plastering in order to control the quality of this type of finishing:
- the concrete base of the ceiling must be prepared for plastering - frequent notches are applied to the slabs with an ax or a grinder with a disk to improve adhesion to the mortar, after which the base is primed;
- along the perimeter of the walls, using a laser level or a transparent hose with water, control lines of the plane are drawn on which the base should reach after plastering;
- along cords stretched between opposite control lines, point “beacons” made of cement mortar are installed on the ceiling, which, after curing, are connected to each other with mortar, forming parallel guides of the required height;
- the space between a pair of parallel guides, after they have hardened, is filled in layers using a plaster trowel with cement-sand mortar;
- after the solution has set, its excess is removed by wiring along a pair of parallel guides of a flat rail;
- The shells remaining on the surface after installing the slats are rubbed with a trowel.
Important! Curing of the completed plaster coating should occur without drafts and additional heat sources (heating devices); within 5 days, starting from the third, the plastered surface must be moistened.
Leveling the ceiling with leveling mixtures
This method differs from plastering in terms of material and execution technology - instead of cement-sand mortar, dry cement-based leveling mixtures are used, which, after mixing with water, are applied to the concrete surface using a spatula.
The advantage of the method is the ease of preparation of the composition, which does not require compliance with the proportions of the components, sifting and has increased adhesion. The mixture prepared according to the instructions on the package is easily applied to the ceiling using a spatula and does not come off from the base as easily as happens with cement-sand mortar. Leveling cement mixtures are produced in many varieties, differing in characteristics or their numerical values - the degree of elasticity and tensile strength, waterproofing properties, the adhesion force of the “living solution” and its “survival time”. A wide range of these materials allows you to choose a composition that suits specific operating conditions and save on purchasing a universal mixture, the price of which is always higher precisely because of its versatility.
Cement-based mixtures are used to level ceilings with slab height differences of up to 3 cm. If it is necessary to apply a layer with a thickness close to the maximum, layer-by-layer leveling is carried out, waiting for the previous layer to completely cure.
As for surface preparation, the concrete base for the ready-mixed mixture does not require scoring - only priming.
Flat plasterboard ceiling
If the ceilings in the apartment have significant differences, but are at the same time quite high (3 m or more), then you can facilitate the process of their basic leveling by installing an additional base of plasterboard sheets (GCR) on them. GKL is laid on a frame made of wooden blocks or a special steel profile with mounting fittings, which is attached to the walls and concrete ceiling.
Frame installation
The manufacture of the frame begins with marking its structure on the ceiling and calculating the need for materials. There are several ways to arrange the frame, depending on the size and thickness of the standard gypsum board sheet. Based on the most common size of drywall 120x250 cm, the marking of the frame structure is carried out with a transverse step of 60 and a longitudinal step of 60 to 80 cm.
Then, along the perimeter of the walls under the ceiling, a starting line is drawn - a mark along which the frame will be mounted. The distance from the ceiling to the starting line should take into account the functionality of the new ceiling covering - with the planned implementation of heat and sound insulation, and even with additional protection of the hygroscopic insulation from steam, this value should take into account the thickness of the insulating materials. If the purpose of the plasterboard ceiling being installed is only leveling, then this distance will correspond approximately to the cross-section of the steel profile used.
ud-profiles are attached to the walls along the starting line using self-tapping screws; jumpers made of cd-profiles are mounted perpendicular to them, which are additionally fixed to the ceiling with hangers along their span.
If it is planned to soundproof the ceiling, then the installation of the frame is carried out on a vibration suspension - special suspensions and gaskets that prevent the transfer of vibration to the mounted structure from the concrete base.
Heat, sound and vapor barrier materials planned for installation are placed between the frame and the ceiling in a certain sequence - the vapor barrier should be located on both sides of the insulation, and in the case of a foil internal vapor barrier - with the foil towards the room.
Drywall installation
After calculating the consumption of gypsum plasterboard (room area plus 15%), the material is purchased and they begin laying it on the frame using metal screws (if the frame is made of a steel profile). Drywall sheets are cut with a utility knife by making a cut on one side and bending the plasterboard in the opposite direction, followed by cutting the opposite shell.
Before installation, the joining edges of the gypsum boards are chamfered with a knife to ensure that the seam can be filled to its full depth with gypsum mixture. The joints of the sheets are arranged so that they are located along the jumpers of the frame, otherwise the constant appearance of cracks in the finishing along the seams is inevitable.
In this case, the sheets are laid “staggered”, or offset, so that the joint of two sheets is not a continuation of the seam of two adjacent gypsum boards. Self-tapping screws along the seams are placed in a checkerboard pattern, maintaining a pitch of 12-17 cm and recessing their heads flush with the surface of the drywall.
After the installation of the gypsum boards is completed, the heads of the self-tapping screws are puttyed and the joints of the sheets are filled with a special compound from Knauf, while the seams are simultaneously glued with reinforcing serpyanka tape 5 cm wide. After the seal has cured and dried, the surface of the joints is treated with sandpaper, and the ceiling, after priming, is ready for finishing.
Method of applying putty
Let's look at how to repair the ceiling with your own hands, if you use a putty mixture for this. Puttying takes significantly more time than plastering. Although the goal of both processes is the same - leveling the surface. In addition, the puttying technology is somewhat different from working with plaster. In this case, the worker will need two spatulas (narrow and wide), a painting mesh, a mixing container, as well as two types of putty - the starting “Isogypsum” and the finishing “Satengypsum”. The surface is pre-treated with the Betonkontakt primer mixture.
Let's describe how to repair a ceiling using putty:
- The thoroughly cleaned and primed surface must be examined for the presence of potholes or level differences. In these places it is necessary to apply the starting putty in several layers. This material practically does not shrink, and its layer in some places can be 5 cm. For work, it is most convenient to use a wide spatula or a rule.
- A painting mesh is placed into the wet starting putty. This simple method of reinforcement makes the ceiling surface more durable. The mesh needs to be slightly pressed into the surface of the putty, for which purpose a wide spatula is passed over it with some pressure.
- If there is no need for additional leveling of the surface, repairing the ceilings in the apartment before painting can be done with finishing putty. It is applied to the surface with a wide spatula, removing excess. If desired, you can use a painting mesh for reinforcement.
- When the first, main layer of putty is completely dry, you can apply the finishing layer, leveling it until smooth.
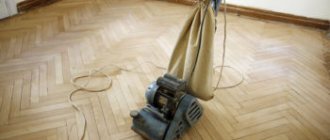
The final cleaning of the surface until smooth is carried out with special graters and emery. It removes the slightest nicks. After this, the final decor can be applied.
Alternatively, the ceiling surface can be covered with plasterboard panels. The joints and irregularities between them are filled with a putty mixture, and then the ceiling is decorated according to your choice - painted, whitewashed or wallpapered, or a decorative finish is made.
Suspended systems
Such a ceiling is realized using a frame part, which is located at a distance of several centimeters from the ceiling, and the slabs themselves.
There are currently two types of suspension systems:
- Open;
- Closed.
These two types have two distinct advantages:
- The material used in the manufacturing process is environmentally friendly;
- Provides high fire safety characteristics;
- Features excellent sound insulation;
- Provides ample opportunities to create a real masterpiece.
Recently, the fashionable modern trend of creating mirror-reflective surfaces with their help has intensified.
For this purpose, special glass processing is used. The variety of shades is simply amazing. This excellent solution is especially preferred by owners of small premises.
In general, it is not difficult to choose the most interesting solutions for finishing such an important surface as the ceiling for your apartment. By using your imagination, you can become the owner of an original version above your head for many years, looking at which you will experience a joyful feeling of satisfaction.
Coloring
When deciding how to repair a ceiling with your own hands, you turn to painting as a finishing method quite often. This popularity is primarily due to the availability of paints and varnishes on the construction market, as well as the ease of performing the work. Moreover, in some areas, such as kitchens or bathrooms, painting is a practical and convenient option. Mandatory conditions for high-quality ceiling painting are careful preparation and leveling of the surface. Otherwise, all irregularities will be visible.
Most often, water-based paint is used, less often - oil-based paint. Before use, just stir the paint thoroughly and, if necessary, dilute it until the desired thickness and color are obtained. After this, you can finish the ceiling - repair the ceiling by painting. To work, you will need a brush and a paint roller with a long rod. Painting begins from the wall, where a narrow strip is worked with a brush. For the central part of the ceiling, use a roller.
Sometimes an already painted surface needs a do-it-yourself cosmetic repair of the ceiling. In this case, the ceiling is examined for the presence of blisters and peelings of old paint. Defective areas are cleaned with a spatula and then painted again. In this case, a full repair will soon be required. However, if the old paint layer is holding up well, you can simply refresh the appearance of the ceiling by applying a new coat.
Loft-style ceiling: 5 affordable ideas
The loft style implies an extremely unusual combination of simplicity and luxury at first glance. In the most paradoxical loft style, seemingly multidirectional and contradictory things are combined. Combining rough, clumsy finishing with elegant sophistication and minimalist grace, combining simplicity with luxury - breaks the stereotypical vision of design preferences and forces you to look at home comfort and familiar principles in the interior in a new way. Fundamental details in the loft style are most often not sophisticated designs. This applies primarily to ceilings and walls.
Content:
The Loft direction was not formed artificially, but as a result of the style and lifestyle of creative people. The Great Depression of the 30s of the XX century, which hit industrialists and entrepreneurs, caused the bankruptcy of most factories and factories. The abandoned manufactories of America with their spacious workshops became favorite objects of creative and free people, who turned industrial premises into living and working studios.
Loft style is created using:
- Unfinished walls;
- Open communications;
- High ceilings;
- Open plan with a minimum number of partitions;
- Large windows to the floor;
- Mezzanine (mezzanine, which is created within the main floor);
- A mix of industrial elements with antiques and modern technology.
A loft-style ceiling is, first of all, maximum simplicity of finishing and open communications
A true loft is created only from industrial areas that have a history, but you can safely stylize the interior in this direction using characteristic elements. Modern materials make it possible to realize the dream of a spacious and rebellious loft even in ordinary apartment buildings.
A spacious room, characteristic of a loft, is created by the maximum combination of adjacent rooms. The effect of an abandoned industrial area is reproduced thanks to the brickwork and properly designed ceiling. Designers in loft interiors give preference to wood, concrete, and metal.
Loft ceiling design stylized in modern interiors
Basic loft design structures, such as ceilings and walls, are characterized by a restrained and sparse color scheme. White and gray tones, shades of brown and black, the presence of metal and chrome parts. A ceiling with a loft style can be the main design element.
For loft ceiling styling you can use:
- Concrete covering;
- Ceiling tiles with patterns, which are used in offices;
- Stretch ceilings with suitable film;
- Metal mesh;
- Decorative false beams;
- Metal partitions and pipes imitating industrial pipes and communications.
Please note that the loft style is best suited for spacious rooms with high ceilings
The loft concept assumes an open plan, so the design of zones is carried out with ceiling decoration, for example, beams.
Brick wall decoration in a loft style can be combined with suspended ceiling systems. Matte and glossy PVC coatings are suitable for modern loft design: white film, dark brown, beige, steel film, etc. For greater originality, the photo printing technique is suitable. A stretch ceiling system stylized as brickwork or concrete covering will fit perfectly into the loft atmosphere.
The only drawback of decorating a loft ceiling with a tension covering: the loft style requires free spaces and high ceilings, which does not always meet the standards of multi-storey apartments, and tension systems additionally reduce the ceiling height.
Original concrete loft style ceiling
The most effective way to emphasize the industrial style is concrete coatings. Concrete is considered a universal, environmentally friendly and durable material that is suitable for pouring ceilings, creating columns, furniture, and partitions. If previously a concrete ceiling indicated the beginning of renovation, now it is one of the decorative techniques that is gaining momentum in popularity.
Loft ceilings are characterized by unplastered surfaces, often even bare concrete
Rules for using concrete on the ceiling:
- Moderation and dosage. If a loft atmosphere is created in a small room, then it is advisable to use concrete in fragments.
- Compatibility with walls. Concrete ceiling surfaces look great with wood in warm shades, glass elements, and brick trim.
- Proper processing. Concrete, being a cold, rough and ascetic material, needs a subtle and careful approach.
If the room is no higher than three meters in height, then the concrete ceiling covering should be combined with darker walls.
Correct loft ceiling design with concrete material
If the concrete ceiling is “native” to the room, then it is polished and coated with special products. If the house is brick, then the exposed concrete ceiling can be imitated.
To simulate concrete I use:
- Microcement;
- Decorative panel;
- Architectural concrete.
Microcement with architectural concrete will create the same effect of a cement screed with characteristic color transitions and a pleasant “suede” texture.
Before applying materials imitating concrete, the ceiling must be treated as before painting.
An untreated concrete ceiling looks aesthetically unattractive, and due to its roughness, it quickly becomes dirty and ages. Modern tools make it possible to process concrete with high quality, after which the coating acquires marble smoothness and shine.
It is advisable to sand the concrete ceiling and coat it with a special compound
The benefits of polishing a concrete ceiling are:
- Spectacular appearance of the surface, which resembles a marble or polymer ceiling;
- Strength and surface hardness;
- Possibility of using a variety of color shades for surface finishing;
- Financial accessibility of this processing method.
Stages of polishing a concrete surface:
- Milling;
- Grinding;
- Application of a special mixture.
For each stage of processing, a special tool is used. A milling machine opens deep pores of the concrete surface, cuts off large sagging and bumps, but does not remove wave-like differences. The milling stage leaves grooves in the concrete up to 4 mm deep, which are removed by grinding.
Using a grinding machine with diamond or corundum coating, small irregularities are removed from the concrete, the surface is cleaned of cement laitance, which prevents the penetration of polishing mixtures into the surface of the concrete.
The first stages of work are carried out with dry concrete. For final processing, the surface is coated with a special varnish mixture.
Interior design in loft style (video)
The industrial loft theme is stylized using versatility. The variety of photos with loft interiors is proof of this. Rough and cold brutality, exposed structures are combined with soft home comfort and warm tones, creating an atmosphere of freedom and originality. Creative people, with the help of loft style, embody their most original ideas, accentuate and emphasize, at first glance, shortcomings and turn them not just into advantages, but into new fashion trends. The main task of the style is the ability to combine industrial rough details in such a way as to create an atmosphere of freedom and purity.
Ceiling design in loft style (photo)
homeli.ru
Whitewash
The process of how to repair a ceiling using whitewashing is somewhat different from painting. The fact is that in this case it is not paint that is used, but quicklime, which needs to be diluted, filtered and applied to the ceiling surface. For work in this case, a roller, brush, spray gun or vacuum cleaner is suitable.
Please note that a brush and roller will not give a sufficiently even layer of whitewash. A better job will be done using a spray gun and a vacuum cleaner. Although the appearance of a whitewashed ceiling blends harmoniously with any interior, it needs periodic updating, at least once a year. However, the cost of materials is quite affordable, so this type of repair will not be too expensive. The surface of the ceiling that is planned to be whitened must also be properly prepared - cleaned and leveled.
Conclusion
Repairing the ceiling is not a difficult job, but it is a responsible one; if you miss something, problems will appear very soon, so follow all the recommendations and use only high-quality materials. The video in this article will tell you about some of the nuances in more detail, and if you don’t understand something, then ask in the comments.
Did you like the article? Subscribe to our Yandex.Zen channel
October 28, 2021
Ceiling installation, Ceiling operations, Ceilings, Construction and repair
If you want to express gratitude, add a clarification or objection, or ask the author something, add a comment or say thank you!
Pasting wallpaper
To apply wallpaper to the ceiling, the joint efforts of at least 2 people will be required. This is quite a difficult job, since you will need to hold the wallpaper above your head and join it correctly. To work, you will need glue, selected wallpaper, a roller, a construction knife, as well as a glue bucket and dry rags.
The wallpapering technique looks like this:
- after thorough preparation of the surface to be glued, it is necessary to prepare the glue in accordance with the manufacturer’s instructions;
- wallpaper is cut into panels of the required length, parallelly joining the pattern on adjacent sections, if necessary;
- A cut piece of wallpaper is spread on the floor, glue is applied to the back side with a brush and it is allowed to lightly saturate the wallpaper;
- in the meantime, glue must also be applied to the surface of the ceiling along the entire length of the panel;
- then a piece of wallpaper is rolled into an accordion and pasted onto the surface of the ceiling, gradually straightening it out;
- using a roller, remove all air bubbles from under the canvas, and wipe off excess glue with slightly damp rags.
All other sections of wallpaper are glued in the same way. If there is a decorative pattern on the wallpaper, you should make sure that it matches the adjacent canvases. The room is closed and the wallpaper is left to dry for a week.
Room design features
So that the ceiling does not create the impression of incompleteness, does not cause a pressing, oppressive feeling, it must be correctly introduced into the interior and combined with other components. The desired effect can be achieved by suitable lighting - the ceiling will immediately cease to be gloomy.
For a loft-style interior, they buy chandeliers hanging from above, and lamps without shades are placed above the work areas. Also, spotlights, chandeliers in the form of fans and with a large number of small light bulbs, retro chandeliers, roof rails with diode lamps are well combined with a concrete vault.
Advice! To add coziness to a room with a concrete ceiling, you should add natural textures and warm shades. Wooden ceiling beams, furniture and floors made of natural wood successfully fit into the interior.
The walls should be decorated with accessories that suit the style, for example, panels or paintings. Glass surfaces look advantageous in this design - the concrete is reflected in them and looks softer and warmer. With the help of additional decor and beautiful finishing, you can get a unique interior with a cozy homely atmosphere, and even the roughness and brutality of concrete will not be a hindrance to this.
How to stick polystyrene tiles
Compared to wallpaper, the process of covering the ceiling with polystyrene tiles is much faster and easier. You can do the job alone. You will need tiles, acrylic glue, painting thread, a spatula, a construction knife and a mounting gun.
The working method is as follows:
- Calculate the center point of the room by drawing two diagonal lines from the corners of the room. Through this point, draw two lines perpendicular to each other between the walls.
- You should start gluing the tiles from the center of the ceiling. Glue is applied to the tile along the edges in a dotted line and a little in the center, after which it is applied to the ceiling. The angle of the tile must strictly coincide with the lines on the ceiling.
- All other tiles on the ceiling surface are glued in the same way. If the tile does not fit completely at the edges, it is cut to the required size.
- Finishing is done using decorative skirting boards or borders.
In this material, we looked at how to make ceilings in an apartment with your own hands, using several of the simplest methods. We hope the information will be useful to you. As for suspended and tensile structures, they are a separate topic for description.
Advantages and disadvantages
A concrete ceiling in the interior has a number of pros and cons.
Advantages
- Unusual appearance. A spectacular and uncharacteristic texture for a classic upper finish immediately highlights the interior, making it more interesting and textured. And the room does not have to be decorated in a loft style: it can be modern minimalism, eclecticism, or hi-tech. Concrete can fit even into the classic or Scandinavian style.
- Versatility. This material goes well with any other: from warm wood to elegant stained glass. In general, in contrast with the brutal canvas, any familiar texture (plastic, metal, fabric, marble) will sparkle in a new way. You don’t have to think about the harmony of materials: even contrasting combinations of cold and warm, industrial and homely will look interesting.
- Saves effort. If you like concrete in its pure form, you don’t have to think about plaster, paint and additional decorative finishing of the ceiling covering - it will be enough to fix what is already there with a protective varnish.
- Specifications. They are also worth attention because this material is fireproof, durable and environmentally friendly. It stays cool for a long time in the summer and is not afraid of fungus.
Instagram @flackstudio_
Instagram @cartelledesign
Instagram @pradesign
Instagram @mart_da.spb
Instagram @cuubstudio
Project of Aida and Ilya Tversky. Photo: Natalya Gorbunova
Project of Aida and Ilya Tversky. Photo: Natalya Gorbunova
Flaws
- Regardless of whether you are planning a classic loft or another design, concrete will play a major role in it. It might get in the way.
- Without a primer, it will absorb moisture and react to temperature changes. This problem is mitigated by appropriate processing of the canvas.
Instagram @artcreatework__spb
Instagram @yousupova.design
- Decoration
Concrete wall in the interior: 10 stylish options for different rooms
Comments: 25
Studio ARTIDOM
Year(s)/Years ago: 6 I think we should leave the concrete on the ceiling.
- Like | 4
- Save
Mikushin Dmitry
Year(s)/Years ago: 6 You definitely don’t need to paint, it will streak or stain, you can varnish the finish, but then it will become glossy.
- Like | 3
- Save
DYAC thanked: Mikushin Dmitry
Related discussions
Comments (43) Hello!
Everything is as bad and complicated as it seems: 1. You need to coat it with any primer, but first rub the seams a little with mastic. But they must be read well. 2. Choose a shade from white to gray, perhaps a coffee shade and paint the slabs 3. Hang a chic chandelier 4. Keep the loft style mixed with neoclassicism and everything will be great! Is it worth painting the walls in a new building?
Comments (15) I haven’t encountered anything you wrote above. done - forgotten. original appearance. installed 7 years ago. They eat up the ceiling to the width of the cornice mounting, about 4 cm maximum. if maintenance is necessary, suddenly a ladle of borscht will fly up, the ceilings can be easily wiped with an ordinary dish sponge and even without detergent. verified. and, excuse me, “the ceilings are low, only 2.7” - you were bitten. 2.55 I live now, no one died.
Advise design direction
Comments (35) Yu U Thank you for your thoughtful comments on the layout. We have mandatory conditions, strict bindings - windows, front door, built kitchen, gas boiler, gas inlet under the stove, 2 adults working at home and 3 children - boys 8 and 4 years old and a girl 2 years old. The layout depends on them. I would like sufficient sound insulation while working at home. 1. adult bedroom - what is the point of an additional table and chair. The function of a dressing table can also be performed by a desk by the window. - spouse's workplace. 2. The freezer is in your daughter’s room - put it in the kitchen. not standard - sell and buy 2 that can be built in. - useful advice. I should think. Just off the top of my head, how much does a built-in freezer cost? Where should I put it? 3. Both children's ones can be remade. — what are the gross mistakes? 4. What is the point of the rest of corridor 3 with a window whose width is slightly larger than the width of the window? - this is a corridor with access to the future summer terrace - door, window 5. 5 people in a family with one bathroom. It makes sense to add another bathroom to the dressing room. Move the office into corridor 3 with a window and fill out the remaining area with storage systems. - Do the dimensions of the house allow it? It seems like they were thinking about two bathrooms, but then the office is not included.
50 shades of white: doors are too white. Help with color
Comments (28) Good evening! In fact, this combination of white shades looks very interesting and not boring. But again, it's a matter of taste. If you think it doesn’t look stylish and doesn’t fit your idea, then you can choose option “B” - repaint the ceiling and ceiling cornices the white color of the doors. First of all, less work. Secondly, the walls and doors will not merge into a single whole, and the color of the ceiling will echo the color of the doors. White color always looks elegant and expensive; it makes the interior cohesive and harmonious. However, over time, an all-white interior may become boring. The advantage is that it can be interestingly played up and diluted with decor. You can also add photos, paintings, unusual lighting into the room - all this will not overload the eye. Well, don’t forget that white expands the space quite well. If I were you, I would give preference to milky white (like the walls), because the color of the doors is a cold shade of white, and in living spaces it is better not to overdo it with a snow-white tone. It will look very “sterile” and “hospital-like”. Good luck with choosing furniture!)
nataliashashkova
Year(s)/Years ago: 6
I am in favor of leaving it concrete. What color are the walls? What is the ceiling height? Photo is avaiable?
A lot depends on this.
- Like
- Save
Year(s)/Years ago: 6
Photos to come later, ceiling height 2.75.
The walls are predominantly white.
Plank floor, the color of the old attic wood (grayish brown)
- Like | 1
- Save
zamolotskikh
Year(s)/Years ago: 6
In the photos above, the concrete ceiling fits very accurately into the interior.
Materials such as concrete need to be worked with carefully and considered in the context of the entire interior, and not as an independent element.
Best regards, Stanislav.
- Like | 4
- Save
DYAC thanked: zamolotskikh Year(s)/Years ago: 6
Stanislav, thank you for your opinion! Yes, the interior includes unfinished walls, concrete, and blocks. Concrete countertops. Plank floor.
- Like | 1
- Save
Conscious interior studio of Anastasia Kiseleva
Year(s)/Years ago: 6 Last changes: Year(s)/Years ago: 6
It should be treated with concrete impregnation or matte varnish.
- Like | 3
- Save
DYAC thanked: Conscious Interior Studio by Anastasia Kiseleva Year(s)/Years ago: 6
Yes, all processing will be carried out.
- Like
- Save
Irina
Year(s)/Years ago: 6
concrete walls and ceiling are one of the features of a loft, why get rid of it.
- Like | 1
- Save
DYAC thanked: Irina
Elena-art
Year(s)/Years ago: 6
- Like
- Save
DYAC thanked: Elena-art
REMONSTROOM
Year(s)/Years ago: 6
Are the slabs monolithic or hollow? Question for the electrics - how do you plan to conduct and install it? After the groove, the ceiling needs to be sanded and painted, I believe. (And this goes into the price of the issue)
- Like
- Save
DYAC thanked: REMONSTROOM
olgabonnie
Year(s)/Years ago: 6
As I understand it, external wiring is planned?
- Like | 2
- Save
Year(s)/Years ago: 6
Yes, there will be external wiring, suspended structures on pins.
- Like | 1
- Save
ann-ulya
Year(s)/Years ago: 5 Last changes: Year(s)/Years ago: 5
I’m now also racking my brains over a similar problem - I have to do renovations in a new building, and there’s no escape from shrinkage..But I’m leaning towards the option with tinted concrete ceilings (I have such an apartment in my bookmarks) In my opinion, it all depends on the VOLUME of the room. 2.75m is not enough for gray concrete ceilings? Here then you need at least a larger area of the room itself.
Finishing methods or basic properties of different methods
We discussed the most common ceiling finishing options. But we didn’t talk about methods and tricks. There are many more finishing methods. Each group combines a large number of options for finishing the ceiling. Let's look at them in more detail. We will discuss both the advantages and disadvantages of each option to make it easier for the reader to make a decision in the future.
Whitewashing with lime
Perhaps this is the best option for many who do not want to make something fancy out of a simple ceiling decoration. A common and simple method that has been used for at least several generations. Has a number of advantages, such as:
- The solution that will be applied to the ceiling is completely safe for human life.
- Lime and all its components will not hit your budget due to its low price.
- This option can be used in any room.
But you shouldn’t immediately rush to buy this solution. It also has unpleasant properties. For example, it is no longer possible to clean and wash the ceiling, only to update it. The service life is quite short, only a few years. The surface needs to be prepared, and the lime itself absorbs moisture well. This is the best method for those who do not want to overpay for tension and hanging sections.
Coloring
Let's look at the coloring a little closer. This is a modern type of ceiling decoration. The main advantage that sets it apart is its attractive appearance. Always use water-based paints, they contain a huge range of shades. You can achieve a completely matte or glossy surface, which looks very beautiful. Color is an element that needs to be added to paint to achieve saturation and change shades.
Some paint not only the ceiling, but also the walls, in the form of attractive designs and so on. Of course, for this you need to have some kind of drawing skill. Sometimes it is with the help of paint that designer styles are created in apartments. Wet cleaning of the surface should take place at least once a month. The shelf life is approximately three years. After this, the material will begin to crack and fall off.
Wallpapering
The most budget-friendly and simplest option for everyone. If the wallpaper is chosen correctly, the home will look attractive, elegant and unique. It is also worth highlighting the huge number of colors, shades, patterns and designs. The material can be thick so that it can be painted in the future. Of course, this version of wallpaper will cost several times more than simple analogues, but its service life is much longer.
You should not use wallpaper in the bathroom or toilet. You won’t believe it, but many people are seriously thinking about this option. It’s not worth it, wallpaper is afraid of moisture, as well as sudden temperature changes. As a result, the material will begin to swell and then fall off the surface. Our craftsmen advise leveling and cleaning the surface before actual gluing. If this is not done, then all the irregularities will be visible in the future.
Liquid wallpaper
Have you ever thought about the existence of liquid wallpaper? Unique properties allow you to instantly improve any room, and do it yourself. The type of finish is quite reliable, does not fade in the sun, is not damaged by touches and generally looks very strong. The peculiarity is that you yourself can choose any color, as well as patterns covering the surface of the material.
But there are also disadvantages that are worth highlighting before directly purchasing the material. It has a high price, which makes this option unaffordable for many ordinary people. Also, if the material is damaged, it cannot be hidden by partial repairs and other similar methods. You will have to completely change the ceiling decoration, which again depends on your budget.
Surface finishing with plasterboard boards
Gypsum boards are a simple and attractive option with a very low price. Just a few elements can easily hide any problem areas on your ceiling. No additional processing is required before installation. The surface should not be leveled, as, for example, before laying tiles or painting. Special slats are installed on which plasterboard sheets will be fixed in the future.
Pasting with panels
Ceiling finishing can be based on a very practical and versatile material called PVC. It has attractive visual characteristics, making it number 1 in recent years. PVC has obvious advantages:
- Low price.
- Many varieties.
- Easy installation.
- The tiles can be laminated, making them easier to clean in the future.
- Excellent visual performance.
Patterns are almost always applied to PVC. Select them carefully and tastefully so that you don’t have to change the ceiling finish. Simple glue will allow you to secure all the components to the surface. Be sure to take a knife with you, sometimes the tiles need to be straightened and trimmed a little. You will also need a tape measure and a ruler, which will ensure you get accurate measurements throughout the process.
Installation of polystyrene foam boards
An excellent option, which is not so popular due to ignorance about it. Polystyrene foam boards come in thousands of shapes and colors on the market. They have a low price and also make it easy to hide the imperfections of your ceiling. They can be cleaned with a damp cloth and this will not cause any damage. Always pay attention that the surface of this option is embossed, which may not suit the design of a particular room.
Laminate boards
Laminate has always enjoyed some popularity, and in recent years it has become very popular. The main advantage concerns easy installation. There is no need to clean the surface and make unnecessary “movements”. The resulting ceiling is very attractive, but its installation has obvious disadvantages. The first and most important thing is complexity; it requires a master of his craft.
We strongly advise against installing a laminate ceiling to a person who has never done it before. Also remember that the material does not like moisture, so it is not installed in the bathroom, toilet or kitchen. Otherwise, the laminate will simply swell and begin to peel off. In general, if you do not take into account the dislike for liquids, the material is very strong and often serves its owner for about ten years.
Multi-level ceilings
A multi-level ceiling can zone the space in a room. This is an ideal and very attractive option. Such ceilings look aesthetically pleasing, even chic. But do not forget that their cost will cost you a large sum. The material is plastic, yet it is durable and reliable. It can bend into bizarre shapes, allowing you to create a unique design.