Repair is a responsible task that requires not only time and money, but also a certain amount of experience.
If you do even the most basic tasks incorrectly, the results of your efforts may not last long. For example, this applies to plastering work.
A person can spend a lot of effort plastering the walls of an apartment or other object, but after a few days, weeks or months he notices with horror that the new coating is cracking and crumbling.
How to prevent this from happening? – just avoid the following 5 common mistakes.
Poorly prepared base
Before applying a new layer of any coating, it is necessary to very thoroughly clean the base of the surface being treated from old material.
This could be old wallpaper, plaster, putty, a layer of paint, or some other things. All this should be carefully stripped to the maximum; you should not leave anything from the old coating.
Sometimes it is allowed not to completely cover the old layer if it sits very firmly.
If this is not done, then the following happens - new plaster is applied to the walls according to all the rules, but since it lies on a shaky foundation, it begins to fall off, peel off, crack due to vibrations, etc.
How to properly remove a crack?
You need to start repairing cracks in the plaster immediately, as they, left without repair, continue to lengthen, leading to the loss of entire pieces of finishing material.
The method for sealing a crack is selected depending on its nature, depth and structure of the coating underneath it. If thin cracks appear on the wall, this is most likely due to a violation of the ratio of the ingredients of the solution or the drying mode. Such cracks can simply be primed with glue and then puttied. But for a better effect, the wall is covered with a special fiberglass-based painting canvas.
Advice
Even small cracks should be taken seriously. Left untreated, they will enlarge and appear under the paint and even under the wallpaper.
You can prepare a special mixture for grouting cracks yourself from cement and PVA glue mixed in a 1 to 1 ratio.
Deeper cracks reaching the wall are a consequence of foundation shrinkage . They require a lot of work to remove.
- At the first stage, the crack must be widened - grooved and deepened with a chisel or hammer drill. As a result of the work, the thin gap should turn into a wide, at least 1 cm, gutter in the wall.
- Then the hole is cleaned of dust with a vacuum cleaner, and its walls and bottom are well moistened with water. Fresh concrete mortar with the addition of PVA glue is poured into the gutter. It is pressed forcefully into the gap so that the particles of the composition penetrate into all the small pits and cracks of the gutter.
- The surface of the wall above the gutter is immediately leveled with a spatula and rubbed with a trowel.
- After the solution has dried, the repaired wall is puttied.
Using primer
Some self-taught craftsmen believe that priming is completely optional. Or they simply don’t know about its existence.
As a result, a new layer of plaster is placed on the surface that has not been treated with a primer. Particles of old material, dust, paint, sand, dirt remain free underneath, reducing adhesion.
At the slightest load, say, a blow from the front door or children running around the apartment, the absence of a binding layer makes itself felt and the plaster begins to crumble and crack. That is why it is better to use a primer.
Why does plaster crumble?
When the finish falls off the walls, it is necessary to determine the cause. Most often, this phenomenon is associated with the following factors:
- Stains from grease and oil compounds on the walls are not degreased or they were done poorly.
- There is soot on the surface.
- The walls are not washed from dust, so the plaster is crumbling.
- The surface is not coated with primer.
- The whitewash has not been removed beforehand.
- The gypsum mass is applied to a concrete or cement base without first installing a separation barrier.
- The walls are not sprayed with water, which is why there is not enough adhesion to the plaster.
- There is little binding material in the original composition.
- There is no pre-made waterproofing layer.
- There is no strengthening of the thick-layer mortar garment with reinforcement.
- The application technology is violated - the solution is not protected from dehydration, the dough loses water and does not gain strength.
- The hardened solution turned out to be stronger compared to the base material. Internal stresses are greater than those that the wall can withstand.
Incorrect use of the composition can also be classified as a separate group:
- The gypsum mixture was used in a room with very humid air.
- If the house is gradually shrinking, and the walls were plastered with any mineral composition, the material will also crumble, and it needs to be strengthened. In this case, it is better to use polymer-based elastic plaster.
- Shedding is also observed when using concrete contact. Normally, it is used only when a light gypsum mass is applied to concrete. The primer forms a film with a rough texture that does not allow water to pass through. Thanks to this, it prevents the gypsum dough from getting wet and sliding down in the place where it adheres to the concrete. Moreover, the adhesion of the film is low, so it cannot always withstand the weight of a heavy coating.
Why does plaster crumble after drying?
Even if the finishing technology is followed, it happens that the plaster crumbles from the walls after drying, which is why it needs to be strengthened.
This phenomenon is often associated with a violation of the hardening conditions:
- The room experienced negative temperatures for a short time.
- The humidity is too low, it is not enough to harden the mass.
- There was no ventilation, which is why the humidity, on the contrary, became too high.
Poor quality of working mixture
There is a rule - when mixing a solution, water is first poured into the container, and then the mixture itself is added.
If you do the opposite, then no one can guarantee the quality of mixing dry material into a mixture of the required consistency.
Even a good mixer may not cope with this task. If the plaster contains poorly mixed components, lumps, pebbles, then it will not allow the master to work normally and will begin to fall off at the first opportunity.
Common mistakes when painting the ceiling
Common mistakes when painting a ceiling relate to the quality of preparation of the base surface, paint preparation, choice of application tool and painting method. Most often, defects appear due to the use of thick paint. Your mistakes in this case:
- high concentration of glue in paint;
- thick layer of coloring composition.
Correction of defects will also be necessary in case of poor preparation of the base surface:
- the paint comes away from the base due to the presence of dirt or particles of wax mixture on the ceiling;
- efflorescence appears when applying paint to a very wet base;
- rubbing occurs if you paint without a preliminary primer or over old paint;
- Irregularities and veins on the ceiling appear if the cracks are covered with gypsum and a high-quality primer is not applied.
It is equally important to follow the painting technology and know in which direction to paint the ceiling. Otherwise, the following problems will arise:
- stripes and stains appear if the coloring composition is not mixed before use or if the brush (roller) is pressed unevenly;
- if the direction of painting is violated, streaks from the tool will be visible (the first layer is painted perpendicular to the windows, and the second - parallel);
- folds appear when using too thin or thick paint;
- Unstrained compounds result in bumps and unevenness (we will tell you later how to correct unevenness on the ceiling after painting).
Operating at the wrong temperature
It is recommended to plaster walls at a room temperature of +5 - +25 degrees Celsius. If, for example, the temperature is too high, then the water from the solution will dry out too quickly, and the gypsum will not be able to harden correctly, according to technology.
Low temperatures are also dangerous as the material will crystallize too slowly.
How to prevent cracks and holes from appearing?
Important
To prevent the appearance of cracks, cracks and holes in the plaster, you must follow the rules for its application.
Any house shrinks, on any soil. It is not recommended to plaster walls for at least 1 year after building a house. This can be done during the construction of a private country house, but in commercial construction this approach is not encouraged.
- Firstly, you need to try by any means to insure the walls from the appearance of cracks. Proper preparation of the base will help. They need to be cleaned of dust and moistened with a glue solution. Small fractions of sand and concrete will be securely glued to the wall and will not create air pockets in the future.
- Secondly, it is advisable to use reinforcing mesh. It is available in different thicknesses, so you can choose it for even the thinnest basting.
- Thirdly, the mixture for plastering the base must be prepared according to technology (how to dilute the mixture correctly?). A small amount of cement will weaken the plaster, and excess will destroy the crystal lattice of the coating.
- Fourthly, the drying regime must be maintained in accordance with the brand of cement. The room temperature should be from 5 to 20 degrees, drafts are unacceptable.
- Fifthly, when plastering the ceiling, it is advisable to use a quick-drying mixture or add alabaster or gypsum to it yourself.
Anyone can do a job like plastering walls or repairing them when cracks appear. Of course, there are special educational institutions that train professional plasterers and molars, but still this work is not as specific as, for example, flying an airplane.
Anyone can master it. You just need to not be afraid of manual labor and remember that during repairs, not everything goes smoothly, something always has to be completed or redone. Only long-term practice guarantees excellent results .
Plaster can be applied to walls made of different materials. In our articles you can read about how to plaster foam block, gas block, plasterboard, aerated concrete, penoplex, polystyrene foam.
Add water to the mixture
Many people add water to the finished solution, seeing that it has begun to set or is losing consistency.
This is wrong, since the properties of such education are already different from those that are necessary for work.
By adhering to simple rules of work and avoiding these mistakes, even a non-professional will be able to properly repair his home.
Do you know what mistakes cause fresh plaster to fall off the walls? Share your experience in the comments.
What to do if plaster falls from the ceiling
If old or new plaster is falling off the walls, it is important to understand what to do first:
- Remove old plaster.
- If there is a crack, make a V-shaped indentation with a putty knife.
- Carefully inspect the area that needs to be strengthened.
- Moisten it generously with water until the wall is completely saturated.
- Apply a solution of lime or cement to strengthen the layer.
- Let it dry until completely hardened.
- To reliably seal the plaster that has fallen off the walls, apply a second portion of the solution. It should not fill the crack completely, but about 2/3.
- Spread it over the entire area of the recess.
- After hardening, apply the solution again.
- Wait until it dries and rub it perfectly flush with the ceiling.
To strengthen the ceiling surface, it is treated with lime or cement mortar.
How to cover it up and what to do if the plaster has fallen off from a wooden ceiling
Repairing crumbling plaster from a wooden surface has its own characteristics. In this case, first take a formwork board, which should be slightly longer in length compared to the area being repaired.
The board is painted so that the solution sticks to it as well as possible. A plastic film is placed between the solution and the board. Next, to strengthen the wall, the composition is applied to a large area and then covered with a board. To support it, spacers are installed - two other boards (they should be 1-1.5 cm longer).
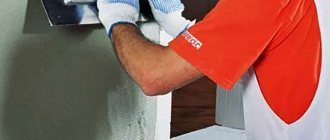
How to putty walls correctly?
The last step before applying the finishing material is to putty the walls. It is designed to eliminate small defects and flaws in the surface being finished. And before applying it, the wall must be cleaned of dust and dirt.
Materials for puttying are numerous and varied. And it will take a lot of time to study them all. So let's focus on the most basic ones.
Types of putties
One of the most popular brands is Fugenfüller putty.
How to apply putty correctly
This is an excellent high-quality material that gives the surface high strength. They are very good at finishing problem walls with many defects and large differences in plane.
Experts recommend using Fugenfüller for painting or wallpapering. True, not all masters like this material. The fact is that this putty is difficult to sand.
What to do?
If the cement-based plaster has come off from the aerated concrete, then you need to completely clean it off and reapply it.
First, it is advised to finish the walls inside the room, and only then finish the facade.
The plaster may come off due to constant changes in humidity. You need to find the source of the increase or decrease in humidity and correct it.
If this happened due to a mixture of poor quality or an old composition, then you can only completely remove the old finish and apply a new one.
The problem should be carefully studied; perhaps this was due to subsidence, which appeared due to the fact that the plaster preparation time specified by the manufacturer was not followed. Then just redo everything.
When applying the mixture in hot weather, it is necessary to slow down the drying of the walls. To do this, they are moistened from time to time.
But if cracks do occur, then the walls are rubbed with mortar or gypsum dough. If the gaps are too large, they are widened, cleaned, moistened and plaster is applied.
Try placing paper tape over the peeling plaster area. If the tape breaks, you will have to start all over again.
Sealing cracks in plaster has its own algorithm of actions, filled with some subtleties that require careful study.
Subtleties of sealing cracks:
- It is advised to buy a mixture of the same brand that was used previously.
- You cannot work at air temperatures below +5°C and at humidity levels above 80%.
Restoration work
Plaster repair also involves removing stains from the wall surface. They appear during operation and can be caused by grease, soot or rust. It also happens that the stains formed before the finishing work. In this case, you will have to solve this problem before you start gluing wallpaper or laying tiles. Restoration work is as follows:
- For greasy stains, use a two percent hydrochloric acid solution. The entire surface with stains is treated with the composition until they disappear.
- As for rust stains, copper sulfate or a two percent solution of hydrochloric acid will help to deal with it.
- If the stains are deeply ingrained into the plaster and cannot be cleaned, then you will need to seal the area with dye or white.
Advice! Whatever surface you're cleaning, it's important to clear it of dirt and dust first. Only after this other manipulations are performed.
The restoration of the surface under the tiles requires special attention. The procedure is as follows:
- using a rubber mallet, tap the surface of the wall. This is the only way to identify a peeled or poorly fixed area;
- When the area is found, you need to knock harder so that the tile falls off. If it is not removed in this way, then you will have to act radically - break it. The process requires accuracy: the tile is broken from the center so that the adjacent one is not damaged;
- If after removal there is a strong layer of plaster left, then it is not necessary to knock it down. The new tile should be glued more securely using a special glue;
- when the plaster falls off, the area is cleaned, primed and plastered again. After drying, a new tile is glued.
How to avoid destruction of plaster
When the first signs of cracking or shedding of the layer appear, it is necessary to assess the extent of the problem and take measures to eliminate it.
Experts offer several methods of strengthening:
We use deep penetration soil
Treating walls with deep penetration soil is the simplest method of combating crumbling. The solution is applied in a generous layer to the entire surface of the wall.
The work is carried out in several stages:
It is important to follow the sequence of steps and allow time for the materials to dry.
Strengthening plaster with impregnation
Impregnations to strengthen the internal bonds of materials allow you to fix the crumbling plaster layer. To date, compositions have been developed that can penetrate into concrete to a depth of 1.5 meters.
How to make a defect invisible
For small defects sealed with sealant, you can make them invisible using a small brush and paint.
Simply paint the white caulk over the edge of the resulting hole with a brush.
It is advisable to match the paint by color, but if it does not match too much, it is not a problem.
In a small area this will not be very noticeable.
For larger defects, full finishing is carried out.
If the defect is on the wallpaper, it is necessary to putty the defect and align it with the rest of the wall, and then replace the sheet, carefully cutting it along the adjacent wallpaper. If the defect is on a painted wall, it is puttyed and painted over.
In this case, you need to very accurately select the paint color to match the base color. If on a tile, several tiles are placed at the site of the defect. If it is not possible to hide the defect, the entire wall is refinished externally.
How and with what to seal the grooves is shown in the video:
It is unlikely that you will be able to completely plaster the ceiling and walls if you lack the skill, but you can still try to repair individual areas.
For plastering, solutions are used consisting of binders (cement, gypsum, lime, clay), fillers (sand, slag) and water, which are mixed in certain proportions.
Usually internal stone walls
plastered with lime mortar containing 2 parts sand to 1 part lime.
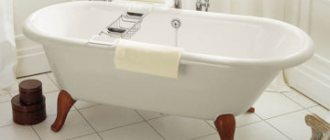
Walls in bathrooms
plastered with a waterproof lime-cement mortar that is easy to work with and adheres well to the surface: 1 part of cement is mixed with 2 parts of sand, diluted with lime milk and stirred until a plastic mass is obtained. The solution is good for one hour.
Wooden interior walls
plastered with lime-gypsum mortar (1 part gypsum to 3 parts lime mortar). Pour a little water into the bowl, add gypsum in small portions and quickly mix everything until a liquid dough forms. Then, within 2 minutes, a lime solution prepared in the same way is added to the resulting gypsum solution while stirring. This solution should be prepared in small portions, as it sets quickly.
Loose, swollen plaster
you need to knock the wall off the foundation with a hammer. By lightly tapping with a hammer, check the strength of adhesion of the plaster to the base around the damage site. A dull sound means that the plaster is not held firmly, so this plaster also needs to be beaten with a hammer. Then you should prepare and moisten the surface for new plaster, remove paint and wallpaper around the areas to be repaired, make a suitable solution and re-plaster, carefully rubbing the new plaster onto the old one.
Options for wall decoration
Repairing a wall in an apartment can be done using various materials. The most popular of them are:
- wallpaper of various types;
- frescoes;
- decorative plaster;
- dye;
Wallpaper for walls
Some people believe that wallpaper is a long-outdated way of covering walls, but this is not so. The possibilities of such coverage are simply enormous. Canvases with a variety of designs and patterns are updated every season. The most commonly used types of wallpaper are:
- paper or non-woven;
- vinyl;
- washable.
A variety of coatings will allow you to choose an option according to personal preferences. Non-woven fabrics are of high quality and density; they can hide small unevenness in walls due to their thickness. Paper coatings are inexpensive, but their strength is quite low. It is highly not recommended to use them for tiling in the kitchen or bathroom, since they are not protected from moisture.
A good solution for cladding walls in a home would be vinyl and washable wallpaper. They have an average cost, but are of good quality and moisture protection.
Use of fresco
Fresco is a handmade work that involves covering walls using water-based dyes on wet plaster. The only drawback of this treatment is the high cost, but its appearance will fully cover all costs. The fresco is perfect for creating almost any style, especially for bohemian interiors.
Decorative plaster
Decorative mixtures are a more modern method of cladding. The composition of this plaster includes the following components:
- marble stone chips;
- synthetic additives;
- nylon fibers or cellulose.
The effect of cladding with decorative plaster Various additives can significantly change the result of cladding walls in an apartment, so the composition of the solution must be taken into account during the purchase.
Painting the walls
Apartment renovations are rarely complete without paint. The combination of painted surfaces looks attractive and stylish. Designers often experiment with a palette of colors, creating unique interior pictures. The most popular options are highlighting one wall with an unusual shade or painting the surface using a stencil.
As can be seen from the article, wall repair is an extremely important procedure. The possibility of further surface finishing will depend on the quality of this work. With the help of the photos used in the article, it will be possible to see in practice each stage of the work.
How to repair plaster
Advice: If you are not confident in your own abilities or have never had to plaster walls before, you should trust the professionals. They will complete the entire process faster and better than a self-taught amateur.
Plaster repair is carried out in several stages. To isolate the wall surface from moisture, you will need to apply a protective compound, and then proceed to further operations.
The repair procedure is as follows:
Advice: If the coating defects are very serious, the damaged areas should be re-applied with a putty mixture or plastered.
What to cover and how to strengthen crumbling plaster
If cracks appear, you must try to find the same brand of mixture with which the walls were previously treated
If the finish falls off in large pieces, it is necessary to completely remove the coating. You'll have to prime and plaster again. When it holds tolerably on the base, it is not necessary to completely remove it. It is enough to simply fix the crumbling plaster on the wall. To do this, use a soil mixture and reinforcing mesh.
Why does putty bubble when applied to a wall?
Gypsum plaster is widely used in repair and construction work. But not every master takes into account all the nuances that arise, as well as the technological subtleties of the mixture.
To prepare gypsum plaster, you need to carefully study the table of technical characteristics, which indicates time, quantity, composition.
Each point and sub-point is given for detailed study. Not only the speed of the master’s work depends on this, but also the quality of the surface created.
Creating a surface (plane) using gypsum plaster is carried out in several stages, which follow each other.
If one of them is omitted, the surface plane will have defects that, at first glance, may not be noticeable, but this will become apparent during further finishing.
Tools for working with plaster
Without a set of the necessary tools, it will not be possible to create a strong, even wall, ready for wallpapering or laying tiles.
Required:
- Gypsum plaster KNAUF Rotband – 25/30 kg.
- Water container.
- "h-shaped" rule.
- Trowel.
- Construction mixer.
- Brush.
- Trapezoid rule.
- Spatula-scraper (facade spatula).
- Grater.
- Medium spatula.
With the help of the right tool, work will progress easily, naturally, and with high quality.
Preparation of the solution
To prepare a solution of gypsum plaster, you will need a certain amount of water (the manufacturer’s bag indicates 15-16 liters per 25 kg).
Water-gypsum ratio - the amount of water needs to be divided by the amount of dry mixture (16/25 = 0.64). Now, for example, in order to prepare a solution of 2 kg.
plaster, you need 2 * 0.64 = 1.28 liters of water.
Important point. Before stirring the gypsum material, a certain amount of water should be poured into another container; if necessary, it is gradually added during the mixing process. Do not pour the dry mixture into the finished solution - this will speed up the setting time (just like a dirty tool).
In order to pour the gypsum mixture into the water, you should take 7-10 spatulas and gradually “spray” them. This is done so that some lining is created at the bottom of the container. Afterwards, when the rest of the plaster is poured in, it does not lie down in a heap.
Further, after pouring and spraying several blades of the solution, a certain film with flakes appears on the surface of the water. These are fillers. In Knauf mixtures, the fillers are soft and soften during the smoothing process. Next, pour the entire mixture into a container of water.
Using a construction mixer, mix everything thoroughly. If the consistency is thick, then add water. After kneading, you can check the durability. If necessary, add water. Check the durability again. If the solution is thick, then it will harden faster.
Applying gypsum plaster to the wall surface
It is most convenient to apply the solution with a trowel, because... conventional “assistant spatulas” are inconvenient, overloading the hand and causing premature fatigue.
The material is thrown onto the surface as evenly as possible, without gaps, since gaps are future air bubbles in the mixture, voids covered with a thin layer of solution during distribution.
Distribution stage. Closing
The “h-shape” rule should be drawn lightly from bottom to top. Then use a trowel to remove the remaining mortar on the tool and fill it with the voids that appear on the surface.
Don't press the rule too hard. The tool should be carried out in a zig-zag manner, making movements from side to side several times.
In this case, the surface becomes more even, the gypsum plaster remaining on the tool is added to the surface in places that require filling. Air bubbles may appear on the wall.
They need to be pierced with a trowel. Using the “h-shaped” rule, you need to work until the surface becomes smooth, without air swelling.
After the surface is formed, small air bubbles (3-5mm) may remain. This defect will be corrected with further work. The surface will be rough.
Perlite (filler) came to the top. This is an indicator of how much filler is in the mixture.
Part of the plaster is left on the surface to fill the grooves remaining after removing the beacons.
The next stage of surface formation begins after 60 minutes. During this time, the entire tool should be cleaned of the working mixture. This stage will affect the speed of work. The instrument is washed with a brush in water.
How to strengthen crumbling plaster with your own hands
The plaster is crumbling, what should I do? It happens that, saving on cement, builders make plaster almost from sand. And this material is used indoors and for external decoration of walls of any building.
Plaster increases the strength of the wall by almost 30 percent, which is very important, and only then the owners decide for themselves: to paint the walls, tile them or glue them with wallpaper. In addition, such a coating helps to level walls, hide defects on them and ideally prepare surfaces for applying liquid or gluing regular wallpaper.
Repair technology
Stains, lumps of swollen material, cracks - all this will have to be eliminated if you want to get a beautiful ceiling at the end of the work.
The easiest way is with small cracks - they are slightly expanded with a spatula and filled with a solution specially developed for this purpose, sold in hardware stores. It has the words “crack filler” in its name. After the crack is filled with it, the surface is rubbed and leveled into the same plane as the rest of the ceiling. If the damage is more serious, you will have to tinker.
In all places where defects were found, the old coating is removed with a regular spatula. When determining the area of damage, the area around it is tapped. A dull sound indicates that detachment has occurred in this place as well. The entire damaged area is removed, extending about two centimeters onto the hard surface.
The surface is cleaned either down to concrete or to a depth of one centimeter, provided that the base is held firmly. If this is not the case, then it is worth cleaning right down to the concrete.
Priming the cleaned surface will be the next step. The soil is selected based on what material will serve as the base and the humidity of the room. Betonkontakt is suitable for concrete; for other materials, a different primer will be required. The strength of subsequent layers depends on its quality and compliance with the material of the surface on which the primer will be applied, so you should not save money here.
After the primer layer has dried, you can begin to eliminate defects. As a rule, several layers are applied. The starting mixture is applied first. It has a coarser structure, but allows you to get a thicker layer on the surface.
Quite often, instead of the starting mixture, the composition that was previously plastered on the ceiling, diluted to a more liquid state than usual, is applied.
For lime coatings, it is lime mortar that is used, and for cement plasters, only cement mortar is used.
The base is moistened with water, and about five millimeters of liquid solution is applied to it. When it has thoroughly set, a cross is made on its surface - crosswise, with a spatula or trowel. This is necessary for better adhesion of the finishing coating to the applied layer of solution. You can make several passes with this mixture until the desired thickness is achieved.
After the starting layer has set, the final, finishing material can be applied. It is applied in a thinner layer, usually not exceeding five millimeters. After application, the surface is rubbed with a special felt float until a uniform surface of the repaired area is obtained.
The restored part is ground in such a way that it forms a single plane with the undamaged areas.
If the plaster has dried out during the repair process and is not rubbing well, it can be lightly moistened with water from a spray bottle.
When the surface has been restored, you should wait until the area dries and carry out the final painting.
Surface Preparation Tools
Preparing the necessary tools is an important element of preparing for work. The set of required tools may vary, but in general for such purposes you should have with you:
- hammer drill with a special attachment;
- chisel and hammer;
- a grinding machine, a sanding bar and sandpaper, which has a varied fraction;
- scraper;
- putty knife;
- construction hair dryer;
- sponge and spray bottle;
- needle roller;
- rollers and brushes of different shapes and sizes;
- vacuum cleaner or broom.
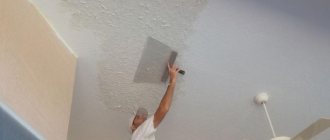
We plaster the ceiling ourselves
High-quality plastering of the ceiling surface with cement mortar
Until now, ceiling plaster is the most common finishing option that is used everywhere. In any apartment, office, country house, industrial enterprise, workshop, warehouse - everywhere you can see a flat surface covered with a layer of gypsum mixture.
In any city it is easy to find a master who will masterfully perform the work described. But the technology of applying plaster itself is so simple that you can master it yourself. This finish has significant advantages over other options. But there are also disadvantages. Therefore, before choosing this type of finish, you should weigh the pros and cons.
Advantages of plastering ceilings
The described technology has a number of advantages. This:
- Relatively cheap. The cost of materials for work will be significantly lower than what you will have to spend on any other finishing option.
In addition, primary plastering of ceilings is a mandatory step in most alternative finishing methods. And those who decide to carry out such work on their own can save a lot on attracting professional labor. It’s no secret that two-thirds of the cost is paid for someone else’s labor.
Therefore, today such ceiling repairs are often classified as in the middle price segment.
- Space saving is another positive advantage of plastering technologies. They help to reduce height loss to a minimum - the correct layer of plaster takes only 3 centimeters. And for small apartments with very low ceilings, this is quite important.
- Versatility of use. This circumstance helps to use plaster when finishing any surface - be it concrete, brickwork or wooden partitions. It will hold up very well and equally reliably on any of these types of floors. It is enough just to choose the correct composition of the mixture and observe in detail the features of repair technologies.
Method of plastering the ceiling
As you can see, the above arguments speak of a worthy finishing material that can easily meet the requirements of modern times.
But it is worth mentioning the disadvantages of this option. Applying plaster is a very labor-intensive process that requires special professional skills. Any deviation from repair technologies will lead to disastrous results: the plaster ceiling may crack, and then the finishing will partially or completely collapse.
Modern mixtures can withstand even high room humidity, but cannot “survive” the flooding of neighbors. In this case, cosmetic repairs will definitely be required, and this will provoke new expenses.
Despite all these disadvantages, this method of finishing ceilings continues to be very popular. Today this is the most understandable and affordable type of repair work that can be easily done with your own hands.