Before planting plants in open ground, you need to draw up a planting plan. This will help avoid many mistakes, and a pre-planned garden will look much more harmonious than a hastily planted one.
Your planting plan can look like anything you want: a handwritten list or an entire map. We suggest doing something in between: a schematic sketch that includes all the necessary information.
This plan will help you maintain proper crop rotation. After all, by saving the diagrams for several years in a row, you will be able to accurately change the location of crops in the beds. In addition, you will have the opportunity to choose your neighborhood more carefully. By planning everything in advance, you will get a well-planned garden that is a pleasure to care for.
Choosing a place for a garden
Most plants love sunlight. Then they grow and bear fruit normally. It is necessary to choose a place for a vegetable garden taking into account this fact. It is especially important to allocate a well-lit area for a vegetable garden in the middle zone and northern regions.
It will be beautiful and convenient if you do everything according to the rules
Before planning, take a closer look at how the shadow is distributed on your site during the day. It's not just buildings that are throwing it off. Another shade is provided by a solid fence, trees and bushes. Based on the results of your observations, divide the area into three groups: illuminated all daylight, until noon, and all day in the shade.
You need to choose a place for a vegetable garden taking into account the amount of sunlight on the site
For regions with a cool climate, the best place for a vegetable garden is where the sun shines all day long. In the south, choose other areas - in partial shade. For southern regions, it is ideal if there is sun only in the morning, and in the afternoon the area is covered in shadow. Where there is shade throughout the day, only shade-loving plants can be planted. There are few of these in the garden, but there are enough flowers or ornamental plants. So you can make a flower bed.
Illumination and characteristics of crops
So, the illumination of the site is extremely important for planning the location of the beds:
In addition, you need to consider the nature of the crops you plan to plant. Usually every gardener has a clear list of his favorite vegetables, some of them are low-growing, others are tall.
Considering that you will need to organize proper crop rotation over time, it is important to initially make the beds so that the above-ground parts of the plants do not block their neighbors and do not deprive them of life-giving sunlight with their shadow.
You can get some more information about the layout of the site and the orientation of the beds according to the cardinal directions from the following video:
How many beds do you need?
To plan a vegetable garden, you need to know how much area you will need to allocate for each type of plant. When you decide on the area, you can, already in the planning process, choose the size of the beds and their shape. So, how many beds do you need? First of all, you must decide what you want to grow in your garden and how many kilograms you would like to have of each crop. The easiest way to do this is in table form.
| Vegetable crop | Productivity in kg per hundred |
| Potato | 250-300 kg |
| Carrot | 230-270 kg |
| Cabbage | 500-600 kg |
| Beet | 300-370 kg |
| Onion | 100-120 kg |
| Tomatoes | 60-70 kg |
| cucumbers | 350-420 kg |
| Eggplant | 200-350 kg |
| Bell pepper | 150-200 kg |
Then you need to find data on yield per acre in your region. You need data for each type of plant you want to grow. The table shows the average yield for Russia. They counted them into kilograms per hundred square meters. They will differ by region, and significantly. But for a first estimate, you can take these numbers. After the first harvest, adjustments can be made. You can also try to find out from your neighbors how many vegetables they grow and focus on local indicators.
Calculation of the area of beds for crops
All you need to do to calculate the area for beds is to divide the figure that you plan to receive in the form of a harvest by the yield for a given crop. Find out how many acres should be allocated for this vegetable. Then, when planning your garden, decide on the length and width of the beds, then you can finally understand how much space is required.
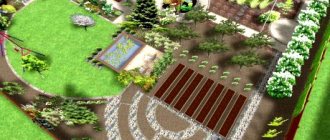
Two vegetable gardens. Both there and there have everything you need. It all depends on preferences and the required volumes of grown products
Let's look at it with an example. For example, we want to grow 250 kg of potatoes, 50 kg of onions, 50 kg of tomatoes and 50 kg of cucumbers. We count:
- Potato yield is 250-300 kg per hundred square meters. We still want the same 250 kg. That is, we will allocate 1 hundred square meters for potatoes.
- We want 50 kg onions. Productivity - 100-120 kg. We count: 50/100 = 0.5 hundred parts.
- You need 50 kg of tomatoes. Productivity 60-70 kg. Calculation: 50/60 = 0.8 acres.
- We plan to get 50 kg of cucumbers. The yield is 400 kg, we get 50/400 = 0.125 acres.
We calculate in the same way for all the plants that we want to grow in the garden. We add up the resulting numbers and compare the result with the area that we can allocate for a vegetable garden, and make adjustments.
This is if you do it “according to science.” If gardening is more of a pleasure for you, then take a plot plan to scale, and on the same scale make templates for beds of different shapes and sizes. Move the beds around the area until you get a picture that you like. Then simply distribute the vegetables among the beds. But even in this case, lighting must be taken into account.
There is no gain in space, but it looks interesting and the lighting could be better
Location of beds
If we talk about orientation to the cardinal points, then the most optimal placement of the beds is from north to south. In this case, the planting will be illuminated all day long, and shading will be minimal. But this is true for regions with cool summers. In the southern regions the problem is different. It's not about how to get better lighting, but how to stop the sun from burning your plants. The task is the opposite, but it is no easier. The advantage here is that the orientation of the beds is not so important.
You can plant plants both along the long side of the bed and along the short side.
Northern regions
The choice of location for vegetable crops is also influenced by the location of the region and the presence/depth of groundwater. Recommendations for northern regions:
- Arrange the beds from north to south.
- We make sure that the shadow of the house or trees falls on the garden as little as possible.
- When the water level is high, we try to allocate the highest areas for the garden or make ditches around the perimeter to drain the water.
- We arrange high or raised beds.
Still, it’s easier to achieve beauty with fenced-off beds.
These are general principles and rules. See for yourself what suits you and what doesn’t. As for raised beds, it is worth saying that they require more time and money to set up. But they justify themselves. Firstly, they warm up earlier, and secondly, soil waters and substances dissolved in them have minimal impact on plants. Thirdly, the gardening season can be extended, since it is easy to make something like a greenhouse by making arcs on which to stretch the covering material. This will also protect the crop from sudden frosts.
Vegetable garden in the south
For the southern regions, the layout of the vegetable garden is subject to different principles. It is necessary to protect the plants from the scorching sun and ensure normal watering. Here's what you can do:
- We plant plants that tolerate heat well in direct sun. These are sweet peppers, eggplants, tomatoes.
- Plants with more delicate foliage are planted in partial shade or alternating with tall crops that will shade them. For example, cucumbers can be alternated with corn. Two or three rows of cucumbers, one of corn. And along the edges of the planting there is also corn.
If there is a lot of sun, at least position it radially - Drip irrigation is more efficient and economical.
Raised beds in the south are also applicable, but really high and with light walls (whitewashed). The reasons here are different. In the southern regions with dark soil, it heats up so much that it is impossible to walk barefoot - it feels like being in a frying pan. With raised beds, you raise the plants above the hot soil. Well, it’s easier to shed a limited volume of soil. In addition, you can also install arches and stretch covering material or shading mesh to protect from the scorching sun.
Cultivation method and width of beds and row spacing
Not all gardeners divide their plots into beds. Many people simply plant plants in rows, not even always separating one crop from another. Sometimes the division is a wider “pedestrian” row spacing. In principle, this is possible, but dividing it into beds makes it easier to care for and makes the garden more attractive. When properly processed, it increases productivity.
Who said it should only be smooth?
How to plan a vegetable garden for beds
There are several systems for dividing beds. They determine the width, planting length, and some also the row spacing.
- Narrow beds. The width of the beds is 45 cm, the distance between them is 90 cm. Why is this so? In a regular bed, the outer plants are usually taller and stronger because they receive more light. For this reason, they make a bed 45 cm wide, planting only two rows of plants. In this way, high yields can be achieved; even sun-loving varieties ripen in the middle zone. But there is also a significant disadvantage: wide row spacing reduces the “working” area, and they are also overgrown with grass, which has to be dealt with.
The famous gardener Igor Lyadov grows a sumptuous harvest in narrow beds - Normal beds or regular width - from 50 cm to 90 cm or even up to 1 meter. The row spacing ranges from 40 cm to 60 cm. They can be level with the ground or raised. Raised - these are without walls, but the sowing area is higher than the level of the row spacing. The height difference is formed due to the soil brought in or the site added from other places.
- Raised beds. The walls are made of boards, slate or other similar material, and humus and a layer of earth are poured inside the box. Such beds are not flooded by floods or rains and warm up better. They are more comfortable - easier to handle, no need to bend too low. But the device requires more costs and time.
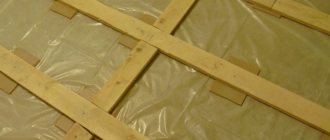
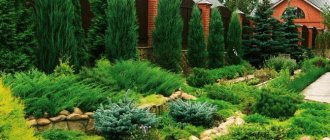
Increasingly, beds occupy only part of the garden. The rest of the area is allocated for a recreation area, garden, rock garden and other similar garden “excesses” - Warm beds . They differ from tall ones in their “filling”. Inside the box made of boards or slate, layers of branches, foliage, humus, and a layer of soil are laid in which the plants are already planted. Width - up to 1 meter. The good thing is that rotting foliage warms the soil, which allows plants to be planted earlier. This is important for the northern regions; for the southern regions it is not so relevant, but also practical due to the better results that prepared soil gives.
You can use any of the methods of growing plants in beds. You can also choose any width of the bed. Optimally - no more than one meter. Possibly less. We select it individually: it is important that you can reach the middle without much difficulty. And not only to reach - you will have to handle the middle of the landing, but it should not be too uncomfortable.
Stone fencing
The beds, framed with stones of various sizes and shapes, look static and very decorative. This is a durable option. During installation, certain skills in laying such material are required if it is decided to use cement-sand mortar as a binding material.
A simpler option is to fill stones between metal gratings, which are strengthened along the perimeter of the ridges at the preparatory stage. Such pergons look noble, introducing an innovative sound even into an ordinary landscape.
Garden beds made of stone can easily withstand any external influences, are durable, and allow you to create any configuration and shape.
Forms of beds
The traditional shape of the beds is a rectangle. Its width, as you understand, is from 45 cm to 100 cm and depends only on your desire and the chosen growing method. The length of the bed again depends on your desire or on the layout of the site. Why is a rectangle most often chosen? Because this is the most efficient use of the garden area.
The shapes of the beds can be any. As in this case, they can emphasize the shape of the flower bed
In general, there can be beds of any shape: square, triangle, polygon, circle, oval and more complex shapes. These forms may look more aesthetically pleasing, but there is more space “walking around”. So you choose the shape of the beds at your own discretion. It affects the yield slightly, but the appearance of the garden is very different.
Using slate
You can quickly create a neat frame for a bed of any configuration using flat slate. This is an inexpensive and durable material. Its fragility must be taken into account.
- First, mark and level the perimeter of the bed, making straight lines. It is advisable to check the joints using a square and control all dimensions.
- Cut slate sheets into strips and dig a trench so that its depth is equal to half the width of the prepared material.
- The slate panels are installed strictly vertically, fixing them together with metal corners with a protective anti-corrosion layer.
- Gently sprinkle with soil, compacting each layer. Metal pegs are installed in several places on both sides of the slate fence, securing the structure.
- All that remains is to fill the internal space with fertile soil, and a neat, aesthetically pleasing garden bed is ready.
Sheets of wavy slate, which give an interesting sound, are no less successfully used to make fences. The combination of two types of slate – flat and wavy – will diversify the decor.
Beds on a site with a slope
It is more difficult to plan a vegetable garden on a site with a slope. Here, retaining walls set the direction of the beds and changing something is too difficult and expensive. You have to use what you have to the maximum. On the southern slope, everything is fine - the lighting is ideal, and the retaining walls additionally warm the plantings - they accumulate heat, then warming up the air. Therefore, we make paths closer to the edge of the leveled area so that the heat from the walls reaches the plants.
Where to make paths on a site with a slope
On the northern slope, a retaining wall provides shade. It lies close to the wall almost all day, while the edge receives more sun. Therefore, we make paths right next to the wall, moving the beds to the edge of the site. In this case, it is more convenient to process plantings one level higher. This way you won't have to bend over at all.
How to make beds on an eastern or western slope? Observe which part is illuminated more and which receives less light. Make paths where there is less light.
You can also make small beds on a slope not leveled by supporting walls (example in the photo below). Install two wide boards in parallel (or knock together a couple of narrower boards). The distance between the boards is the width of your bed. Optimal - 70-90 cm.
Beds can also be made on the slopes themselves
Lay the boards on the slope “on edge”. You can dig in a little by burying the bottom edge into the ground. You hammer in pins on both sides of the board that will hold it in this position. You make mini-retaining walls from short pieces of boards and fill the voids with soil. Now you can plant the plants.
It is convenient to grow greens and aromatic crops in such beds. Suitable for strawberries, you can plant tomatoes or bush beans. In principle, the selection of crops depends on the lighting. And one more thing: plants that climb or produce a lot of volume are not very good on such a slope. And keep in mind that the walls will hardly accumulate heat, except perhaps in the spring. Later they will be covered with greenery.
Land preparation
Initially, the area that you have chosen for the beds needs to be processed, dug up and plant debris removed. If there was previously a building at the chosen location that you demolished, you need to remove all construction debris, and there will be a lot of it: glass, wood chips and nails.
Ideally, of course, bring new soil to such a site, because there is a possibility that the soil is no longer fertile.
The most important thing is to prepare the bottom layer of soil. If it is dense, then moisture will accumulate on it all the time, which is why the rhizomes of plants can rot. In order to loosen the soil, it is better to use a cultivator - this will be difficult to do manually. And give some soil for testing, so you will find out the acidity level, because there is a possibility that the soil is not suitable for growing crops.
How to organize a vegetable garden in a small area
Not everyone wants to have a large garden. More and more summer residents prefer to relax at the dacha rather than cultivate the plantings. Nevertheless, going to the dacha with a full set of products is “too much” for many. Therefore, they make a couple of beds where they plant greens and a couple of bushes of various vegetables. In principle, this is a global trend, so there are more than enough ideas for organizing beds in a small space.
A mini-vegetable garden can even be organized on the terrace
Vertical beds
An interesting idea is to grow plants in vertical beds. This name hides many different methods. The only thing they have in common is that the plantings/crops are located one above the other. They may be offset or exactly one below the other, but they all tend upward and occupy a minimum of area.
Vertical plantings do not require much space
Option one is a wall for a vegetable garden. Trays and boxes with soil are hung on an existing or specially built wall or fence, in which plants are planted/sown. This is how green crops and various herbs are grown. If you want, you can plant climbing or climbing ones. But it makes sense to plant them together, providing support in the form of a mesh or wooden lattice.
Not everyone likes this idea of hanging planting boxes on the wall. You still have to water it, so the wall may get wet or the finish will be damaged. In this case, make a rack on which you place the containers. And this stand may not be near a wall or fence. It can, for example, separate a vegetable garden from a garden. Or cover some areas or buildings (in front of a toilet, shed, compost pit).
The most popular are various boxes and drawers
You can even use vertically or horizontally fixed large-diameter plastic pipes in which to cut “windows” for planting. Strawberries feel best in such plantings, but greens and aromatic plants will not be offended.
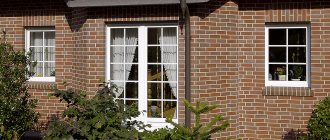
Vegetable garden along the fence
Not everyone has a fence around the perimeter of their entire plot. But if it does exist, you can make beds under it. An exception is corrugated board fencing in warm regions. The metal gets so hot that everything just burns. In the northern regions, this is not a hindrance - it will additionally heat the plants.
The method of organizing beds under the fence depends on the groundwater level, soil type and amount of precipitation. If the soil is good and the water does not stand still even after heavy rain, you can simply separate a part for planting. Dig up a bed 50-60 cm wide and place a border.
Height and material for the border - your choice
If the soil is not very good, there is a lot of water, or you just want a more well-groomed appearance, we make high beds. Add partitions and get space for greens, cucumbers/tomatoes. If you don’t want to “spoil” the fence, you can make a full-fledged box. In any case, it is covered from the inside with geotextiles. To protect against moles, you can lay a fine-mesh metal mesh on the bottom.
As mentioned above, the width of such a bed is 50-60 cm. You need to reach the far edge without much effort. And stand in this position for a while - plant, weed, water. Height is entirely at your discretion. As is the wall material.
Even a narrow passage to the house or garden can become attractive
Wooden fencing
Wood attracts with ease of processing and simple installation. But this material is short-lived. The prepared parts should first be treated with impregnation to prevent rotting.
To make your own garden beds with wooden fencing, you use various parts.
These can be vertically dug narrow dies, pegs, or cuttings of logs. If the latter have a large diameter, they should first be sawed along the longitudinal center line. Unsanded birch logs look great.
You can weave a fence from willow twigs. Convenient to use are boards made from floor slats, slabs, planks, clapboards, and picket fences. They are easy to install, secured with stakes. If necessary, the fence can be quickly dismantled and moved.
Advice! If you plan to use the garden beds for more than one season, it is better to use high-quality wood material: dry bars, wide wooden panels, edged boards, block house, thick lining.
A couple of ideas for small areas for a vegetable garden
If you have a small garden and you want to achieve maximum results, give preference to those plants that grow well in your region and are guaranteed to produce a harvest. It is possible to occupy squares for exotics, which probably will not survive, but only if the area is large. The same goes for time. If you can allocate minimal time to caring for your garden, you should not plant plants with complex agricultural techniques. They take a lot of time, and a positive result is not guaranteed.
From small areas to the maximum: compaction
Use the principles of compact planting - this is when another plant species is planted between plants of one type. Relevant for narrow beds or small vegetable gardens. The rules for selecting plants are as follows:
- so that they are not affected by the same diseases,
- so that food is taken from different depths,
- “compactors” mature earlier than “main” ones.
Compaction gives good results.
The landing site must also be taken into account. For example, it is better to plant salads and cabbage between rows. The remaining crops are in the same row as the main species. List of what can be sealed with:
- beets - dill, salad;
- potatoes - garlic, beans, radishes;
- cabbage - salads, dill, spinach;
- carrots - spinach, radishes;
- zucchini, squash - beans, beans, dill, corn on the cob (remove young).
What is best to compact with what in the beds
These are the most common schemes for intercropping. As you can see, there is no need to allocate a separate place for dill, radishes and salads at all. They combine well with various garden crops. Just don't sow them all at once. Optimally - with an interval of a week or 10 days, otherwise everything will reach maturity at the same time, you won’t know what to do.
Pre-sowing and post-sowing
Another way to optimize your vegetable garden is to use pre-seeding or post-seeding. Post-sowing is when new plants are planted in place of mature plants. If quickly ripening species are sown in early spring in place of late-planted species, this is called pre-sowing (pre-sowing). For previous or subsequent sowing, radishes, lettuce, greens, onions, and watercress are suitable.
There's a lot to consider
Border tape
Plastic curb tape is easy to install without requiring any special skills. Considering the variety of colors, this material looks very decent.
Thanks to its flexibility, it allows you to frame beds of any configuration.
This material is frost-resistant and durable. Withstands shock loads and does not fade for a long time. To ensure the strength of such a fence, the tape is installed in a shallow trench, soil is sprinkled, compacted with palms, and plastic pegs are installed on both sides.
Principles of crop rotation
To have a harvest every year, change the areas for planting plants of the same type. For example, don't plant tomatoes in the same place every year. Pests and diseases of a specific type accumulate in the soil. By changing plants and sowing disinfectant plants, you destroy pests.
Tomatoes, eggplants, potatoes are all nightshades and have the same pests.
So when selecting plants, it is also worth looking at the classification of species. To make it easier to navigate, we present a table of sequence/combination of crops.
| Culture for planting | Good predecessors | Valid predecessors | Bad Predecessors |
| Medium and late varieties of cabbage | Peas, beans, beans, cucumber, carrots, early potatoes | Beetroot, cabbage | |
| Early varieties of cabbage, cauliflower | Onions, cucumbers, beans, peas, beans, sederats. | Carrots, tomatoes. | Root vegetables, cabbage |
| Beet | Potatoes, cucumbers, greens, green manure. | Tomatoes, onions, carrots, cauliflower and early cabbage, | Beetroot, late and mid-season cabbage |
| Cucumbers, zucchini, squash, zucchini | All legumes, onions, garlic, cabbage, except late cabbage. | Potatoes, beets, greens | Tomatoes, carrots, late cabbage. |
| Tomatoes | Cucumbers, turnips, cauliflower, greens, green manure. | Onions, beets, cabbage of medium and late varieties. | Tomatoes, potatoes |
| Onion garlic | Legumes, potatoes, cucumbers, cauliflower and early cabbage | Beets, tomatoes, late cabbage | Greens, carrots |
| Potato | Legumes, green manure, cucumbers, cauliflower and early cabbage | Beets, carrots, mid and late cabbage, greens | Tomatoes, potatoes |
| Greenery | Legumes, onions, cauliflower and early cabbage, cucumbers, green manure | Potatoes, beets, greens, tomatoes | Carrots, late cabbage |
| Legumes | Potatoes, onions, garlic, whole cabbage, cucumbers | Root vegetables, green manure, greens, tomatoes | Legumes |
How to “change” vegetables in the garden beds
If you change places for planting plants according to the table above, it is most convenient to divide the garden into 4 parts. For the first time, plant plants that have the same requirements for soil and fertilizers in a certain area. For example:
- Responsive to the addition of organic matter: pumpkin, cucumbers, squash, cabbage.
- Less demanding soil qualities: tomatoes, peppers, eggplants.
- Root vegetables (carrots, beets, turnips, turnips, rutabaga).
- Potato.
Next year we are moving everything forward. In the fall, we add humus to the area where the potatoes were. We plant plants of the first group there. Plants from the second group move to 1 plot, etc. Schematically, the first option for crop rotation for a vegetable garden is shown in the left figure below.
Correct crop rotation in the garden - what to plant next
Sometimes potatoes and tomatoes take up half the area. In this case, we divide the second half into three sections, where we place the plants of the remaining groups. Every year, potatoes/tomatoes move from one half to the other, and the vegetables in the second half also alternate with each other. This crop rotation is shown schematically in the right figure.
Metal fences
Fences made of metal parts have a long service life. It is necessary to select options with corrosion protection.
A good option is an aesthetically pleasing profiled sheet of galvanized steel with a polymer surface coating.
These types of fencing for garden beds will be quite expensive, but their cost will be offset by durability. The advantages of corrugated sheets include reliable protection against corrosion, a wide range of colors, and light weight.
Green manure
A gardener has two global tasks: maintaining or improving soil fertility and fighting weeds. There is one method that will immediately solve both problems - the use of green manure. These are plants that grow quickly and form dense greenery that suppresses the development of weeds. They are sown after or before the main sowing/planting, then the greens are cut off, leaving the roots to rot in the ground. By rotting, they enrich the soil and also make it looser. And some of the green manures also kill diseases. So this agricultural technique is really very important.
This is not out of stupidity. This is an agricultural technology to improve soil fertility
Rules of application
Several basic techniques for using green manure. They are sown immediately after harvesting in a continuous carpet (lupine, rapeseed, phacelia). Or in early spring before planting the main crops. Scatter the seeds over the surface, then cover them with a rake. Two to three weeks before planting the main plants, green manure is mowed. Greens can be used for mulching. You need to cut it before the seeds appear, otherwise you will get a new type of weed.
Growing seedlings using green manure
When planting seedlings, green manure does not need to be mowed. We just make the hole larger, plant the seedlings, and mulch the soil. If green manure covers the sun, they can be trimmed, but in general, they even out temperature fluctuations. When the seedlings have taken root, you can cut off the green manure and mulch the soil with leaves.
What types of green manure plants are there and their choice
Many plants are suitable for improving soil health. When choosing green manure, take into account what you will plant after it.
- They enrich with nitrogen almost like adding manure: alfalfa, clover, sweet clover, china, lentils, peas, beans, etc. They also kill the nematode.
- General improvement of the condition of the upper layers of the soil and the fight against nematodes: winter rye and wheat, spring oats and barley, Sudan grass, millet, fescue. Dense greens do not rot very well, but make excellent mulch. Suitable for all types of soils, including acidified ones.
Green manure plants have different properties, but they all improve soil condition
- Soil enrichment (not suitable for acidified soils): rapeseed, mustard, rapeseed, radish. The greens are soft and rot well, but they need to be mowed before the “arrows” are pasted. After green manure from this group, you cannot plant cruciferous vegetables - cabbage, radishes, radishes, spinach, arugula.
- Phacelia, mallow, amaranth, flax, calendula, tagetes (marigolds) are also good for increasing soil fertility. It is necessary to mow before the buds appear.
To suppress weeds, green manure can be sown not only in spring or autumn—row spacing can also be sown in summer. Just remember to mow on time. The greens will be used as mulch. For regions with hot climates, green manure can be planted after the main plants have taken root. In this case, dense greenery will keep the soil from overheating.
If you plant oats/barley and legumes, or flax and calendula between the potato rows, there will be fewer Colorado potato beetles and nematodes. And phacelia and mustard will help get rid of wireworms. Plant sweet clover and lupine between the tomato bushes - they will prevent horse rot and late blight from developing.
How to create a slate bed with your own hands: photos and recommendations
Slate is very easy to use, so summer residents willingly create beds for vegetables and herbs based on it. Such structures hold the earth well within a clearly defined area. At the same time, the beds look neat and attractive.
Advantages of asbestos cement boards:
Neat beds made from leftover slate
In addition to the advantages, the material also has disadvantages. Many experts note the harm of flat slate for beds, because due to overheating, the products contribute to the accelerated evaporation of moisture from the soil, which negatively affects plants in the heat. In addition, during rains, the soil is eroded and light slate sheets tilt, so the owner of the site will need to constantly adjust their position.
DIY technology for making slate beds
Asbestos cement sheets with waves are used as a finishing material for roofing. The remains of the product can be used to arrange beds on the site.
The sequence of making beds from wavy slate:
Slate is a durable and at the same time fragile material, so you need to be careful when working with tools
Slate sheets can have horizontal or vertical waves. If material with horizontal waves is used in the construction of beds, the shoots of some plant species will run along the recesses. Therefore, you should carefully dig up the soil so as not to damage the fence.
Do-it-yourself technology for making flat slate beds
If it is planned to manufacture structures from corrugated sheets, then the construction of beds will be accompanied by a minimum amount of waste. In this sense, flat slate is less convenient and practical. It is recommended to use asbestos-cement sheets, the length of which is 1.75 m, for the manufacture of beds.
Slate for making beds can be purchased in the form of ready-made sheets
The process of making beds is as follows:
Flat slate beds can be dismantled if necessary and moved to another convenient location
Buying slate sheets for beds: price of products and preparation for use
To cut asbestos-cement sheets, it is better to use a grinder. This type of tool can handle cutting any materials, including slate, pipes, iron, etc.
There is one caveat when working with an angle grinder. When cutting material, the tool must be turned so that the dust blown by the wind flies to the side.
Asbestos-cement dust is dangerous to human health, so when working with sheets you must wear safety glasses and a cotton-gauze bandage. It is strictly forbidden to use a saw designed for working with wood to cut slate. A person in such conditions risks serious injury.
The soil in beds made of asbestos-cement sheets heats up faster, so plants produce crops earlier than in open soil
Most often, the remains of slate are used to build beds after the roof of the building is covered with it. This applies to corrugated sheets. The assortment of many stores allows you to buy ready-made strips for slate beds.
Average prices for asbestos-cement strips for beds:
| Product size, cm | Product thickness, mm | Number of products per package, pcs. | Weight, kg | price, rub. |
| 150?25 | 6 | 400 | 4,6 | 70 |
| 150?30 | 400 | 5,5 | 83 | |
| 175?24 | 400 | 5 | 72 | |
| 175?30 | 400 | 6,3 | 82 | |
| 150?20 | 8 | 400 | 4,9 | 68 |
| 150?25 | 400 | 6,2 | 78 | |
| 150?30 | 400 | 7,4 | 93 | |
| 175?24 | 400 | 6,6 | 84 | |
| 175?30 | 400 | 8,3 | 109 | |
| 300?30 | 250 | 14,7 | 210 | |
| 150?30 | 10 | 400 | 8,7 | 108 |
| 175?24 | 400 | 8,2 | 102 | |
| 175?30 | 400 | 8,7 | 126 | |
| 300?30 | 200 | 17,4 | 229 |
Choose “convenient” trees
Caring for an orchard requires not only time, but also certain knowledge, skills, and abilities. To simplify and reduce worries about the garden, it is recommended to adhere to a certain strategy at different stages of cultivation.
How to simplify the care of garden trees:
- Low growing varieties. The smaller the height of the tree, the easier it is to care for. A large pear or apple tree is very difficult to maintain; you have to use a stepladder to perform various tasks. In a garden of dwarf and columnar fruit trees it is easier to: spray;
- perform pruning (in the indicated types it is kept to a minimum) - standing on the ground, you can trim any branch;
- to collect fruits - you don’t have to climb ladders and use fruit pickers.
Single style
We bring to your attention the most popular solutions for vegetable garden design in a general style.
Mediterranean style
Colors: Pastel shades, terracotta, ocher
Materials: Natural stone, paving slabs, wood flooring, brick
Peculiarities:
- Decentralization
- Availability of a recreation area
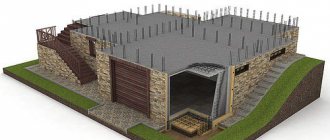
- High terraces, multi-level structures
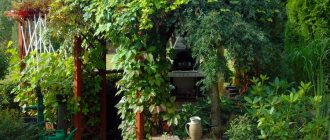
- climbing plants
Country
Colors: Variegated natural shades
Materials: Natural wood, stone, willow rod
Peculiarities:
- Smooth lines
- Large number of colors
- Using household items as accessories
- Wicker structures
Japanese style
Colors: Green palette
Materials: Small crushed stone, pebbles, boulders
Peculiarities:
- Decoration with lanterns, bridges, gazebos
- Asymmetry, irregular shapes
- Low beds
French style
Colours: Delicate natural colors
Materials: Almost any: wood, stone, brick, slate, concrete
Peculiarities:
- Beds of regular geometric shape, divided into segments
- Paved paths
- Framing with decorative stone or border
A stylish vegetable garden with a unique design will become the pride of any summer resident, and smart technologies, high beds and the right choice of soil will help increase productivity and save effort and money spent on maintenance.
Irrigation system
A significant part of gardening work is watering the plants. If you use lazy beds, you will have to water much less often. But even in this case, it is better to route the pipes around the area correctly. You already have a plan for the location of the beds in your garden. Now add flower beds, bushes and trees. Get a plan for the placement of plants that need to be watered. Now you should think about how to lay water pipes in the garden so that any “irrigation object” is no more than 2-3 meters away. If you do this, then you will have to pull a small hose to each bed, which is much simpler.
Homemade drip irrigation system made of polymer pipes, water source - barrel
It’s even better if a hose for drip irrigation is installed in the smart garden bed. This will reduce water consumption and increase yield. Yes, at the same time. A drip irrigation hose is a polyethylene tube with small holes through which water drips drop by drop. When planting, plants are planted next to the holes. As a result, water is supplied to the root, the plant receives a sufficient amount of moisture, and the spaces between plants remain only slightly moist (due to the redistribution of moisture in the soil).
When using drip irrigation, you will have very little work. You open the tap, wait a certain period of time, close the tap. All. Hoses for drip irrigation are available for connection to a water supply (sold by the meter), and are available in the form of kits with a small pump that will pump water from the container. The price range for hoses for drip irrigation is significant - prices differ significantly. No matter how limited your finances are, don't buy the cheapest hoses - they won't last more than one season. It’s better to pay a little more for a quality product and use it for several years. When choosing kits for drip irrigation, you must also consider the area to be irrigated. But, most likely, it will suit you, since lazy beds are rarely large. Read more about drip irrigation kits and manufacturers here.
Grow fewer seedlings
Many garden crops are grown by seedlings. At the same time, it is not at all necessary to plant it on windowsills. Seedlings can be grown directly in a greenhouse, or even directly sown in the ground. Indoors, seedlings often stretch out and get sick and do not tolerate transplantation well.
The seedling method should be used only if it is truly profitable, or if it is impossible to obtain a harvest in any other way. Cabbage, cucumbers, pumpkin and melons - all this can be grown from seeds. The harvest will be later, but you won’t have to bother with seedlings.
Use the results of scientific and technological progress
Keep your finger on the pulse of scientific and technological progress, which never bypasses agriculture. Along with traditional growing methods, you can use all sorts of progressive advances that simplify the processes of caring for plants.
Among the most popular and effective solutions are a heating cable that warms up the greenhouse soil, artificial lighting, automated watering, automatic temperature control systems and much more.
Perennials
“You can make life in the garden easier by growing perennials instead of annuals. It is enough to plant them once and occasionally look after them. If, for example, tulips need to be dug up at least once every two years, then peonies can grow in one place for 20-30 years. There are flowers that require virtually no care: ephemeroids, scylla, Pushkinia prolesciformes, crocuses, galanthus, Golden Ball rudbeckias. Of those plants that can be used as food, Jerusalem artichoke, vegetable or berry physalis, perennial green onions (spring onions, chives, slime, multi-tiered onions) and others are considered unpretentious. Sometimes they just need to be weeded, thinned and fed,” he shared.
It's time to fight. What should a summer resident focus on in late spring and early summer? More details
Buy ready-made seedlings
It is easier and often cheaper to buy seedlings than to grow them yourself. There are people/companies that professionally grow seedlings in large greenhouses. Optimal growing conditions are maintained there.
Many gardeners spend time growing seedlings, believing that this is the only way to get healthy, uninfected seedlings. In fact, there is no guarantee that such seedlings will be healthy and will not develop blackleg or other dangerous diseases.
The best solution to the issue is to find a reliable supplier of seedlings, then you can save a lot of time and effort on growing them.
What do you do?
Grow your own seedlings
85.79%
Buy ready-made seedlings
14.21%
Voted: 894
Create optimal conditions for plants
Before planting a plant, find out what growing conditions it requires. How does it relate to light, does it tolerate shading, is it afraid of groundwater and other nuances. The more factors you take into account, the greater the chance that the plant will grow safely without creating problems for its owner.
Taking into account growing conditions is especially important in relation to fruit trees - they do not grow quickly, replanting is treated extremely poorly, so every mistake leads to loss of time, harvest, and the tree itself.
Working in the garden today is not a necessary necessity for many people. It is rather a hobby that allows you to spend your time productively. To make gardening a pleasure, you need to carefully consider the strategy for developing your plot and approach the organization of its maintenance wisely.
1
0
Copy link
Take care of garden tools
Many inexperienced gardeners waste a lot of effort due to the use of low-quality or unproductive gardening tools. Dull hoes, inconvenient handles, all this complicates and delays gardening work. Often the instrument deteriorates due to improper storage.
How to choose good equipment:
- The cutting parts must be sharp. Otherwise, you will have to devote more effort to work than necessary.
- When choosing hoes, shovels and rakes, take into account your height - and choose equipment for it.
To prevent equipment from deteriorating, it must be stored correctly. If you throw rakes and shovels on the street, the iron parts will rust, and the wooden parts will begin to rot and deteriorate.
There is equipment for a variety of types of work that can simplify work in the garden and vegetable garden - fruit and berry pickers, special stools and carts for doing work while sitting, hand cultivators, mowers and much more.