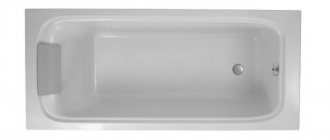
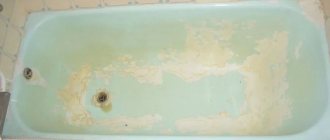
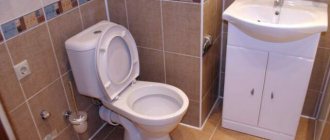
In this article we will talk about what it is to restore a bathroom with liquid acrylic: reviews and prices. We always want our bathtub, in which we take water procedures, to remain snow-white and beautiful for many years, maintaining its newness. But over time, during use, scratches and cracks, yellow spots, rust and various deposits appear on the surface of the bathtub.
It is not always possible to replace an old bathtub with a new one; it is much easier, faster and cheaper to restore a bathtub with liquid acrylic. Reviews and prices, if you look at this issue in more detail, lead to only one thought: restoring a bathroom with liquid acrylic is a quick and very simple solution, which also saves a significant amount of money in the family budget.
To ensure that your bathtub remains snow-white and beautiful for many years, in this article we will introduce you in detail to all the intricacies of the process of restoring a bathtub with liquid acrylic, all the pros and cons of acrylic coating, and how to properly care for it. After reading reviews and practical advice, you will find out why more expensive to restore a bathtub does not mean better. And you will be able to make the right decision, allowing you to avoid a lot of mistakes when choosing a bathtub restoration service with acrylic.
The easiest, fastest and most proven method is bathtub restoration with liquid acrylic
There are different ways to refinish a bathtub. In this article we want to talk about all the advantages and nuances of this method of restoring bathtubs, such as restoring a bathtub with liquid acrylic or restoring bathtubs with liquid (self-leveling) acrylic. This method of restoring bathtubs is also known as a pour-in bathtub.
This method of restoring bathtubs has replaced enameling bathtubs, which has become unpopular because in recent years, bathtub enamels have been produced of poor quality. Manufacturers of enamels and various bath paints constantly reduced the cost of their products, which could not but affect the quality.
There are many enamels on the market, the coating of which begins to peel off after 3-6 months, even if your bathtub has been properly prepared. Recently, only a few manufacturers have been producing high-quality enamel for restoring the surface of bathtubs.
Therefore, enameling bathtubs or covering a bathtub with enamel as a method of restoring bathtubs has become less and less popular in recent years. This method of restoring bathtubs has been replaced by restoration of bathtubs with liquid acrylic. This is the same inexpensive and quick way to restore the coating of a bathtub; it is also called the pour-in method or “fill-in bath.”
We repair chips
Chips on an acrylic bathtub are a common occurrence. They are formed as a result of careless use, accidental impacts with massive metal objects, etc. The choice of repair method depends on the size of the chip.
If it is minimal, try to solve the problem of restoring the surface by simply polishing. Before performing this, the chip must be rubbed with coarse sandpaper, and then polished with fine-grained sandpaper. You can speed up the work by using a drill equipped with a polishing attachment. Having completed polishing, you need to remove dust and wash the restored area of the coating with a soap solution.
ABRAforce sandpaper, fabric 100mm x 5m, (P60), art.500024839
If the size of the chip is significant, then again you cannot do without a repair kit. When restoring chips, you need to proceed in the same way as when eliminating cracks. First, the working area is cleaned with sandpaper of different grain sizes, after which the chipped area is washed and degreased. Then follow the same steps as when sealing cracks. Liquid acrylic must be applied carefully and just enough to level the surface. Excess applied restoration mass must be removed immediately, avoiding the formation of a tubercle at the chip site. The restored bathtub should be dried for 6-12 hours, depending on the temperature and humidity in the room, after which the working area is polished and washed off with water.
What you need to know about restoring a bathtub with liquid acrylic
This method of restoring bathtubs got its name due to the fact that acrylic is applied to the surface of the bathtub using the pouring method; it is, as it were, poured onto the sides of the bathtub and flows down the walls under its own weight, forming an even and smooth glossy coating on the entire surface of the bathtub, which hides the existing There are imperfections on the bathtub - bulges, depressions, etc.
I would like to note that this method of restoring bathtubs has gained enormous popularity precisely due to the fact that acrylic coating, unlike enamel coating, is much more durable; the bathtub becomes like new - snow-white and shiny. That is why this restoration method is in great demand.
80% of the durability of acrylic coating depends on the quality of preparatory work
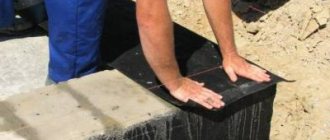
The technology of covering a bathtub with acrylic using the pouring method is not complicated. If desired and knowing the nuances, even a non-professional can do the restoration of a bathtub with liquid acrylic at home with his own hands. But it is for the durability of the coating that the correct preparation of the bathtub for restoration is of primary importance.
If the preparation is carried out correctly, the acrylic will penetrate into the micropores of the surface, due to which it firmly adheres to the surface of the bathtub and will serve you for many years and delight you with its appearance.
Proper preparation of the bathtub for restoration is the key to durability
The surface of the bathtub is cleaned of rust, limescale, cement mortar residues, tile adhesive and silicone sealant. To do this, the surface of the bath is cleaned using a drill with a special attachment or an angle grinder, as it is also called in simple words “grinder” with a special cleaning disc.
The disk, rotating at low speeds, grinds, in other words, cleans the surface being prepared, giving it a matte and rough appearance. Power tools must not be used at high speeds. Otherwise, the so-called overheating of the metal cannot be avoided; in such areas there will be very low adhesion to the surface being painted.
After abrasive cleaning, the surface of the bath is treated with a special chemical composition that removes fatty and organic deposits in the micropores of the surface. After this, the surface of the bath is thoroughly washed with warm water, dried and degreased.
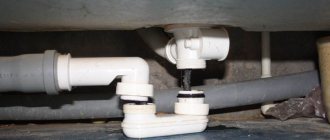
After this treatment, the bathtub becomes matte and rough; the applied acrylic gets into the micropores and firmly adheres to the surface of the bathtub. Then the plumbing is dismantled.
A specially prepared mixture of liquid acrylic and hardener, which has a sour cream-like consistency, is applied to a clean and grease-free surface of the bathtub by pouring. Flowing from the sides along the walls of the bathtub and along the bottom, acrylic forms an even and smooth, snow-white-looking glossy coating. After complete hardening (after 16 or 24 hours), the plumbing is installed back.
If the restoration of a bathroom with liquid acrylic is carried out by an experienced craftsman, following technology and using high-quality materials, you will receive a coating that will serve and please the eye for many years.
In order to objectively understand the situation, we will next talk about all the advantages and disadvantages of restoring bathtubs with acrylic.
Removing scratches from an acrylic bathtub
Getting rid of scratches is easy. This is a minor defect; usually scratches on the acrylic surface are shallow and can be easily restored. First of all, the area with the scratch needs to be treated with sandpaper. Prepare two types of sandpaper - coarse-grained and fine-grained. Use coarse sandpaper first, then fine-grained sandpaper. After sanding, the surface to be restored should be degreased using some ready-made composition or, for example, just alcohol. After degreasing, polish for working with acrylic is applied to the treated area and left to dry. If the length of the scratch is minimal - just a few millimeters - you can repair it with epoxy glue.
EDP two-component universal fast-curing epoxy adhesive 0.25 kg, art. EK000132481
We offer another method for removing scratches, which is especially good if they are of significant length. In this case, use a special tape. Before using it, the area with the scratch is thoroughly degreased, after which repair tape is applied along the defect, removing the protective layer from it. It is important to position it so that on both sides of the scratch it occupies an adjacent area at least 1 cm wide. When gluing the repair tape, you need to act carefully, slowly, and make sure that no air bubbles remain under it. The area repaired with tape will take at least three hours to dry; throughout this period it must be protected from moisture.
Remember that you need to restore all scratches that appear, including the smallest and most insignificant ones. Otherwise, they will increase over time, and their elimination will require much more effort, time and restorative material.
Everything from A to Z about the disadvantages of acrylic coating
Acrylic coating applied to a bathtub using the pour-in bath method also has disadvantages. But such coverage has significantly fewer advantages and advantages.
Acrylic coating cannot withstand high temperatures; at temperatures of 100 degrees and above it begins to melt and deform. Therefore, you cannot place heated curling irons and other objects on the sides of the bathtub, you cannot pour boiling water into the bathtub, etc.
The acrylic surface is afraid of aggressive detergents, as well as products with abrasives. Do not use hard brushes or sponges to care for the surface of the bathtub.
The acrylic surface of the bathtub cannot be washed with products not intended for the care of acrylic bathtubs: bleach, soda, Pemolux and other similar products.
In case of yellowing of certain areas of the surface, rust stains or limescale deposits, use special cleaning products for acrylic bathtubs such as “Unicum” or “Mr. Clean”.
Also, the acrylic surface is scratch-resistant. Therefore, if you bathe your pets in the bath, be sure to use a rubber mat.
Do not leave heavy metal or sharp objects on the shelves above the bathtub. If accidentally dropped, they may cause damage.
If chips and scratches appear on the surface of the bathtub during its operation due to impacts from heavy and sharp objects, the damaged areas of the surface can be easily restored independently at home. It is not necessary to call specialists. To do this, use special repair kits that are sold in hardware and construction stores.
Brief note:
• do not keep heavy or sharp objects on the shelves above the bathtub; • when bathing pets, use a rubber mat; • do not pour boiling water into the bath; • do not place curling irons or other heated objects on the surface of the bathtub; • wash the bathtub only with detergents for acrylic bathtubs.
Restoration of bathtubs with acrylic - all the pros and cons
Restoration of cracks on acrylic surfaces
The most common cause of cracks in an acrylic bathtub is an accidental fall of a heavy object. If this problem happened to you, it’s time to buy a repair kit or repair tape. A crack is a serious defect, so restoring it will take longer than removing scratches. Repair a crack in acrylic as follows:
- Treat the surface with two types of sandpaper in the same way as is done when restoring scratches.
- At the ends of the crack, carefully drill small holes with a diameter of 1 mm, as if artificially enlarging the crack. This is necessary in order to stop further crack growth, which without this simple action is guaranteed even with gentle operation.
- Rinse the area to be restored, removing any solid particles and dust remaining from drilling from the acrylic surface, then dry the bath thoroughly.
- Degrease the work area with alcohol or another solution of identical effect.
- Apply the compound from the repair kit for acrylic bathtubs to the crack. It consists of two components that are combined immediately before use. For large cracks, it is often necessary to apply acrylic in several approaches. After applying each layer, it is allowed to harden, making a pause of 3-4 hours in restoration work.
- After the crack is completely sealed, the bathtub should be allowed to dry for several hours. While the acrylic applied to the crack is drying, you cannot use the bathtub: it is forbidden to pour water into the bowl or press on the repaired surface to check the degree of drying.
- After the new acrylic coating has completely dried, all that remains is to carefully treat the crack with fine-grained sandpaper and polish the area to be restored.
If you choose to restore with tape, use it in the same way as when restoring a scratched surface. But keep in mind that with the help of restoration tape you can only repair cracks that are not very long and not too deep. After installing the tape patch, you must not use the bathroom for several hours at all, protecting the new coating from contact with moisture.
Preparatory work before repairs
When the surface of the bathtub loses its presentability, the optimal solution is to contact our company, where the craftsmen will carry out repairs in the shortest possible time without dismantling the plumbing equipment. First, prepare the surface to cover it with self-leveling acrylic. This procedure is performed in several stages. First, the bath is rinsed with warm water. The surface of the plumbing product is washed with a mild cleaning agent before repair. You need to wait 20-30 minutes for the cleaning product to work, then remove it with a soft cloth. Much attention is paid to cleaning areas where there are defects. The bath is rinsed with copious amounts of warm water.
Correction of minor defects
You don't always need to resort to a complete bathroom renovation. If there are very few defects and chips, they can be eliminated locally. You can repair scratches and other damage using a special restoration kit. The kit usually includes: sanding paper, rubber block, cloth, enamel, hardener, polishing paste.
Defect elimination method:
- Treat the damaged area with an anti-corrosion agent.
- Clean the surface with powder or dishwashing detergent.
- Degrease the coating using acetone.
- Apply the selected substance to the chip.
- Wait for it to dry and clean the surface.
- If necessary, paint over the mark with a paint that matches the tone.
Whitening and polishing
The simplest and most energy-consuming way. Suitable only for darkened or yellowed products that do not have scratches or defects on the surface. For the procedure, you will need a bath cleaner, bleach, polishing paste, and a sander.
Progress:
- Rinse the coating thoroughly, removing all contaminants.
- Apply bleach to old enamel.
- Wait the required time and rinse off the substance with plenty of water.
- Sand the surface using a sander, starting with the coarsest sandpaper and ending with fine-grained sandpaper.
- Apply polishing paste to the surface.
Before the procedure, test the method on a small area; if no visible changes appear after treatment, you will have to use a more effective method of restoration.
Specifics of restoration work
Coating plumbing fixtures with acrylic requires extreme care and attention. To carry out repairs, you will first need to prepare the surface by cleaning it from dirt, then dry it and apply the prepared composition to the surface. As a result, clients receive an updated bath that shines with whiteness.
A decent result from the procedure of applying self-leveling acrylic can be obtained by using the services of qualified specialists with extensive experience in this field. They use high quality materials in their work. We guarantee clients who order services from us high quality work and fulfillment of obligations to restore an attractive appearance to even the oldest bathtub .
The craftsmen complete the work as soon as possible after the clients contact us. The work is carried out by high-level craftsmen who carry out repairs efficiently, without making mistakes. We propose concluding an agreement for the provision of services. Owners of plumbing equipment do not have to worry about additional costs. Prices for restoration are negotiated in advance. After agreeing on the cost of services, our specialists will begin to fulfill the order.
When plumbing equipment loses its attractiveness and its surface becomes unaesthetic, rough, with cracks, scratches, contact our company to rectify the situation.
We will carry out the restoration work, and you will not have to buy new plumbing equipment. After all, purchasing it will require spending much more money than restoration work. An acrylic coating will help extend the life of the bathtub by at least another ten years.
Enamel painting
Enameling is the most affordable and easiest way to restore the surface of a bathtub. In order for a restored bathtub to last as long as possible, you need to choose the right enamel, properly prepare the surface and apply the paint properly.
Which enamel to choose
Take your choice of enamel seriously. Do not buy ordinary paints, but select only specialized substances. On sale you will also find ready-made restoration kits.
Variety of enamels:
- "Svetlana" and "Fantasy" from . Sets consisting of two-component enamel, hardener, polishing agent. The Svetlana set also includes a color to give the coating a certain shade.
- "Epoksin-51" and "Epoksin-51S". Two-component liquid enamel eliminates small cracks and prevents the appearance of yellowness. Both products are identical and differ only in the drying speed, category “51” - dries in 48 hours, and “51C” - 24 hours.
- "Reflex" from "Tikkuril". The enamel is more liquid, which is why it requires 4 layers. Adheses well to the surface.
Please note that if you buy only enamel, take care of purchasing a degreaser. A similar tool is already included in the kits.
Preparation for restoration
Prepare the surface for the procedure in advance. Such a manipulation must be done to eliminate any contamination, as well as to create a coating that provides the best adhesion of materials.
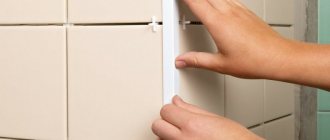
Before processing, take care of the cleanliness of the tiles by covering them with polyethylene and securing them with tape.
Progress:
- Wet the surface of the product and sprinkle generously with abrasive powder.
- Remove the old covering.
- Wash away any remaining dust.
- Treat the surface with an acid, such as oxalic acid.
- Fill the bath with hot water and leave for 10-15 minutes.
- Empty the bath and dry the surface thoroughly, preferably with a hairdryer.
- Cover deep cracks and chips with automotive putty and sand with sandpaper after drying.
- Vacuum the bathtub and nearby surfaces to reduce the risk of dust getting on the fresh layer of enamel.
- Degrease the surface.
- Close the taps with polyethylene, remove the siphon and drain, and place an unnecessary container under the hole to drain the paint.
After all the manipulations, you can proceed directly to painting.
Applying enamel to a bathtub
A day before application, prepare the brush for work so that no lint remains on the surface during the process. To do this, soak the brush in water for 24 hours, and then carefully sort the bristles and remove loose bristles.
The process of applying enamel can be divided into several stages:
- To begin, mix the base and hardener correctly according to the instructions on the package.
- Dip the brush into the enamel about half the length of the bristles.
- Start painting the surface from top to bottom.
- First, paint the coating horizontally, and then vertically, eliminating smudges.
- The first layer should be the thinnest as it acts as a primer.
- If there is paint collected at the bottom, remove it.
- Without waiting for the first layer to dry, apply the second.
- Be careful that there are no empty spaces left on the surface.
- Dry the layer according to the instructions on the package and re-coat the surface with enamel.
- Repeat the procedure 1-2 more times.
- After all coats have been applied, coat the new enamel with solvent to achieve a glossy finish.
- Leave the paint to dry for 4-5 days.
Please note that the enamel has a very pungent odor and is difficult to wash off from the skin, so carry out the treatment only with a respirator and gloves.