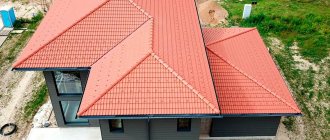
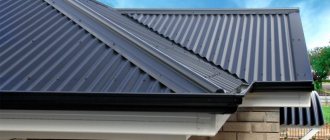
In the process of roofing design, it is recommended to pay special attention to the distance that is between the edge of the eaves and the wall of the building. If such a gap is up to 0.4 meters, then you should definitely take into account that the water that flows from the roof during precipitation will immediately fall on the blind area and the wall, and at the same time terrible winds will blow into the space under the roof gusts.
The filly in the rafter system is used quite often, and through it it is possible to equip the overhang of the required dimensions.
What is it and why do you need a filly in the rafter system?
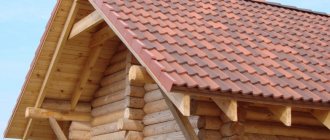
The filly is an extension of the rafter leg in the part that rests on the wall of the building. The filly is a support on which the roof overhang (eaves) lies.
The roof eaves are a very important part of the roofing system, as they
- protects the walls of the building from precipitation;
- prevents water from penetrating into the roof frame;
- protects from direct exposure to ultraviolet radiation;
- gives a beautiful appearance.
The filly is used if the rafter leg itself does not protrude beyond the plane of the wall.
Reasons for using fillies:
- Rafter legs are quite heavy, long and expensive, so it is often advisable to lengthen them with fillets.
- For the element itself, you can use a board thinner than for the rafters.
- The overhang line must be at the same level and be strictly horizontal. It is easier to provide this not with a rafter board, but with fillies.
- In case of repairs, replacing fillets is easier than replacing rafters.
The fillies can also play a decorative role if carvings are made along their ends or along their length.
Why don't they use longer rafters?
The first method that comes to mind to solve the problem of short slopes is to lengthen the rafters by the required 65-85 cm in accordance with calculations using the Pythagorean theorem. If we take into account that, depending on the angle of the roof, the length of the frame ribs can reach 8-10 meters, then an increase by seemingly small amounts will lead to an increase in the load on the house frame, which is already quite large.
In addition, the extension of the rafters beyond the walls will require the manufacture of a complex groove system for fastening to the Mauerlat. When installed at the bottom end, the connection process is much simpler. Lengthening the rafters also leads to an increase in the mass of the parts, which complicates their lifting to the top. The work of aligning the lower ends of long parts to bring them into a common plane is also complicated.
Using a filly can slightly reduce the severity of these problems. This is done by reducing the thickness and width of the parts used to lengthen the rafters. Considering that the load on the lower parts of the frame ribs is not large, this solution is considered optimal.
Installation of fillies on the roof
As a rule, the overhang has a width of 50-100 cm. To mount the rafters on the rafters, the latter must be installed on a beam or log laid on top along the perimeter of the outer wall (mauerlat). That is, the filly is simply a continuation of the rafters.
Before laying the roofing deck, it is recommended to install the eaves board provided for attaching the drip line. After laying the roofing material, the overhang is sewn up from below with boards or other material.
Attention! Please note that a wide cornice has a large windage area. In strong winds, the entire roof will be subject to heavy loads. If the overhang is more than 100 cm, support is made on the console.
Roof frame dimensions
The filly is fastened with an overlap, so a margin of 35-50 cm is required. That is, the length of the filly is equal to the width of the overhang plus a margin of 35-50 cm.
If a board with a section of 50 by 150 mm was used for roofing rafters, then for fillies the normal option would be a board with a section of 120 by 40 or 100 by 30.
Important! After preparing and installing the elements, it is necessary to carry out antiseptic treatment, which will reduce the risk of fungus formation and extend the operational period.
How is a cornice formed?
A wide roof eaves are the key to safe operation and more convenient maintenance of the building. It is formed by increasing the length of the roof slope by 40-50 cm. There are 2 technologies for installing the cornice:
- Due to the use of longer rafters. The easiest way to create a wide eaves overhang is to use rafter legs to install the rafter frame, the length of which is 40-50 cm longer than the length of the slope. However, this option has one drawback - the frame turns out to be quite massive and expensive. In addition, if the roof slope is more than 6 meters long, then it becomes quite problematic to find lumber, the dimensions of which allow the formation of a more or less decent cornice.
- Due to the installation of fillies. To form an overhang of the required length, it is fashionable to use fillies. The roof filler is needed to increase the length of the rafters without unnecessarily weighing down the frame. They are attached to the end of the rafter leg to increase the length of the slope. The fillies can extend the cornice to any length, and this technology is cheaper, since boards of a smaller section are used, which are inexpensive.
What are fillies for rafter legs?
Important! Professional roofing craftsmen recommend using fillets to form the cornice, as it is often cheaper. In addition, it is more convenient in terms of installation, since it is not necessary to lift and move rafters of great weight and length along the roof.
How to make fillies for rafters
You need to remember : the longer the filly, the greater the margin for fastening. This is important to ensure the necessary structural rigidity.
Work on attaching the fillies to the rafters is carried out in the following stages:
- Preparing a template for cutting out wooden elements.
- Treatment of elements with fire retardants.
- Installation with an overlap of up to 50 cm. Fastening can be done with ordinary nails. For each knot, 2 nails on each side. All ends are bent, this is necessary so that there is no weakening during operation.
- First, the outer fillies are attached. Then the cord is stretched, further fastening is done according to its level. It is important to prevent sagging of the cord.
- If the overhang width is large and consoles are installed, the fillets must be fastened flush from the side of the horizontal beam.
- The eaves are covered (soffits, boards, siding, galvanized sheet). The last action is necessary to prevent moisture from getting inside and to extend the life of the wooden roof elements.
We complete the installation of the cornice
If decorative fillies were chosen for construction, or even in ordinary ones, with the help of impregnations, it was possible to reveal a beautiful wood structure, then in this case the work on organizing the consoles can be completed. In other cases, they resort to installing a cornice box. The main thing to remember is that the entire roof must “breathe”. That is, there must be circulation of air coming from the eaves, passing through all layers of the roof and exiting outside. This process is natural ventilation, keeping each roof element dry and extending the life of the structure as a whole.
To install a cornice box, another element is attached horizontally to each filly - a hemming board. The design is necessary to obtain a closed contour: fillet - hemming board - section of wall. Next, the cornice is hemmed. When choosing materials and installing a box, you should remember not only that the quality of its execution will affect the aesthetic perception of the house as a whole, but also the need to create a “breathable” roof. Therefore, the cornice, like other roofing elements, cannot be mounted hermetically; the use of polyurethane foam or silicone is not recommended.
The cornice is an important element of the roof. It is necessary to take into account all the details and take a responsible approach to both its design and design. Neglect of the advice given in the article will inevitably lead to disruption of the roof microclimate, accelerated rotting of wooden structures and premature failure of the roof as a whole.
Recommendations and useful tips
Experienced professionals give the following tips and recommendations:
- The tree must undergo antiseptic treatment. As for the presence of knots, there should not be more than three of them over one meter, and their diameter should not exceed 3 cm. It is important that there are no through cracks.
- The wood used must have a moisture content of no more than 18%, otherwise, upon subsequent drying, the connecting nodes will weaken and the structure will lose its reliability. If it is not possible to use dry wood, then the fastening must be done with bolts. Nails and staples are not relevant in this case.
- Unplaned materials are not recommended for use, since it is in these types that fungus infests most quickly, which leads to rapid rotting.
- When attaching the fillies, it is worth considering an important point: the roof must “breathe”. Natural ventilation is the key to long service life of the entire coating.
The filly plays an important role in the rafter system, so this issue must be approached responsibly. We hope this article will help you with installing a roof overhang using fillies.
Details
Installation of roofing fillies
The eaves overhang, which has a width of 0.9 to 1 meter, is quite easy to install. To do this, you need to secure the fillies to the roof using rafters. In this case, the rafters should be mounted along the mauerlat or on the top frame. The rafters are a continuation of the rafter system, as a result of which, during the installation process, sheathing, waterproofing material and roofing must be installed on them.
Before installing the decking, it is recommended to install a cornice board along the edge of the roof, on which the drip line will be located in the future. After the roof is fully installed, you need to sew up the overhang on the eaves. To do this, you can choose jointed boards or soffits. The placement must be perpendicular, and at the same time there must be a small gap, due to which ventilation will not be impaired. Due to air circulation, moisture will be removed, as a result of which the putrefactive process of wooden elements can be prevented. If you plan to install an overhang, the length of which is more than 1 meter, then the filly on the roof will experience quite heavy loads. In order to prevent roof collapse, it is recommended to support the elements of the rafter system on consoles, which are beams placed in a vertical position.
As a rule, consoles are also separate, and they do not necessarily have to be connected through a horizontal connection along the common perimeter of the slope. In this case, the fillies are able to rest on the Mauerlat, and as practice has shown, the choice of design will fully depend on the width of the eaves extension. It is recommended to use consoles if the material for making the filly is more than 1.5 meters.
Element dimensions
You know why you need a filly in a rafter system, and if during the construction work it was decided to use such elements for the rafter system, then it is recommended to make the calculations correctly, as well as calculate the length of the filly. As practice has shown, it is best to carry out installation work after the roof has been installed. When calculating the required length of parts, you need to understand that a margin of 0.3 to 0.5 meters must be made, because the fastening will be overlapped. Only after this can you begin to select building materials for future work. In this case, it is permissible to use boards with a cross-section of 5 * 15 cm, and at the same time, a size of 12 * 4 cm or 10 * 3 cm is perfect for creating fillies. Most experts advise giving preference to materials made from coniferous wood. In this case, it is necessary to ensure that the moisture level varies within 8-10%. There should be no knots or rotten fragments on the elements.
Helpful advice! After all the parts have been prepared and adjusted to the dimensions, it is recommended that all elements be carefully treated with an antiseptic composition, which makes it possible to prevent the formation of rot and fungus during the operational process.
How to make fillies for rafters
It is recommended to carry out roofing construction work, where it is planned to install fillers on elongated rafters, using standard technology. After the rafters are installed, you need to move on to the preparatory stage of the remaining elements, the number of which should be equal to the legs used. The dimensions of the elements fully depend on the overhang width, to which about 0.3-0.5 meters should be additionally added to create a fastening. One rule should be remembered - the longer the fillies used, the more margin is required to be left for fixation. Only this method can achieve the required level of rigidity and completely eliminate subsidence of the structure. It is recommended to use boards with the required cross-section or timber trim.
The step-by-step installation algorithm looks like this:
The first step is to prepare a template according to which the elements used in construction will be cut out. After this, each pruning must be treated with a fire-retardant composition. The installation must be carried out with an overlap on the rafter system - approximately 0.3-0.5 meters, and after that the upper ends of all elements must be aligned. Rough or even simple nails can be used as fastening. In order to ensure high-quality adhesion, each node should require up to 4 nails, which it is important to hammer in a couple of nails on each side. To ensure that the fastening does not weaken during operation, the ends of the nails must be bent.- Initially, fillets for the rafter system should be fixed at the edges, on the slope, and at the same time, the dimensions of the overlap should be measured as carefully as possible. It is necessary to pull the cord between such elements, and then carry out further installation work. This method is perfect for skates that are short in length, because the cord used should not sag.
- If during the construction process the overhang requires the presence of consoles, then the fixation of the fillies should be carried out flush on the side of the horizontal type beam. In order to strengthen the structure, it is recommended to additionally install thickened or even continuous sheathing, which makes it possible to achieve the desired level of rigidity.
- After the construction work has come to an end, it is necessary to hem the cornice.
Now some useful things.
