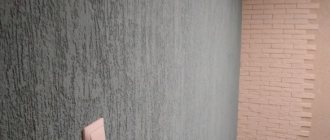
Among most finishing materials, decorative plaster occupies a leading position along with ordinary wallpaper. Plaster is used not only for exterior but also interior decoration. However, it also has a number of disadvantages, in particular, not everyone can work with it independently. A certain alternative to conventional plaster is going on sale, imitating it - this is wallpaper for plaster. Why are they special, what types of products exist, and what advantages and disadvantages do they have?
Is it possible to glue wallpaper onto plaster?
Surface plastering is a procedure for leveling the building base for subsequent decoration. Wallpaper is most often used as a finishing coating. Since in most cases homeowners carry out the restoration of the premises with their own hands, the craftsmen have a question - how to put wallpaper on plaster? To do this, it is recommended to adhere to some rules for decorating the surface. In this case, you can count on high-quality and durable finishing.
Finish coatings for wall protection
After all the work is completed, the walls finished with decorative plaster will need to be further processed. We are talking about an additional finishing coating, which can be varnish, wax or paint. I usually use a protective wax coating for Venetian plaster, but it is suitable for other coatings. The situation is approximately the same with protective varnish.
Wax and varnish are applied with a sponge (bath or coral). A brush or thread roller may also be suitable for these purposes. The work of applying and rubbing is completed immediately after obtaining a uniform shade over the entire surface, so as not to spoil our coating on the wall due to changes in light due to thick layers of the finishing coating.
The finished coating is usually painted in cases where the solution was not tinted before application. Only water-based acrylic paint is used. Application is carried out in the standard way using a brush or paint roller.
When is it wrong to glue wallpaper onto plaster?
Whether or not you can glue wallpaper onto plaster depends on what composition was used to level the surface:
- Cement based material. It is not recommended to apply wallpaper to such a composition without prior puttying. This is explained by the fact that the cement product has a granular structure, so after hardening the surface becomes rough. If you paste wallpaper onto such a base without puttying, then small imperfections in the form of roughness and bumpiness will appear on the surface, which will negatively affect the appearance of the finish.
- Gypsum based material. In this case, it is not recommended to glue wallpaper onto plaster due to the lack of moisture resistance of the composition. Gypsum quickly absorbs moisture and has the ability to draw liquid from any composition, including wallpaper glue. As a result, after a certain period of time, the decorative coating will lag behind the surface, which will necessitate repeated restoration of the walls.
Wallpapering plaster is also not recommended if thin, light-colored material is used. As a result, the color of the base will appear through the wallpaper. There will be a feeling that stains have appeared on the wallpaper, which will cause the finish to lose its attractiveness.
Another reason why you should not wallpaper plaster is cracking of the surface of the building base. After some period after finishing, such a defect appears on any type of surface. This leads to a lag in the wallpaper and a loss of visual appeal of the finish.
Based on this, before wallpapering it is important to prepare the surface. This will increase the service life of the finish and preserve the aesthetic appeal of the finish coating.
Requirements for the surface before wallpapering
Before gluing wallpaper, the wall must meet the requirements that allow this work to be done efficiently and for a long time.
- There should be no cracks, crevices or holes on the surface. They are reinforced and plastered.
- If there are metal objects that cannot be removed, they are coated with protection (regular paint) to prevent rusting.
- Primer coating is a must. This will protect the surface from moisture and provide good adhesion.
- In most cases, the surface is covered with putty. This protects the walls and ceiling from moisture and cracks. And dark spots do not appear on the wallpaper. The coverage has a long warranty period.
- Before gluing wallpaper, be sure to choose a suitable adhesive. Each type of trellis has an adhesive label on it.
Before gluing, the rough base is covered with putty mixtures. After grouting, a primer is used, only after that the finishing is carried out.
Glue selection
Before wallpapering walls, you need to choose an adhesive. The quality of the finish also largely depends on this material. The choice of product depends on the type of wallpaper for which the composition will be used. So, for a regular paper finish, PVA glue is suitable. For other wallpapers, it is recommended to use special material.
Price is not the main selection criterion, but cost should also be taken into account when purchasing a product. Professionals do not recommend choosing cheap glue. As a rule, such material is of low quality. It is also not advisable to buy an expensive composition. It is recommended to choose material in the mid-price category.
When purchasing, they also pay attention to the manufacturer. Professionals prefer only well-known brands, since popular companies value their reputation and supply quality products to the market.
Decorative sides
Typically, such sides are used to decorate walls with 3-D panels along the entire perimeter or along the sides. The sides are matched to the color of the main coating, but can also be contrasting.
Such elements are well suited for joining panels with other materials. The junction will look more aesthetically pleasing and neat. There are sides of different widths on sale, and the widest of them can serve as independent interior decor.
Edge for table top
When can you glue wallpaper onto plaster?
Gluing wallpaper onto plaster, video tutorials confirm this, is possible if there is no time to carefully prepare the surface and when the aesthetic side of the reconstruction is not of great importance. In such situations, finishing rules are neglected. However, in order for the decorative coating to last for a long period, it is recommended to follow the technique of wallpapering plaster:
- the surface is cleaned with an industrial grater to get rid of roughness and other flaws;
- several layers of wallpaper glue are applied to the construction base with a break for drying;
- After the last surface treatment, wallpaper is immediately applied.
This finish will not last for a long period, but will save time on puttying.
Lighting and furniture
Often, well-chosen lighting allows you to visually mask the difference in planes. For example, when the perimeter is illuminated from the inside, a volumetric panel will successfully merge with the surrounding surfaces, and the junction of materials will become natural and logical.
In addition, the border of different textured finishes can be successfully hidden with furniture. The easiest way is to hang shelves and install an interesting rack. When connecting vertically, you can install a built-in cabinet in the problem area.
Application of non-woven and liquid wallpaper to plaster
Is it possible to glue non-woven wallpaper onto plaster? This is another question that interests non-professional finishers. This material has a denser structure than a paper product. However, even such wallpaper will not hide the graininess of the cement plaster, and the gypsum product will also absorb the glue water. For this reason, it is recommended to glue non-woven material onto putty only after plastering.
Liquid wallpaper should also not be applied directly to a plastered building base. To prepare such decorative material, water is used, which negatively affects the plaster, destroying the product. For this reason, before applying liquid wallpaper, the surface is treated with water-based paint. After this they act like this:
- Knead the decorating material. To do this, place the product in a clean container and fill it with water. The proportions are indicated on the packaging. The solution is mixed using an industrial mixer or a drill with a mixer attachment. The product is left to mature for 15 minutes and the product is stirred.
- The material is placed on a wide spatula using a narrow spatula. The composition is distributed over the surface. It is recommended to treat all walls at one time. The layer of material should not be thick. The product is immediately leveled with a spatula so that there are no defects. To apply the solution, you can use a special tool that is sold in hardware stores. In this case, the hardening period of the material will be 3 days.
- After applying liquid wallpaper, you can structure the surface. To do this, the perimeter of the building base is treated with a textured roller. Next, the surface is painted or left unchanged.
Sealant
This tool is suitable for eliminating a joint if the edges of two materials fit perfectly together and their texture is similar. In such a situation, you can make the joining line invisible using a sealant of a suitable color or a transparent composition.
Important! The sealant is best suited for combining tiles, mosaics, porcelain tiles, and panels.
Sealing the joint with sealant
It can be used even in damp rooms. True, it will have to be replaced periodically, since the service life of the material is only 2-3 years.
Is plaster suitable for gluing?
- Cement plaster. The diluted material has a heterogeneous granular structure. After application and hardening, the plaster acquires a rough, bumpy surface. If you attach wallpaper without putty, especially thin wallpaper, then all the imperfections of the uneven base will be visible through it. In addition, the mixture is dark in color. Because of this, the appearance of the wallpaper may deteriorate. The plaster mixture will simply be visible through thin wallpaper, especially if the wallpaper is translucent. Cement mixtures are also capable of absorbing moisture. When applying wallpaper glue, moisture from it can quickly be absorbed into the plaster, which will lead to poor quality of gluing. After getting wet, the plaster darkens unevenly, becoming stained throughout the wet area. This type of mixture is often used in new buildings.
- Gypsum plaster. The solution also has moisture absorption properties. Therefore, the wallpaper will not stick to the surface in the best way. And after a while they will begin to peel off completely and disappear completely. Often the surface of the gypsum is even and close to smooth. Therefore, there is no need to particularly level the surface. You just need to treat the gypsum base with a primer.
- Decorative plaster. The material is intended to create a finishing coating. Not intended for mounting on top of other finishes. You should not even try to glue trellises if the decorative mixture forms a relief surface after drying. Thick wallpaper on a non-woven or vinyl base will not be able to hide the relief of the finish.
Obviously, it’s better not to start gluing wallpaper without putty if the result is to get a perfectly smooth, predictable finish.
Otherwise, without puttying, the following problems may arise:
- Plaster tends to crack over time. Voids are formed, which lead to peeling of the canvases and even ruptures if the discrepancies are large.
- Thin canvases will show the rough material through, which will distort the overall appearance of the finish.
The most suitable plaster in this case is considered to be gypsum. After treatment, the surface turns out to be smooth, and in order for the wallpaper to stick firmly and for a long time, the hardened plaster will need to be primed. This achieves a reduction in liquid absorption.
How to properly apply decorative plaster with your own hands
There are several additional types of decorative plaster application:
- fur coat;
- "lamb";
- terrazite;
- foam.
All of them are done using special tools and hand movements. You can work with both granular and fibrous mixtures. Grinding machines, textured rollers, comb spatulas, and textured sponges are used.
The decorative effect of bark beetle plaster varies. It depends on the direction of the working movement of the plasterer’s hand. The application of vertical bark beetles is done with sharp movements in a vertical straight line. Horizontal - horizontally (a trajectory in waves is allowed). Chaotic - application in a circular motion.
Important! The thickness of the layer should be the same as the thickness of the solid granules. Using a grater, they “scratch” the surface. This is how bark beetles are produced.
The principle of sgraffito plaster consists of several steps. First, a layer of the color that makes up the design itself or the background surrounding the design is applied. Allow the layer to dry and settle. Then a second layer of a contrasting color is applied. Here you can no longer wait for complete drying. You need to have time to cut the necessary contours to get the drawing.
Working with the second layer of decorative plaster sgraffiti Source mvestnik.ru
You can make the right craquelure by applying acrylic paint of the same color to the wall surface. Let everything dry thoroughly. Then a special mass is distributed over the painted surface. There are options for compositions that crack on their own after drying. The remaining plasters are heated with an industrial hair dryer. Cracks will form in heating areas. This method is needed when you need to achieve cracks only in some places.
Clear crack lines craquelure Source remont-book.com
Anyone can treat indoor walls with mosaic plaster. If, for example, sgraffito requires the skills of a master, then the mosaic mixture can simply be applied using a regular spatula and a metal grater.
Applying decorative mosaic plaster with a metal float Source kraski-net.ru
Before application, be sure to level the wall and then treat it with a primer. Sea Breeze should be applied correctly by spreading the topcoat over the wall. It is allowed to dry, and then decorative plaster is spread over the painted surface. It is better to repeat the pattern in increments of 1 square. At the end, let everything dry for 24 hours. Only after 2 weeks can the coating be washed with a damp cloth or sponge.
Perfectly applied sea breeze decorative plaster with the addition of silvering Source art—deco.com
Features of plaster
The modern market offers a wide range of both plaster solutions and wallpaper. All of them are very heterogeneous in their technical characteristics and texture. Most often, wallpaper is glued to concrete walls without plaster. To correctly answer the question whether it is possible to glue wallpaper onto plaster without putty or not, you should take a closer look at all available types of plasters and wallpaper. Plaster mortars can be classified according to several criteria:
- Composition of the mixture components.
- Application area.
- Purpose.
Scope and composition
According to the area of application, all plaster solutions are divided into compositions for external and internal finishing. There are increased requirements for plasters intended for finishing the external walls of a building. They must be resistant to ultraviolet radiation, withstand winter cold, summer heat and high humidity.
For interior work, compositions are intended that are less resistant to external influences - dampness and temperature changes. From the point of view of gluing wallpaper on plaster, it is the latter version of the mixtures, intended for interior decoration, that is of interest. The table shows the recipes for various plaster solutions.
The composition of the mixture for plastering interior spaces can include a variety of components. Quartz sand of various fractions, mineral additives, and decorative elements are used as fillers. Cement, gypsum, lime, clay, and polymer additives can act as a binding component.
The most common types of mortars are based on cement and gypsum. They can be made with your own hands at home, adhering to the proportions recommended by SNiP, or purchased at a hardware store in the form of a dry mixture.
Purpose
According to their purpose, all plaster compositions can be divided into the following groups:
Decorative plasters
Decorative compositions are ready-made or dry mixtures for finishing walls. They come in two varieties: textured and textured. In the first option, the wall surface is plastered in the usual way, and the decorative effect is achieved by giving the treated surface a relief with special stencil rollers, a sponge, a trowel, etc. Thus, “rain”, “Leonardo”, “fur coat” plasters, etc. are obtained.
Venetian plaster
Another type of decorative plasters is textured, the main feature of which is an exquisite pattern imitating polished marble, granite, amber, jasper, etc. This finishing material has another name - Venetian plasters, after the place of its invention. In addition to binding components, their composition includes a crushed fraction of natural minerals.
It is, in principle, possible to paste wallpaper onto decorative plaster if it is a Venetian mixture. The technology of its application provides for ideal smoothing of the surface, up to a glossy or matte shine. In this case, puttying the surface to level it will be completely unnecessary.
Before gluing wallpaper onto Venetian plaster, you should, on the contrary, take all measures to increase the adhesion of the base. If the walls are plastered with textured compounds, then it will be completely impossible to paste wallpaper on them due to their relief. It will also be very difficult to putty such plaster and the best way out in this case is to completely remove it.
The cost of decorative compositions compared to conventional plasters is very high, so using such mixtures as an underlying layer for wallpaper is simply not feasible from a financial point of view.
Leveling
This group includes mixtures intended for purely utilitarian purposes - leveling walls. They can be very different in composition, but most often there are mixtures where cement and gypsum act as a binder. Such plasters have a low cost, a wide range of applications and are easy to apply. You can also find polymer-based mixtures on sale - they are more expensive, but they are plastic and resistant to external influences. All leveling compounds are divided into base, starting and finishing.
Basic leveling plaster
Basic compositions are intended for rough leveling of walls that have large deviations from the norm horizontally and vertically. Such compositions are produced based on cement and filled with coarse sand or a fine sand-gravel mixture. As a result, a wall coated with base plaster has a rough-to-the-touch surface with numerous irregularities.
In this case, it will be simply impossible to glue wallpaper onto plaster without putty. Not only will their surface become grainy, but it will not be possible to achieve high-quality adhesion of the canvas to an uneven surface.
Finishing compounds are intended for processing relatively smooth walls and removing small surface defects: cracks, chips, potholes. Finishing plasters are also applied to surfaces pre-treated with base mixtures. Such mixtures consist of gypsum, cement or acrylic, to which a finely dispersed filler is added.
Dry gypsum plaster
They have a finer texture and in this respect are closer to putties than to basic plasters. Wallpaper can be pasted onto the finishing plaster provided that the surface is well leveled.
Gypsum compositions
Special mention should be made about plaster mixtures based on gypsum. This raw material is most often used in the manufacture of finishing compositions and allows you to obtain smooth surfaces. As a result, you can glue wallpaper onto plaster without putty or other leveling treatments. This binding material has one big disadvantage - it is afraid of dampness. As a result of its hygroscopicity, gypsum tends to absorb moisture and retain it. When applying a large amount of wallpaper glue, the plaster compositions become wet, lose their quality and can peel off from the wall. In this regard, the question often arises: is it possible to glue wallpaper onto gypsum plaster without first applying putty?
Moldings and borders
An excellent idea is to frame an unsightly junction of materials using overhead convex strips - moldings, borders. Such products are independent decorative elements, but can also serve as a means of masking various flaws.
As a rule, moldings are used to separate the decoration in a classic interior, more often in a horizontal plane. Simply put, if the lower part of the wall is covered with one material, and the upper part with another, then a dividing strip-molding is laid between them. The simplest example is companion wallpaper pasted across a border.
Stucco moldings and moldings in the interior
If you decide to join materials vertically, then the use of moldings is not recommended. The latter will rest against the ceiling, where they will also have to be somehow combined with the baseboard. But moldings and borders are suitable for framing the wall, which will distract attention from the joint and serve as additional decor for the room.
When and how can you stick wallpaper on plaster?
Some manufacturers of building materials indicate in the description of mixtures that their plasters do not require further putty. This statement is partly true. But still, the plaster coating is not a finishing layer, so it is advisable to use putty before gluing.
If you do not need to obtain a perfect finish, then you can hang wallpaper without putty. The result will not be durable or visually perfect. But the finishing will be able to hold out for a certain time.
To stick canvases onto plaster, follow the algorithm below:
- Level the surface as thoroughly as possible. Attach coarse-grain sandpaper to a special holder or block. Start sanding until the surface is as smooth as it was originally.
- Treat the wall with a deep penetration primer to fill existing pores and strengthen it. Wait for the mixture to dry completely. Sometimes it may be recommended to do several primings. But as practice shows, there is no significant improvement from repeated impregnation of the base. But the consumption of the mixture, and therefore the cost of soil, also increases.
- Mix wallpaper glue and apply to the wall. Wait until it dries, then you can stick it on.
In some cases, before sanding, it is necessary to additionally smooth the surface with liquid plaster. As a rule, such work is required when the first layer has been applied according to the rule. Then the surface after hardening is not the smoothest. First you need to smooth out the unevenness and then clean it and cover it with primer.
A little plaster mortar is prepared for smoothing. There is no need to knead a lot, since the mixture consumption is small. You need to achieve the consistency of thick sour cream. Mixing is done in a separate container.
To work, you will also need two spatulas - a small one and a wide one. The first tool is used to apply plaster to a wide spatula or directly to the wall. The second is needed to spread the mixture over the surface.
If there are noticeable protruding irregularities on the wall, then they must first be eliminated with sandpaper. Next, use plaster to level the areas that need it.
Wait for the time required for hardening, and then go over the treated areas again with sandpaper. This is how you finally get rid of unevenness.
You can ignore inconspicuous holes and depressions, 2-3 mm in size. Such defects will not greatly affect the finishing result.
Creating a textured coating, making the right efforts
It's time to learn how to apply decorative plaster to walls. In most cases, texture is the decisive factor when choosing a particular material. When decorative plaster is used for interior wall decoration, you need to think about the desired texture. A wide variety of tools can be involved in its creation.
It's very easy to use a notched trowel, brush or comb. By running these tools over the “raw” coating, we will create a different pattern. This also includes using your hand, a plastic bag or a regular sponge. With all this we apply or touch the decorative material that has not yet dried, forming a varied texture.
Stamps and special rollers can also be used. Such stamps and rollers already have a certain pattern that will be transferred to the wall. You can take a very ordinary roller, wrap it with a rope, and then create a texture with it. You can buy a ready-made tool with the design you like. The main thing is to then move the roller evenly along the wall so that the pattern is uniform. With a stamp it’s even easier, although it takes longer. Simply press it against the wall in the desired locations. Decorating walls with decorative plaster is impossible without creating a decorative effect. But it is achieved not only through special tools, but also thanks to the properties and composition of the solution.
The most understandable example would be the bark beetle. This decorative plaster contains granules, which create the texture. By the way, in this case the wall must be perfectly flat. Otherwise, the coating will not be uniform, and in some places the “bark beetle” will appear, but in others it will not. The fact is that the thickness of the applied layer of such a solution must correspond to the thickness of the grain used in its composition. Otherwise, the drawing will not work.
This decorative material is based on synthetic polymers and mineral fillers. The latter are of particular interest, because they help create the bark texture of the walls. Such fillers include crumbs of the following materials:
- Marble
- Granite
- Quartz
By the way, do-it-yourself decorative plaster of walls using this material is the most affordable option for the average person. You need a minimum amount of tools, because you will need to apply the solution and then simply rub it with a grater. And no special skills are required, just rub the solution evenly over the wall.
“Fur coat” on the wall - is it advisable?
I would also like to note the “fur coat” finish, which is also considered decorative. The technology of decorative plaster on walls to create a “fur coat” effect is very simple. Take the most common plaster (cement-lime) and simply spray it on the wall. For example, a broom is dipped into the solution and transferred to the wall by spraying. To do this, bring a broom with a solution on it to the wall and hit it against a stick or hand so that the solution flies directly onto the wall. Instead of a broom, a brush can be used to get a smaller drawing, if you can call it a drawing.
With this method, it is best to use a mortar gun, which is used to apply it to the wall.
In fact, this material does not have any decorative properties, and the decorativeness of the coating is imparted by a special application technique. It is also advisable to paint everything in beautiful colors to add more beauty. But in most cases, “fur coat” is used for facade decoration. It is also called decorative plaster on uneven walls, because it allows you to level the surface, since a large amount of mortar can be applied to one place.
What to do if there is no desire or opportunity to prepare the walls
- Even if you decide to glue wallpaper on unprepared walls, you should understand that in any case you need to clean the walls of all excess and prime them.
- The primer doesn't cost that much money, but thanks to it your wallpaper will stay firmly on the walls and won't peel off.
- The primer forms a good layer on which it is easy to stick wallpaper or apply any other decor.
- If you glue wallpaper to dusty walls, then most likely the wallpaper will come off in some places and you will need to re-glue it or re-glue it altogether.
Is it worth priming?
The primer protects the surface and finish.
Firstly, it is protection against mold, mildew, and various insects.
Secondly, the mixture provides strong protection against moisture penetration into the rough base. So the adhesive composition remains unchanged.
Thirdly, the glue applies evenly to the base coated with the mixture and does not flow down. The primer promotes good adhesion.
Before you apply the mixture, you need to select it. There are many types with antiseptics. This option is applicable for the first priming - getting rid of fungus and midges. And also a deep penetration primer that protects the rough base from negative influences.
Under the trellises, during the second priming, they use Pufas - white, as well as “Moment”, “Knauf Tiefengrund”, “Ceresit CT 17”.
The base should be primed carefully, not missing any spots, and not leaving dry corners. If the roller is not enough, use a brush.
Advantages and disadvantages of gluing on plaster
- No need to spend money on buying putty.
- Reducing repair time due to the absence of the puttying stage, but the need to have a high-quality surface is important.
- There may be visual defects in the rough finish, so it is advisable to prepare the wall and not choose thin, light, transparent wallpaper for hanging. The best option would be textured thick dark materials.
- The plastered wall must initially be smooth, otherwise there is a need for additional smoothing.
- You will have to use a lot of primer to reduce absorption.
Working with Venetian plaster
Since we discussed above the possibility of using textured (requires additional tools to create the texture) and structural (the relief is created through the use of various granules and additives in the solution itself) plasters, then to complete the picture it is worth considering Venetian.
Can smooth decorative plaster be applied to walls without leveling them? In the case of the Venetian, the answer will be negative. Therefore, in this case, the wall should not only be perfectly flat, but also as smooth as glass. Only then covering the walls with Venetian decorative plaster will give a magnificent effect. The beauty of this material is that it is made from marble flour and appears transparent. The result is the effect of marble walls. It is very difficult to work with it yourself, and the problem is not only that it requires careful preparation of the walls for decorative plaster.
Venetian decorative plaster for interior wall decoration is applied in very thin layers, which are usually tinted in different shades. There should be several such layers, usually 5-7. Grouting of the surface is carried out using fine sandpaper, this is a kind of grinding. It is also necessary to apply a protective layer of wax at the end, which adds shine to the entire coating. Finishing walls with Venetian decorative plaster is a painstaking process. You can ruin the coating with one wrong move at any stage of its creation.
Repair work
Below are step-by-step instructions that will help you re-hang the wallpaper. That is, the finishing is already there, but it is old and needs to be replaced.
To work you need the following materials and tools:
- putty;
- plaster;
- deep-penetrating primer;
- wallpaper adhesive mixture;
- level or plumb line;
- container for kneading the mixture;
- an industrial mixer or a regular electric drill with a mixing attachment;
- a set of spatulas – small and large wide;
- roller or paint brushes;
- grater (sandpaper attached to the holder).
Surface preparation
- Removing old wallpaper or other covering. You need to wet it well with water, spraying liquid from a spray bottle, or treating it with a wet washcloth. Next, wait a quarter of an hour until the wallpaper is well saturated and soaked. Afterwards, removing the coating will not be difficult. The wallpaper will peel off in large pieces. Pry up the canvas with a spatula, then rip it off. It is important to remove everything without exception. Even small pieces left behind can cause bubbles on the new coating. The tiles are removed mechanically using a chisel and hammer. Oil paint can be removed with a spatula after heat treatment with a construction hairdryer, or with detergents.
- Detection of weak areas of the coating. Lightly tapping the hammer over the entire wall, especially over visible flaws. Unstable, weakly adhering elements are removed. The resulting cavity inside is coated with primer and wait until the composition dries. Then the missing pieces are covered up.
- The wall is cleaned of dust and dirt. Grease stains are removed with solvents.
- Previously installed metal parts (nails, screws, dowels, etc.) are completely removed and the cracks are sealed. You can also hammer the elements inside flush with the surface. Or cut it with a grinder. It is advisable to additionally paint all metal objects with regular paint. Painting is done to prevent corrosion processes.
- If the wall as a whole is very curved, then it is recommended to make an alignment. An excellent option would be to use the Rotband brand.
- After completing the above steps, the surface is ready for priming. The primer is applied in two layers, each of which is possible only after the previous one has completely dried. To reduce the amount of glue absorbed into the surface in the future, you can add a small amount of PVA to the primer. An alternative to primer can be diluted wallpaper glue.
Puttying
- As indicated in the instructions, prepare the plaster mixture.
- Using a narrow spatula, the plaster is scooped out of the container and applied to a wide one. You can also immediately place the mixture on the wall.
- Using a wide spatula, moving from bottom to top, the solution is distributed over the wall in an even thin layer. The surface is not touched until it hardens.
- The wall is given perfect evenness. Processing is carried out with sandpaper, which is fixed on a block, or with a special construction float.
"Artistic junction"
Oddly enough, careless design visually blurs the boundaries of the finish, making it seem to flow into the boundaries of a material with a different texture. A good example is a fresco or painting: it can not be highlighted with a frame, but, on the contrary, the edges can be made “torn” and poorly processed. An uneven border of a stone finish will also look more harmonious against the background of wallpaper or a painted surface than a coating with clear contours.
Is it possible or not?
Basically, the construction team rents out their projects that do not have putty. Plastered walls - rough finish. Is it possible to glue wallpaper on them?
To answer this question, we need to consider the quality of the plaster used, as well as the satisfaction of the work. If the plaster is cement-based, you should not glue wallpaper without treatment. Coarse grain will interfere with the tight fit of the canvas, no matter how tight it is.
Gypsum plaster is also an incomplete base for wallpaper. There are reasons for this:
- The rough base absorbs moisture. The glue applied will not hold the canvas for long and it will soon fall off.
- The color of the plaster can show through the finishing material, thereby spoiling the appearance with dark spots.
- In most cases, cracks appear on the rough foundation. They are different in nature, but the consequences are the same: the wallpaper either tears in these places or comes off.
After such reasons, you can thoroughly answer the question - no. However, there are cases when you can glue wallpaper onto plaster without putty. You can also do this by doing some preparatory work.
When can you glue
When replacing an old decorative coating with a new one. That is, the old trellises must be removed from the surface. The surface is wetted, and then carefully, without damaging the rough base, removed with a spatula.
After this, the room is well dried and ventilated. Examine for the presence of cracks. When found, they are expanded, treated with a primer and covered with sickle tape. It will not give further discrepancy.
If there are metal objects (screws, nails) in the surface, they need to be processed. This is done with regular paint so that no rust remains.
After the solution has dried on the cracks, paint and all dust are swept away with a dry cloth or soft brush. The surface is coated with a deep penetration primer. It's better to do this twice.
After the work has been done, you can begin the gluing process.
When not to
In new buildings (apartments, houses), the walls and ceilings are often plastered with cement mortar.
The cement, when applying glue, will absorb all the moisture. Wallpaper will not stick to the surface. And if you wait for some time, gray spots will appear on the decorative finish and spoil the appearance.
Therefore, before starting the main process, it is necessary to carry out a number of works.
- Clean the base. Seal holes and cracks. Clean from dust.
- Coat metal objects with rust protection and the entire surface with primer.
- After which the walls are puttied.
- The last preparatory step is re-priming.
Often, cement walls are leveled with “dry plaster” - plasterboard. But, a number of works also need to be done with it in order to prepare it for gluing the canvases.
How to properly plaster walls under wallpaper: some tricks at work
Unfortunately, not everyone knows how to plaster walls under wallpaper. And although this process is not particularly complicated, there are still some tricks in it
Wall processing technology:
- Preparation. At this stage, you need to remove all the old layer from the surface. Remove large irregularities with a hammer drill using a special attachment. After removing the dust, apply two coats of primer to the wall. Then use a leveling solution to secure the plaster mesh to the surface.
- Alignment of walls. The next stage prepares the walls for decoration. Having mixed the plaster solution, we take a small amount onto a trowel and begin to throw it into the space of the plaster mesh. Then we level the wall, removing excess material. When this stage is completed, we fill the holes with a repair mixture and smooth everything out efficiently.
- Completion. The last stage begins with grouting the plaster layer only with your own hands. Using coarser sandpaper first, and at the end you should use a finer abrasive, eliminating traces of the previous stage of work. After which you need to prime the treated surface for reliable adhesion.
It should be understood that sticking wallpaper onto a layer of plaster is, in some sense, a gamble. And you need to look at this critically, assessing the whole situation and be sure to study all the recommendations and advice.
outer corner. junction of wallpaper and painted wall
Roman curtains in the kitchen: current models, tips for choosing and 40 photos in the interior
How to choose wallpaper for the kitchen: all about materials and design
Chandeliers for the kitchen in a modern style: 100+ photos of the best models and tips for choosing
Are you a professional architect or designer?
IVD. Repair and finishing
Are you a professional architect or designer?
The IVD.ru website is a leading Internet project dedicated to the issues of reconstruction and interior design of residential premises. The main content of the site is the archive of the magazine “Ideas for Your Home” - exclusive author’s articles, high-quality illustrations, practical tips and lessons. A team of professionals is working on the project in close collaboration with famous designers, architects and leading publishing experts.
On our website you can choose comprehensive design solutions; view detailed reviews of the market for construction and finishing materials, furniture, machinery and equipment; compare your own ideas with design projects of leading architects; communicate directly with other readers and editors on the forum.
Decorating corners in an apartment with decorative corners
The corners of the walls in the apartment are a problem area for most finishing materials, since they are not always smooth and are constantly subject to mechanical influence. In order for the repair to be carried out efficiently and for a long time to remain in its original form, it is customary to trim the joints with decorative corners. We’ll talk more about how to decorate the corners of the walls in an apartment in this article.
Decorating corners in an apartment: places of application
Corner profiles are used when repairing the following elements:
Door and window slopes
Traditionally, double-glazed windows are equipped with special corners that complete installation. The door kit also includes fittings and platbands. These elements protect the slopes from damage and have an aesthetic function.
If the corners are not closed, then selecting these elements yourself is not difficult. A suitable option is plastic corners. By choosing the required profile color, you will make the transition of a door or window opening smooth and less noticeable.
Horizontal joints of ceilings, floors and walls Corners for ceilings and floors are usually called plinths, and they are practically the same as corners for walls. Ceiling profiles can also be called baguettes, fillets or moldings.
A foam ceiling baguette is the easiest to install in an apartment
Such an L-shaped plinth necessarily has two flat and smooth surfaces that are attached to the ceiling and wall, and two front surfaces with a relief or ornament m. The fillets are fastened in different ways depending on the material; the foam baguette is, for example, glued to silicone or liquid nails.
One of the popular floor models is a plastic plinth with a collapsible design. The base of such a plinth is attached to a dowel-nail to the wall, then the front colored part is attached to the base using a special lock. Floor and ceiling profiles are made from various materials: PVC, polyurethane, dupolymer, wood, metal. Ceiling corners are also produced in gypsum and foam.
Corners of decorative partitions, openings, including arches
Popular doorways in apartments are semicircular arches. The contours of this design can be repeated by corners made of flexible plastic, veneer, MDF or bamboo.
Where walls and showers or bathtubs meet
The dimensions of a standard bathroom in apartment buildings suggest installing a shower or bathtub in one of the corners of the room. At the same time, the joint between the surfaces must be carefully and securely closed and protected from water getting under the bath.
Skirting boards for the bathroom are ceramic marble, plastic, acrylic, and there is also a self-adhesive border made of PVD and silicone profiles.
The easiest to work with and cheapest option is a self-adhesive border. Its only drawback is its service life, since such a corner needs to be changed after 1-2 years.
Joints of countertops and aprons or countertops and other objects.
Installation of any kitchen set is completed by installing corners at the joints of the countertop and apron. The plinth here not only has a decorative function, but also prevents water and food residues from getting behind the countertop, and also hides defects and damage that occurred during installation. new kitchen.
Kitchen profiles can be plastic, aluminum, wood, stone. Aluminum plinths are resistant to temperatures and chemical influences, plastic ones come in a variety of colors and designs, wooden and stone ones are environmentally friendly. The choice depends on various factors.
The shape of the borders is also varied: flat, curly, rounded, convex, or vice versa.
Vertical wall joints - internal or external
Wall corners, especially in walk-in rooms or narrow corridors, are often susceptible to accidental contact, friction or even impacts. They can be damaged by moving furniture, children or animals playing. This is why designers and/or owners decide to decorate the wall joints with decorative corners. However, corners are used not only for this purpose.
A transparent acrylic profile with ornamentation will complement the wallpaper design and make it sophisticated
Why use wall corners?
Improving the appearance of the finish
Decorative corners on the corners of walls are used to give a finished appearance and decoration - like a photo frame or lace for a tablecloth. This technique works both with the same wall finishing material and when transitioning from one material to another.
Protection against damage and contamination
External corners, especially in the hallway or hallway, are susceptible to damage: abrasion, accidental impacts or scratches. Such defects appear due to carelessness, and durable decorative corners will help to avoid them.
Docking material
When finishing walls with hard materials not intended for corner transitions, difficulties arise precisely at the junction of two surfaces adjacent at an angle. For example, plastic panels, lining, stone or tiles require decorative design of the joint.
Adding functionality or decoration
How to decorate the corners of an apartment beautifully and, if possible, functionally in a non-standard layout? In such a case, the designer faces a difficult task - he needs to save space or make an inconvenient corner useful. The solution lies, for example, in arranging a corner with furniture that turns it into a place for reading, relaxing, or a house for animals.
A non-standard apartment layout is not always included in the plans of the owners, but even such a difficult task can be dealt with. Original design of a corner in a functional niche
Types of decorative corners
Corners can be considered a universal finishing material; they are used in the bathroom, in the kitchen, in the nursery and even on the balcony. Not only walls are decorated with corners, but also fireplaces, stoves, and furniture. The appearance of the corners and their technical characteristics directly depend on the material from which they are made. The material also determines the scope of use of the corners. According to the material and scope of use, there are several types of corners:
Metal
The most popular metal angles are made from aluminum, brass and steel. This type of corners is rarely used for finishing residential premises - more often in furniture production. Brass and steel corners have a smooth polished surface.
The aluminum profile can also be of a natural color with polishing, as well as anodized with a coating of any color. Such corners are usually used to match the tone of the material with which the walls are decorated.
Metal profiles under ceramic tiles smooth out sharp edges and make the bathroom safer
Wooden
This type includes models made of bamboo, cork, MDF or natural wood. Mainly used for finishing external and internal corners of walls lined with clapboard, natural board or similar material, but also suitable for finishing wallpaper of any kind. go type.
Natural wood corners are made from different types of wood, additionally painted, varnished, and sometimes may have patterns on the surface.
Wooden corners are an excellent solution for attic balconies and bathhouses lined with wood. Such corners are fastened using secret nails and/or carpentry foam. Of the mines, the low is the low and the Xpykkok, the same is not for the time and the sole of the same Lami.
Silicone
This type of corners is suitable for framing joints of wallpaper or painted surfaces. In addition to aesthetics, the silicone profile will make the corners less dangerous when it comes to a children's room.
In addition, it is resistant to water, so it is used in the bathroom and can even be installed on an uneven surface due to its flexibility. To attach such corners, a sticky corner base is used.
The disadvantage of silicone corners is their instability to household chemicals, which makes care more difficult. For cleaning, you should use non-aggressive means.
Polyurethane
Such corners are produced using the pressing method, they have a smooth surface and complex relief. Such profiles are wear-resistant, they are not afraid of moisture and temperature changes. Unlike plastic, they are thicker, which can complicate the installation process, but polyurethane profiles are easy to paint if necessary.
Polyurethane corners imitate gypsum stucco molding, wood texture, and can be simply white or with gilded ornaments. Fits perfectly into a classic interior. To attach them, polyurethane glue is used.
Corners made of decorative stone
Elements made of stone are usually used to decorate the facades of houses, but if the interior of the apartment also has stone trim, such profiles will fit organically here too. You need to choose flat stones, they will add aesthetics to the structure. The stone corner combines harmoniously with decorative plaster, wooden panels, and even ordinary wallpaper.
How to design the corners of walls in an apartment: photo
The easiest to use is a decorative flexible stone. The material is lightweight, but at the same time durable, and can be mounted on any surface using liquid nails.
Flexible stone, despite its lightness, is a very durable and wear-resistant material
Under the influence of hot air, the stones become soft and pliable, thanks to which they can be attached at any angle, even at imperfect angles. This stone has a rough surface and varied texture, resistant to mechanical influences.
Flexible artificial stone can be mounted directly on the corner
Ready-made corner elements are also distinguished by quick installation. This L-shaped tile, imitating stone, consists of a short and a long part of a brick. These same elements can be used to decorate arches and slopes.
Corner elements of artificial stone based on gypsum
To cover a wall without using ready-made corner elements, the edges of decorative stones are cut at an angle of 45 degrees and brought together with this part.
Further work is carried out according to the usual pattern - the seams are rubbed with cement grout. For internal corners, we will use only the second option with sawing, since ready-made internal corner elements are not produced.
What is the best wallpaper to use?
The answer to the question depends on the choice: can they be glued to plaster. In most cases, choose one of three options:
- Paper web - quick erasing and fading. It is difficult to glue because they swell quickly. There is one advantage - their low cost. They do not glue to the plaster stand, even when using a primer. Only temporarily, before gluing a more durable coating.
- Non-woven fabrics – composition: cellulose and polymers. They are dense, so if the base is made of gypsum plaster, coated with a primer, then they can be glued.
- Vinyl - two-layer fabric. Heavy, dense trellises. Glue to a surface coated with putty and primer.
There are other types of canvases on the construction market that are not used so often, but make the interior of the room unique: 3D wallpaper, liquid trellises, photo canvas, canvases with diode elements.
Each type has its own requirements for the rough foundation. To fix them, you need to study the instructions for use, the base for gluing, glue, special primer, and room humidity.
Liquid wallpaper is a mixture of cellulose and water. To fix them, you need to prepare the surface. This is one of the types of trellises that are glued to unplastered walls, but do not reflect unevenness.
Glowing wallpaper - there are different types. From the use of phosphorus and powder to the insertion of diodes. The surface must meet all requirements. It can be plastered and coated with a primer, but for other types the base must be perfectly flat and smooth.
In the first case, we were unlucky, and the amount of work ahead is quite impressive. In the case of treatment with water-based compositions, labor costs will be less, but you will still have to try.
Complete removal of coating using an angle grinder
The optimal sequence of actions for any painted wall will be as follows:
- At the first stage, we control the plane of the surface, determining the thickness of the future plaster layer.
- Next, we inspect the condition of the paint layer. We remove all damaged areas using a paint spatula.
- Then we begin the final cleanup. Using a metal brush mounted on a sanding machine, remove paint from all surfaces.
Note! Water-based emulsion can be cleaned less efficiently, but oily compounds must be completely removed, without leaving even the smallest areas. It’s all about the principle of some unscrupulous builders: “we steal paint, add drying oil” - traces of drying oil contained in the paint layer will greatly reduce adhesion.
- After removing the decorative coating, dust off the cleaned surface.
- Again we control the plane, and then apply a penetrating primer.
- After completing these works, the walls can be safely plastered.
A penetrating primer would be quite helpful.
The main advantage of this technique is its versatility. Those. Regardless of what the walls were painted with and what condition the coating was in, the plaster will be laid evenly and will last for the required period.
At the same time, the complexity of the task facing us is very impressive. This is especially true for old walls painted with oil-based compounds: peeling off the decorative layer from the base will require effort.