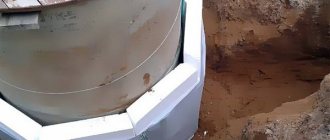
But when excavating soil on different types of water bodies, certain nuances must be observed.
In this article we will look at what a pit for a lake, a swimming pool or a well is. What does the procedure for digging a pit for a pond include and what stages is the work divided into?
Digging features
A pit under a pond is an artificially created depression in the ground, intended for subsequent filling with water and use for certain needs.
The peculiarities of pits for reservoirs are that their boundaries must be resistant to the volume of water with which they will be filled. The profile, shape, size and depth of the pit are determined by the functional purpose of the future reservoir.
Excavation pits for reservoirs can be divided into 3 main groups:
- under lakes and ponds;
- for swimming pools;
- under the wells.
Let's look at each of them in more detail.
Under an artificial pond
Pit pits for artificial reservoirs can be classified according to their main purpose as:
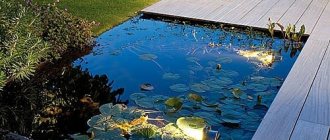
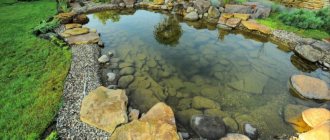
Decorative. As a rule, small pits located in a semi-shaded place where the sun hits in the morning and evening. This is important for maintaining the vital activity of all microorganisms in the reservoir. It is more appropriate to make the profile stepped.- For fish farming . Usually a large pit with a depth of at least 1.5 meters. The relief should be divided into zones of different depths, including a wintering pit, the bottom of which will be 150 cm below the soil freezing level.
- For swimming. The most common option is a smooth descent to a depth of up to 3 meters. If the pond is shallow, it may begin to bloom. The deeper, the colder the water below, and therefore flowering does not occur. You can make a sandbank for easy entry, where the water will warm up.
- For recreational use. Such reservoirs must be large enough, with a high water exchange coefficient.
The main differences between the types of lake reservoirs are the bottom topography, depth and size.
Under the well
Mine wells, which can be of three types, require digging pits:
- Imperfect.
- Perfect.
- Perfect with a sump.
They are very similar to each other in structure and pit depth. These wells differ in the methods of water supply and some construction nuances.
Under the pool
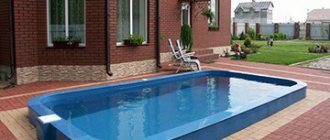
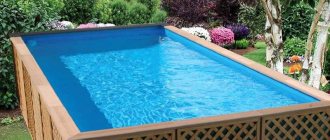
The shapes of pools are:
- square,
- rectangular,
- trapezoidal,
- round,
- oval,
- decorated to look like natural bodies of water,
- with straight walls,
- with inclined walls.
Also for their installation, bowls of different compositions are used:
- concrete,
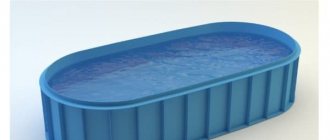
- plastic,
- polypropylene,
- composite compositions.
Concrete bowls are the strongest and most durable, but they take a long time and are expensive to install.
Alternative methods of waterproofing
In addition to the popular options of films, bowls and concreting, there are other ways to retain water in the tank. Let's name just a few.
Liquid rubber over a layer of geotextile. In this case, the pit is prepared as usual, but it is covered not with film, but with special geotextiles. Liquid rubber is applied on top of it in several layers. This option is especially good for small reservoirs with difficult terrain.
Tamper with a clay castle device. The method is quite complex, requiring the use of heavy equipment for compaction and therefore used mainly for large ponds for economic purposes. You can just build a clay castle with your own hands, but even in this case you will have to work hard.
Gabions and gabion structures. Metal mesh filled with stone - gabions - can be successfully used to fence the banks of a pond. Waterproofing will be required in any case, but the rapid formation of aesthetically attractive banks is guaranteed. Another convenience is that you don’t have to dig a pit, but make the reservoir above ground level.
Size calculation
The size of the future depression in the ground must be calculated in advance; the practical volume of work on excavation and removal of soil depends on this. There are various methods and calculation formulas that are selected depending on the characteristics of the relief and methods of carrying out work.
In order to calculate the size of the pit
you need to know:
- Depth.
- Length and width along the bottom.
- Length and width at the top.
To perform calculations for recesses of complex shapes, you need to break them down into simple geometric bodies, count them separately and sum them up.
Here is an example of calculating a rectangular pit:
V = (H/6) (ab + cd + (a + c)(b + d)), where
- H - depth;
- a and b - width and length along the bottom;
- c and d – width and length at the top.
It is easier and faster to calculate the dimensions using special calculators for calculating earthworks. All parameters must be specified in meters to avoid possible errors during automatic calculation.
You can use the calculator not only at the work planning stage, but also in the process of adjusting the parameters of the object during the digging process.
To make soil volume calculations as accurate as possible, you can use additional tools:
- Topographic survey.
- Office processing to establish additional points and correct calculations.
- Assessment of the geological parameters of the site.
Next, a technical report is drawn up, which indicates all the errors and calculation results.
For artificial lake
The size of the pit for a pond or lake must be selected based on the size of the area on which it will be located.
The larger the area, the more spacious the lake or pond can be.
It is recommended to calculate the size of a water body in a ratio of 1:30 to the area of the territory . Such a pond will look harmonious and will not require unnecessary labor.
The depth of the pond should be at least 0.5 m, for decorative ponds it is optimal 0.8–1 m, and for fish farming - at least 2 m. If you want the pond to look natural, it is better to avoid strict straight lines.
For a well
The well is an elongated pit 5-15 m deep with reinforced walls. To understand how deep a well is needed in a particular area, you can check the dimensions of similar structures in nearby areas, or pre-drill a well.
For the pool
The pit for the pool must contain, in addition to the bowl itself:
- sand cushion,
- formwork,
- pipes,
- embedded elements.
Accordingly, the pit is made approximately 0.5-1 m wider than the size of the bowl along the entire perimeter.
This size also depends on the material of the bowl. For example, concrete walls are wider than composite walls.
How to dig a pond: step-by-step instructions
The approval procedure depends on what kind of pond you want to dig. If you just need a separate pit for storing water supplies, by law you can do without obtaining permits. If the pond is located next to a river or lake, you will have to perform the following steps:
- Order a reservoir design from a specialized organization.
- Coordinate the procedure with ecologists, specialists from the Ministry of Emergency Situations and the Urban Planning Committee.
- If the land has agricultural purposes, you must apply for permission to use it as a fishing farm.
At the final stage, the application, along with the project, an extract from the Unified State Register and the results of the examinations, is submitted to the administration. If all formalities are met, municipality employees will issue a permit.
Requirements for slopes
There are certain requirements for pit slopes. Deviation from the norms may lead to the collapse of the walls of the recess.
The determining parameters are the depth of the hole and the density of the earth:
The length of the recess is a minor factor. Large straight sections can also collapse, which is rare for short distances.
Types of country ponds
There are several types of decorative ponds, among which are the following:
- small
- like a bright zone in a small garden; - central composition
- an element of the overall design in the landscape of the site, can be with lighting, a bridge, a fountain or waterfall, or a stream; - a pond with fish
– where exotic decorative bright fish can live, or crayfish and carp that can be caught; - a decorative swimming pool for a summer residence
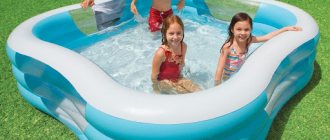
is one of the most popular in recent years; both adults and children can swim in it.
It is easier to monitor the ecosystem of a large pond.
When breeding several breeds of fish in a pond, you need to pay attention to their compatibility Source matgoblog.xyz
Work on creating a hole for a lake or pond
The first thing you start with when constructing an artificial reservoir is planning. It is better to draw a sketch on graph paper.
Planning
The planning procedure proceeds as follows:
- Using a compass, the south and north sides are determined and markings are made on the plan.
- Objects that cast shadows (buildings, large trees, fences) are marked. This should be done in sunny weather during the day every 2 hours, reflecting on paper places of partial (blessed for 4-6 hours) and full shade. Partially sunny locations are ideal for placing ponds. Under such conditions, flowering can be avoided without harming the vegetation and inhabitants of the reservoir.
- The optimal location on the site for the pit for the pond is selected. There should be no underground communications or large objects laid nearby.
- The type of pond is determined by its purpose.
- The dimensions of the pit, its depth, shape and profile are being worked out. Data to scale is plotted on the plan.
- The pit zones are being worked out, taking into account their purposes and design.
Land works
After developing the plan, you can begin preparing the territory and excavating the soil. These works are carried out sequentially in several stages:
Preparing the site for the pond.- The area is marked according to the sketch. You can use twine and pegs for this.
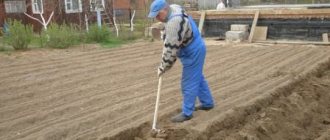
- Excavation of soil with an excavator or shovel.
If the work is carried out using an excavator, then it must be a tracked one with a rotating tower and a 1-2 cubic meter bucket. It is better to start digging from the edge, gradually moving towards the center, going deeper in the right places. During work, you need to check the uniformity of heights using a level. The banks should be at the same height relative to each other. You can adjust the height using the soil left over from digging the pit.
The overall result and quality of the reservoir depends on the correct implementation of each stage.
Digging pond from the perspective of water legislation
To properly understand the issue, it is necessary to define the terminology.
According to clause 4 of Art. 1 of the Water Code of the Russian Federation (hereinafter referred to as the Water Code of the Russian Federation), a water body is a natural or artificial reservoir, watercourse or other object, the permanent or temporary concentration of water in which has characteristic forms and characteristics of the water regime.
Clause 3, Part 2, Art. 5 of the Water Code of the Russian Federation provides a closed list of reservoirs - lakes, ponds, flooded quarries, reservoirs.
The terms pond and reservoir are given in GOST 19179-73 “Hydrology of land. Terms and definitions" (hereinafter referred to as GOST 19179-73), which establishes the terms and definitions of basic concepts in the field of land hydrology used in science, technology and production. GOST 19179-73 gives the following terms:
– A reservoir is a body of water in a depression of land, characterized by slow movement of water or its complete absence. There are natural reservoirs, which are natural accumulations of water in depressions, and artificial reservoirs, which are specially created accumulations of water in artificial or natural depressions of the earth's surface;
– Reservoir – an artificial reservoir formed by a water-retaining structure on a watercourse for the purpose of storing water and regulating flow;
– Pond – a shallow water reservoir with an area of no more than 1 sq. km.
Based on the terms given in GOST 19179-73, a pond is a shallow artificial reservoir formed by a water-retaining structure on a watercourse for the purpose of storing water and regulating flow with an area of no more than 1 square. km.
GOST 19179-73 also gives the concept of “Pond-dig” - a small artificial reservoir in a specially dug depression on the surface of the earth, intended for the accumulation and storage of water for various economic purposes.
In practice, there are different classifications of ponds.
By origin it is customary to distinguish:
- dug reservoirs (digging ponds)
- created by blocking a permanent or temporary watercourse with a dam (river ponds).
Depending on the purpose, there are cooling ponds, settling ponds, storage ponds, evaporation ponds, etc.
Thus:
POND is a shallow artificial reservoir formed by a water-retaining structure on a watercourse or in a specially dug depression on the surface of the earth, intended for the accumulation and storage of water for various economic purposes with an area of no more than 1 square. km.
Under the well
Not any time of year is suitable for excavating a well. It is better to do this in the summer, when the aquifer is at a low level. This will help avoid erroneous determination of the groundwater level.
Planning
As when digging pits for a pond or lake, you need to start by drawing up a sketch, which will take into account the following nuances:
- Choosing a location. The pit for the well must be located at least 5 m from large buildings, otherwise there is a risk of soil being washed out from under the foundation. Also, at a distance of 50 meters from the well there should be no places where manure and other impurities are located. This may affect water quality.
- Planning a method for strengthening the walls of the well. The walls can be strengthened using materials such as:
- A wooden frame is inexpensive, but short-lived.
- Monolithic concrete is expensive, but reliable.
- Brick takes a long time to install, but, like concrete, it is reliable.
After drawing up the plan, the selected area is cleared and markings are made on the ground. Next, you can begin land work.
Land works
A pit for a well can be dug either manually or mechanized using an excavator. Let's look at the features of these methods separately:
- When digging with an excavator:
Temporary placement of the excavated earth should not be close to the pit, so as not to collapse its walls. - It is necessary to monitor the depth of the pit and the condition of the walls, and pay attention to any delamination. If the delamination turns into a series of collapses, stop work, fill up above the collapse level and contact professionals.
- If the influx of groundwater is insignificant, the walls must be strengthened and work continued manually.
- When digging manually:
- Ideally, the work is carried out by three people: the first is in the pit and removes soil, the second is at the top, scraping soil from the edge of the pit, and the third monitors the condition of the pit system and the worker inside. If they change roles every half hour, the work will go quickly and without stopping.
- The pit should be round, with a diameter 20-30 cm larger than the outer diameter of the rings. Round walls are more stable.
- If the pit is deeper than 2.5 meters, then its walls need to be strengthened: when this depth is reached, 2 rings are lowered into the pit - they become natural protection for the person working in the pit. Then the soil under the lower ring is gradually dug in a circle, and it lowers under its own weight. If the expected depth to be dug is greater than the height of one ring, then you need to fasten the rings together with plates using anchor bolts. Otherwise, the upper ring may be pinched by the ground and will stop settling along with the lower one.
After digging by mechanized or manual means, the bottom must be leveled and cleaned. Then the pit is checked and, if necessary, the depth and slope angles of the walls are adjusted.
Fifth stage. Selecting materials
The next issue that needs to be dealt with is the choice of consumables. There are many options on the modern market that can be used to create an artificial pond. Let's look at them.
concrete pond
The photo shows a concrete pond
The most expensive option, which, nevertheless, allows you to operate the reservoir for quite a long time. Although concrete pouring is more suitable for arranging a swimming pool.
Finished plastic container
Plastic container for pond
This option is more suitable. The mold, made of fiberglass or PVC, allows you to build a pond in record time and use it for up to 30 years (the specific period depends on the quality of the container).
The procedure itself will consist of only four steps:
- digging a pit;
- set the form;
- fill the remaining voids with sand;
- We plant plants and fill the pond with water.
Pond tank installation diagram
The disadvantage of this method is the difficulty of transportation (if the volume is large) and the need for basic installation knowledge (otherwise the bowl may be damaged). Moreover, plastic containers degrade over time when exposed to UV radiation.
Rubber reinforced fiberglass bowl
Polymer film
In terms of pond shape, this option provides simply unlimited possibilities. The most affordable material is polyethylene film, although it will not last long.
Polyethylene film
PVC film has a longer service life; with proper installation, it can last up to ten years.
PVC film
Butyl rubber film
Perhaps the most reliable option. For ponds with a rocky bottom and great depth, it is recommended to use a butyl rubber membrane (EPDM), which has a service life of up to 50 years. In addition, this material can withstand repeated frosts.
Butyl rubber film
There are several folk ways of making a pond, which use available materials. Let's take a look at the most popular of these methods.
Pond from an old bathtub
Diagram of a pond from an old bathtub
An excellent option, because a bathtub is a container that was originally intended to hold liquid. The bathtub can be painted in bright colors and placed in a picturesque corner of the site or, alternatively, buried in the ground.
Tire pond
A simple way to create a mini-reservoir on your site. The manufacturing procedure is shown in the photo below.
Arrangement of a reservoir from a tire
Pond from a basin
An even simpler way. The basin is able to hold water well, so it can be installed in the same way as a bathtub. With proper decoration, such a mini-pond will become an excellent decoration for the yard.
Pond from an old basin
Under the pool
It is necessary to draw up a schedule of earthworks taking into account seasonal changes in groundwater levels. It is recommended to start work in the summer, when groundwater is at its maximum depth.
Planning
Before planning begins, it is necessary to conduct engineering studies that will provide information about the properties of the soil.
Next, a sketch is drawn up, following the following recommendations:
- The location for the pit must be chosen outside the area where utility networks are located. It is worth considering the location of the place relative to the buildings. If proximity to them cannot be avoided, then the soils of existing structures must be strengthened.
- If the groundwater level is high, you need to consider ways to reduce water on a temporary or permanent basis. To temporarily lower the water level, a depression is made with a slope below the bottom of the pit. For permanent – drainage.
- When choosing the shape of the pool profile, you need to consider the following nuances: It should ensure the stability of the bowl and prevent its erosion.
- The optimal slope configuration is stepped. The height of the ledges is about 30-40 cm. This ensures maximum operating safety and increases the service life of the pool.
As a base for the pool, ready-made polypropylene bowls of various sizes and shapes, butyl rubber or reinforced concrete can be used.
Land works
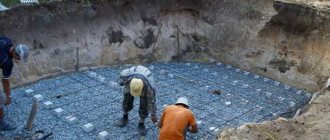
Excavation work is very labor-intensive and, to facilitate this task, it is better to use an excavator. When using mechanized excavation, it is recommended to select a volume of soil commensurate with the volume of the pool with a small margin and complete the excavation manually.
Main stages of earthworks:
- Marking the shape and dimensions of the pit.
- Removing the top soil and plant layer to a depth of 20-30 cm.
- Removing the second layer with an indentation of 30-40 cm from the edge. This is done to create an indentation that will serve as the edge of the pool, preventing erosion of the coastline. In the future it can be decorated.
- Deepening the pit to the design level. The bottom and slopes are leveled, compacted and protected from erosion by a layer of sand 5-10 cm thick and waterproofing material.
If stones or thick roots are found during the excavation process, they must be removed to protect future waterproofing.
Decoration with plants
Ideal design - creating a natural picture. Naturalness is the most aesthetic and attractive. They use different plants that live in the depths and grow in the swamp.
They create an expressive landscape, taking into account the number of crops required for a given size. 2-3 types of plants get along well with each other, it’s not worth taking more.
Calamus irises, dwarf reeds and cattails, marigolds, and swamp forget-me-nots are suitable for mobile ponds. When the depth of the reservoir is shallow (10 cm), pennyroyal in baskets, sword-leaved rush, water hyacinth, and Mexican azolla are placed.
Possible mistakes
Inaccuracies and flaws in the design and excavation of pits can lead to deformation and deterioration in the functional qualities of the reservoir.
The most common mistakes include:
- The right angle of slope of the walls of the pit for the reservoir. In winter, with such a steep slope, the freezing soil will put pressure on the walls of the bowl, deforming them. The slope should be 45°, then optimally distributed pressure prevents the occurrence of landslides. Also, with such a slope, the decorative elements of the inside of the bowl do not slide anywhere.
- Lack of gas drainage in pits for decorative ponds. Leads to pressure of subsoil gases on the membrane and raising of the film. It is necessary to remove subsoil gases.
- Subsidence of the pool bowl after filling with water. Occurs due to insufficient soil density. It is necessary to remove all loose soil from the bottom of the pit.
- Lack of water flow in low-lying reservoirs. Low-lying reservoirs can overflow with melt and rainwater. If there is a lower place on the site, then you can dig a trench under the drainage pipe and release excess water through it.
Pros and cons of a pond on the site
Having learned that there are no particular obstacles to the construction of a reservoir, you should not rush headlong into the work. It is necessary to consider all the pros and cons of a pond on the site to decide whether the result is worth the effort and expense.
Among the many positive aspects, the following can be highlighted:
- a thoughtfully designed pond on the site will certainly become a decoration - a highlight in the landscape;
- on the shore you can make an excellent recreation area with a gazebo or barbecue - the proximity of water relaxes and relieves nervous tension;
- by equipping the appropriate reservoir, you can organize fishing right on the site;
- in hot weather the pond can be used for swimming;
- the presence of a reservoir on the land humidifies the air, which has a beneficial effect on plants, giving the foliage a bright, rich color;
- due to the presence of water, the air in the area becomes cleaner, having a beneficial effect on people’s lungs;
- if there is a reservoir at the dacha, the total soil moisture decreases, which reduces the swampiness of the area;
- the pond will be an excellent storage tank for rainwater all summer, which can be used to water plants during drought.
However, besides the positive aspects, there are also negative ones:
- you need to spend a lot of time on care;
- frogs, lizards, and snakes will inevitably appear in the reservoir, which may be unpleasant to people;
- the soil on the shore becomes wet and, without artificial strengthening, quickly turns into a dirty swamp;
- due to high air humidity, weed growth accelerates, and fungal diseases may appear on cultivated plants;
- Mosquitoes and other insects will breed near the pond.
Only by considering all the advantages and disadvantages, weighing all the pros and cons, will the owner of the site be able to decide whether a pond is needed on the site,
or is it better to use the territory for other needs.
Fish breeding rules
Breeding fish in a pond at the dacha also has its own nuances. The first step is to make sure there is oxygen in the water. Otherwise, the reproduction of living creatures will occur very slowly, and the risk of extinction of some representatives will also increase. The function of supplying liquid with air in such reservoirs is performed by vegetation.
Pay attention to the landscape design features in front of the fence. Purchase floral decorations for the pond in specialized stores
Vegetation is selected according to the depth of the pond. Susak, chastuha, and barnacle are suitable for shallow waters, and basilisk, Siberian guillemot, and loosestrife are suitable for deep pools.
Purchase floral decorations for the pond in specialized stores. Vegetation is selected according to the depth of the pond. Susak, chastuha, and barnacle are suitable for shallow waters, and basilisk, Siberian guillemot, and loosestrife are suitable for deep pools.
Plants are planted in the spring, at the end of May. They should be placed in separate containers. This approach will allow you to create an area with floral decoration and not take away the space reserved for swimming. You can buy ready-made soil mixture for aquatic plants or mix clay and peat yourself in a 2:1 ratio. First, the bottom of the container is lined with burlap. Plants are placed at a depth of no more than 2/3 of the container.
Here you can read how to properly plan the landscape design of a small courtyard.
The release of fish is not carried out immediately after the creation of a reservoir. A silt layer must first form in it. This will take about a month from the moment the liquid is filled. After this period, the water will need to be drained completely, but the layer of sludge will not be touched. Then fill it with new liquid and plant the vegetation.
When it is noticeable that the floral elements have taken root, you should check the acidity level. To do this, use special devices or litmus papers. The indicator should be neutral. Otherwise, the fish may not take root in the pond.
Did you know? Artificial ponds became a fashionable element of landscape design during the Renaissance.
The next step will be to select food in accordance with the type of aquatic inhabitants. When the water warms up to +24°C, you can try to make the first release of livestock. Initially, regardless of the size of the pond, about 5 fish are added. Their condition and development are monitored for several months.
Otherwise, the rules for breeding fish will differ depending on their species. It is recommended that you first study all the necessary information on specific representatives of the water kingdom.
Water filtration and useful tips
Care recommendations are quite simple:
- cleaning. In the warm season, it is imperative to remove weeds and algae from the water. This can be done manually or using special preparations;
- water regulation. It is necessary to monitor the filling level of the pond and constantly add evaporated water;
- the surface must be constantly cleared of leaves brought by the wind; it must not be allowed to sink to the bottom;
- The bottom and walls of the reservoir need to be cleaned of silt, usually this is done in the spring.
When marking an area for a pond, be sure to take into account the ratio of its depth and the amount of sunlight. The deep container should not be located in a dark area.
If you place a shallow container in the open sun, the water will become very hot and lose a lot of oxygen. If fish live in the pond, this will have a very bad effect on their life.
When making a pond at your dacha with your own hands, you need to remember to purchase and install a water purification system. If you want the pond to be inhabited and plan to breed fish, then you need to take filtration very seriously.
Ready-made water purification kits are sold in hardware stores. Installation of the equipment is simple; you can handle it yourself, making a pond with your own hands at the dacha.
