Wooden houses began to be built in ancient times. Previously, there was quite a lot of such building material, so all the walls were built in one piece and only at the end were openings made for windows and doors.
The process of installing a door in a log house depends on what material will be used for construction.
In the modern world, to achieve maximum savings, all openings are marked in advance. This will reduce waste. The installation of a door in a log house is carried out after the construction of the walls and roof has been completed. When building walls, it is very important to leave solid logs or beams in the area of the door opening; this will prevent the crowns from being squeezed out. After the entire structure is strengthened, solid logs are cut from the opening.
The process of installing a door in a log house directly depends on what material is used for construction. Regardless of what is used (log house or timber) for building a house, the installation of the door is carried out in the same way. It is very important to pause when installing the door. Such a temporary break should be counted from the moment of complete completion of the construction of the walls and completion of the assembly of the entire roof structure and be about 6 months.
Doorway arrangement.
During this period, the house will undergo partial shrinkage. Over the next year, the structure will shrink as much as possible. Shrinkage rates will depend not only on the technical characteristics, but also on the moisture level of the wood.
On average, the period of complete shrinkage can reach 6 years. Over the course of a year, a house can change its height by up to 5 cm. Based on these indicators, work on installing a door in a log house must be carried out using a special technology. By following certain rules, you can avoid such a phenomenon as skew. Today there are two options that can be used to install a door:
- installation of a special casing;
- installation of casing when using timber.
Ways to seal an opening above a door
Making repairs with your own hands is doubly pleasant. After all, this allows you to enjoy the process and gives you the opportunity to really get what you want. And independent actions are an opportunity to save money. As a result, this approach is very popular among us, but many suffer from it. After all, any repair involves certain difficulties that have to be overcome. And very often unforeseen circumstances or unusual situations arise. For example, there is a space above the door that needs to be filled. What is the best way to do this? What tools and materials should I use? How to properly lay the opening above the door?
Opening above the door
Let's try to answer all these questions, using photos for clarity.
Plastering slopes
[flat_ab > Slopes are most often plastered along with the entire apartment when the finishing is not completed.
- Putty knife.
- Level.
- Master OK.
- Rule.
- Painting mesh.
- Painting tape.
- Painting corners.
- Construction mixer.
- Plaster (dry mix).
- Finishing putty.
- The primer is liquid.
- Sandpaper.
- Water-based paint.
Do-it-yourself plastering sequence:
- Prime.
- Install and fix the beacons using a level.
- Close the junction of the wall and the slope using a painting corner.
- Cover the front door and frame with masking tape
- Attach the painting mesh.
- Make a solution.
- Fill potholes.
- Apply the solution to the entire surface, stretch along the beacons, then wait for it to dry and seal the cracks.
- Prime.
- Level with finishing putty.
- Wait until dry and sand with fine sandpaper.
- Paint with water emulsion.
If we are talking about a private house, it is advisable to treat the cleaned opening with an antifungal primer before work and add a little to the solution itself.
Advantages of metal doors
Metal doors have a number of advantages:
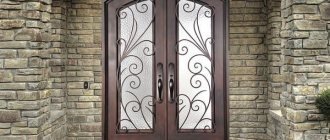
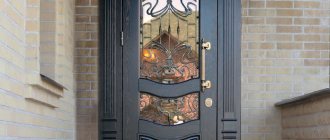
- aesthetic appearance. A wide range of entrance doors will help you choose a model to suit every taste. An iron door will harmoniously fit into the interior of a wooden building. The choice of model depends on your preferences and financial capabilities;
- strength. Metal is much stronger than wood. The steel door block can withstand high loads. It does not deform from impacts, does not change its positive properties due to temperature changes;
- durability. The strength and reliability of the material contributes to the long service life of the product;
- safety. A metal door is difficult to break down. A steel door, strong hinges and multi-level locking mechanisms are the key to the safety of your property. Instead of a regular metal door, you can install a safe door. It is distinguished by high reliability indicators, because it consists of 2 steel sheets with a thickness of at least 1.5 mm and has stiffening ribs. Equipped with two locks of different designs: level and pin;
- moisture resistance. If the door is installed correctly, then water cannot get inside and freeze. The canvas is usually insulated or additional insulation is used;
- fire resistance. A metal door prevents the spread of fire and smoke during a fire.
First working stage: cutting out the opening
Alignment of walls
After the marking is completed, cutting out the opening begins. During this seemingly simple operation, the following rules must be observed:
- the cutting plane must be strictly perpendicular to the longitudinal axis of the logs;
- The cutting line should run in such a way that there are no distortions and spontaneous falling out of the logs.
After cutting the opening, it is necessary to check the condition of the end of the frame to ensure that the vertical axis is maintained. If deviations are noticed, then the next stage of work is leveling the wall.
This is done with the help of special devices that pull the logs into one line.
This screed is temporary and is dismantled after installation of the casing.
Please note that in cases where an increase in wall distortions is detected, it is advisable to install a U-shaped version of the frame.
Law first
Remodeling an apartment is, of course, an interesting thing, but the law does not always allow you to do what you would like. This is primarily due to safety, since almost every element of the design of a residential building has its own purpose. For example, you cannot move a bathroom into a living space, and vice versa. Also, openings cannot be made in load-bearing walls. If you recklessly make any changes to structural elements, you can significantly reduce the strength.
Please note that you must coordinate any redevelopment actions with the relevant services before work begins. This way you will avoid problems. But if you do make a redevelopment, then still try to arrange everything correctly. Otherwise, over time, when you want to sell your apartment, you will have to urgently resolve this issue, which cannot always be done quickly.
In order to correctly complete all approvals, you must first go to the district administration and receive there an order to develop an architectural planning task and technical conditions. Next, we go to an organization that operates under a license and order the development of the project. Having received the project, we coordinate it with the district architect and, if all is well, we receive an order to begin work.
If we are talking about sealing an opening, then verbal approval from the architecture will be sufficient. After all, you are not destroying the structure of the house, but on the contrary, you are sealing the opening. However, everything here will depend on exactly how you decide to seal the opening. If you are drilling into a load-bearing wall, these actions may be unsafe.
With what? Choosing material
Before you start work, you need to decide on the material with which you will seal the doorway. If you want to seal it once and for all, then use one of these materials:
- Brick;
- foam block;
- drywall.
Each of these materials has its own characteristics, which we will discuss below. However, remember that if you can dismantle a plasterboard structure if necessary, then removing brickwork or blocks will not be so easy. We will also look at how you can decorate the opening without completely sealing it - such a temporary solution will allow you to avoid major repairs and approval from the authorities.
Brick
Brick can be considered the most reliable building material that can be used to seal a doorway. You can use brick to make a strong wall, which will also have good soundproofing qualities. If you have to seal an opening in a load-bearing wall, then brick will be the most preferred material.
When working with brick, it is necessary to remove the floor covering right down to the concrete panel. The walls also need to be prepared so that they can be securely connected to the new masonry. To do this, you can pull out several bricks from each side. During the process of laying bricks, it is necessary to check the masonry from time to time using a level to avoid the appearance of the so-called “belly”. Once you are done with the bricks, you can move on to the plaster.
Foam block
It is more convenient to work with foam blocks than with bricks - they are larger in size, which means the work can be completed much faster. In addition, foam blocks have excellent strength, which allows them to be successfully used when working with permanent walls. Foam block also provides excellent sound insulation.
To lay the blocks, gypsum glue is used, which is diluted at the work site. If the block needs to be sawed, then use a regular hacksaw. In order for the block to lie tightly, it is necessary to additionally tap the laid block with a rubber hammer.
Please note that a partition made of foam blocks will not withstand hanging heavy objects without additional reinforcement. Take this into account when choosing material for work.
Drywall
It’s easier to work with this material - you don’t need to fuss with mortar or glue, and all the work can be done in a matter of hours. If necessary, you can use mineral wool, with which you can make good sound insulation. This sealing option is suitable for non-load-bearing walls, which are usually much thinner.
Doorway
If a new door frame is installed, you need to decorate the opening beautifully. For this, different cladding products are used that match the color of the door.
- Fill the voids with polyurethane foam.
- Seal the slopes with plaster.
- Fix the facing materials with special glue or cement mortar.
Slopes
When starting to finish the slopes of the entrance door indoors, you need to select a material: panels or a regular layer of plaster. Sealing is carried out in several stages.
How to seal correctly:
- Remove dirt and debris from the opening.
- Install external corners on both sides.
- Add foam or soundproofing material and remove protruding areas.
- Prime, plaster (you can use mixtures of Knauf, Ceresit, etc.).
- Cover with panels, if necessary, or putty with a finishing mixture.
When everything is done, you need to let it dry for at least a couple of days before painting or other work. Cladding materials are attached to the sheathing with plastic dowels and impact screws.
This video shows how to install slopes in a doorway:
There may be gaps between the trim and the door opening. They can be sealed with gypsum putty (for example, Rotband). The remaining foam will need to be carefully removed with a sharp knife.
- Cut the mounting foam 1–2 cm deep.
- Prime the gap.
- Cover with plaster.
- Glue the serpyanka.
- Cover with finishing putty.
- If the cracks are small, you can seal them with sealant and then plaster them.
- Polyurethane foam (if they are very large) and an adhesive solution are also used to seal cracks.
- The voids of the slope are also filled with mortar, especially if it is planned to lay panels in the future.
This video shows how to seal a gap in a doorway:
Holes
Open holes after installing the door require very careful sealing. It is most effective to use polyurethane foam, then primer and plaster. The joints are sealed with a special tape, the surface is puttied and finished (with wallpaper, tiles, panels).
This video shows how to seal holes in a doorway:
Shoals
To avoid covering the door jamb, you need to cover it with masking tape.
- If there are gaps between the jamb and the walls, they are sealed with mortar or felt, tow, cotton wool, and then with foam and plaster. A layer of solution is applied several times.
- If the holes are masked with drywall, then there should be no gaps between the wall and the panel. They are removed with glue. Plastic sheathing strips must be fastened at intervals of ten centimeters.
You can finish the doors after installation in different ways. The most popular of them is cladding:
Before plastering the doorway, beacons are installed, which will make it easier to level the surface. The voids are filled with a solution of sand and cement, glue. The surface is leveled according to the beacons, and then subjected to finishing.
Drywall
How to decorate a front door doorway cheaply and without expense? In this case, plasterboard sheets are used.
It works well for eliminating defects, such as crooked walls. In addition, you can form a new doorway - narrower than the previous one. Subsequently, it is covered with a layer of finishing putty, painted or wallpapered.
Pros: simple and cheap. But there are a few more disadvantages:
- The strength of drywall is very low. The decoration of doorways will definitely not last long if there is a child or dog in the apartment.
- It absorbs moisture well through the slightest cracks.
- Drywall has been going out of fashion for a long time. Still, it belongs to the category of cheap materials.
Materials for work
Wood panels, laminate, veneer, MDF, plasterboard, plastic and other materials are used for embedding. You need to prepare:
- Screwdriver Set;
- screwdriver with a set of bits;
- drill for metal.
You will also need:
- level to check;
- polyurethane foam;
- wooden slats;
- putty knife;
- fastening means.
Plaster
Plastering is the most common method. It is used to eliminate defects after the door has been installed. You will need to set the guide beacons and mix the solution. A vapor barrier is carried out on the foam seam of the door block to avoid the appearance of moisture on the internal slopes in the future. This will also help prevent the appearance of fungus and mold.
For external and internal work, a special hydro- and vapor barrier sealant is used, which can be bought at any hardware store (Stiz A, B, etc.). We seal the openings with a plaster mixture (sand-cement mortar) and carefully level them. For basic sealing, tile adhesive is sometimes also used.
Plastering work begins when both adjacent walls are already plastered and the opening is covered with a primer compound. If sounds are heard from the stairwell, the gaps are first filled with soundproofing materials. Excess plaster mortar is cut off with a float or a regular lath. When the material dries, you will need to grout it.
This video shows the plastering work of a doorway:
Drywall
Finishing with plasterboard, which is installed in the doorway, leads to an ideal result. The surface of the sheets is treated with putty.
Plasterboard sheets are mounted:
For doorways it is better to use glue. This option is preferable for interior doors, but for entrance doors it is better to use a different finishing method. After processing, the plasterboard sheets can be plastered, painted or covered with wallpaper or ceramic tiles.
DIY window bookmark
Laying openings in a wooden structure is carried out in several stages, each of which requires care, concentration and accuracy.
First, the window block is removed:
- Remove the doors and immediately take them to a safe place.
- Remove the hardware, cut and remove the polyurethane foam. Carefully remove the frame from its socket. It is not worth sawing and breaking it in the traditional way, since the product can be useful on the farm.
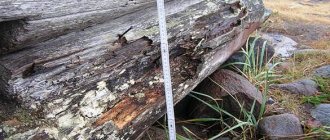
- Clean the opening from debris and sealant residues. Scrape or grind off areas damaged by rot.
- Treat the wood with an antiseptic and a hydrophobic agent. Wait until the material is completely dry.
In a log house, you can sew up the opening with a block house
Frame assembly sequence:
- Cut four fragments from a thick board corresponding to the parameters of the opening. There are no special requirements for casing. The main thing is that the material is well dried, treated with an antiseptic and a hydrophobic agent.
- Install casing. The boards are screwed or nailed to the walls of the opening. It is necessary to ensure that there is room for shrinkage, which in wooden houses lasts constantly. Seal the remaining cracks with sealant or foam.
In conclusion, you need to eliminate minor imperfections and defects left after installation - seal the joints, cover the cracks, if necessary, paint the insert so that it does not stand out against the background of the facade. Similar work is carried out inside the house.
Some tips
When installing doors in a wooden bathhouse, it is necessary to take into account not only the shrinkage of the entire frame, but also increased humidity. It can cause logs and boards to swell somewhat, which can also lead to deformation of the doorway.
The entrance door to the bathhouse should open outward so that in the event of an accident or fire it does not interfere with exit.
It is better not to install all metal latches, latches and handles inside the steam room. Not only can they simply rust, but you can get burned on them.
We can probably end here. All the main secrets for installing a door in a log house, both wooden and iron, were indicated. All that remains is to wish you success in coping with this difficult but interesting work and, if you are installing your door or doors in a bathhouse, an easy task.
Causes
What could be the reasons for this situation? Essentially there are two of them:
- design features;
- inaccuracy of measurements taken.
In the first case, there are situations when the door opening corresponds to the height of the ceiling. Quite often you encounter this in bathrooms, storage rooms and even living spaces.
Opening above the door
Varieties
In order to accurately select a door between rooms with a transom, you need to know what design features these doors have and determine which type is suitable for a particular interior. As for the type of arrangement of the valves, today there are several options:
- mounted only above the door;
- installed on one or both sides;
- combined - installation is carried out from above and from the sides.
By shape
Attention:
Transoms can be rectangular or arched in shape.
Rectangular ones are the most practical and also classic version of the doors , which are suitable for any model of door leaf and any interior design. Arched ones resemble arches in appearance; they give the interior an original, sophisticated and sophisticated appearance.
By type of design
Based on the type of construction, the following types of transoms are distinguished:
- solid;
- separate;
- deaf;
- glazed.
Glazed
This type of shutter is suitable for dark rooms, as the glass serves as an additional source of lighting. Sometimes such transoms can open, providing ventilation to the room.
Separate
Autonomous structures are mounted separately from the door on the side and on top of the door leaf. Such designs are used if the distance between the door and the opening exceeds 12 cm.
One-piece
A solid transom is a door element that is similar in appearance to the top crossbar. Experts recommend installing such a leaf if the distance from the opening to the top of the door leaf is less than 12 cm.
Deaf
Such doors are installed when the door being mounted has significantly smaller dimensions than the doorway.
Complexity and pitfalls
Wood is a living material that constantly breathes. After installation on the foundation, the log house must stand from several months to several years before it is subjected to subsequent finishing. Shrinkage can reach 15% of the height of the frame.
Even after shrinkage, in a house that has already been completed, the wood will still continue to breathe. Wood absorbs moisture and releases it depending on the state of the environment and air humidity. The permissible values for changing parameters are 1 centimeter per 1 meter of wall height, that is, a one-story log house will move by 2-2.5 cm, a house or bathhouse with two floors will be up to 5 cm.
When a house breathes, the geometry of the object may be disrupted. The weakest points are window and door openings, since the size of the metal door leaf, window frame and glass does not change. During construction, shrinkage and operation, it is important to ensure that these elements have a rigid and unchanging shape.
Expanding the window opening
Good day.
Please tell us how to seal an unnecessary window opening in an old log house (how the joint is made between the existing log and the new beam and how and with what the joints are insulated), and then expand the existing one to install a window block of a different size. Igor, Vologda.
Hello, Igor from Vologda!
Let me clarify: your question consists of two parts. The first question is how to seal the old opening and the second question is how to expand the existing one.
Since the log house is old and has already completely settled over the many years of its existence, there should not be any special problems.
Owners solve the sealing of an old and unnecessary window opening in different ways. In the simplest case, they sew up the opening both inside and outside with ordinary wooden panels made from boards of some type (edged, lining, imitation timber, blockhouse, etc.). It is clear that for a more aesthetic perception it is advisable to choose the relief of a new material that matches the shape of the old one.
And the main goal is for the sealing of the opening to provide strength properties and, above all, not to be a “cold bridge.” Why are both vertical and horizontal joints made not end-to-end, but stepped. Either these joints-slots are closed with overhead strips or window casings that are the same in shape as the rest of the window openings in the log house.
In the case when stepped joints are made, then on one side of the wall (external or internal) old logs (or beams) are sawn through about a quarter of their thickness with a chain saw. /At the same time, the main thing is not to run into old nails, otherwise you won’t have enough chains./ Most often along the entire contour of the window, with a deviation of five centimeters or a little more from the existing opening. Use a chisel to remove excess wood. This results in a sample size of one quarter.
And then the two shields mentioned above are made. One is external, the other is internal, different in area. Depending on the thickness of the walls, a corresponding window frame is made, onto which these two panels are stuffed on both sides. The internal cavity is filled with insulation (tow, moss, isover, mineral wool, etc.).
/If you have available cuttings of logs of the required diameter, then you can do without a frame with sheathing, and insulation will only be needed along the cracks. The trimmings of the logs are selected along their bottom in the form of a groove-groove, as is the case on old wall logs. The top trim is adjusted to the location. Fastening From the ends with nails or self-tapping screws “at an angle,” that is, obliquely.
The expansion of the old opening for a larger window block is done in the same way as described above. That is, with cutting into a quarter, but according to the size of the outer contour of the new window and the thickness of the window block. If the thickness of the window block is small (most often this happens with plastic windows), then you can cut it deeper. But then, to install the window frame casing, sometimes you also have to cut out and select the wood of the log (timber) for it.
I don’t know how clearly I presented the material, I hope the main ideas are clear.
During a major renovation, the opposite situation may arise: the opening should not be removed, but, on the contrary, expanded so that more light penetrates into the premises. In this case, you will need to dismantle the old window, disassemble the frame and cut a hole to the size of the new one. However, you need to take into account that the opening must be at least 14 cm wider than the selected window sashes: 5 cm on each side will be required for a new frame and another 2 cm for a layer of polyurethane foam that will hold the frame.
The side parts of the pigtail - the carriages - are made of wooden blocks in which grooves are cut. Protrusions are cut out at the ends of the logs, and with their help the casing is installed in place. A gap of 7–10 cm is left between it and the top log above the window, which will gradually decrease in the future due to shrinkage.
After installing a plastic window, it is filled with insulation, which will shrink over time. The height of this gap should also be taken into account when preparing a new opening. The gap cannot be filled with polyurethane foam: this material will not allow the logs to sink.
Ways to fill the opening
Sealing a window in a wooden house is a rather complicated process, primarily due to the fact that even after filling, the former window opening lets in cold air and becomes a source of drafts and dampness in the rooms. Because of this, you have to carefully select the material to fill the empty wall space. In addition, the decorative component must be taken into account: the sealed hole should not be visible either from the street or from the inside of the building.
There are several common solutions for how to remove a window in a wooden house:
- The most radical, but also the most reliable and aesthetic way is to disassemble part of the log house and replace the logs or beams. If we are talking about an attic or dormer window, this is not such an expensive solution, and it will allow you to forget about all the problems with blowing through the walls. But it should be borne in mind that old and new lumber will settle differently, so it is better to purchase dried wood and do not forget about laying insulation. When shrinkage is complete, re-caulking of the resulting cracks will be required.
- Installation of fragments of logs or beams of similar size and diameter into the hole. This is a rather labor-intensive method: the opening logs are cut at an angle of 45 degrees, the same angle is made at the ends of the insert pieces. There is also a minus: the new elements filling the hole will be very different in color. In this case, you will have to paint the entire wall to disguise the embedded part, or use another cladding option.
Frame method
How to install a window in a wooden building with minimal labor costs without cladding? There is a simple and effective method that will allow you to forget about the cold, and at the same time the structure will remain beautiful and neat. Sequencing:
- The old window block is being dismantled. The doors are carefully removed and the frame is removed. There is no need to throw away the plastic system: it will be useful for a summer house, greenhouse or gazebo.
- The resulting hole is cleared of accumulated debris and dust. After this, a frame made of thin timber or wooden slats is installed in it. It can be attached to the wall logs with nails or self-tapping screws.
- A frame is stuffed onto the frame from the outside, and material corresponding to the walls is attached to it. If the house is made of logs, they usually use a block house, if it is made of timber, a horizontal lining of the required size is used. As a result, the opening will not be noticeable from the street, and the surface will appear smooth. To avoid any difference in color tone, the wall should be painted.
- The internal space of the frame is filled with insulation: you can use a thick layer of mineral wool, penoplex, extruded polystyrene foam or other materials. The insulation must fit tightly to the frame and sheathing, then the wall will not freeze.
- On the inside, similar work is performed: the sheathing is installed, and decorative material is nailed to it. Usually this is a clapboard or block house. Next, the entire wall is covered with varnish or paint so that it acquires a uniform appearance.
If external or internal cladding is intended, you can do without sheathing. OSB boards made from sawdust and shavings are nailed to the frame-frame, and the internal space is similarly filled with insulation. After this, the building is finished with the selected material: OSB boards retain heat well, the insulation will not allow the wall to freeze.
In some cases, a window opening in a log house is covered with brick or aerated concrete blocks. This method is possible if the object is supposed to be faced with brick or other material, with cladding on the inside. Typically, infill bricks are used only in very old buildings where shrinkage has long since completed.
Options
So, let's look at what options there are to seal the opening above the front door. Much, of course, depends on the material of the walls:
- construction of a plasterboard structure;
- use of wooden boards and bars;
- brickwork;
- use of available materials.
Construction of a plasterboard structure
To do this, we will need metal profiles or wooden blocks, drywall itself and self-tapping screws, primer and putty. Tools include a hammer drill (if the walls are not wooden), a screwdriver, a tape measure, a pencil, a level, a spatula, a roller, sandpaper and finishing material, which can be wallpaper, paint or other options.
First you need to build a structure. To do this, you need to carefully correlate this element with the parameters of the wall, taking into account that drywall will also be attached to the structure. It is necessary to consider the placement of elements to ensure proper rigidity of the structure.
Next, you need to secure the drywall using self-tapping screws. Moreover, they need to be pressed in a little so that they do not protrude above the plasterboard surface. These places, like the joints, must be sealed using putty. When it dries, the surface should be treated with sandpaper, after which it should be coated with a primer using a roller.
After this procedure, you can start finishing. To do this you will need: either wallpaper, or paint, or another option. Of course, since this area will be part of the wall, the finish should be identical. It's good if the rest of the part is not yet lined. If there are already wallpapers on the walls of the room, you will need to select the same ones or supplement them with some other option.
Using wooden boards and bars
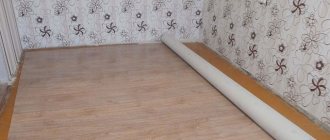
This option is especially relevant if the renovation is carried out in a wooden house or in those apartments where wooden boards in combination with plaster are used as floors.
In this case, it is important to calculate everything correctly so that the resulting structure does not differ in size from the rest of the wall. You will need a minimum of tools: tape measure, pencil, building level, screwdriver, saw. The materials you will need are screws, putty and finishing material.
First you need to take measurements, and then act. After this, it is necessary to perform finishing operations.
Related article: How to cover a doorway with plasterboard
Brickwork
Blocking the opening with bricks is the most difficult option. Therefore, to close the opening in this way, you should think carefully; it is better to avoid it. If the decision is made, then it is necessary to organize the base - make a crossbar on which bricks can be laid. To do this, you can use metal corners or channels. It is important to “weave” the bricks into the existing masonry to ensure sufficient strength.
Without the proper qualifications and experience, it will be very difficult to perform such actions. Therefore, it is still recommended to find an alternative.
Using scrap materials
For example, an old door leaf may be suitable for this purpose. It must be cut to size and then secured in the opening. This is perhaps the simplest and most affordable option. And if in other cases you can perform the actions yourself, then here you will need an assistant.
So, we figured out the options for how to seal the opening above the door. Each is good in its own way and has its own shortcomings, so the choice must be individual. It is only important to act consistently, take into account the recommendations, then the opening above the door will be completely identical to the rest of the wall.
You can learn even more about the possibilities for sealing or filling an opening above the door by watching the video provided.
Methods for arranging a pigtail
The casing, which is also called casing or casing, can be implemented in several ways. Most often in practice there are three time-tested options. Using their example, we will consider the features of the correct arrangement of window and door openings in wooden houses.
A groove is cut out at the side ends of the window opening. Its standard dimensions are 50 by 50 millimeters. A block of appropriate size is tightly inserted into the groove. It is not attached directly to the wall material. But it must be compacted and insulated using flax-jute fabric.
Next, the casing is assembled from edged 50 mm or 40 mm boards. It can be either closed or have only three sides - without a bottom. The box is firmly attached to the bars installed in the grooves. The pigtail is ready. You can install a window frame. She is no longer afraid of shrinkage.
At the side ends of the opening, not grooves are made, but tenons. In some cases, this technology is preferred because it is a little easier to implement. The casing box is assembled in the same way as described above, only from the outside, reciprocal grooves are cut out along its side parts. In this case, it is easier to assemble the pigtail directly in the window or doorway.
Used less frequently, but also found. To implement it, wooden blocks and 50 mm grooves are not used. Metal corners are simply attached to the sides of the opening, for which counter grooves are made in the assembled boxes.
Regardless of the chosen implementation method, any pigtail will work according to the same principle. The walls will shrink and decrease in size, sliding along the casing without transferring any load to them.
Features of installing a door structure
If you need to install wooden doors, then installation of the frame is not required; its role will be played by the casing system. An exception may be the situation when wood lining is used as a finishing material. Then the box is placed on polyurethane foam.
After installation, the box is closed with platbands. In case of severe shrinkage, they can be replaced with new ones or simply reinstalled by adjusting the dimensions.
If you plan to install a metal door, then the casing is done a little differently. Its upper part does not need to be installed. Instead, you need to leave a gap that allows settlement to occur naturally.
The main advantage of a metal door is strength. Its box is able to withstand the pressure of wood during shrinkage without any consequences.
When cutting an opening, a number of recommendations should be taken into account:
- firstly, its height should be 150 millimeters greater than the door;
- secondly, the width of the opening should be 100–120 millimeters larger than the box (if its installation is necessary).
The above requirements are relevant and, if necessary, install a window. The casing must be carried out in any case, even if the opening cut in the log house is small.
When carrying out the work described above, the possibility of the formation of cold bridges should be taken into account. To avoid this, it is necessary to use thermal insulation materials, for example those with which the wall was insulated.
In other words, cracks and gaps formed during the installation process can be sealed with tow, polyurethane foam and other materials with similar functions.
It is preferable to use polyurethane foam, because it not only prevents drafts, but also gives strength to the structure. At the same time, it is much easier to use.
Tile
Decorating with tiles is only justified if it is in harmony with the surrounding design. Basically, it is used to finish the slopes at the metal entrance, and to match it. Ceramics “metal” or “stone” are suitable for this.
It is almost impossible to break, scratch or break tiles. Glass glaze is much harder than steel or aluminum, which is used to make rivets and clothing fittings.
Of the minuses: before you make the slopes of the front door with your own hands, you will need to perfectly level the wall.
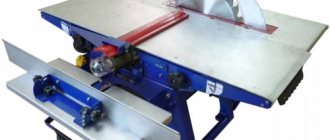
What tools will be needed for installation?
When deciding how to make a doorway and insert a door, first of all you need to decide on the tools necessary for this work. They must be at hand at all times. This will allow installation to be completed as quickly as possible. To carry out the work you will need:
- chainsaw or electric saw with a bar;
- hammer;
- perforator;
- circular saw or manual milling machine;
- chisel;
- construction measuring instruments: level (preferably laser), tape measure and square.
As a rule, searching for tools will not take much time, because all of them, one way or another, were used during the installation of the log house. Having prepared everything you need and understood how to install the door correctly, you can begin work.
How to lay a window in a wooden house: step-by-step instructions and video
How to install a window in a wooden house if you need to get rid of it on the wall is not very often of interest, but it does happen. This can happen if you want to divide a large room into smaller rooms. There may be a lot of extra windows in the corner room, so it would be appropriate to make the decision to get rid of them. Otherwise, in summer there is a risk of excessive sunlight entering the room, and in winter it can be quite cool.
Getting rid of the window
First of all, it is necessary to completely remove the unnecessary window in the wall. This process begins by removing all fasteners, after which it will be possible to remove the window frame. After this, it is worth getting rid of all sorts of protruding parts, particles of solutions from previous installation work, as well as other elements that may interfere with the further work process. A large rectangular hole appeared in the wall.
Dismantling a window opening
Frame and sheathing
To create a light wall directly inside the main wall, you first need to make a frame. The material is selected in accordance with the material from which the building is made. In this case it is a wooden frame. In no case should you skimp on nails, because it is they who must securely and firmly hold this structure in the wall.
In order to remove an unnecessary window opening, it is necessary to attach slabs to the frame; these can be OSB slabs. They are long-sized chips compressed under high pressure. Each subsequent layer of such chips is located perpendicular to the previous one, which subsequently helps to provide such structural elements with an increased level of strength. These boards are distinguished by a homogeneous structure without knots, which is significantly superior to the structure of plywood. Thanks to this, the boards have high strength and durability. It is also worth noting the addition of formaldehyde to the mass of parts, due to which the slabs become environmentally friendly.
Insulation
When the wall is completely covered with the above panels, the structure should be insulated using basic materials. Here are the main types of possible insulation:
- Mineral wool - the material has good thermal insulation properties, helps absorb noise and contains environmentally friendly components.
- Foam plastic - helps create a favorable microclimate in the room and protect the walls from the cold.
Note!
When insulating the walls of a house from the inside, mixtures such as ecowool, wet plaster and polyurethane foam are used.
Moisture insulation
At this stage, a drainage system or special insulation impregnated with resin should be prepared. This process helps to protect the wall from water and moisture entering the room. Due to this, the resulting moisture will flow down the walls. The insulation needs to be carefully secured; for this purpose, plastic nails are often used.
Attention!
Be sure to ensure that cracks and crevices do not appear during moisture insulation.
Facing
Finally, all that remains is to veneer the wall from the outside, after which it will be completely ready.
The inside of the wall is covered with plasterboard. An important process is the alignment of joints. If you do not have the skills to work with this material in this direction, you should seek help from specialists.
Taking into account the capabilities and taste preferences of the owners, you need to paint the wall or hang wallpaper on it.
Eliminating a passage with a brick
When sealing openings, brick, as a structural material, has undeniable advantages. With its help, you can wall up a passage in both a load-bearing external and internal wall. Moreover, there is not much difference whether these walls are brick or panel. Although we note that in panel houses they are rarely allowed to move.
As for partitions, brick is more often used for sealing. The reason is that the thickness of asbestos-cement, plaster, or gas-block structures does not always correspond to half a brick. When the thickness differs, differences are formed, which can create certain problems during plastering.
Selection of material according to the thickness of the partition
But there is almost always a way out - you just need to try to choose the material that best fits the width. The same brick, but only solid, can be laid not flat, but on the edge, which is important for those cases when the partition has a minimum thickness (7.5-8 cm).
- You can see how it looks in the picture below, and the difference of 1 cm can be easily removed by increasing the thickness of the plaster coating. If, for example, the thickness of the partition is 9-10 cm, you can take not a single brick, but a one-and-a-half brick, which has a height of 88 mm, and also place it on the edge.
- If the wall is to be plastered, then it is better that the thickness of the “patch” be less than the thickness of the main structure. If the masonry protrudes beyond the plane of the wall, then in order to smooth it you will have to spend more plaster on the entire surface, which will entail unnecessary costs.
- Before sealing the passage with piece masonry material, you need to properly prepare the base and end surfaces. The base below should be level, without a threshold or floor covering. Usually this is a concrete slab, on which it is advisable to lay a strip of roofing material under the first row of bricks.
- So that the new masonry can firmly adhere to the old one, notches need to be made on it. If the wall is brick, you can simply remove part of the mortar from the end seams, or even slightly knock down the corners of the products to create peculiar grooves. Then the dust is carefully removed, the surfaces are thoroughly moistened with water - and you can begin sealing the opening.
The masonry is carried out in the usual way, with bandaging of the seams. For reliability, some craftsmen hammer long nails into the seams of the old masonry so that their free end can be placed in the new one. But by and large, this is not necessary.
Sealing an opening in a new building
Sometimes the question arises, how to seal a window in a wooden house if it has just been built? The reasons may be different: the owners decided to make changes to the project or purchased the structure at a low price and want to modify the design themselves. Unlike an old building, in this case shrinkage has to be taken into account.
The new log house must “sit down”, so its height will decrease. Rigid fastening of any structures to walls is impossible. When shrinking, this can lead to cracks in the logs and other deformations.
The simplest solution to the problem in this case will be the frame method described above. The unnecessary window is removed, but there is no need to disassemble the frame. The frame is installed not in the opening itself, but in the frame of the frame, fastened to the wall using a tongue-and-groove system, and the nails for fastening the frame should not go into the wall.
After this, a lining or block house is attached to the frame in the same way, covering the hole. The internal space and all cracks are filled with insulation, then the cold will not penetrate through the opening. You can install false window shutters on the outside; the inside of the wall is sheathed with clapboard, plasterboard or other materials.