Concrete is the main building material. It is found everywhere and has many positive characteristics. But its thermal conductivity coefficient is high, so the material is cold. Heat escapes through the walls, so a lot of money is spent on heating. The only option is to insulate concrete walls. There are many materials for this purpose, and the work itself can be done with your own hands.
Insulation by spraying polymer
The most effective, but much more difficult, is to insulate walls by spraying polyurethane foam. To do this, the wall surface is prepared similarly to other insulation methods. For spraying, a special two-component mixture is used. Polyurethane foam is applied to the surface using a spray gun. The liquid solution, falling on the surface of the wall, hardens within a few seconds. As a result, a dense layer is formed with good thermal and waterproofing properties. Spraying is carried out evenly over the entire surface of the wall.
Return to contents
Rules and main disadvantages of insulating walls from the inside
Internal insulation, compared to external insulation, has a number of disadvantages that you need to know about before starting work on installing thermal insulation. Due to the location of the insulation on the inside of the apartment, the wall does not accumulate heat and heat loss cannot be completely avoided; in any case, it will amount to up to 15%. Also, when insulating from the inside, the “dew point” will be located between the installed thermal insulator and the wall. Therefore, condensation can accumulate on the wall, which can cause fungus and mold to appear in the rooms.
Insulating a wall correctly in an apartment from the inside is much more difficult than from the outside, and making even minor mistakes during installation work will lead to the wall still freezing, which is why construction, cladding and thermal insulation materials will be subject to increased wear.
To prevent condensation from appearing on the walls, it is necessary to install a high-quality vapor barrier; this is what protects the insulation from moisture and will significantly extend its service life.
For the work, we will need a high-quality vapor barrier film and construction waterproof tape (to seal the seams of the installed vapor barrier). Materials with low vapor permeability should be used as thermal insulation.
It is very important that the vapor permeability of the insulation is lower than that of concrete walls. This will allow moisture to evaporate outside, rather than inside the apartment.
When installing vapor barriers and insulating materials, they should be coated very carefully with glue and firmly fixed to the wall so that there are no cavities left between them. Before installation work, walls should be primed with special compounds that protect surfaces from fungus and mold. They also help improve the adhesion of installed materials.
It is also recommended to provide high-quality ventilation in an insulated apartment. Standard natural ventilation is unlikely to be sufficient, so you need to either install a forced air circulation system or equip the window frames with special valves through which fresh air will enter the rooms.
It is extremely important to correctly calculate the required thickness of the installed thermal insulator. The thickness of the insulation must correspond to the wall material and climatic conditions in the region. If the insulation layer is too small, it will not be able to reliably protect the apartment and its occupants from the cold
During installation, special attention must be paid to the joints of the slabs; here there is a high probability of the occurrence of “cold bridges”.
Cork covering for wallpaper
Features of the material and its cost
Cork has several characteristics:
- Pleasant appearance, bright wood texture, which itself can be a good solution for home decoration.
- Excellent insulating properties - it does not allow cold, extraneous sounds to pass through, and reduces heat loss.
- Supplied in sheets and rolls of various thicknesses, which makes it possible to save space.
- It is not susceptible to mold, mildew, rotting, and is not afraid of moisture and temperature changes.
- Suitable for reusable use.
- Features a long service life.
- It stands out for its relatively affordable price.
How to install a cork under wallpaper for insulation?
The cork covering is installed in the same way as roll insulation:
- Fixed only on a prepared, leveled surface.
- Attached with special adhesives.
- Dries within two days.
- After this, wallpaper can be glued to the walls. For these purposes, it is better to choose denser, heavier models, through which the wood texture will not be so noticeable.
- Drying is allowed from one to three days.
You can see the installation details in this video:
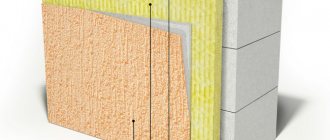
The choice of materials for insulation and their features
Insulation using polyurethane can create a moisture-resistant barrier with excellent thermal insulation characteristics. The problem with using this material is the technology of its application. Initially it is a foamed liquid that hardens very quickly. In order for this liquid to form a flat surface of sufficient thickness, you will have to use formwork and gradually fill the required space with foam.
To insulate walls with polyurethane, it is necessary to construct formwork.
When the entire surface of the heat-insulating layer has been formed, it is necessary to install steam and water protection. For this, polyethylene film is used, which is attached to the floor, adjacent walls and ceiling using slats and gluing with mastic or sealant. Due to the low strength and density of polyurethane foam, it will not withstand further plastering and finishing cladding. To do this, you will need to build an additional plasterboard wall. Although such insulation is effective, it requires additional costs and measures.
If you decide to insulate a room with expanded polystyrene foam (EPS, penoplex), which does not meet the required characteristics for insulating walls from the inside, you need to pay special attention to its installation. Due to the fact that this material is smooth, even sheets of fairly dense material of standard size 100x50 or 100x100, joints will form on the wall
It will not be possible to completely get rid of the joints, so you need to fit the insulation sheets as closely as possible to each other, and apply a layer of sealant to the ends of adjacent sheets. As is usually customary when working with this material, the solution is applied in the form of separate cakes, however, if insulation is carried out from the inside, this option is immediately eliminated. The fact is that as a result, air chambers are created in which condensation will collect. Sooner or later, the liquid will find cracks to escape into the room, ruin the finish and lead to the formation of mold and mildew.
Why is it necessary to insulate?
According to modern requirements, single-layer insulation is practically not performed. The composition of the heat-protective cake is determined by:
- installation location: outdoor/external;
- characteristics of the wall;
- the type of insulation chosen.
If you ask a professional how it is preferable to insulate the walls of a residential building, from the outside or from the inside, the answer will be unequivocal - from the outside.
Internal thermal insulation is installed only as a last resort, when there is no other possibility, for example, the building is an architectural monument or the small distance between adjacent walls does not technologically allow the installation of insulation.
The installation of internal insulation must be treated with great care, this is primarily due to the occurrence of a dew point at which condensation begins to flow along the wall, and in addition, the insulated wall is no longer protected by heat from the in-house heating system, since the heat barrier will not be able to transmit heat to it .
External insulation protects at cold temperatures, and to prevent household moisture from getting on the thermal insulation material , waterproofing is installed, in this case the dew point moves much further from the room to the street.
To prevent water from collecting between the wall and the heat insulator, a vapor barrier will need to be installed. Innovative heat-protective building materials are produced with a pre-installed vapor barrier layer.
In cases where the heat insulator is applied to the outside of wall structures, a wind barrier made of a vapor-proof membrane must be installed on top. It fences off the heat insulator from cold air masses hitting it.
Many novice craftsmen believe that there is no such thing as excess thermal insulation; this is not entirely correct. In thermal protection of buildings, the term used is excessive or excessive insulation.
A thick layer of insulation can disrupt the ventilation system of building structures . In connection with this, condensation will begin to accumulate, increasing the humidity in the room, which contributes to the occurrence of rotting processes and the formation of mold.
Option for insulating a balcony from the inside
In the case of a loggia and a balcony, the situation is often completely different. If the authorities do not allow the installation of a wall, they require that the existing reinforced concrete screen be left; it is cut off from the warm air by careful thermal insulation made of extruded polystyrene foam (EPS).
Insulation of the balcony from the inside
In this case, it is better to make the insulation excessive than at least slightly insufficient. The total thickness is divided into two layers. They are laid without a gap (preferably with locks), and so that the seams of the first layer overlap the sheet of the second. There should be no through access of warm air to the screen.
It is necessary to approach very carefully the issue of insulating the floor and ceiling of the loggia/balcony, ensuring tightness at the junction of them with the walls
Also pay attention to how the glazing will be installed: there may also be problem areas: the joint with the screen, walls, insulation of the part above the frames. All of them must be well finished, excluding the possibility of contact of warm/cold air
In this case there will be no problems. Even if the balcony is combined with the room.
Insulation instructions
Regardless of the type of insulation, there are a number of basic rules that anyone who wants to insulate concrete walls on their own should know:
- Carry out work only in the warm season, when there is no high humidity.
- Dry the surface. At this stage, you can use a heater.
- Perform a complete clean. Pay special attention to areas where there has been moisture or mildew.
- Treat the surface with an antiseptic, then prime. The wall must dry out after each stage.
- The second wall is mounted only after the surface has completely dried. Do the final work on it: glue wallpaper, paint, etc.
Expanded polystyrene
This material is popular, it is easy to get in the store, and the gluing procedure is quite simple:
- Lubricate the back side of the tile with glue, it is better to do this pointwise at intervals of 30–35 cm;
- glue the slabs so that the seams in the rows do not match;
- glue the fiberglass mesh and cover with an additional layer of glue;
- strengthen the corners with a special steel profile.
For better reliability, in addition to glue, use disc dowels. The reinforcing mesh should have cells of 3–5 mm and an overlap of about 10–12 cm.
If housing is built according to old technical standards, the recommended layer thickness is at least 8 cm.
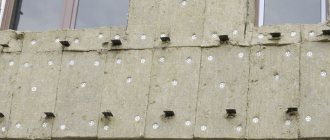
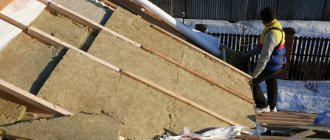
Mineral wool
The technology for installing such slabs is distinguished by the presence of a special frame, which is made of wood or metal. Below we have selected the main recommendations:
- Fastening in two stages - filling the space between the surface and the frame and in the gaps of the frame.
- The insulation boards for filling should be about 50 mm, density - at least 75 kg/m³.
- After insulation, a vapor barrier film is attached to the frame using a stapler. If the frame is made of metal, use double-sided tape or glue.
- The film is attached with an overlap on the lower and upper edges.
- The places with which the film comes into contact are covered with a liquid sealant, which is applied to the junction. The film is fastened in the same way as described above. It’s better not to use just adhesive tape and be on the safe side.
- The final work is attaching drywall and finishing the surface.
Plastering
Most often, plaster is used at the final stages. It is usually applied using indicators to ensure uniform coverage. The final touch is primer.
The plaster is applied in three layers:
- Spray. Layer thickness – 10 mm. This is a liquid solution that is used to cover all cracks and roughness.
- Padding. Thickness – 45–60 mm. The basis of thermal insulation.
- Covering. Thickness – 5 mm. This is a solution of chalk powder and water, designed to completely hide flaws.
Other materials for insulation
In addition to the above, there are other insulation options. They are less popular, but are also used.
Thermal panels
When purchased, insulation is already applied to the plasterboard slabs. Quite easy to install: glue is applied to the sheet and attached to the surface.
Foam glass with fiberglass coating
Foam glass slabs, mainly with a density of 100–150 kg/m³, are glued and, if necessary, additionally fixed with dowels. In addition to glue, dowels are used during installation. Plasterboard is also placed on the slabs or simply plastered. It is convenient because it is steam and waterproof, environmentally friendly, not afraid of fire and rodents, and also cuts well.
The surface of the slabs is also additionally secured with glass mesh and metal corners.
The main disadvantage of fiberglass is that the material is more expensive than other offerings on the market.
Penofol
It is characterized by high vapor permeability. Insulation with penofol 10 mm thick will have a heat-saving effect equal to insulation with mineral wool with a layer thickness of 3 cm. But often this thickness is not enough for effective insulation.
More often they are used as an auxiliary material, as an additional insulation material and as a vapor barrier. Attaches to the sheathing.
If you are offered to insulate your home with penofol alone, securing it in several layers with gaps, then this method will be extremely unprofitable - the process will be expensive and labor-intensive.
Use of polystyrene foam
Expanded polystyrene comes in different types, differing greatly in their properties. Classic polystyrene foam is not recommended for use in the home due to its fire hazard (when engulfed in fire, it drips and emits acrid smoke). For insulation of ceilings from the inside, polystyrene foam is strictly prohibited.
Extruded polystyrene foam (for example, Penoplex, Technoplex and others) is used much more often, since the material is more resistant to combustion.
It has a high compressive density (it is not as easy to make a dent in it as in regular foam).
In addition, dense penoplex cuts perfectly and does not crumble. Working with him is a pleasure!
The characteristics of extruded polystyrene allow it to be used for brick and concrete walls.
Two methods are used for fastening:
- Pasting.
- Frame.
The easiest way is to simply purchase a special adhesive composition and stick sheets of insulation onto the wall, especially since concrete and brick are usually quite smooth. But for reliability, it is still recommended to additionally “grab” the slabs with dowel-nails with wide heads.
Vertical guides are constructed from wood or metal. The distance between them is the size of the foam plate with a slight deficit so that the sheet is inserted at random.
Seams and joints are sealed with sealant or foam.
After installing the penoplex, finishing is applied to it.
How and with what to insulate a wall in a corner apartment from the inside
https://vk.com/id188753612 Nina Anisimova
I inherited from my grandmother an apartment on the fifth floor of a brick building. The corner room was cold and felt somewhat damp, although there was no fungus. There was no way to insulate the wall from the outside, so we decided to do it from the inside. They covered it with plasterboard, and mineral wool between the wall and the building block. It became warm and cozy.
https://vk.com/id188395771 Tatyana Vyalaya
We also suffer from this problem and want to insulate a corner in the bedroom. We don't have any problems with freezing, but the walls are very bloomy. The wallpaper is always moldy no matter how much you re-paste it. I didn’t want to insulate myself with polystyrene foam, I thought it was harmful, but it turns out mineral wool is toxic. My husband wants to run more batteries along the wall, like a snake, so that they warm up better. In general, let's think about it now.
I think the approach of insulating the wall from the inside is fundamentally wrong. Let's figure out what happened. Your wall is frozen or frozen. Clearly the design does not meet the requirements. The consequences are obvious. Microbes or microcracks will soon simply destroy the wall. You are protecting yourself, but you need to eliminate the cause. After all, no matter how much you insulate from the inside, you will not change the dew point, even if you lose half the room for insulation. Sooner or later, the destroyed wall as the main barrier to the external environment will remind itself. The fungus will come out next to your insulation and the destroyed wall will crack away from your insulation. And then major repairs cannot be avoided. What am I talking about? If you seriously decide to overcome the problem, insulation should be carried out only from the outside. I'm not even talking about the lost space and the harm of any insulation. Don’t be fooled by advertising; there are no safe materials.
There was such a problem in a large room, five corners. Three of them were near the windows and the corners there were constantly freezing. So they solved the problem easily - they insulated it with polystyrene foam, it is very easy to install and disguise with wallpaper.
The procedure for carrying out insulation work
To insulate a room from the inside, you will need the following tools and materials:
- insulation material;
- primer emulsion;
- adhesive composition;
- rule;
- spatula-comb;
- drill;
- level;
- drill attachment “Mixer”;
- dowels for fastening foam;
- vapor-proof film;
- metal profiles for installing the frame;
- plaster mesh;
- self-tapping screws;
- dowels;
- hanging plates.
Before you start insulating, you need to dry the walls. Batteries, heaters, etc. contribute to this.
There are a number of aspects that determine the conditions and time at which walls can be insulated from the inside. Do not under any circumstances skimp on materials or skip steps in the technological process. Any attempts to reduce insulation costs can result in very big problems.
It is necessary to carry out work on thermal insulation of the room in order to comply with the technology of wall insulation only in the warm period of the year without precipitation and high air humidity. It is necessary to dry the wall as much as possible. To speed up the process and improve drying of the wall, it is better to use heaters or heat guns. This will make it possible to reduce the humidity level to a minimum.
First of all, the wall is brought back to normal condition. It is necessary to completely remove all the covering: paint, wallpaper, cladding and decorative elements. It is best to also remove the plaster right down to the base, i.e. to the concrete slab. The entire surface of the wall must be cleaned of dust and dirt using a broom and vacuum cleaner. It is especially necessary to clean areas where the surface was especially damp and fungus has formed.
The next stage of work is surface treatment with antiseptic compounds and priming. After each operation, it is necessary to allow the wall to dry. It must be primed with a deep penetration primer. If heating elements or polystyrene foam are used, it is necessary to plaster and level the wall using a solution mixed with water repellents or ready-made mixtures intended for finishing swimming pools or bathrooms. It is best to use the plastering method using beacons if the difference in wall level is more than 10 mm.
Insulating an apartment with mineral wool
With this technique, the walls do not require special preparation; they do not even need to be plastered. Wooden or metal slats are immediately attached to the surface. The height of the slats must correspond to the thickness of the heat insulator; the distance between them is taken as the width of the roll (mat) minus 2 cm to ensure that the material fits tightly into the frame.
A vapor barrier film is laid on top of the slats; it can be attached to the wall using “liquid nails.” Next, mineral wool is laid, on top of which another layer of vapor barrier is made. After which the entire structure is covered with plasterboard, the sheets of which are attached directly to the slats. - a matter of taste of the owners.
How to insulate a wall in an apartment from the inside
Insulation of apartments from the inside, as a rule, becomes a necessary measure in houses made of panel blocks. Firstly, the wall ceilings in such structures are very thin, which leads to rapid cooling of the premises. Secondly, centralized heating systems cannot cope with heating a home, since the rate of heat loss exceeds the rate of heating of the premises by radiators.
The key to a comfortable temperature is not the time and intensity of heating, but the quality of thermal insulation. How to insulate a wall in an apartment from the inside, and what materials you will need for this, you will learn from our article.
Consequences of the lack of protective layers
Thin insulation that does not have important protective layers or excessively thick insulation cause equal damage to a home. In this case, a distinction is made between mechanical and chemical destruction of concrete structures.
The absence of a heat insulator leads to the following mechanical damage:
- temperature changes, freezing/thawing cycles of building structures;
- frequent cycles of drying/wetting walls;
- destruction of concrete under the influence of wind and water.
Chemical damage includes bimetallic corrosion, the action of acid and alkaline vapors in the air, as well as corrosion from stray currents, as a result of which the carbonization process occurs on concrete, when alkalinity around steel embedded parts and reinforcement units is lost.
Thus, the reasons for the destruction of concrete partitions are complex with a number of factors, but most of all they are associated with the appearance of humidity, which contributes to the appearance of dampness in the room and black mold, which is extremely harmful to people, which is one of the strongest allergens.
Insulation from the inside
The surface preparation is carried out in the same way as on the facade: clean the wall, level it, install the frame in accordance with the size of the slabs.
The main requirement for installation: the mandatory presence of a waterproofing and vapor barrier layer. The first layer is laid on top of the sheathing, the second layer on top of the insulation.
In this case, the fleecy surfaces of the membranes are located to the sides of the insulation outward. If the second layer has a foil covering, then it should face towards the room (reflect heat inward).
After installing the vapor barrier, you can begin finishing - for example, with plasterboard panels. The insulation of the concrete house is completed.
Installation
There are different methods for installing insulation. When choosing a suitable option, you need to take into account the complexity of its implementation and financial capabilities.
Insulation
To attach the polystyrene foam sheet, an adhesive mixture of Ceresit and dowels are used. First of all, you need to dilute the adhesive base with water to obtain a uniform consistency. The quality of this mixture determines the reliability of fixation of the material.
After applying the glue, proceed to fixing the material. The sheets are glued from the bottom corners. It may take 2 to 4 days for the mixture to dry. To improve the strength properties of the structure, dowels are driven into the wall. The formed joints are treated with plaster or construction foam.
Mesh and rough finish
After making sure that the adhesive base has completely dried, you can proceed to the next stage - fixing the reinforced mesh using the same Ceresit glue.
The base must be evenly distributed over the slab, pressing the mesh with reinforcement on top, moving from the upper parts to the lower ones. After this, another layer of glue, putty and primer are applied. At the last stage, siding panels are installed.
What can be used as thermal insulation
There are many similar materials, namely:
Scheme of insulating a concrete wall with polystyrene foam.
- Expanded polystyrene or polyurethane.
- Styrofoam.
- Plaster.
- Drywall.
- ICE or fiberboard panels.
- PVC panels.
Let's consider ways to use them for wall insulation.
The easiest and cheapest way is to apply a layer of additional plaster. To perform such work, you will need a metal construction mesh. The walls are first primed and a liquid primer is “sprayed” on them to strengthen them.
This is also done after laying each layer of plaster, which is applied evenly and has a thickness of up to 5 mm. There should be 4-5 such layers, and they cover all the walls of the apartment. Before starting work, the old plaster must be removed and the rooms must be vapor-proofed. It can be made of roofing felt, bitumen mastic, waterproofing material, etc.
Preparing mortar and applying plaster to a concrete wall.
When using plasterboard slabs, the lathing is first made from metal profiles. Then thermal insulation made of felt, mineral wool or polystyrene is installed in the resulting cells and covered with sheets of plasterboard.
When using PVC, ICE or fiberboard panels to insulate walls, you need to make a frame from slats. A vapor barrier and thermal insulation material are installed inside it.
Styrofoam can be directly glued to the wall, but this “cheap” option does not always produce positive results.
The most reliable way is to use polyurethane for wall insulation. It is able to create a good moisture-resistant barrier and has excellent thermal insulation properties.
The difficulty is that at the first stage it is a foamed liquid and hardens very quickly. To create an even layer of thermal insulation, you need to use formwork, all the voids in which are gradually filled with polyurethane.
Scheme of insulating a concrete wall from the inside with polyurethane foam.
After this, vapor protection and waterproofing are installed. It is made of polyethylene film, which must be secured to adjacent walls, floor and ceiling. This is done using slats and sealant. Since polyurethane has relatively low mechanical strength and low density, an additional wall of plasterboard is made from inside the apartment. This is a very effective thermal protection, but, compared to other types, it requires additional financial costs.
If you use polystyrene, you need to pay attention to its installation. This material consists of sheets measuring 100 x 100 cm, so many joints are formed
The sheets must be adjusted, and a layer of sealant must be applied to their ends. When insulating walls from the inside of a room, air chambers may appear, in which fungi and mold or condensation will appear over time. To secure the sheets, apply glue evenly over the entire surface. Before this, the material is perforated with a needle roller, which helps the adhesive composition to better adhere to the sheets.
In any case, you must first level the walls. To do this, you need to purchase special mixtures that can form a layer of waterproofing.
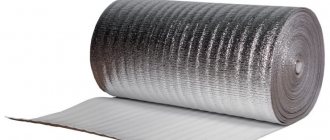
Functions
The substrate consists of several layers. In the middle, as a rule, there is foamed polyethylene, enclosed between layers of paper.
Many multi-apartment “anthills”, both old and new, do not have good sound insulation. Residents hear other people's conversations, and not only in raised voices, but also music and harsh sounds from their neighbors. All this is unnerving and does not allow you to live in peace. Sound insulation is ensured by using a wallpaper backing. This material also allows you to overcome the problem of indoor humidity.
It is an excellent lining for any wallpaper. Using it, the outer decorative layer is easier to glue and it will look better on the walls.
As a result, the finish will last longer and the problem of new repairs, as well as the material costs associated with it, will be postponed. Once upon a time, old newspapers were used as a backing. It was easier to glue wallpaper on them. Technology has come very far since then. Taking into account all the possibilities of modern substrates, their use cannot be considered a whim.
Some tips for insulating walls yourself
Schemes of the walls of a house with and without insulation from the inside.
Carefully treat the walls with an antiseptic: the durability of the installed thermal insulation depends on this. The insulation must be installed so that there is a small gap between it and the wall. Before starting work, all communications and electrical wires running along the wall must be carefully secured. After installing thermal insulation, this will be impossible to do. Do not try to insulate the walls in any particular room: it will be a waste of money. If there are heating system radiators in the room, then it is very difficult to install anything behind them. But there is a way out - foil plastic.
It is insulation consisting of a thin sheet of heat-insulating material, covered on one side with aluminum foil. This layer should be facing towards the inside of the room. In this case, the foil serves to reflect heat into the room.
Conclusion
Rolled insulation under wallpaper is an excellent solution for any house or apartment; it is important to prepare the walls well and glue the material well. The video in this article will tell you additional information on the topic, and if anything is unclear to you, then write your questions in the comments below.
Did you like the article? Subscribe to our Yandex.Zen channel
September 2, 2021
Insulation materials,Wallpaper,Thermal insulation
If you want to express gratitude, add a clarification or objection, or ask the author something, add a comment or say thank you!