The ceiling plinth is a decorative element that emphasizes the decoration of the ceiling and walls. Without it, the entire design of these surfaces can often look somehow unfinished. Accordingly, the installation of such skirting boards (or, as they are often called, fillets or baguettes) must be perfect, with precise adjustment of all connecting joints.
How to make a corner of a ceiling plinth
On straight sections of the ceiling, it is not so difficult to fix and connect the planks. But corner joints cause difficulties for many beginning craftsmen. Therefore, for those who have decided to do the finishing work themselves, and are doing this for the first time, it will be important to figure out in advance how to make a corner of the ceiling plinth. The process of fitting parts in corner areas will be discussed in this publication.
Installation of plastic corners
The work of installing plastic corners on slopes consists of the following:
- Regardless of where you need to glue the plastic corners - on the door, if there is no trim or window, outside or inside, you need to take measurements and cut the material correctly to length.
- Prepare the surface where gluing will take place - remove excess elements, clean the base.
- Install and glue the strips correctly.
How to properly glue plastic corners to any slopes:
- Thoroughly degrease the surface before strengthening the corner piece.
- Polyurethane foam is not used in the design process.
- Excess protruding plaster is cleaned to a tangible smoothness.
How to properly glue plastic corners
- The sticker provides markings using a pencil.
- Before gluing all the parts, you should use this advice: it is better to measure the corners for the slopes of doors and plastic windows locally. First install the top horizontal element, and then use a cutting tool to mark the vertical stripes.
Fundamentally! Using photos and videos, every beginner can handle the gluing process without the help of others. The iron element is also fixed with screws.
Covering with corners also involves additionally securing the strips using narrow masking tape. Fix the strip with it in several places and leave it for approximately 24 hours. This is still enough to firmly glue the corners to the surface.
If the corner is used as a final finish, then the place where it is glued should be cleaned of finishing materials. This way the quality of grip increases. When fixing to an area decorated with trellises, you should cut a strip a couple of mm wider than the plastic corners. Adhering to the usual design rules, fixing decorative elements will be simple and quick, and in the end they will amuse you with an aesthetic and spontaneous appearance.
How to glue
Finally, we got to the main question of how to glue the corners to the slopes. But before you start specifically fixing, you should do a fitting, so to speak. After making sure that everything is trimmed correctly, you can move on. We apply an adhesive solution to the inside of the corner, at the junction of the sides, in increments of approximately 10 cm. At this step, the mounting gun will be an indispensable assistant. Then we quickly press the product to the surface and secure it in this position with masking tape. You should start with the horizontal slope, and then proceed to the side slopes. Use a damp cloth to remove excess sealant from the surface of the walls and let it dry thoroughly. You can remove the tape only after 24 hours.
Installation
Installation of plastic corners does not require deep knowledge in the field of construction and can be done independently.
For this, the following materials and tools are used:
- A sharpened utility knife or scissors for cutting metal.
- Specialist. glue or liquid nails.
- Silicone.
- The angle profile itself is made of plastic.
Before purchasing tools and materials, it is strongly recommended to measure all slopes and openings where it is planned to install finishing elements.
It is not recommended to add all measurements into the total length of the required material , as this will only increase the magnitude of the error.
Step by step guide:
- The first step is to prepare the surface of the opening , and you should start by cutting off the excess, protruding and protruding parts of the wallpaper, plaster or polyurethane foam that interfere with the fastening of the decorative element.
- When the surface is ready , the corner itself is covered with an optimal layer of glue, sufficient? so that it sticks, but don't overdo it? otherwise the glue will come out from under it and stain the surrounding surface. Another thing is the self-adhesive version, from which you just need to remove the film and it is immediately ready for installation.
- It is important to immediately apply the material absolutely correctly , so that you do not have to adjust its position by smearing glue on the working surface, and self-adhesive products only have one attempt for high-quality installation. In this matter, the main thing is to join the corners clearly, with minimal gaps, or better yet flush, and cut them very accurately. An unsuccessful joint can be easily disguised by filling it with silicone.
As a result, you can easily decorate any window or door opening. The plastic corner profile is made in compliance with all environmental standards, has a permanent color and does not emit odors, and is easy to clean with any damp cloth or napkin.
The price of such plastic products is several times less than similar ones made from other materials, and this is the main advantage of this material, which, combined with an almost eternal service life, makes PVC corner the most popular option for finishing slopes and openings.
What does it depend on:
- Firstly, it depends on the type and shape of the section, as well as on the size of the shelves; the larger they are, the more spent on making the plastic corner and the more expensive the product.
- Secondly , depending on the method of fastening, glue is already applied to the self-adhesive corners, which is included in their price.
Examples of prices:
For example, white self-adhesive corners are sold in rolls, each containing 50 linear meters. The cost of such corners varies depending on the width of the material, so a roll with a 15×15 corner will cost 59 rubles, and 35×35 will cost 72 rubles.
Regular options are presented for sale in 2.7 m lengths and are sold in packs of 100 pieces inside, the price of one piece varies depending on the width, so a product measuring 10×10 costs about 20 rubles, and a version with a width of 50×50 is sold for 90 rubles per piece .
Recommendations for beginners to make the task of attaching slopes less problematic.
- “Measure twice, cut once,” says the proverb. You need to take accurate measurements so that there are no gaps.
- It is not recommended to fasten joints with silicone. The composition darkens over time and stands out unattractively in relation to the plastic profile, disrupting the aesthetics of the finish.
- You need to measure the corners. An angle of 89 degrees is not straight, the joints will have to be processed differently.
- In the absence of experience, it is wise not to immediately glue the corners, but to first secure them with tape, comparing measurements, identifying gaps.
- It’s easier to make an arch using a hair dryer. The plastic profile bends well when heated.
Decorated
Gluing the corners is not difficult. No skills are required to beautifully decorate a plastic window. You need to select and install a profile according to the instructions.
How to Cut a Plastic Corner at 45 Degrees
During renovation work in premises, plinths play a decorative role and are the finishing touch of the design. They are also designed to close the gaps between different surfaces. Proper gluing of ceiling and floor plinths is an easy but responsible task. In this regard, the issue of their installation becomes particularly important.
The photo shows the joining of skirting boards in the inner corner of the room.
Floor plinths are available in a very wide range of products:
- Made of foamed PVC, plastic, produced with cable channels for laying wiring and without them.
- Made of wood, made from various wood species, solid, in other words, laminated; Installing a wood plinth is no different from installing plastic fillets.
- Steel, steel and aluminum, with cable channels and flat.
The plastic or steel products come complete with various connections and endings, which make it easy to create an installation. Therefore, there is almost never a question about what exactly it is, how to cut plastic skirting boards at the joints. Wood lacks such connecting parts. They need to be cut for a beautiful connection.
Fundamentally. Before installation, wooden fillets must be kept in the room for which they are intended for more than a day. Just like any wooden product, it must adapt to temperature and humidity.
- miter box;
- hacksaw with a small tooth;
- sandpaper.
Let's look at how the pruning process is carried out.
To connect planks when going around corners, the question is how to cut the baseboard at 45 degrees? This is done very simply, but it is better to have a special device called a miter box.
Basic Rules
To cut the ceiling plinth at an angle of 45 degrees, you need to decide on the sides. The main mistake is precisely the incorrect determination of the sides of the fillet. A proven way to determine the correct side is to apply the material in place. This makes it clear how to cut the baseboard. This operation, despite its apparent simplicity, is very labor-intensive, since after trying on the baseboard you have to go down to the place where sawing will be done. Most often, in order to avoid deformation or damage to the baseboard, especially if it is made of foam plastic or similar material, it is necessary to cut it on the floor.
Then all this must be lifted back to the ceiling for final fitting and installation, the same actions are done with the other section.
The joints of two skirting boards in the corners should look aesthetically pleasing, so they need to be cut or sawed off as carefully as possible. A hacksaw works well for this. In some cases, a sharp knife. If the cut was done correctly, small flaws can be eliminated with putty or sealant.
Plastic, wood or MDF - which one to choose?
Having made sure that installing corners is not just a whim, but a necessity, we will study the construction market in order to make the right choice. These products are divided into types depending on the material from which they are made. So, the corner can be plastic, wood, beech, made of cork or MDF. Each type has its own pros and cons; let’s look at them more carefully.
Plastic corners are made by hot bending a sheet of polyvinyl chloride. Basically, they have similar shelf widths - from 10 to 40 mm in increments of 5 mm. But there are asymmetrical specimens, for example, 10x25 mm, but regardless of this parameter, the angle between the sides is 90 degrees. If you need to transform an arched opening, this is done using a special flexible profile. Their advantages include their relatively low price; they do not require painting, unlike the same wood.
The next view is cork corners. Such decorative elements are quite often used for arched skylights, but this does not mean that their use is limited only to this area. They can also be used to finish slopes of various shapes. Cork has a number of advantages, including strength, fire resistance, practicality and environmental friendliness. In principle, this material has virtually no disadvantages, except that if your pet wants to sharpen its claws on it, this will damage the surface.
It is also necessary to note wood and beech products, which will always be signs of excellent taste and will fit into any interior. In addition, we must not forget about their environmental friendliness. True, such elements are somewhat more expensive than their counterparts made from other materials, and besides, they often require painting. A material such as MDF can also be compared with natural wood, but it costs much less, because wood dust is used to create it.
READ How to cut a plastic corner
Why do you need to attach corners to slopes?
Let's start with the most important thing - why is this necessary? What role do the corners play - only decorative or do they have more severe functions? Let’s not argue with the fact that if you border the slopes of doors or windows with special decorative elements that fit perfectly into the design of the room, then the interior will immediately change for the better.
But apart from this, they also perform a very important protective function. At some point, you have to carry large items through the opening, which can damage the corners, and you can simply accidentally hit the outer corner and destroy it. There can be a lot of situations, the main thing is that the result is the same - a damaged surface and, accordingly, a damaged appearance. In addition, as practice shows, in most cases the wallpaper begins to peel off specifically in these places. So it is best to protect the outer corner of the slope with the help of a decorative element, which will also transform the interior.
Corners are not only protection, but also a discreet aesthetic appearance
What glue to use
In addition to the corners themselves, we will also need an adhesive composition, with which we will strengthen the selected element. When choosing it, you should keep in mind that quite often, especially if you need to glue a narrow product, the glue penetrates from under it and, naturally, gets on the walls. As a result, the latter may be damaged, which, accordingly, will have a bad effect on the appearance of the room as a whole. Therefore, you should choose an adhesive composition whose excess can be removed from the surface.
Basically, the corners are glued to new slopes, but still make sure that the surface is relatively flat, because no decoration will be able to hide huge hills. It should be free of foreign objects such as nails, screws, etc. It also needs to be degreased; white spirit is suitable for this purpose.
Surface preparation
In order to carry out the procedure for preparing surfaces for installation of corners, it is necessary to consistently carry out a number of small but important measures. All of them should be carried out in strict sequence and without deviations from the plan, otherwise failure to comply with these recommendations may lead to undesirable results.
You will most likely have to redo everything again. And this will require additional time, effort and finances.
- Make sure the surface is free of any protruding parts. Any nails, wallpaper and all surface irregularities should not bother you. If the wall is uneven, then it is worth leveling it with plaster.
- If there is wallpaper pasted on the corner of the wall, then it must be cut off. Otherwise, you will glue the corner not to the wall, but to this wallpaper, and there can be no talk about the reliability of installation.
- The surfaces need to be degreased. Use a weak solvent or alcohol. The corners are glued to the slopes already prepared for this.
At this point, surface preparation can be considered complete and you can proceed further.
What to attach to
The choice of method for fastening corners to protect the corners of the walls depends on the material of the corner and on what surface they will be fixed to. In most cases, glue is used. At the same time, “liquid nails” are among the favorites. This is a universal composition, but before purchasing, check that a certain brand can glue the materials you need.
You can put a corner on the glue if it is even, without huge flaws. If there are holes/depressions, you are unlikely to glue it. In this case, you can use silicone. If you are gluing snow-white corners, you can use snow-white silicone. For colored ones it is better to take transparent ones. It is not better to use acidic in every place. Although it is cheaper, it can destroy metals or paint.
In both cases, the wall and corner must be clean and dry. The compound is applied to the corner, it is pressed against the corner, and fixed with strips of masking tape. We grab it after 40-60 cm. If everything is smooth, you can do it after 60 cm; if you need to repeat the shape, after 40 cm or even more often.
How and with what to glue a PVC corner to the wallpaper
Leave it in this state until the glue dries or the silicone hardens. Check the packaging for exact times. Then the masking tape can be removed. It differs from ordinary tape in that it peels off even from cardboard wallpaper without damaging the surface. But to be sure, try sticking and peeling off in an inconspicuous place.
Foam rubber corner - L-shaped and universal on a self-adhesive base
There is also another option for gluing corners onto a wall with wallpaper or painting. You can use double-sided tape. First stick it to the corner, then, after removing the protective coating, press it to the corner. There are corners to which the tape is already glued. Some types of foam rubber or plastic (usually flexible or universal).
Conclusion
All three methods I described work; the choice depends on what tool you have and what your professional skills are. If after watching the video you still have questions, welcome to the comments, I’ll help in any way I can.
If you are not confident in your abilities, then for both floor and ceiling plinths there are joining elements that allow you to do without trimming.
Types of protective corners: from what materials
According to the area of application, corners are for outdoor (on the street) and indoor use. For now, let's talk about how to protect corners in an apartment and a house - indoors. Let's start with the materials. Corners for protecting wall corners can be:
- Made of plastic (PVC). Various colors, textures, there are even transparent ones.
- Made of metal. Brass, duralumin (polished or not), stainless steel, with or without colors.
- Woody. Made from various types of wood, smooth, with relief.
The corner on the arch is covered with a flexible plastic corner
- MDF. With imitation of different types of wood, smoothly painted, with different patterns.
- From a traffic jam. It could be a fun twist to add cork trim to more than just the corners.
- Rubber. Typically used in clinics or kindergartens. Perfectly protect corners in the garage.
- Foamed rubber. Same as rubber ones, but softer. Suitable for protecting very active children from injury.
- Decorative - with carvings, rhinestones, patterns, etc.
Cork corners to protect corners
Corners for protecting wall corners: selection options
Not everyone likes this design technique for wall corners - protective corners, but there are no particular alternatives. In any case, on walls covered with wallpaper, a corner is still better than sticking out and torn canvases.
There is only one solution available for the integrity of wallpaper without the use of decorative corners - to make a rounded angle rather than an acute one. In this case, there will be no problem with finishing it. You can simply roll up the wallpaper without cutting it. But you need to remove the corner completely; otherwise you will have to cut it , which means that the question of protecting the wallpaper joint at the corner will arise again.
It is important to choose the right decorative corner so that it does not look alien. There are special techniques for this.
The interior looks good in the appropriate style
You need to select corners to protect the corners of the walls based on the overall design of the room. There are several standard solutions:
To match the wall trim.
A complete color match is better, and even better if the texture is similar.
Or to match the wall trim, or to match the doors
One of the options, completely logical
In general, you need to select corners to protect the corners of the walls depending on the design of the room. This can be done after the furniture has been arranged and textiles have been hung. In this case, it is easier to imagine the final result. Because the picture in our head can be very different from reality.
READ How to cut porcelain floor tiles with a tile cutter
If you just can’t find an acceptable color, but you need to protect the corners in your apartment, pay attention to the transparent plastic corners. They are of different types - rigid, flexible, with different wall widths.
How to join the corners of a ceiling plinth
If you saw or cut the baseboard correctly and then create bevels, there will be no problems with joining. However, due to incorrect wall geometry and errors in work, difficulties often arise.
The most common is the impossibility of normal joining of skirting boards. Most often it is caused by uneven walls. In this case, it is necessary to attach the plinth to the place where it will be glued, notice where there are inconsistencies, and then further process the product.
If you don’t want to carefully cut out every joint, you can use special corners. They help connect the ceiling plinth at both internal and external corners. However, the corners have one significant drawback. They are not produced for all models of skirting boards.
If gaps at the corner joint are discovered after gluing, and there is no desire or opportunity to dismantle the decor, they can be treated with putty. The best option is final acrylic. It is quite plastic, has a white color, like the baseboard itself. You will need to apply a little putty to your finger, lightly press it into the gap, and then carefully smooth it out. Residues are removed with a damp cloth. Usually, after this simple procedure, the gap can be completely masked - it becomes completely impossible to notice it.
Shapes and sizes
Finished corners usually have an angle of 90°. The corner itself is not always sharp; there are options with a rounded one. By type, corners for protecting wall corners are divided into:
- hard
- external;
- internal;
Universal corner made of MDF
Questions can only be about universal ones. These are two strips of plastic or MDF connected by a narrow strip of flexible material of the same color. Thanks to this connection, you can create an obtuse or acute angle, internal or external - without much difference. But in terms of reliability of protection, it is inferior to rigid ones - after all, the elastic part is quite narrow.
It is also worth knowing that corners can have shelves of similar or different widths. More often they are found with similar ones, but you can also find those in which one is wider, the other is narrower.
The width of the shelf varies from manufacturer to manufacturer. Plastic ones, for example, can have shelves from 10 mm to 50 mm. MDF corners do little with a shelf width of 20 mm, iron ones - from 10 mm, but the longest shelf length is 90 mm (aluminium). So there is plenty to choose from.
Miter box manufacturers
When choosing a manufacturer, you should take a closer look at proven brands. The most popular products are Gross, Stanley, Kuper, Profi and Stayer. They produce and constantly improve equipment for both home and industrial use. The products have a quality certificate and are designed for a long service life. You can find a suitable tool in different price categories.
High-quality and modern tools allow you to complete the intended work much faster and more efficiently. Many experienced craftsmen, as well as amateurs, appreciated the miter box. The device helps to make cuts on different materials under specified parameters in the shortest possible time.
5 665
Arch finishing
The design of the arch often becomes a problem. In general, there are not so few external corners in the apartment, but on the arch there are certainly some. And in the aisle they very often get touched. Either furniture, or other cargo, or simply an inhabitant who did not fit into the gap. And if there are no questions with the straight part, then the round part may be a problem.
And not only in the doorway can there be an arched vault
In general, you can use universal corners for the arch. They are flexible, which is very comfortable. There are flexible, non-universal ones - plastic, made from a special polymer with high elasticity.
But in general, corners with different shelf widths are used to design arches. They are even called arched. They have one shelf of 10 mm (external) and the second - internal - 30 mm or more. They simply bend. You can’t twist it into a donut, but it’s not difficult to get at least some curvature in the arc. You will only need to use a secure hold while the glue dries.
If you want to bend an ordinary corner, you can do this by heating the plastic. For this work you need a hair dryer. Ordinary one - for hair - will not work, because its temperature is very low. We also need a template according to which we will bend the plastic corner. Take a piece of fiberboard, tighten the screws or drive in nails, forming the profile that you require.
This way you can decorate the corners of the arch with protective corners
They start bending from the middle. Warm up the area, constantly pressing on the middle, and using a hairdryer, moving from the center to the edges. So you need to bring the corner to a suitable curvature and leave it in this position to cool. To prevent it from straightening out, along with a number of screws, holes are made for the 2nd row. The distance between the rows is equal to the width of the corner shelf. After the plastic has bent, insert and tighten the screws a little. After the plastic has cooled, remove them.
How to cut finishing corners
cut to protect the corners of the walls . They are sold in strips from 2 to 3 meters long. The cutting tool is selected depending on the type of material. For wood and metal, thick plastic, you will need a hacksaw, but the blade is different - for wood, and with a fine tooth for metal or thick-walled plastic.
Thin plastic can be cut with a construction or stationery knife or sharp scissors. If you need to cut perpendicularly, it is easier to use scissors. We use them to cut to the corner on both sides, bend the corner, and cut the remaining millimeters with a stationery knife. If there are flaws, they can be easily corrected with the same knife or very fine-grain sandpaper (polishing).
How to cut protective plastic corner (PVC)
If the plastic corner needs to be cut along the fold, cut it along the inner corner using a stationery knife. There is no point in cutting through the entire thickness. You just need to leave a noticeable stripe. Then we bend the piece that needs to be removed. It comes off at the cut site. We remove irregularities with a knife or sandpaper.
Required Tools
When starting to decorate a room with ceiling skirting boards, you need to prepare the appropriate tools:
- stationery knife for foam baseboards;
- hacksaw for metal;
- roulette;
- carpenter's square or simple school square;
- miter box;
- pencil;
- a stepladder that is stable and of sufficient height.
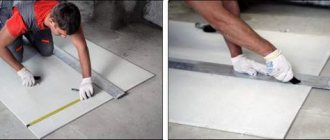
It is necessary to free up space on the floor in order to make cutting skirting boards convenient. It is on the floor that it is best to place a miter box; the length of a table or portable workbench is sometimes not enough to securely place the sawn plinth.
Shapes and sizes
Finished corners usually have an angle of 90°. The corner itself is not always sharp; there are options with a rounded one. By type, corners for protecting wall corners are divided into:
- hard
- external;
- internal;
Questions can only be about universal ones. These are two strips of plastic or MDF connected by a thin strip of flexible material of the same color. Thanks to this connection, you can create an obtuse or acute angle, internal or external - without much difference. But in terms of reliability of protection, it is inferior to rigid ones - after all, the flexible part is quite thin.
It is also worth knowing that corners can have shelves of the same or different widths. More often they are found with the same ones, but it is quite possible to find those in which one is wider, the other is narrower.
The width of the shelf varies from manufacturer to manufacturer. Plastic ones, for example, can have shelves from 10 mm to 50 mm. MDF corners are made with a minimum shelf width of 20 mm, metal ones - from 10 mm, but the maximum shelf length is 90 mm (aluminum). So there is plenty to choose from.
Preparatory activities
Naturally, preparation is a very important process, so you should carefully approach its implementation:
- If work is carried out on surfaces that have not been finished, then it is necessary to check for the presence of protruding elements, screws, and nails. You need to get a flat surface, otherwise the corner will not install correctly.
- Slopes and adjacent surfaces are wiped. It happens that you need to degrease some areas.
- The opening is well measured. It must be taken into account that one of the sides of the plastic element is taken as the basis. For example:
- elements are laid, the outer side of which is 20 mm;
- when measuring a vertical stand, it must be taken into account that it should be 20 mm larger on the outside;
- the same overlap is left for the top bar, only taking into account two sides.
READ How to cut a plastic corner lengthwise
Trimming is done using a sharp construction knife. If work is performed with the wrong tool, the material may be damaged.
When installing plastic corners, it is important to ensure that the material fits correctly
Preparing for work
Before attaching the plastic corner to the work areas, they are freed from dust particles and construction contaminants. If there are protruding parts, remove and level the surface, otherwise the profile will lie crooked.
For work you need to prepare the following devices and tools:
- glue gun;
- roulette;
- construction knife;
- masking tape;
- square, preferably made of metal;
- miter box (you can do without it).
Clean and dry surfaces to be bonded are degreased with any solvent.
It is important to correctly measure the window slopes and prepare the finishing material. The basis should be one of the sides of the corner, which is cut off from the outside with a margin of 20 mm, this applies to the vertical, upper parts, taking into account both sides. All parts must consist of one whole segment; connections are not allowed.
External corners are joined in the following ways:
- overlapping each other, then leveled with putty to match the color of the plastic;
- cutting at an angle of 45°;
- by cutting one of the allowances to the base (the top one remains with a margin, and the vertical ones are cut flush).
It is advisable to check the accuracy of the cut elements by joining the parts. Cut with a special knife, otherwise the material may be damaged.
Scope of use and additional information
The framing corner is made by hot bending a PVC sheet. The decorative element allows you to choose colors that will suit any interior. Application area:
- Window slope inside a house or apartment.
- As an external material to protect external or internal corners.
- Door or arched opening.
- To protect the corner of the wall when decorating with wallpaper.
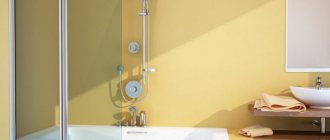
- Protection of corners when finishing with plastic in the bathroom.
- Draping the joint when decorating external siding.
The plastic element is a good protector from mechanical stress, but, like any material, it has advantages and disadvantages:
- The installed corner is used as a finishing seam at the junction of finishing materials.
- Long service life - up to 25 years.
- Installation is carried out independently; you can glue the corner without prior preparation.
- The plastic element is easy to trim and comes in different colors.
- Acceptable price.
Why are plastic corners needed on slopes?
Among the shortcomings, the following were significant:
- Plastic is a fragile material, so be cut with special tools - cracks may appear.
- The flammable finishing element does not tolerate high temperatures.
Product installation
Now that all the elements are prepared, the installation of the corners on the window begins.
- The placement of fragments is carried out in random order. Although it is recommended to mount clockwise.
- Glue is applied to the reverse side. This should be done closer to the inner corner, taking into account that the excess will protrude over the edge.
- The workpiece is immediately pressed to the selected area. Excess adhesive is wiped off.
- Each element is additionally fixed. To do this, use masking tape.
- Thus, following the described procedures, the entire perimeter of the opening is lined.
- The tape is removed after a day, making sure that all parts are securely glued.
After installing the corners with glue, you must additionally secure them with masking tape.
Installing plastic corners is a simple task. The main thing is to be careful and follow precise calculations when pruning.
How to make a miter box from wood at home
Making a miter box with your own hands is not particularly difficult. How to make a miter box with your own hands, see the video below.
How to make a box
First you need to select the material for making the box. Coniferous planks up to 2 cm thick are ideal for these purposes. Plywood should have a smooth surface and even corners. For greater productivity, it is recommended to make the box no more than 15 cm wide. The sides are fixed to the bottom using self-tapping screws. Edges are placed on the lower part.
Marking cutting locations
It is impossible to make a high-quality miter box with your own hands for the baseboard without clear slits. Accurate marking is required along lines parallel to each other, located at the same distance. The slits are made using a hacksaw and sandpaper.
Plastic corners for street decoration
Outdoor finishing of plastic windows includes installation of drainage and processing of installation gaps. The latter is done both to protect the foam and for aesthetic purposes. Processing gaps can be done in different ways:
- plastering,
- installation of plastic corners,
- installation of external plastic (sometimes metal made of polymer galvanization) slopes identical to the internal ones.
The most common of the listed methods is the second - finishing with plastic corners. Corners are not only cheaper than slopes, but also easier to install. These are the ones we will talk about here.
The plastic corner on the window is not only a decorative element that closes the gap between the quarter and the window, but also protects the foam in the mounting seam from sunlight and, to a lesser extent, from precipitation. To close the foam, it is enough to use simple corners with a 90° or 105° turn, 2 mm thick and a shelf width of up to 50 mm. If you need to close a quarter completely, more expensive hollow corners are suitable, in which the width of a large shelf can be from 75 to 120 mm . The thickness of such corners is 8 mm.
It is better corners with a 90° turn on the window so that only one shelf is visible. The second is adjacent to the surface of the window profile and goes into the gap between the quarter and the frame.
In this case, the corner is simply glued to the window with Cosmofen glue, when the frame is already fixed in the opening, but the installation gap has not yet been foamed. After foaming the window, the glued corner is additionally fixed with foam.
If, during installation, the seam is waterproofed using PSUL tape, then in order to be able to install the corner according to the indicated scheme, the PSUL must be glued not to the window frame, but to the quarter immediately before installing the window in the opening. After securing the frame and expanding the PSUL until it contacts the surface of the profile, you can begin installing the angle: one shelf is pushed into the gap between the frame and the tape. For reliability, it is advisable to additionally attach the corner to the profile at several points with Cosmofen glue. Just don’t need to apply it in advance so as not to smear it on the frame when installing the corner into the gap. It’s better to do this later, when the corner is already on the window, using the tip of a thin blade to carefully apply small drops of glue into the gap between the corner and the window profile and press for a few seconds.
A corner with a 105° turn, unlike the previous one, is placed on the window with both shelves facing outwards (see figure below). It is attached either with glue or with short 3.5x11mm self-tapping screws with a “Bedbug” drill bit. Why with a drill? The fact is that a self-tapping screw without a drill, when screwed into plastic, squeezes out chips that accumulate in the form of a tubercle between the corner and the profile, which is why the corner does not fit tightly to the frame in this place. Self-tapping screws with a drill-shaped tip do not have this drawback. Protruding screw heads can be painted over with white automotive corrector.
The only inconvenience when using such a corner can be caused by its visible second shelf, with which it is attached to the window: if the window frame extends deep beyond a quarter (half the width of the profile or more), this shelf may interfere with the installation of the mosquito net. But the undeniable advantage of the 105th corner is its large turn, thanks to which it lies exactly against the quarter.
An alternative option for simple and inexpensive outdoor finishing of a plastic window is the use of the Click System. developed (Novosibirsk). “Click System” is an outdoor window trim with locking corners, without self-tapping screws. This system combines the advantages of the two finishing options described above:
- after installing the corner, only one shelf remains visible from the outside;
- the corner fits tightly to the quarter, since its front shelf is located at the same angle to the window as the 105's.
The principle of the “Click System” can be easily understood from the following figure:
Essentially, only two components are used here: a clip and a corner.
There are three corner options: with a shelf length of 50 cm, 90 cm and 120 cm, for different widths of the outer slope.
Before installation, the clips are cut into 3-5 cm lengths (this is a PVC profile supplied in 2-meter lengths). Clips are available in two types:
- for Veka window systems,
- for window systems KBE, Rehau, Gealan and many others.
Plastic corners. Everything you need to know.
The frame is “clicked” with clips before installation in increments of 15-20 cm. The corner is inserted into the clips after installing the window. The result looks something like this:
Detailed installation instructions for the Click System can be downloaded from the website or here.
There are thin 2mm corners and large ones: 100x20x2mm (105°).
Sources:
https://stroychik.ru/vnutrennyaya-otdelka/plastikovye-ugolki https://krovli-zabori.ru/otkosy/plastikovyj-ugolok-dlya-otkosov-chem-krepit.html