Painting a bathtub detailed instructions
This article will discuss a procedure such as painting a bathtub with your own hands, various nuances associated with it, and brief instructions for painting.
A bathtub, like any other item, has its own service life, which eventually ends and requires updating or replacement.
Bath restoration
The essence of the problem
Worn enamel on an old bathtub looks quite unsightly; there are three ways out of this situation:
- Replacement instead of restoration of the bathtub;
- Installation of acrylic liner;
- Painting your bathtub yourself or with the help of specialists.
The first two methods are more suitable in the case of a complete bathroom renovation, since they require significant financial costs and involve a large amount of work performed.
And you can paint a bathtub with your own hands at minimal cost and in a fairly short period of time.
It is important to understand that self-applied enamel cannot be compared in quality and strength to enamel applied by the manufacturer. But this work costs much less, and the bathtub can be painted in almost any color
You also need to know what paint you can use to paint your bathtub. For this, two-component polyurethane enamels are usually used, to which a hardener is added according to the instructions included with the enamel. Before applying each layer, a new portion of enamel is prepared, since finished enamel cannot be stored.
Bathtub staining
After choosing the paint for the bathtub, they begin to prepare the base, that is, the bathtub itself. It is washed with a detergent for an enamel surface, and the old coating is cleaned off with an abrasive sponge.
If there are cracks and chips, they are puttied; it is advisable to use putty recommended by the enamel manufacturer.
Next, the bathtub for painting is degreased, after which all surfaces that are not allowed to come into contact with enamel are covered with masking tape. Film is laid on the floor. The enamel is applied in even layers using a brush, avoiding smudges.
The paint is usually applied in two layers. The last layer will take several days to dry, during which time you will not be able to use the bathroom. When performing work, you should use gloves and a respirator. Next, painting - do-it-yourself bathtub restoration will be discussed in more detail.
Instructions
Painted bath
To paint the bath you will need:
- Bath enamel;
- Hardener;
- Measuring glass;
- 100 g oxalic acid;
- 0.5 l of acetone;
- Two glass jars of 0.5 l each;
- The spatula is narrow;
- Brush;
- Sandpaper (waterproof);
- Rubber gloves.
Coloring
In the case of an old bathtub, painting includes the following steps:
- Preparing enamel for work. The jar with the lid removed is placed in hot water for 30 minutes, after which it is thoroughly mixed and allowed to cool;
- Using gloves, wash the bathroom, equipment and the bath itself as follows. Oxalic acid is poured onto the bottom of the bath and moistened with water, turning it into a paste, after which it is evenly distributed over the bottom of the bath;
- Using sandpaper soaked little by little in acid, treat the entire surface of the bathtub, removing uneven surfaces, rust and a layer of old paint;
- The acid is washed off with warm water and the bath is washed again using a cleaning agent. Next, fill the bathtub with hot water for 10 minutes, after which it and the area surrounding the bathtub are wiped dry with a clean rag;
- Apply acetone to a rag and degrease the surface of the bathtub;
- The first can is being prepared for painting. To do this, pour 200 ml of enamel into a measuring glass, pour it into a glass jar and add acetone (about 10 ml). Stir the mixture, then add the hardener (20 ml) and mix thoroughly for about 10 minutes;
- Using a brush, apply the first layer, starting from the side of the bathtub. First, several vertical stripes are applied to a small area, after which the enamel is distributed horizontally using rubbing movements. Paint the entire bath in this way;
Important: the enamel should be applied with even, thin movements, avoiding the formation of unpainted areas and smudges.
- After 15 minutes, apply a second layer of paint in the same way.
The bathtub can be used in a week, when the enamel has completely dried and set.
That's all I wanted to tell you about how to paint a bathtub. Before you start restoring your bathtub by painting, you should carefully consider whether this will be the optimal solution to the problem of a yellowed bathtub, or whether it would be better to replace it.
When choosing a color, you must select the paint correctly, and when using it, follow all the provisions of the manufacturer’s instructions and this manual.
Wall decoration
A solid color looks neat and advantageous. You can make your bathroom more interesting and give it an unusual look with additional decoration.
Coloring with stencils
Light patterns, ornaments, images of animals or objects can simply be applied with a stencil.
Blanks can be purchased ready-made, ordered, or made on your own.
For even application, the stencil is secured with tape to a dry wall.
Stripes on the walls
Horizontal stripes will visually expand the room, vertical stripes will save you with low ceilings.
Contrasting colors and similar shades look interesting.
To ensure that the lines are straight, markings are applied using a plumb line or a building level. Apply masking tape along the marked lines.
It is removed when the paint has set slightly, before it begins to dry, so as not to damage the integrity of the coating.
Applications using rollers
There are rollers with convex patterns.
First apply the base color, then dip the roller into the paint. It needs to be rolled out well before application.
It is important to ensure that the drawings do not overlap each other, otherwise the wall will look sloppy.
What paint to paint a bathtub at home
Every year the coating of a cast iron bathtub deteriorates.
It loses its shine and attractiveness. The surface itself in some places becomes covered with rust and becomes rough. Washing in such a cast-iron bathtub does not bring any pleasure, and microcracks become clogged with dirt, from which you can get some kind of disease. Replacing a bathtub is quite expensive, so most owners decide to restore it instead of replacing it. Nowadays, home conditions make it possible to paint the bathtub. A lot of different companies and individual entrepreneurs are engaged in this type of work. They restore baths right in your home, and always with high quality.
To paint a bathtub yourself at home, you need to study the technology of this matter and do everything in strict sequence.
To paint, you must have special paint for cast iron bathtubs and a hardener. You can only paint a cast iron structure with it. Paint dilution must be carried out exactly according to the attached instructions.
Best answers
Irima:
buy a bath liner. or install a new one, minus all costs from the rent.
Evgenia Voldkova:
The main thing is that the hostess is pretty and doesn’t mind showering with the swami, but lying with her is not the main thing! ;-))
Bolshevik cats:
Well, degrease and paint with alkyd enamel.
Sergey Vasiliev:
We painted the shower tray with white enamel 3 times, several years passed, nothing happened, not even yellowed from the water...
647 acc:
It’s not worth the candle, don’t even think about it, especially in a rented apartment!! ! We hired bathtub enamel painters, the paint literally peeled off within a week, we called them to redo it, and history repeated itself. So we bought a new bathtub...
ENLIGHTENED:
To prevent the enamel from peeling off, you must first clean it well (sand the bathtub), then apply a layer of primer, sand it again and then apply the enamel. Moreover, you also need to know which enamel to cover. In short, hemorrhoids, but if you do everything correctly, the coverage will last for a long time
How to paint a battery with your own hands
If the manufacturer's instructions do not indicate the possibility of applying the composition to old paint, then radiators require pre-washing, cleaning of the old paint layer, then priming and painting in 2 layers.
Work is carried out wearing protective glasses
, respirator and gloves.
Attention! A set of protective clothing is the best protection against harmful dust and chemicals. To protect the space around the radiator from accidental splashes, protect the surfaces with plastic film, cardboard or paper.
Protection against direct water ingress
For maximum safety of the walls in the bathroom, they can be additionally protected from splashing water. A good option would be to combine tiles and painting in finishing. Places with high levels of moisture penetration - areas above the bathtub, near the shower stall and washbasin - are often protected with tiles. This method is practical, because the tiles are more durable and better withstand the effects of hot water. And combination with painted walls will create an unusual design.
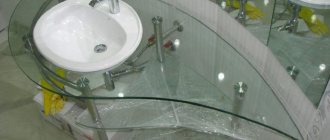
If tile is not an option for you, you can protect your tinted panels in another way. Installing shockproof glass on the walls will protect them well from water and will be almost invisible. An alternative to glass will be transparent polycarbonate panels.
What color should I paint the battery?
White radiator
- classic. In our country, batteries are usually placed under the windows, and they are almost always white. A radiator in the color of the window sill and frames is the most common and absolutely organic solution. However, it is far from the only one.
Black batteries are very popular today
. There is an opinion that a radiator painted black heats a little better than a white one. However, experts say that the difference, if any, does not exceed 1-2%. The black color of the battery is more of a design tribute than a concern for heat. Such radiators can often be found in modern interiors, especially those decorated.
Battery to match the wall color
- a less common solution, but certainly successful. Of course, this does not disguise the battery or make it invisible. However, thanks to this technique, the radiator does not stand out from the general space and does not look like something alien.
Photo from the project of designer Galina Yurieva
Not many people would dare to paint the radiator in a bright color that contrasts with the walls. Making the battery a focal point is a bold move. And very effective. This design option is suitable for a modern minimalist interior.
An interesting idea is to paint the battery using the ombre (or gradient) technique. The outer section is painted, for example, white. The second has a subtle color, and each subsequent section becomes more saturated.
Photo source: the-village.ru
Colored batteries are especially appropriate in children's rooms. Here you can safely get creative. For example, decorate the radiator with patterns, drawings, and thematic painting. Or paint the battery in the form of colored pencils, rainbows, etc.
Sky-high prices for good quality cast iron bathtubs force us to look for a real alternative to purchasing new items made of cast iron. The easiest way to solve the problem is to restore the enamel coating, for example, paint the bathtub. The method for solving the problem is not particularly difficult. All that remains is to choose what to paint the inside of the cast iron bathtub with. To be honest, the range of materials is extremely limited; any polymer coating is inferior in its characteristics to the mineral enamels used to cover the bathtub. But it’s still worth trying to repair a cast-iron bathtub with paint, since if you’re lucky, you can solve a serious problem at minimal cost.
Proven restoration products, bathtub like new
Today, there are only four types of paint that can be used to paint a cast-iron bathtub in your home:
- Epoxy two-component enamel or glue;
- Acrylic two-component materials;
- Powder paints;
- Specialized paints and varnishes for restoring the enamel coating of bathtubs from leading manufacturers.
In addition to the above, there is a huge number of paint and varnish coatings that, in theory, can be used to repair cast iron bathtubs. These are hot-dry automotive paints. They provide a uniquely smooth coating and withstand soap and shampoo very well, but the process of applying to the bathtub will require quite complex equipment. The shine and gloss on cast iron walls is determined by the amount of glypthal varnish added to the paint.
Advice! When looking for how to repair enamel scratches on a cast iron bathtub, it is best to choose white oven-dried automotive enamel.
You just need to prepare the bath, dry and degrease the damaged area, apply a thin layer of paint with a pneumatic sprayer and dry the patch with a hot hairdryer. To be sure, you can lay 3-4 layers on the cast iron wall.
The advantage of car paint is that the enamel can be applied in a small spot in the bath, and the coating will not peel off during use. All other paint options - epoxy, acrylic and even the vaunted Tikkuril enamels require complete painting of the cast iron bowl.
If the house has powerful 1000 W halogen spotlights, then you can try to completely repair the bathtub with car paint. But before painting a cast-iron bathtub, it is necessary to provide high-quality exhaust ventilation and tightly seal the doors to the room during drying. Car paints have a very unpleasant, irritating odor.
A natural stone
The use of natural marble, onyx, and granite in the bathroom interior allows you to achieve a special atmosphere of luxury and turns an ordinary utility room into a real spa. The pattern and color palette of natural stone is never repeated, so you can be sure of the uniqueness and exclusivity of the interior. In wet rooms, you can use any type of marble, onyx, travertine, as well as granite and quartzite.
The surfaces are decorated with amazonite (walls and part of the floor), marble (leaves on the floor) and mirrors. Project authors: Pavel Mironov, Anna Kulikova
The surfaces are decorated with amazonite (walls and part of the floor), marble (leaves on the floor) and mirrors. Project authors: Pavel Mironov, Anna Kulikova
- Marble has a noble appearance, high strength and durability. The material is quite resistant to temperature changes and temperature surges. But at the same time, it does not withstand contact with aggressive detergents. Also, sometimes the structure of the stone contains iron components, which during use can give a rusty tint. The cost of marble slabs is also steep. The price of natural materials is influenced by many factors: including processing, cutting, and the cost of delivering raw materials to production.
The floor and walls of the bathroom in the master bedroom are decorated with natural marble with an active large pattern. Project author: Tatyana Boronina
The floor and walls of the bathroom in the master bedroom are decorated with natural marble with an active large pattern. Project author: Tatyana Boronina
- Onyx is a semi-precious stone that looks especially impressive when used in interiors as accents. It is valued for its intricate patterns and interesting color transitions on the slab. This is a durable material that is resistant to temperature changes. But like other natural stones, onyx walls are not recommended to be washed with alkaline products or containing abrasive particles.
The walls are lined with onyx with white veins. Project author: Yuri Zimenko
The walls are lined with onyx with white veins. Project author: Yuri Zimenko
- Today travertine is mined in Germany, Italy and Turkey. This stone has a pleasant beige creamy tint and, after polishing, acquires a silky, pleasant-to-touch surface - finishing with travertine gives the room a special coziness and intimate atmosphere. Unlike other types of stones, travertine conducts heat, which means it is not cold to the touch. The porous surface ensures no slipping.
- Granite is actively used in the decoration of bathrooms, thanks to its rich color palette - from light to dark shades and inclusions. Granite slabs are easy to install, which is also a plus.
- Quartzite is a stronger and more durable material than granite. It is difficult to scratch, so walls decorated with this stone can be easily washed even with a brush. The only drawback is the small selection of quartzite types on the Russian market and the high cost in connection with this.
Briefly about enamels
Kinds
Acrylic (latex) paint – the main component is acrylic. Also applies to two-component coatings.
In most cases, to restore the acrylic coating of a bathtub, the pouring method is used.
Alkyd enamel - contains components such as alkyd resin, organic solvent, vegetable oils and auxiliary ingredients.
Advantages and disadvantages of enamel coatings
| Dye | Epoxy | Acrylic | Alkyd |
| Advantages | Uniform coverage. High resistance to aggressive chemicals. Doesn't thin out. Suitable for metal and cast iron | Holds color for a long time. Resistant to various types of damage (impacts, chips). Low level of thermal conductivity. Suitable for steel, cast iron, acrylic | Non-toxic. Retains color for a long time. Suitable for all types of coatings and ceramics. |
| Flaws | Toxic. The finished solution hardens quickly. Drips may occur during application. It quickly loses its whiteness. | Toxic. Big expense. The use of cleaning products containing acids and alkalis is prohibited. Incorrect application can lead to damage to the integrity of the coating. | Ideal surface preparation is required. Big expense. Application is difficult. |
All types of paints are available in aerosols. Their main advantage is easy, quick, uniform application that does not require special skills. Loyal price.
Minuses
The main disadvantage of aerosol enamel is its thin layer and limited color range.
You should approach the choice of enamel in bathroom spray cans carefully.
Features of tiles as a material
Renovating a bathroom is not an easy task and requires special attention even at the design stage. It is necessary not only to carry out all the work efficiently, but also to choose those materials that will fully satisfy all your requirements regarding durability, practicality and beauty.
So, in the bathroom, the finish should be resistant to mold, not afraid of moisture, not fade over time, not be very slippery... In a word, ceramics or ceramic tiles immediately come to mind, a traditional material that is most often used when finishing surfaces in damp rooms . Perhaps, this particular material almost fully satisfies all the requirements regarding hygiene, durability, moisture resistance, etc. And, of course, it looks decent. The advantages of tiles are obvious.
The tiles in the bathroom look very nice
- High moisture resistance. Tiles are rightfully considered one of the most water-resistant materials in construction and renovation. It certainly does not threaten to crumble and deteriorate from liquid that gets on it or from dampness.
- Durability subject to correct and high-quality installation. Yes, as long as the tile is not fixed to the surface, it is easy to damage. But glued ceramics are resistant to many influences (except the most severe) and will easily last for decades without damage.
- The wear resistance of the tiles is truly colossal. It will retain its bright color and beauty, its original appearance, for decades. And it may well be used even by your descendants, unless, of course, they make repairs.
- Easy to care for. Taking care of tiles is as easy as shelling pears. It can be washed with any means, and dirt can be removed from it without the slightest difficulty.
- A large selection of colors and textures will allow you to choose the tiles that perfectly suit your interior. You can easily bring to life even the most unusual design project.
And yes, tiles can be used in a variety of styles. It is easily suitable for both high-tech and country music. The main thing is to choose the right pattern.
Different colors of tiles in the bathroom
Tiles have some disadvantages. But the most significant is the complexity of installation. In order for the material to fully justify all the costs, you will have to call an experienced tiler and pay him also, and not just for the coating. Otherwise, there is a high risk that the tiles will not last as long as they could.
What color to paint a cast iron radiator
White.
Classics of the genre. A classic color that will fit into absolutely any interior, especially if the batteries are traditionally located under white metal-plastic windows and window sills.
Black.
A color that is suitable for interiors decorated in dark colors. Batteries painted black will not stand out as brightly against dark walls as white ones. There is an opinion that black batteries heat better. But experts say there is virtually no difference. Therefore, black color is more about design than about increasing heat transfer.
The color of the wall.
An excellent solution for disguising the battery against the background of bright walls. You can choose a paint shade to match the wall or choose a couple of tones lighter or darker.
Contrasting color.
A bold solution that is suitable for modern interiors decorated in minimalist, modern, eclectic and related styles
Such a battery will undoubtedly attract attention, so it is important to correctly place bright accents in the room. Otherwise, it may turn out that radiators will become the center of the visual composition
Ombre.
A very interesting and fashionable coloring technique. It consists of a soft and gradual transition from a lighter shade to a darker one. A cast iron battery is ideal for these purposes. The outer section is painted white, for example. Each subsequent section has more and more saturated color.
You now know how to paint cast iron batteries
If you need to buy new ones, we recommend that you pay attention to. Cast iron bathroom paint is intended for restoration of old products
It saves it from disposal, because the bathroom is a necessary room in a house or apartment. Many residents of apartment buildings have cast iron products, as they are convenient and practical to use. Cast iron bathtubs are a design in which you can bathe and wash clothes. They have a long service life
Cast iron bathroom paint is intended for restoration of old products. It saves it from disposal, because the bathroom is a necessary room in a house or apartment. Many residents of apartment buildings have cast iron products, as they are convenient and practical to use. Cast iron bathtubs are a design in which you can bathe and wash clothes. They have a long service life.
But after mechanical and chemical influences (chips, scratches, detergents), the coating inside becomes unusable over time. It acquires a gray tint, cracks, and yellowness. You can correct defects without calling a specialist by painting the product yourself. Painting a cast iron bathtub at home with your own hands is the ideal solution.
For painting, you need to choose only a dye for metal structures.
This method has a number of advantages:
- Large selection of paint and varnish tones;
- The price of the dye saves a lot of money;
- Possibility to paint a cast iron bathtub without calling specialists;
- Saving time and effort, fast execution;
- No unpleasant odor after the dye dries;
- Beautiful glossy finish.
However, this method of surface renewal has disadvantages:
- Before applying the composition, the outer coating must be treated with a grinding machine, and then with a primer mixture;
- It is necessary to apply dye to an old cast iron product only after treating the coating with an antifungal compound;
- There are acrylic solutions that take a long time to dry - three days.
How can you paint a cast iron bathtub? First you need to find the appropriate paint, only then begin work on treating the surface of the cast iron.
Why paint tiles in the bathroom
Traditionally, tiles are considered the best wall and floor coverings for rooms with high humidity. The average lifespan of finishing material is 25 years or more. Naturally, during this time the bathroom interior becomes outdated/boring many times over. The main tasks that painting tiles in a bathroom solve are:
- replacement of existing interior design;
Wall painting to increase the decorative value of the interior. - reducing the budget and labor intensity of repairs;
Removing tiles is considered the most dusty operation of a bathroom overhaul. - cosmetics instead of major repairs in a short time;
- absence of “wet” technologies and work;
- masking tile defects (chips, cracks);
- reduction of finishing time.
Painting work is carried out much faster than laying tiles.
Over time, interiors become boring, and tiles are too expensive to buy collections of them every 5 years to implement fresh design solutions. Therefore, it is easier to apply paints and varnishes to individual areas in fragments or to paint the entire surface in a color of interest to the user.
Floor and wall coverings - mosaics, tiles, porcelain tiles - are subject to restoration.
How to paint types of enamels for cast iron radiators
Heat-resistant enamels for cast iron batteries are produced on the basis of resins
(alkyd, acrylic, silicone),
water dispersions
(acrylic and silicone), there are also powder paints, but their use requires special equipment; painting is done in a factory.
For painting at home with your own hands, acrylic compositions (water-soluble or organic solvent-based) and alkyd are popular.
Alkyd
Photo 1. Alkyd enamel for cast iron heating radiators with a plastic effect from.
The disadvantage of enamels is the drying time and unpleasant odor
, which persists indoors for several days, can appear at high coolant temperatures; enamel cannot be called harmless.
Reference!
Alkyd enamel
is applied in 2 layers
to a pre-primed surface with a brush or using a spray gun.
Water-dispersible acrylic
Water-based acrylic enamel dries quickly, the paint layer is smooth and even, like plastic. It is odorless, non-flammable, safe and environmentally friendly
, has high adhesion to metal.
The disadvantage of acrylic water-dispersed enamels is instability to abrasives
(the surface cannot be cleaned with powders).
Photo 2. Acrylic glossy enamel for cast iron batteries PROFI VD-AK-1179 dries quickly and leaves no odor.
Acrylic with solvent
In addition to acrylic resin, the composition includes pigments, additives and a solvent - white spirit.
The enamel forms a durable and stable coating; the paint can be applied to surfaces previously treated with acrylic or alkyd.
The layer is durable and does not turn yellow
over time.
The disadvantage is the unpleasant odor and the drying time - the painted surface takes about 8 hours to dry
, the second layer is applied
a day later.
Bowl resurfacing methods
The following update methods are considered the most popular:
1.painting with enamel.
2.applying liquid acrylic.
3.liner insert, made of acrylic material.
All types of coating have positive and negative properties. Painting using enamel or acrylic is considered a non-labor-intensive job and can be done with your own hands. The most important thing is to determine the correct composition and follow the instructions strictly.
Installing the liner requires skill, which is why it is worth inviting specialists.
Bath liner
How can you paint a bathtub? This question need not be asked, because this restoration method is called “bath in bath.” In an old cast-iron bathtub, a liner is placed on glue, which completely follows the shape of the bathtub.
This method has advantages:
- The new coating consists of acrylic, which is able to withstand impacts and is resistant to chemical influences from detergents;
- The surface does not change color over time;
- The bathtub is like new – smooth and shiny.
However, there are a couple of nuances when installing the liner in the bathroom. If the bathtub is made of thin cast iron, then in the future it is impossible to avoid deflection of the structure, as a result of which the liner is deformed. Also, before laying the acrylic surface, the siphon is dismantled. From the above, we can conclude what and how to properly paint a cast-iron bathtub inside and out.
Why is it profitable to restore a product?
The bathtub coating gradually becomes thin; rust and limescale deposits give the product an unaesthetic appearance. It is important to carry out restoration work in time, while the plumbing can be saved without replacing it.
If your plans do not include renovating the entire room, replacing tiles and floors, then it is more profitable to update only the bathtub.
Buying a cast iron bathtub is expensive; its transportation, delivery and installation will require additional costs, because it is impossible to do it alone due to its weight.
At the same time, replacing it will ruin the appearance of the finish; you will have to change the entire tile.
If the bathtub bowl does not have large cracks with chips, then you can carry out the restoration with your own hands easily and quickly.
Attention! Restoration work on old plumbing does not require large expenses; even a beginner can easily handle the job.
Old-style bathtubs made of cast iron are much higher quality than their modern counterparts, so it is better to restore the product than to install a new one. Modern plumbing has a service life of only fifteen years.
Coating requirements for cast iron surfaces
The industry produces a huge number of paints and varnishes of various compositions. About half of them end up on the market, widely available to the average buyer, and several brands of paints and varnishes can be used as paint for a cast-iron bathtub. There are certain restrictions on the use of bathroom paint with a cast iron base:
- The layer of paint coating applied to the bathtub should be as dense, hard and glossy as possible; the smoother the coating is, the longer the new enamel will last;
- The paint must not contain toxic or irritating components or solvents. All residues must not pass into water, evaporate into the air, be wiped off during mechanical cleaning, or dissolve under the influence of detergents.
Advice! Before painting your cast iron bathtub at home, apply a few stripes of purchased enamel to a small sheet of glass.
Firstly, it will help you evaluate the actual color, how the bathtub will look after the paint layer has dried. To do this, you just need to look at the paint from the back, that is, through the glass. Secondly, you can evaluate how much the bathtub “fades” after the first two washes using a liquid product. You can forget about powders, even washing powders, soda or dish detergent after painting a cast iron bathtub. Due to excessive care for sterility, a cast iron bathtub will lose its paint layer in a few months.
How to choose and use bath enamel
Main selection criteria
Pay attention to the composition. Avoid paints that contain impurities that may affect your health. Thermal conductivity is also an important indicator
The lower the level, the longer the water temperature remains. Life time. Degree of damage to the coating. Bathroom material.
Market leading spray paints
CHAMPION COLOR – epoxy enamel
Manufacturer Poland. Super glossy finish. Long service life.
Attention!
- You can prepare your own spray paint.
- You will need a spray gun, preferably an electric spray gun. Paint in a can. And a solvent (the type of solvent is indicated on the package).
- Alkyd paints are diluted with white alcohol.
How to paint a bathtub with spray enamel
- Before starting work, cover the plumbing fixtures and walls with film. Otherwise, after finishing the work, you will have to clean off the paint splashes. The process is long and labor-intensive.
- Clean the bathtub from dirt. Remains of rust are unacceptable. Otherwise, it will show through and a stain will form.
- Then, using medium sandpaper or a sanding machine, the gloss is removed. The machine will significantly reduce the work time, but will greatly increase the pollution of the room.
- After sanding is completed, the coating is thoroughly washed with water. All remaining dust is removed.
- The bath is dried and treated with a solvent.
- Everything is ready for painting. Before applying the enamel, the can must be shaken well for 2-3 minutes.
- Always keep the can in an upright position.
- Spray at a distance of 30 cm from the product. Try to cover evenly, in a thin layer.
- Subsequent layers are applied at intervals of 5-10 minutes.
- If sagging has formed, remove it with a rubber spatula.
- Complete drying of the paint will take from 2 to 5 days. Depends on the type of paint and layer thickness.
Safety precautions
- Carry out work wearing a respirator and gloves
- The paint is flammable. Avoid spraying near fire.
- Enamel storage temperature is no more than 24 degrees.
- The room should be well ventilated.
Otherwise, the restoration instructions are identical.
Making your own paint for spraying, unlike aerosols, allows you to choose any color. It is enough to choose the desired color or several. It all depends on imagination and desire.
Follow the rules, and the bath will return its former freshness and beauty.
Acrylic painting
Using acrylic, you can create a smooth enamel coating up to 4 mm thick on the walls and 6 mm on the bottom. It will be especially smooth and absolutely glossy when applying paint to the surface using the pouring method. This coating will not be slippery. In addition, it will receive protection from mechanical and chemical influences.
Among the construction advantages of acrylic are:
- the strength of the hardened coating;
- long service life of the material;
- easy care - acrylic can be washed using detergents, they should not damage the surface;
- the possibility of polishing, which may become relevant over time when small scratches appear on the surface of the bathtub.
Liquid acrylic has gained popularity among craftsmen relatively recently; it has been actively used for the restoration of bathtubs over the past ten years.
At the same time, the most difficult thing in the work, according to the masters, is preparing the paint. It is important to strictly observe the ratio of the acrylic base to the other component - the liquid hardener. Their consistency differs greatly, so mixing the two parts can be quite labor-intensive.
To obtain the desired shade, a tinting paste is added to the polymer; only compositions that are compatible with each other are used.
Meanwhile, you need to mix thoroughly and very efficiently. So that hardened areas do not appear on the painted surface later. By the way, using a mixer when stirring the composition is not suitable. After all, it will not allow the part of the composition that is on the walls of the paint container to be mixed.
You can work with either a brush or a roller. It is best to give them a spiral direction - from the edges of the bath to its drain. Movements should be light, without pressure. The main thing is to prevent bubbles from appearing. They need to be noticed in time and removed immediately with a clean brush.
In addition, when painting, the appearance of drips and sagging is inevitable. Their formation should be monitored 3–5 minutes after a specific area of the bathtub has been painted.
Another option for painting with acrylic is this: the paint is applied to the surface of the bathtub using a special plastic cup and an ordinary spatula. From a glass, the paint is evenly poured onto the walls of the bathtub, and the process is only slightly adjusted with a spatula, which is also useful for treating hard-to-reach areas, for example, the corners of the bathtub.
You can remove drips and sagging using a smearing brush stroke upwards
Painting with acrylic will take on average about 3 hours. You can start using the bathroom carefully within a day, provided that it has dried when the thermometers in the apartment showed no lower than +25°C. If the house is a little cooler, the first use will have to be postponed for another day.
It is important to remember that it is better not to use a washbasin located next to a painted bathtub for some time. After all, just a couple of accidentally arriving drops will immediately destroy all the work.
How to paint a bathtub. What paint and what to paint the bathtub with
How to paint a bathtub yourself
Sometimes, in order to update your bathtub, it is not necessary to replace it with a new product. You can safely paint an old cast-iron bathtub and give it a “second life.” How to paint a bathtub with your own hands, how to paint a bathtub and the choice of paint for this will be discussed in the article.
Painting a bathtub at home is a simple procedure. Nevertheless, a good result can only be obtained with certain knowledge of how to paint a bathtub correctly, as well as what paint and tool are best used for this.
What paint should I paint the bathtub with?
It all starts, of course, with the choice of paint. First of all, it must be moisture resistant, and secondly, it must adhere perfectly to any surface, otherwise it will begin to peel off over time. Professionals recommend compositions consisting of three components, which are mixed immediately before painting.
Before starting work, the container must be prepared. To do this, it needs to be cleaned and degreased. It is not recommended to use products containing chlorine. A well-cleaned and degreased bathtub is completely free of drops and streams of water when wetting the surface, and the glossy layer of enamel is also removed.
Next, the bath dries well. For this you can use, for example, a hair dryer. And then pour hot water into the container, which must be drained after about 15 minutes, then wipe the reservoir dry and apply a primer.
How to paint a bathtub with your own hands?
Then the process of painting the bathtub at home begins. In order to protect the bathtub from dust, it is necessary to tightly close all windows and doors and not open them for some time after the bathtub has been painted. It depends on how long the paint takes to dry.
For painting itself, it is advisable to use a flat-shaped brush with natural bristles. It is better to dilute the paint in such a way that approximately half of the prepared volume of dye is used for the first layer.
You need to start painting the bathtub from the edges, gradually descending to its bottom. After the first layer has dried, you need to apply the second. During painting, bath paint must be diluted in several parts, and not all at once, otherwise it may dry out before it is used.
You can use the bathroom no earlier than a week or a week and a half after painting it.
Which is better, acrylic or enamel
Acrylic and enamel are the main compositions for bathtub restoration. Therefore, many are lost and do not know what is best to choose. It is difficult to clearly understand which composition is preferable. You need to rely on your own painting skills, the condition of the product, etc. The advantages and disadvantages of each type of paint should be noted to make it clearer when and what is best to use.
The cost of liquid epoxy enamels, compared to the same acrylic paints, is low.
Pros of enamel:
- Reliability;
- Long service life;
- Economical consumption of funds;
- Fast application method;
- Resistant to chemical detergents.
Cons of enamel:
- Acrid odor;
- Long drying process. Takes on average a week;
- Poor thermal conductivity. The collected water will cool quickly.
Enamels for household use are thicker and are applied in two layers; they are suitable for self-application at home.
The advantages of acrylic include:
- Easy to apply. No roller required;
- Retains heat well. Therefore, the water remains hot for a long time;
- Long service life;
- a perfectly smooth surface is created;
- Wide selection of shades;
- Less subject to delamination.
Among the disadvantages of the composition:
- High cost of the product;
- The surface absorbs hair dye;
- Over time, the color may fade.
You can update your bathtub yourself with a relatively small financial investment.
It’s worth choosing one of the compositions based on personal preferences and the characteristics of the bath, as well as the effect you want to get. There are options that dry quickly, and there are products that create a unique bathtub design.
It is recommended that beginners who decide to paint a bathtub for the first time choose acrylic. Painting with enamel will require experience.
Preparing the bathtub for painting
After the question of what paint to paint the bathtub has been sorted out and the final conclusion has been made, it is necessary to begin work on preparing the surface of the cast iron for applying the painting composition:
- First of all, the drain and pipes are removed from the cast iron bathtub;
- All grease and limescale deposits are removed from the inner surface using special detergents that contain alkali (oxalic acid or baking soda). The cast iron bathtub is polished from the outside;
- Peeling paint and enamel are removed with a grinding wheel or electric drill with abrasive attachments to smooth the surface;
- Cracks and log frames are sanded separately with sandpaper;
- The primer is distributed throughout the bathtub, a thick layer is applied to chips and to the edges of the sides of the bathtub;
- We prepare the mixture and dilute it. You need to know that the diluted composition should not sit for more than half an hour - this is the time to paint the bathtub, as it begins to harden.
- Next, a coloring composition is applied to the dried surface and evenly distributed over the surface of the cast-iron bath by hand;
- The second layer of paint for a cast iron or metal bathroom (quick-drying option) is applied only after the first layer has dried;
- After application, allow to dry for at least a day with doors and windows closed.
The grinding attachment is selected in accordance with the material being processed - metal; you can also use sandpaper or a steel brush.
In our climate, heating is required 6-7 months a year
, therefore radiators are an integral part of the interior.
Cast iron batteries do not look the best; it is not always possible to cover them with grilles.
To prevent the battery from spoiling the appearance of the room, you can use paint to make it attractive.
Nuances of restoring old baths
Old bathtubs are more difficult to restore due to damage that is difficult to repair and dirt that has become too ingrained. Therefore, coloring can be a salvation for some time. But it will no longer be possible to obtain a durable and high-quality product. Or you will have to regularly paint the surface. Old bathtubs require a longer and more thorough surface preparation process, and it is better to use high-strength, durable compounds for them.
After painting, the bathroom must be locked indoors for at least 3 days.
Types of paints
The dye is divided into four types:
- Epoxy resin (two-component);
- Acrylic (liquid base);
- Epoxy;
- Aerosol – good for long products.
Resin
For painting cast iron bathtubs with severe surface corrosion (chips, deep cracks). Epoxy enamel is applied in a thick layer, even without preliminary primer treatment of the surface.
The resin is diluted with solvents to a thick consistency, applied to chips, and then to the entire surface.
Acrylic dye (enamel)
How to paint or treat the inside of a cast iron bathtub at home? Acrylic. Resurfacing cast iron yourself is a simple, easy method of resurfacing.
Acrylic has a liquid consistency, which simplifies the work with its distribution over the coating. After drying, the acrylic composition becomes glossy, which is why this paint coating is popular today. The service life of acrylic film is from 7 to 20 years with proper care, so painting the product with this composition will be beneficial.
Epoxy dye
Epoxy paint is resistant to mechanical influences. It is a synthetic oligomer produced from a resin. Long-lasting, durable coating for metal and industrial equipment. Paint with a glossy effect, hydrophobic in property. You can paint with any convenient tool: roller, brush, spray gun.
Spray
Cast iron bath paint is an aerosol, namely a dye for cast iron products.
It is applied after treating the surface with grinding equipment and a primer. This is a finishing coating with a large assortment - from a bright, varied palette to the manufacturer. The paint dries quickly and can be used in hard-to-reach areas.
Work order
Preparing bathroom walls for painting depends on their initial condition and includes several stages.
Cleansing
- Sometimes it is enough to thoroughly rinse and dry the surface. This option is possible if the walls were recently painted, and the coating is perfect, but you just want to refresh it or change the shade.
- When the paint has come off a little in some places, but overall it holds and looks good, you can clean the problem areas with a spatula, wash the wall and dry it.
- If the bathroom wall covering is in poor condition, you will have to get rid of it completely. The most difficult thing to deal with is old oil paint. To do this, you can choose from simple tools (an axe, spatula, chisel, scraper), electrical appliances (drill, hammer drill) with special attachments, a hair dryer, or chemical compounds (washes). You can read more about how to remove oil paint from a wall in a special article.
Alignment
Before covering the bathroom walls with a paint composition, they often have to be leveled. This need arises if the surface has been actively cleaned or simply has large and small flaws. How to do it:
- A special primer is applied to the cleaned surface to ensure good adhesion of the material to the wall.
- After the solution has dried, all deep cracks, potholes (if any) and irregularities are filled with putty, leveling the surface as much as possible. Wait for it to dry completely again.
- Rub the putty areas with sandpaper and wipe off dust.
- Minor defects are corrected with a soft and flexible finishing putty; After drying, sand with fine-grain sandpaper.
When the process is completed, the entire room needs to be vacuumed and wet cleaned so that there is no construction dust left on the walls.
Primer
When purchasing bathroom paint, it is advisable to immediately stock up on primer. Treating walls with this solution reduces the consumption of base material, protects the coating from stains, improves the adhesive properties of the surface and prevents the growth of fungal bacteria.
For the primer you will need a tray, a paint roller and a brush for working in corners and hard-to-reach places. The technology is simple: you need to completely cover the surface intended for further painting with the composition, and then let it dry.
Tools
To prevent painting the walls in the bathroom from becoming a challenge, it is important to provide yourself with good tools. To carry out the work you will need a standard set of painting tools:
- a paint tray (cuvette) with a special ribbed platform, where it is convenient to remove excess paint from the roller;
- paint roller of appropriate size;
- wide brush for painting corners;
- a narrow brush that can easily get around sockets and switches;
- telescopic handle for a roller, stepladder or stool;
- masking tape to protect surfaces that cannot be painted, such as joints with the ceiling.
When coming into contact with oil paint, it is necessary to protect the respiratory system from toxic fumes, and also stock up on rags and solvent in order to immediately remove accidental contamination, which is rarely possible to do without. Hair can be hidden under a paper cap or scarf, hands covered with gloves, and work clothes should be comfortable.