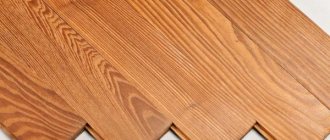
Not all parquet can be processed with all of the above machines. If the parquet is in poor condition (there are uneven surfaces, the parquet is wobbly), then such parquet cannot be sanded with a three-disc surface grinder. More careful work is underway with a domestic drum machine, starting from large abrasive material and ending with the smallest. If your parquet is far from being in perfect condition, then you can do without “fine” sanding with a three-disc surface grinder from an imported machine.
Q. Hello! I don't know who to contact with my problem. The laminate flooring was scratched (severely) by a pull-out sofa. Now in the middle of the room there is a “canyon” in the floor. Please advise what to do? Better. help with repairs! Olga.
A. Dear Olga, unfortunately, laminate cannot be restored like parquet by sanding it again and varnishing it. If the laminate is damaged, only dismantle it and lay a new one. As practice shows, it is impossible even to replace the laminate locally (disassemble it from the nearest wall to the damaged area, replace it with a new one and reassemble the old laminate), because When dismantling the laminate, the locking connection deteriorates and during further installation of this laminate, a tight fit of the lock is not achieved, which leads to loosening of the laminate (the laminate will “bounce”), and in some cases it is generally impossible for the previously disassembled laminate to be connected to each other due to the breakage of the locking joint. To more accurately determine and assess the condition of your floor covering, you need to call a technologist to the site. An on-site specialist assesses the object (floor condition), takes the necessary measurements (temperature, relative humidity, area of the object), recommends equipment and materials.
Q. Hello. They laid laminate flooring in my 3 bedroom apartment, laminate flooring everywhere except the kitchen (S=96 sq.m.). After half a year, the laminate began to rise almost throughout the entire apartment. In response to my complaints against the organization that installed the laminate. I was told that it is necessary to install interior thresholds, otherwise it will not be possible to correct the swelling, because... The apartment area is large and the laminate needs to be divided. I believe that it is necessary to begin with: remove the baseboards and make sure that there are gaps between the wall and the laminate . I would like to know your opinion on this issue. Is it really with laminate without dividing it between rooms? Thank you in advance, best regards Stanislav.
A. Dear Stanislav. There can be several reasons for laminate flooring to swell/lift.
Of course, Stanislav, first you need to dismantle the plinth and make sure that there is a compensation gap between the wall and the laminate of at least 10 mm. In this case, special attention should be paid to the presence of the necessary gap between the laminate and the door frame (unless, of course, the door frame is already on a previously laid laminate). From practice we can say that this is the most likely reason for the laminate to rise. As for laying laminate flooring without dividing it between rooms, it is unlikely that this will cause the laminate to rise. Our company several times, at the client’s request, laid laminate flooring without dividing between rooms. There were no complaints. The main thing, I repeat, is to leave an expansion gap around the entire perimeter of the room! We recommend dividing the laminate between rooms only so that in case of mechanical damage to the laminate in one of the rooms, repair the laminate (dismantle and lay a new laminate) only in this area, and not throughout the apartment.
© "Parquet. Home" 2005 – 2010. All rights reserved. Use of site materials is with the permission of the company.
Floor design from materials of different structures
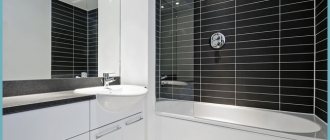
At first glance, it seems that ceramic tiles and laminate are incompatible coatings. But with the right selection and combination of these materials in one plane, they look very harmonious.
The joint between tiles and laminate is used:
- For zoning the kitchen area. We lay the floor of the working area with tiles, and highlight the dining table area with laminate . The tiles are moisture-resistant and easy to clean, which is important in the area of the stove and sink. Laminate is warm and pleasant to the touch, but is afraid of constant exposure to moisture.
- When combining a kitchen and a loggia, we allocate the area with floor coverings of various structures. We use tiles only in places of high humidity. Laminate, thanks to its structure, is practically indistinguishable from wood and creates a comfortable atmosphere in the room.
- In rooms with a fireplace near the high temperature zone, we lay out the floor with ceramic tiles; in the rest of the space we use a warmer covering.
We lay tiles in the hallway and corridor, in the remaining rooms we use laminate.
The floors in the kitchen and rooms are rarely laid out completely with tiles, since the tiles are cold in structure and unpleasant to walk on barefoot.
The combination of laminate and tiles allows you to create an impressive combination in different areas of your home.
Modern options: square panels for tiles or tiles for laminate
In our country at the moment, tiles similar to laminate and wood panels made for ceramic coating have often begun to be found. Tile is suitable for different rooms, but it is mainly used in rooms where air humidity is high.
And for offices, living rooms, bedrooms and other rooms, wood panels and laminate are used. But the design of the premises can be different, therefore the specifics of materials based on technical features must be taken into account when drawing up the project.
Basic characteristics
Square-type laminate differs from its own rectangular counterparts in fact only in shape. Its popularity is justified by the fact that it very successfully imitates different surfaces, such as stone, tiles, tiles, or even metal and artistic parquet.
What distinguishes it from the conventional coatings is its low price and sufficient strength of the products. It is precisely due to these characteristics that this type of laminate is highly valued by consumers.
Now let's look at other advantages of laminate in relation to other types of coatings:
- Laminate flooring can be easily washed and is resistant to most cleaning products, making it easier to keep your kitchen, bathroom and other areas clean.
- The different color palette of laminate and a large selection of manufacturers allows this coating to fit into any interior.
- Laminta has antistatic properties.
- Assembling such a coating and dismantling it is much simpler than the same operations with other coatings.
- The good durability of the products allows the coating to not wear out so much over time, its service life is significantly longer than most other surfaces, and it does not require much maintenance.
- Well, and, obviously, the low cost reduces the cost of creating an interior if associated with other solutions.
HOW TO CUT LAMINATE AT THE DOOR / LAMINATE UNDER THE DOOR FRAME
It should be noted that laminate also has its weak points, such as poor water resistance and the synthetic nature of the additives used. Flooding or simply increasing humidity in the room or base can greatly damage the coating.
Installation of an arc-shaped threshold
When installing a flexible plastic profile, it is necessary to provide a temperature gap of 5 mm between the laminated board and the profile. For more information on the use of a flexible transition threshold, see this useful
Sequence of installation of a PVC threshold:
- First, we drill holes in the floor along the joint line and insert dowels into them.
- Cut the strips to the required length.
- To give the profile a round or wavy shape, lower it into water at a temperature of 70 degrees and soak for 20 minutes. When heated, the strip becomes plastic, which allows you to bend it manually.
- We screw the threshold to the base with screws.
- Snap on the decorative plug.
Unlike the plastic type, the aluminum threshold is installed at the stage of laying the tiles, since the profile has special claws that fit under the tiles.
When the tile is laid, we collect glue along the edge and place the profile tabs under it. We insert laminate boards under the threshold.
When doing the work yourself, it is better to choose the first option for designing thresholds with a rounded shape, since it is easier to implement.
Arc-shaped threshold
There are two types of connections for round and wavy connections:
- The soft joint is made from a flexible clamp attached to the floor. A plug snaps onto it. These elements are easily bent to the desired radius by hand. This overlay covers 1 cm on each side. Suitable for use when cutting material incorrectly.
- The aluminum profile overlaps the joint by several millimeters on each side; if you make a wider side, the profile will be difficult to bend. For more information about installation, see this
It is used for perfectly even cutting of material; if the edges are cut crooked, the aluminum threshold will not block them.
Making a joint with a threshold
The threshold between the tile and the laminate smoothes the transition in height, closes the cracks, and prevents dust and moisture from getting between the materials.
Aluminum, plastic and wooden thresholds are available.
To create round joints, a bending profile is used.
- open method - all fastenings will be visible. We drive dowels into the floor, screw screws through the threshold;
- the hidden connection has internal fastenings.
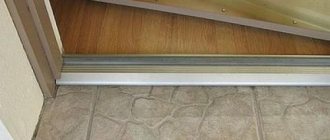
The threshold for laminate and tiles is installed in a doorway or other seam quite simply. We drill a hole in the floor for the dowel. Thresholds are produced with ready-made holes or drilled during installation. We pass the screw through the profile and screw it into the dowel.
Thresholds are made to connect surfaces located at the same level and with a difference in height when transitioning from tiles to laminate.
How to fix gap between screen door and threshold | Home Guides
It is difficult to make a perfectly square opening in a house. When a house settles, it can throw even a perfectly aligned door out of square, causing a gap to form between the bottom of the door edge and the sill. Aligning a screen door with a threshold is a task that even a novice DIYer can quickly complete. Some screen doors already have adjustment pieces, while others require a slot to be added to close the gap.
Doors with extensions
Locate the metal expansion bar at the bottom of the screen door. This is the metal piece that goes through the bottom of the edge of the door. Locate where the rod attaches to the bottom horizontal track of the screen door.
Loosen the screws holding the extension bar to the bottom rail, but do not remove them. The holes on the expansion bar are usually oval shaped to allow for adjustment.
Close the screen door. Adjust the spacer bar down to close the gap between the screen door and the threshold. The door bracket attached to the extension strip should barely touch the threshold when the door is closed. Tighten the screws holding the extender in place.
Loosen the screws holding the bottom extensions to the door frame. Lower the bottom extensions to close the gap between the door frame and the threshold. Retighten the screws.
Doors with wings
Open the door at a 45-degree angle to allow easier access to replace a damaged door frame that creates a gap between the door and the threshold.
Locate under the door and pull the door bracket. The sweep is a brushed or rubberized strip attached to the bottom of the door designed to cover any gaps between the door and the sill. Place the sweeper against the edge of the door handle. You won't have enough room to remove it on the hinge edge of the door. If you are unable to loosen the clamp, pull the end of the clamp with pliers to get started. Remove the sweep from the door completely.
Slide the new track, which matches the profile of the one you just removed, back onto the track at the bottom of the door. Align both ends of the new reamer with the edges of the door.
Doors without wings
Close the door and press the new grill against the door to determine where to place it so there is no gap between the door and the threshold.
Mark the screw holes on the door template. Drill pilot holes in these locations.
Secure the door with the screws from the cleaner's installation kit.
.
How to seal the gap between the laminate and the door slope
Laying the flooring is carried out at the very last stage of all repair work. This is due to the fact that there is a risk of spoiling the facing material at any time: scratches, dirt, stains from solvents that cannot be removed, etc. - all this is especially true for laminate.
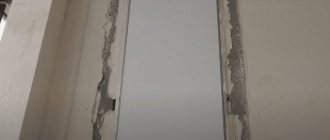
Laying laminate flooring in the area of a doorway is not an easy task. Almost every homeowner who decides to lay the flooring themselves faces this problem. Therefore, it is very important to do everything competently and correctly, so that the gaps between the material and the door frame do not spoil the overall picture.
Seal the gap correctly
Laminate is a fairly common material that is used as a finishing floor. Most consumers appreciate its features and performance characteristics. The material has an attractive appearance and has a huge number of color and pattern options. In addition, it essentially resembles a wooden flooring, for example, a parquet board.
Installation will not cause any problems, and installation is very easy to do yourself. But, nevertheless, it is worth paying attention to several complex nuances, for example, how to correctly bypass a heating pipe or correctly lay laminate flooring in the area of a doorway. Many will think that there is nothing complicated here, but this is far from the case. After all, the entire final result will depend on correctly executed installation technology.
Important! A small gap should be left between the doorway and the laminate, which is necessary in case of thermal expansion of the material.
The main task that should be performed when laying the laminate near the door frame is to create an invisible and smooth seam/transition. The caveat is that it is not recommended to join the board close to the door. The reason is that such flooring needs a small gap as it tends to expand when the temperature in the room changes. If no gap is left in this area, the homeowner will experience a bulging panel.
There are three ways to install laminate flooring in a doorway:
- Trim the door frame in the lower area.
- Install the laminate before the door is installed.
- Fit the panel into the gap formed in the area of the floor and the main element of the doorway.
When laying the laminate, leave a gap of no more than 1 centimeter; the door should function freely. The floor surface must also be carefully leveled. A self-leveling screed is ideal for this. Obvious defects and holes will negatively affect the quality of the floor covering.
The visible seam can be closed with a small threshold. It will allow you to maintain a gap and hide it from unnecessary views of guests. The threshold is selected taking into account individual wishes and the interior of the room.
Features and tips for joining linoleum
Having loaded yourself with good tools and patience, you can safely begin planning the linoleum flooring with your own hands. At first glance, there is nothing complicated, but there are still certain features that you definitely need to know before starting work.
How to trim material correctly
This stage is the most important, because the condition of the seam will directly depend on the quality of cutting. First you need to have the necessary tools:
- sharp knife
- metal ruler
- roulette
- pencil
After laying the first sheet of linoleum, its edges need to be attached with double-sided tape; the entire sheet should not be glued yet. This must be done to cut the edges evenly without moving the material.
Instruction:
- We place one sheet on top of the other, overlapping about 5 cm, do not forget to attach the base with tape. If you have chosen linoleum with a pattern, then it is worth making a selection so that it matches on two canvases. Of course, this will lead to the consumption of material, but it will not be possible to bypass this process, because the seam will already be visible to the naked eye.
- We mark with a pencil the place where we should cut later; if the linoleum has stripes, then this should be done along them, then the joint will be less noticeable.
- Next, you should apply an iron ruler and use a sharp knife to cut two sheets at the same time.
- At the end, all that remains is to remove the remaining material.
Please note that when cutting on a concrete floor, it is necessary to place a piece of old linoleum or something else under the flooring material so that the knife does not become dull.
If you do everything carefully and correctly, you will get a perfect joint. Often at this stage the work ends, and the edges of the material are glued with double-sided tape. But we will consider all possible options.
"Cold" method
You need to prepare the following tools: a sharp knife, a spatula to apply the glue, the glue itself for gluing the linoleum, a special glue for the joint, which has a needle nozzle, a roller and masking tape.
First of all, it is worth gluing the material in the joint area. You should unscrew the linoleum sheets at the joint; 20 centimeters is enough. Then you need to carefully apply the glue with a spatula and press the material with a roller.
After completing all these steps, you need to glue the pieces together:
- We put tape on the seam, and then cut it straight along the seam
- then glue is applied along the entire seam
- after this the tape is removed and after drying the seam is cleaned with a knife
Scotch tape is needed to protect the material from glue, which can damage it.
The video shows cold welding of linoleum:
Features of installation of flexible thresholds
If framing straight thresholds with a corner causes practically no problems, then the installation of curved connections has some peculiarities. They should be considered in a little more detail. Neither wood nor metal are suitable for these cases due to their inability to bend at any degree. There are two possibilities to connect the laminate floor and tiles: use cork inserts or a complex plastic profile. The cork is easy to install, but its installation requires thorough, thorough preparation. A balsa wood expansion joint cannot cover the imperfections of uneven cutting of laminate or tile edges. In order for the joint to be neat and beautiful, the gap between different coatings should be no more than two millimeters.
How to close the gap between the laminate and the threshold.
The joining surfaces of laminate and tiles are located strictly in the same plane. Their edges are carefully leveled, polished, and very precisely adjusted to one another.
While ceramic tiles do not cause any problems, laminated boards are difficult to process and will require additional labor and time. The result is worth it - joints made with high-quality cork look very beautiful.
For a curved connection, a plastic molding also needs a curved one. It is impossible to purchase one with ready-made radii. Typically, products are sold that have a relatively small bend. To obtain the rail of the required configuration, it must be softened before installation work. This can be done using a hair dryer or simply immersing it in hot water. After such actions, the material becomes pliable and easily bends according to the specified parameters. This profile consists of two parts.
The lower part is attached to the floor along the contour of the seam. It is mounted in parallel with the main covering. On the side of the laminated surface, it is necessary to provide a small gap to create an expansion joint. Since boards can shrink and expand with temperature changes. Albeit insignificantly, but in order to avoid deformations, this must be done. The upper part is carefully connected to the fastening clips located on the lower element. In order not to damage the surface of the decorative profile and floor covering, you should not use an ordinary hammer, but a wooden mallet. Plastic strips are convenient because they can hide a fairly large height difference between the coverings. There are profiles that can eliminate the vertical difference between laminate and tiles up to 18 mm.
Types of joining profiles
The laminate laying technology assumes the presence of a compensation gap, allowing the coating to expand and contract with changes in temperature and humidity.
The boundary of the coating can be located in a doorway or in another part of the room and have a straight, broken or curved shape. To achieve a different decorative effect, as well as taking into account the geometry of the joint, choose one or another joining profile. The material from which it is made may vary:
- The aluminum profile (threshold) comes in a variety of colors, including silver, gold and imitation of various types of wood. It is attached to the finished coating using screws and dowels (open fastening) or has a hidden installation system. There is also a self-adhesive threshold. Suitable for straight single-level or multi-level joints with a difference of up to 9 mm. Fits best in a doorway.
- The flexible metal profile can be used for straight and curved joints between tiles and laminate. Typically powder coated to reduce wear.
- Wooden, made from solid wood, has a fairly high cost. It is used for direct joints of coatings at the same level or with a difference in height. Attached with glue.
- A flexible plastic profile can take any curved shape with a radius from 30 to 60 degrees. It consists of two parts - a fastening and a T-shaped threshold. A wide range of colors imitates various types of wood. Can smooth out level differences up to 12 mm.
- The cork expansion joint can be used as an alternative to various joining profiles. It is a strip of cork seal that has sufficient elasticity to compensate for the thermal expansion of the laminate. The edges of the coating should be as smooth as possible and at the same level.
The color of the joining profile should match as much as possible with one of the types of coating. Sometimes a contrasting color, combined with the decoration elements of the room, looks more impressive. In a high-tech style, a silver-colored metal connector would be appropriate.
Basic rules for laying laminate flooring
Immediately before starting to assemble a laminate floor, three basic rules must be observed.
First rule
You cannot start installation immediately after purchase!
Panels in original packaging must be acclimatized.
Acclimatization is the equalization of the temperature and humidity of the building material with the temperature and humidity of the room where it will be installed.
This is especially important during the winter months when panels are brought in from unheated warehouses. Therefore, it is necessary to leave the panels in the room where they will be installed for at least 48 hours
Therefore, it is necessary to leave the panels in the room where they will be installed for at least 48 hours.
In this case, the room temperature should not be lower than 15 degrees Celsius, and the humidity should not be more than 60%.
It is advisable to place the panel packages separately from each other or no more than two floors on top of each other, as shown in the photo below.
After two days, the temperature and humidity level of the material will be equalized with the humidity of the room.
Optimal conditions for laying laminate flooring:
- indoor air temperature - 18-22 degrees Celsius;
- air humidity 40-65%.
Third rule
We make markings for laying the laminate, i.e. We calculate the necessary technological indents (gaps) from walls and other protrusions, if any.
To do this, we measure the parallel walls relative to each other along the length so that the flooring lies evenly.
If we detect any deviations in the geometry of the room, we take them into account when calculating the deformation gaps.
1. First of all, you need to calculate the width of the last row of panels, which should be at least 50mm, and the length of the last row of panels, which should be at least 300mm.
This can be done using a tape measure, or you can lay out one line of laminated boards along the length and another along the width.
The requirement for the width of the last blade to be at least 50mm is due to the fact that this will allow you to snap the lock without difficulty.
If, when calculating the last row, the width or length is less than the recommended dimensions, then the first strip of flooring should be cut accordingly in width and/or length.
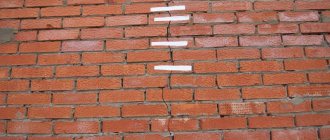
2. In addition, between the panels and all fixed elements of the room (walls, columns, door frames, pipes, etc.) it is necessary to leave a gap of 8-12 mm (most often a gap of 10 mm is left), the so-called expansion joints, technological or expansion gap.
Because under the influence of changes in temperature and air humidity levels in the room, laminated boards expand and contract, i.e. dilatation occurs.
Dilatation is the process of increasing the volume of a material under the influence of temperature conditions and intense saturation with moisture.
This process accompanies almost all building materials that have a porous structure - brick, wood, OSB, plaster, magnesite, laminate, etc.
Therefore, it is impossible to lay flooring close to walls and other fixed elements of the room.
Otherwise, when expanding, the panels under high pressure will rest against obstacles (walls or others), and due to the fact that they have nowhere to expand further, the expansion energy will go to the middle of the flooring (the weakest point), thus causing floor deformation (bending, swelling, etc.).
Expansion (thermal) joints of 10 mm are sufficient clearance for unhindered expansion of the laminate floor, i.e. the floor remains level.
Another function of thermal seams is that they allow the laminate to breathe and remove moisture formed underneath it.
In addition, indentations prevent sound transmission from the floor to the walls.
Types of thresholds for laminate and tiles
The classification of connecting elements connecting ceramic tiles and laminate can be made based on several criteria: materials, purpose, connection methods. The most commonly used raw material is aluminum, but plastic, wood, cork, and a combination of metal and rubber are also used. According to its intended purpose, a threshold (even a completely flat element is called this) can be:
- traditional, classic, if it frames steps, external corners of the same quality or two different materials. It has the shape of an internal or external corner. The threshold is usually made of metal, since wood or plastic are not strong enough, stairs need strong profiles. The steps bear quite a large load from the movement of people and cargo, so the top coverings are subject to increased demands;
- edging or leveling - with a small difference in levels for tiles and laminate, the thresholds are made of metal, equipped with an elastic rubber gasket. It is the rubber layer that compensates for differences in altitude during installation. The result will make itself felt - you get a fairly smooth surface. If there is a larger difference in height, it makes sense to choose a solid plastic threshold that is suitable for the cross-sectional dimensions;
- decorative overlays used to trim the threshold during transitions between rooms. The material is used in the case of joining homogeneous and dissimilar parts. Overlays are made from almost any material. If metal is used, then it can be decorated to match the main type of floor with a finishing film; plastic strips are made in any color, to match any texture;
- curved thresholds - used when connecting dissimilar surfaces with an unusual design solution. The joint can turn out beautiful and even only when both floor surfaces are laid at the same level. Aluminum is not useful here, since it is not flexible enough and arbitrary bends cannot be made. Therefore, durable plastic, cork, is used. It’s not easy to install such a threshold, but it looks very nice;
- finishing - used when framing the edges of the hallway covering, at the exit to the balcony, loggia, or at the podium. This type of threshold is very often used as a multi-level threshold when connecting laminate and ceramic products.
Final Decorative Classic Curvilinear Docking
There remains one more option for dividing thresholds into types - the connection method. The cross-section of the product can be a one-piece letter H, a flat bar, or a composite letter H, consisting of two T-shaped bars. A profile in the form of a solid letter H, laid on its side, is used by laying the covering on both sides of the plank. Fastening to the floor is done with self-tapping screws. In the latter option, one of the strips is installed from the bottom of the seam, with the leg up. The second, having a decorative surface, is mounted on top, then connected with a lower clamp.
Installation Rules
There are two ways to install connecting products: open and closed. The first option is used for installing metal elements. They call it open because the caps of the fasteners remain visible, which must subsequently be painted with the color of the threshold. Fastening is carried out using ordinary plastic dowels equipped with self-tapping screws. The metal plane for this purpose has holes made at the factory. With the hidden method of fastening thresholds, the lower part of the profile is first installed, screwing it to the ceiling with self-tapping screws or placing it on strong glue. On this part of the profile there are special clamps for the top bar. The decorative part of the molding snaps securely into place, resulting in a very strong connection.
The floor covering should not completely occupy the threshold gap. It is necessary to create a compensation gap that will prevent linear changes in the coating due to temperature changes.
Expert advice
In order to avoid mistakes when carrying out work, it is necessary to carefully calculate, measure, and think about the best installation method. Advice from a specialist will help you solve certain aspects without the help of others:
- Before work, determine the gap between the preliminary floor and the bottom end of the door. It must have a small value of 10 mm. Otherwise, the sash will not open, because the floor will rise to the thickness of the laminate and underlay.
Trimming the box is done after making sure that the gap at the bottom of the sash is enough for it to open freely
The finishing option is not suitable for a room with a xylolite floor. The base has the highest residual moisture content.
How to choose a connecting profile for tiles and laminate and perform installation?
The variety of modern finishing materials makes it possible to create unusual design solutions. Quite often, in one room, a combination of different floor coverings, for example, laminate and tiles, is used to highlight functional areas.
To make the joint of materials look neat and not become clogged with dust, use a joining profile. It gives the coating a finished look, masks the joining line or visually highlights an area of the floor. This can be achieved by choosing the right shade from the many available options.
Thresholds for the joint between tiles and laminate
Zoning the space of premises is often carried out by installing floor coverings with dissimilar materials. The surface of the kitchen area is covered with ceramic tiles, the floor in the dining room or living room adjacent to the kitchen is finished with laminate . The materials belong to completely different groups of facing products, but they coexist perfectly. To design the connecting lines between them, thresholds for laminate and tiles are used, which can divide the space while simultaneously making it solid. They frame stair steps, podiums, exits, transitions between rooms from laminate to tile.
Docking methods
In addition to thresholds, there are other ways to join heterogeneous elements. It is impossible to accurately determine their effectiveness, but it is necessary to get to know each other better. The transition from tile to laminate can be done using:
Laminate. installation error, or this will do.
- sealants (foam, paste, mastic) - they can be used to seal seams of any configuration. It is important to choose a sealant that will have good adhesion to tiles and laminate. The connection turns out to be almost eternal. This is both an advantage of the method and its disadvantage. If repair work is necessary, all floors will have to be dismantled. Since sealants adhere tightly to laminated surfaces and tiles. They can only be used if the height of both coverings is absolutely the same;
- Cork expansion joints are completely new products that are already popular. If the work is carried out exactly according to the technology, the transition turns out neat and beautiful. The installation process is completely simple; the compensator is installed using a regular screwdriver. Preparatory steps take a lot of time and require special care, since the seam must be the same depth and width along its entire length. Any damage to the edges of the coatings is not allowed. This is especially true for laminate.
Laying laminate flooring without thresholds throughout the apartment
Not everyone likes laminate joints, no matter how you design them. In small apartments, you can lay this covering with a continuous carpet. But the maximum length without thresholds is 10 meters, and the width is 8 meters. Different manufacturers may have differences in the maximum permissible installation without connecting seams, but not by much.
Threshold-free laminate installation has limitations
Even if this is possible in your apartment, it is not very convenient if you need to repair laminate flooring. The fact is that laminate can become deformed, wear out, etc. When laying with joints, it is easier to get to the desired fragment and replace it. If there are no joints throughout the apartment, for any replacement you will have to go through everything from the very end. Very inconvenient, although not fatal.
Also, laying laminate flooring without joints throughout the entire apartment requires thoughtful development of an installation plan. After all, there are no joints; you have to think about which scheme will be the most convenient.
Topic: What to do if there are gaps between the wall and the laminate?
We installed laminate flooring in the children's room ourselves. The panels aligned perfectly with each other, but large gaps remained in the places where they joined the wall. I don’t even know what this is connected with, maybe they did something wrong. I can’t imagine to seal now Maybe someone has already encountered something similar and can suggest something?
Last edited by Bombardier; 11/14/2012 at 6:22 pm.
(Registered visitors do not see this advertisement. registration)
The most ideal option in this case would be to use a special one. repair agent – putty paste for laminate flooring. And you can buy it in the same place where you bought the laminate. Before use, you need to clean the gap from dirt and debris and cover the edges of the gap with construction tape. Now you can apply the putty. Yes, a small digression, the color of the putty is chosen in accordance with the color of your laminate. We level everything with a spatula, let it dry, remove the tape and wipe everything down with a thick cloth slightly moistened with water. The second method is to apply a colored sealant (in accordance with the color of the laminate). The sealant is very elastic and therefore is a good option for sealing cracks; it can withstand constant loads and is not subject to cracking and shedding.
Before you begin laying laminate flooring, a number of conditions must be met to ensure a high-quality floor covering and eliminate possible problems. Particular attention should be paid to the base on which it is planned to install. It should be smooth in the horizontal plane and not have various protrusions, swellings and bumps. If the room is supposed to replace doors, it is better to do it after dismantling the old door, but before installing a new door frame. This is necessary to create an optimal gap between the door leaf and the new laminated covering, and will also avoid gaps between the door frame pillars and the laminated panels. In the case where the doors remain the same and the laminate is laid on the old floor covering, it is necessary to ensure that the gap formed by the door and the floor is sufficient for it to open freely, taking into account the thickness of the panel and the underlay. It is recommended to lay the laminate in the direction of daylight from the window along the wall; this will make the joints between the laminate panels less noticeable. When laying the first row, the cut portion of the last panel is the beginning of the next row. This type of installation is the most economical and allows laminated panels to be laid in a shifting manner, which improves the reliability of their connections and meets technology requirements. The panels are laid with a 10mm gap from the wall. and locks towards themselves, this makes assembly easier. Gaps are necessary so that the laminated coating can freely expand and contract with fluctuations in humidity, temperature and load. The assembled laminated covering should not be rigidly fixed to the base; the floor plinth is also fixed only to the wall. Near the door frame, the laminate should fit freely under the platband to avoid pressure on the coating; the gap between them can then be sealed with special sealants.
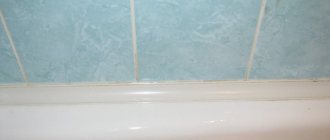
Well, firstly, there should be a technological gap between the wall and the laminate along the perimeter, which will prevent the laminate from swelling if it expands. Its size is indicated by manufacturers on the packaging, usually from 8 to 15 mm. Subsequently, this space will be covered with a plinth. Secondly, if you have a larger gap, then why didn’t you immediately cover it with the same laminate ?
There should be small gaps between the wall and the laminate This improves insulation against impact noise and leaves room for expansion as temperatures rise. If the baseboard does not cover the cracks, you will have to cut out narrow strips of laminate and use them to finish off the last strip (maybe even glue it, although usually there are no problems if the floor is flat). The last row of laminate is inserted in one assembled strip. In order for the last row to fit into the locks, an ax inserted into the slot is used.
What gap is required between the door, floor and frame
Beginners will always face some difficulties when installing doors. The most important stages of door installation are fastening the frame and installing the leaf. During this process, many people are confused about how much space to leave between the door and frame. How to understand the subtlety of installation?
Norms and rules for the formation of gaps between the door and the frame
The further operation of the door structure depends on how well the gaps are calculated and laid. Under the influence of moisture, the door can expand, and then problems with its functionality cannot be avoided. Also, too much gap prevents the doors from being securely locked in the closed position.
There are standards and rules regarding this. According to the rules, gaps are always calculated individually and depend on the geometric parameters of the structure: weight, height and width of the door. In this case, the reasonable error is ±1mm. If, according to its dimensions, the door should have gaps between the leaf and the frame of 5 mm, then, taking into account the possible error, they can range from 4 to 6 mm.
Gaps between the leaf and frame of standard doors
What gap should be left for a standard door leaf with a height of 200 cm and a width of 60 to 90 cm? In such cases, the required gaps of up to 5 mm wide are usually left. And usually it is enough to have gaps of 3 mm. For rooms with high humidity and doors made of materials that absorb moisture well, it is more effective to leave 4 mm or more.
It is necessary to leave a gap of at least 2 - 2.5 cm between the interior door leaf and the floor to ensure natural ventilation. A gap of 4 cm is allowed for convenient and safe opening of the door.
How to create gaps when installing interior doors
- When installing the frame and during initial formation, gaps of 1-2 cm should be left “for foaming”. This is extremely important because during the setting process the foam increases significantly in volume and creates pressure on the box. When this happens, there are no proper gaps between the frame and the door - the frame bends in an arc and the door loses its ability to close.
- Between the surfaces of the frame and the door leaf with the door closed, a strip of any material with a thickness of 3 to 3.5 mm should be installed. Usually this material is door packaging cardboard.
- To prevent the door frame from moving in the doorway, it is fastened with door wedges.
- Afterwards it is necessary to adjust the building level again. A well-balanced door, despite its weight, should stand on wedges. In the open position, the supporting structure must remain motionless.
- After checking the frame, you can gently foam it and the foam will expand.
- If, after the foam has set and the strut has been removed, the structure does not undergo deformation, has a flat structure and gaps of the planned width on all sides (except the bottom), then the installation was carried out correctly.
How to fix a gap that is too big or too small
Sometimes when you close a door (especially an old wooden door), the gap is too narrow or even missing. First, make sure that there is no warping: the frame should be level and maintain the configuration of the corners and diagonals. In this case it is possible:
- for washing off paint;
- to remove the sash from its hinges and cut out the contours with a plane to create the right hinge.
On the other hand, if the door has dried out and decreased in size during use, then too large gaps (more than 6 mm) have probably formed between the frame and the sash. In this case, the door is probably hanging on its hinges or the latch handle does not fit into the slot. The situation can be corrected if:
- You move the door up, rearranging the hinges to eliminate the extra top gap;
- you attach a piece of wood to the hinge side of the door to ensure there are no too many gaps.
Gaps between the front door and frame
Unlike interior doors, the gaps between the front door and the frame must comply with standards not so much because of the possible expansion of the leaf, but because of the danger of penetration of cold air and extraneous sounds from the outside. Such troubles can be avoided by installing a seal, and this is the manufacturer’s problem. If the door is certified according to the standard, there are no problems. But if the design is not certified, the gaps can be of any type and you need to glue the seal yourself.
Thus, in most cases, the gaps of interior doors at the top and on each side are 3 mm, the hinges at the bottom should not be less than 2 cm. If you initially follow these simple rules, in the future you can avoid many problems and possible reinstallation of doors.
.
Sealing joints between laminate flooring and other floor coverings
The need to join two types of laminate or laminate with other floor coverings usually arises in doorways, as well as in a room divided into zones. The width of the compensation gap at the joint of coatings is calculated according to the principle: 0.5-1.5 mm for each meter of joint length.
Joint of different types of laminate
The need to design a joint arises if:
- Laminate flooring with different locking systems is used
- A difference in the height of the coatings is formed
- Design joint, curved
- The podium or steps are covered with laminate
- The area of the room exceeds 64 m² and the covering cannot be made continuous; an additional expansion joint is required
In these cases, special connecting strips (sills, moldings) are used to decorate the joints. This is the optimal solution for laminate joints:
- There remains a gap for temperature fluctuations
- The threshold protects the ends of the laminate and closes the gap at the top, preventing debris from getting into it
Threshold strips vary in configuration and allow you to solve different problems:
- Straight - for sealing joints between coatings located on the same level
- Leveling - for connecting coatings with a small (up to 4 mm) height difference
- Multi-level - for joints with a significant difference in height (up to 2 cm), can be charcoal, round or more complex in shape
- Corner – for joints of mutually perpendicular coverings (steps, podiums)
They are made from different materials:
- Laminated, made from pressed chips, covered with a protective and decorative film. Usually matched to the laminate and allow you to make the joint as invisible as possible
- Made from solid wood - expensive, elite
- Metal, aluminum, steel, brass with anodized coating. These are the most durable overlays that can be used in high traffic areas, some of these products can also be curved to form curved joints
- Plastic (PVC) - flexible thresholds, ideal for decorating curved joints, are distinguished by a variety of colors. Affordable, but not durable
- Rubber ones are usually angular
Joint between laminate and other floor coverings
The joints of laminate flooring with parquet and linoleum are usually covered with thresholds, often leveling or at different levels. Less commonly, the seam between the laminate and linoleum is filled with transparent silicone glue; this option is used if the coatings are on the same level and the cuts at the junction are perfectly even. It is necessary to stick masking tape along the edges so that the adhesive does not get on the surface of the coating.
If laminate and carpet are combined, a fairly rigid underlay is usually laid under the carpet, the thickness of which corresponds to the thickness of the laminate, and the carpet itself is laid overlapping the laminate. If they are joined, it is necessary to use a transitional threshold at different levels.
Special preparations
Special products can be used to eliminate defects on the laminate in the form of scratches. They are designed to camouflage defects and restore the appearance of the surface.
Furniture marker
Furniture markers make it easy to remove scratches on laminate flooring without complicated processing. The surface dries after using the felt-tip pen in a matter of seconds.
Advantages of the product:
- quick drying;
- moisture resistance;
- long shelf life;
- choice of shades;
- reusable;
- good camouflage;
- affordable price;
- quick correction of defects on the surface.
The marker can be erased from the laminate only with alcohol solvents.
Soft wax pencils
Wax pencils (crayons) are an easy-to-use tool that allows you to hide coating defects.
They are produced in different shades, which allows you to choose the closest color. You can purchase such products in stores that specialize in selling laminate flooring.
Pencil use process:
- Prepare the floor - wash and dry.
- Apply several layers of wax and rub it in with a soft, lint-free cloth.
This method of eliminating laminate defects has many advantages:
- long shelf life;
- low price;
- ease of use;
- at the place of application, the coating acquires water-repellent qualities;
- extending the service life of the laminate;
- efficiency.
The disadvantages of using chalk include the following:
- over time, the wax is erased from the surface of the laminate;
- This repair option can only be used for superficial, not deep scratches.
Before using a pencil in the middle of the floor, it should be tested on an inconspicuous area.
Super hard wax
In addition to soft wax pencils, extra-hard wax can be used to fill scratches. To use such a product, you need a special melter that allows you to change the consistency of the product.
How to use:
- Clean the scratch from dust and dirt.
- Smooth the edges of the scratch with the sharp side of a spatula.
- Degrease the surface.
- Melt the wax with a melter.
- Fill the crack with some excess, as the wax decreases in size as it cools.
- Hold for 30 seconds.
- Remove excess product with the ribbed part of a plastic spatula.
- If necessary, use other shades to restore the pattern.
- Sand the surface.
- After all work is completed, it is necessary to clean the melter and spatula from wax.
If the heating increases and the wax begins to smoke, the melter should be cooled slightly by turning off the heat.
putty
In the case where the scratches on the coating are deep, affecting not only the top layer, you will have to use a more radical approach to repair. If it is impossible to solve the problem with wax, putty (paste, putty) for the laminate is used.
Putties can come in various forms:
- Powdery.
- Paste-like (in a tube).
- Solid in the form of briquettes.
Like wax crayons, putty comes in a variety of shades. This allows you to restore the missing amount of coverage and make the repair area completely invisible.
Advantages of use:
- the ability to select colors from an assortment;
- preventing moisture from entering deep layers;
- Suitable for repairing deep scratches;
- a fairly long-term solution to the problem.
The disadvantages of use include the need for skill when applying the composition. When working with putty, it is necessary to cover the areas near the scratch with masking tape. This must be done so that the material used for repairs does not get on the laminate around the defective area - it will be very difficult to remove the putty.
To work you will need:
- masking tape;
- spatula (scraper) rubber or plastic;
- putty.
Operating procedure:
- Prepare the laminate surface.
- Apply masking tape around the affected area.
- Remove a small amount of putty.
- Apply the paste to the scratch.
- Rub in well.
- Remove excess with a scraper.
- Allow the time necessary for the composition to dry completely.
- Sand the treated area.
- Apply wood varnish, if desired.
If you have no experience in carrying out such work with putty, it is recommended to first practice on an unnecessary board, since the composition dries quickly.
How to seal the joints of laminate and tile?
For the joints of the laminate and tiles, you can use the same thresholds as for decorating the joints between two types of laminate, selecting them in accordance with the configuration of the joint.
If the surfaces of the tiles and laminate are at the same level, there is no height difference, you can create a joint without a threshold:
- If the joint length does not exceed 2 m and the joint width is 3 mm, it can be filled with a tile joint.
- Longer and wider seams between the laminate and tiles are filled with an elastic compound (silicone sealant, polyurethane foam, liquid cork)
- A long, even seam without differences in thickness is filled with a cork expansion joint; it can also be used when there is a slight difference in the height of the coatings
Installation of thresholds
Here are some types of thresholds according to installation methods:
- Two-piece T-shaped for hidden installation, fastened with screws (self-tapping screws)
- One-piece with herringbone dowels, the heads of which are inserted into the groove on the underside of the sill
- One-piece for open screw mounting, supplied with pre-drilled mounting holes and screws with decorative heads
- Z-shaped multi-level, with a zigzag leg, the foot of which is attached to the base with screws or glue
- Flexible brass or aluminum, with one-sided tab divided into many sections
- Flexible polymer two-piece, groove and tab
- Self-adhesive
Self-adhesive thresholds are usually used if the base is loose and screwing fasteners into it is problematic, as well as on top of a heated film floor. Before installing them, the surfaces must be thoroughly cleaned and degreased, the protective coating must be removed from the bottom, the threshold must be applied in accordance with the markings and pressed well.
Two-piece planks with 2 legs are mounted in the following sequence:
- The junction is marked
- Holes with a diameter of 6 mm are drilled at the base on both sides of the seam in increments of 20-30 cm
- Plastic dowels are driven into the holes
- The mounting rail is installed in place and secured to the concrete base with self-tapping screws 60 mm long, to a wooden base - 45 mm
- Floor coverings are laid on top of the legs, the seam between them should be wider than the mounting groove
- The leg of the decorative strip is inserted into the mounting groove, and with light blows of a mallet it is driven into place. First, the bar is partially recessed along its entire length, with gradual advancement from one end to the other, then you need to repeat the operation, and only on the third pass hammer it in to its full depth
If thresholds with open fastening are used, first the floor coverings are laid, then the threshold is applied on top and markings are made, holes are drilled in the designated areas of the base, and dowels are installed in them. The threshold is put back in place and fixed with screws.
In a similar way, markings are carried out for one-piece thresholds with hidden dowels. The threshold is installed so that the dowels fit into the holes, and is nailed with a mallet.
It is best to use thresholds of the same brand as the laminate. Quick Step produces laminated and aluminum multifunctional thresholds, with which you can create joints between different coatings, including multi-level ones. Their decorative strip consists of several segments; by removing individual segments, you can change its configuration.
If a threshold with a zigzag leg (one leg) is installed, a coating of greater thickness is laid first. Then, next to it, a strip is attached with self-tapping screws or glue with a paw in the direction opposite to the laid covering. A thinner coating is laid on top of the foot. The upper part of the plank, with careful blows of a hammer in 3 steps, is brought down to the required height so that its edges press both mating coatings.
To seal a curved joint, you must first make a marking on the floor, according to which the profile of the flexible threshold is bent. The metal threshold can be bent using a special tool, as well as manually, resting on the knee.
The polymer groove, which is installed in the mounting seam, is bent during installation and fixed to the base with screws (dowels are first inserted into the holes). The upper, decorative part of the plastic threshold acquires plasticity when heated and retains its given shape after cooling. You can soften the insert with a hair dryer or by placing it in water heated to 50-70° for 15-20 minutes. The insert is gradually pressed into the groove and pressed carefully.
Selection of decorative thresholds
The correct choice of threshold must be made according to a number of criteria:
- functional purpose of joined coatings. For example, if laminate is installed in the hallway, and tiles are installed in the kitchen, then the threshold connecting them must have sufficient strength and moisture resistance in accordance with the operating conditions in both parts of the house. It is best to use an aluminum or plastic strip in such conditions;
- from a design point of view, the choice remains solely with the owner, who should determine how harmoniously the threshold will look in combination with the joined floorings. Here you can play with the method of contrasts or, on the contrary, create a uniform coating. When it comes to delineating rooms, it is best to select a threshold that will be monochromatic for one covering and will set off another;
- if we are talking about height differences, then it is necessary to select multi-level thresholds for the laminate and focus in this process on the thickness to be covered.
How to seal laminate joints?
When laying laminate flooring, it is often necessary to join it with another floor covering at the border of rooms or zones. Sometimes, in places where it is laid, heating or water supply pipes come out of the floor. Finally, joints between the floor and walls are inevitable.
Since laminate is subject to thermal expansion, its connection to other materials should not be rigid. At the same time, the joint must be sealed or covered from above so that it looks neat and so that there is no gap left into which debris will get clogged.
Source
A chamfer is not a gap in the laminate
Let's give a unique definition of the concept of “gap”.
A gap in a laminate is an unplanned gap formed not as a result of a technological solution, but due to defective material or illiterate actions of a craftsman. It also appears due to prolonged use or temperature and humidity factors that influence changes in the size of the laminated board.
A chamfer is a technological solution for processing the edge of a plank, and therefore is not a gap.