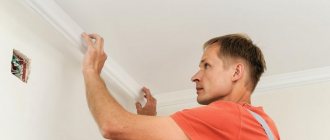
Installing skirting boards is one of the final stages of repair. To give the floor a finished look, to hide the edges of the floor covering and wiring - the plinth easily copes with these tasks. In addition, this detail can act as a decorative element that favorably emphasizes the style of the room.
There are several methods for attaching skirting boards and they depend on various factors, including the material of the element itself, the quality of the walls and floor. Read more about how to install floor plinths in our article.
Advantages of plastic skirting boards
- Affordable prices with high performance characteristics. The opportunity to purchase products in almost any store that sells construction or finishing materials;
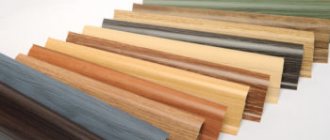
- Product sizes and many colors allow you to choose a plinth to suit any interior;
- Easy to install, makes it possible to install it yourself;
- No additional processing required;
- A plastic skirting board can be used to frame round-shaped walls without cutting it into separate segments, and it also fits better on uneven walls;
- Can be installed in any room, including those with high humidity;
- Long service life;
- They do not require complex maintenance during operation.
Cable laying in the baseboard
Also, a plastic baseboard for the floor can be used as a cable channel.
Features of installing skirting boards on different types of floor coverings
The technology for installing floor skirting boards, how to fasten them - video below, may differ depending on the floor material. Below are the features of installing floor plinths on the most popular types of coverings.
How to attach plinth to laminate
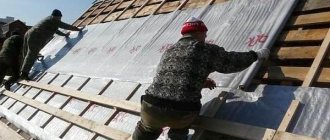
Laminate tends to contract and expand due to temperature changes. This flooring is floating, to avoid deformation, laminate should not be placed close to the wall. To frame such a floor, predominantly plastic or MDF planks are used, and the mounting can only be wall-mounted. If it is necessary to install the plinth to a soft base, for example, drywall, then you should use metal screws to make the fastening as reliable as possible.
You can install skirting boards on laminate using a hidden method
More information about installing floor plinths - video:
For additional heat and sound insulation of the floor, special strips of thermal insulation can be glued to the baseboards. The floor method is often chosen as a method of attaching skirting boards to a wooden base. When fastening with screws or nails, it is better not to press the plank too tightly against the wall so as not to interfere with the free expansion of the floor.
Tile
Tile floors are usually used in rooms with high humidity, which determines the choice of framing. Plastic, ceramic and metal products are ideal for tiles.
The photo shows the installation of ceramic plinths
When fastening with self-tapping screws, holes in the wall must be drilled very carefully so as not to damage the coating. Skirting boards should adhere to the tiles as tightly as possible, so before installing them you should make sure that the floor will not deform over time (the mortar or tile adhesive must dry completely). Ceramic products must be fixed using the same adhesive as the tiles.
How to attach a plinth to the floor yourself
If you are going to install a plastic baseboard with your own hands, you must first remove from the room all objects that may interfere with work or move them to the center of the room, and also remove all debris along the walls. The walls must be prepared, it is necessary to remove unnecessary irregularities and clean them from dust.
You should start working from the far corner of the room and gradually approach the exit. Installation of plastic skirting boards is possible in any room where it is needed. It is important to ensure a tight fit to the wall and floor. Which fasteners to choose for the panels depends on the material of the walls and floor covering.
Towards a concrete wall
When the walls are built of concrete or brick, the installation of plastic skirting boards is carried out using liquid nails or dowel nails.
To drywall
When the walls are pre-finished with plasterboard, this option uses screws with dowels (butterfly) for plasterboard. If a metal profile is laid along the floor, you can use metal screws, and installation can also be done using liquid nails.
To the floor
The plinth is attached directly to the floor quite rarely: this is done if it is necessary to close a large gap between the floor covering and the wall or when the structure of the wall does not allow the plinth to be securely fastened to it. In this case, the mounting methods are the same as on the walls, but there is a nuance. The plinth itself must be turned with the wide side towards the floor, and the narrow side towards the wall, so that the height will be less than the width, or choose products with a wide base.
Attaching plinth to concrete wall
Installation of wooden skirting boards
Wooden planks are used as a complement to parquet and plank floors, less often for laminate. The choice of type of fastening of such a frame will depend on whether it is veneered wood or solid wood.
It is better not to plant wood with glue
Fastening solid baseboards
A feature of such products is the property of wood to constantly contract and expand, so the only possible installation method is to fasten it with screws (plinths made of soft wood, for example, pine, can be nailed).
How to nail a plinth correctly
To prevent the wood from cracking, before screwing in the screws, you need to drill holes for them in the plank, and along them in the wall. The distances between the screws should be 800-1200 mm, and the holes should be at a height of 15-20 mm from the floor.
Dowels must be driven into the resulting holes.
During installation, the heads of the screws must be recessed into the surface of the profile, and after installation they must be masked using putty or a matching wax pencil.
Disguising self-tapping screws
Fastening veneered plinth
The structure of the wood in such products does not allow them to expand and contract freely, so installation is possible not only with self-tapping screws, but also with glue or special clips.
Gluing is a simple installation method. Most often, liquid nails are used for fastening. But this installation has one significant drawback - difficult dismantling, which can damage the planks.
Rules for installing wooden skirting boards
As an alternative, you can install it on clips, which are fastened to the wall with self-tapping screws. Directly installing the baseboard is very simple, and if necessary, the planks can be easily removed and put back if you need to change the floor covering. But such an installation also requires careful alignment of the walls.
General rules
Installation of the plinth is one of the final stages of finishing; it is carried out after the walls and floor are finished. The baseboard must match the design of the room. We must strive to minimize the number of joints during installation; work should begin from the far corner of the longest wall of the room. All gaps between the baseboard, wall and floor must be sealed to avoid dust accumulation.
When installing plastic skirting boards, it is necessary to take into account the depth of the grooves in the connecting elements in order to accurately determine the size of the planks. The attachment points must be positioned in such a way as to ensure a tight fit and reliable fastening to the wall, this depends on the condition of the wall and the rigidity of the plinth strips. Fastening methods are chosen depending on the design of the baseboards themselves and installation methods.
conclusions
Plastic plinth has a number of advantages:
- Available in unlimited colors.
- During operation it does not require special care.
- Installation is easy even for a beginner.
- They don't rot.
- The material is not afraid of water, moisture and ultraviolet radiation.
- Service life more than 100 years.
- No additional preparation is required before installation.
- Flexibility and lightness allow for high-quality installation.
The plinth performs three main functions:
- Protective. Thanks to this solution, the walls are protected from moisture during cleaning.
- Decorative. The floor surface becomes decorated. In many cases more expressive. Emphases in this case are placed as desired. The leading elements can be the floor, the wall, or the baseboard itself, if it is a contrasting color.
- Leveling. Hides all defects and irregularities that formed during the repair process.
By attaching the ceiling and floor plinths in the living room, you can emphasize the completion of the repair work. If you want the installation to be carried out by a specialist, then in the online service you can easily find a large number of organizations that will help you in this matter. On the main page, the company's contacts will be at your service.
Did you manage to solve your problem using the recommendations from the article?
Yes!
46.72%
No. More answers required. I'll ask in the comments now.
37.6%
Partially. There are still questions. I'll write in the comments now.
15.68%
Voted: 625
Installation methods
Fastening with dowels
A reliable way to secure skirting boards. Makes it possible to install plinths, even on uneven surfaces, without visible gaps.
Dowel as fastener
The method is excellent if installation is carried out on a brick or concrete wall. For fastening, dowels and nails with a hidden side are required. The entire dowel must be completely immersed in the wall, otherwise there will be a gap.
Before installation, an internal corner is attached to the profile and placed against the adjacent wall. If the wall has unevenness, you need to add fastening points, then you need to drill holes in the baseboard according to the diameter of the screws. After this, the places for the dowels are marked through the holes and the strip is removed.
Using a hammer drill and a pobedite-tipped drill, make a hole in the wall the size of the dowel. The dowel must be driven completely into the wall with a hammer, without much effort. The plank is put back and the screw is screwed into the dowel through the holes. The same is repeated with subsequent plinth panels, joining them with connecting elements.
The design of the plinth should allow you to hide the attachment points, otherwise the appearance will be unaesthetic. If the design does not provide an external decorative strip, which usually covers the cable channel, the screws should be hidden with decorative plugs or special mastic.
Installation with liquid nails
You can quickly fix the plastic skirting board using special mounting adhesive. This method is suitable if the wall surface is well leveled and prepared for gluing.
Usually a plinth is used for installation, which does not provide for cable laying. The reverse side should be flat for a larger gluing area.
First, markings are made on the wall where the installation will be carried out, then cut to the required size. The glue must be applied in a continuous, preferably a sinuous line to the plank to be glued, so that after pressing it to the wall it does not squeeze out. If the baseboard is narrow, apply the glue in dots every five to seven centimeters. After this, you need to immediately press the plank evenly against the wall without leaving any gaps, for the time specified in the instructions for using the glue. On average it is ten to fifteen minutes.
Do the same with corner joints and couplings. The possibilities of dismantling with such a connection without damaging the surface are very small, so the plinth is fixed only once.
Fastening with clips
Installing plastic skirting boards on clips allows you to completely hide the attachment points and, if necessary, easily dismantle the product. You can only work with flat surfaces. The design of the bar itself must be designed for fastening in this way.
First, make markings for the clips on one line, then they are secured with dowels or screws, after which the plinth strip is placed on the clips. In places where elements are joined, additional clips are installed for a strong connection. If you install a plastic skirting board yourself in this way, you need to know that precise markings for fastening the clips are important.
By drilling through the baseboard
This method is necessary when there is no cavity inside the baseboard. You can drill it with a drill or using a screwdriver. In this case, the part can be secured with screws or dowel-nails. The holes are made according to the diameter of the fastening material and flared under the cap; for this you can use a drill of a larger diameter, and you can also nail the plastic plinth to the floor with nails, but for this you need to drill it or pierce it with an awl and flare the hole under the cap.
To hide the joints, the caps of the fastening element are covered with decorative plugs or putty tinted in color.
MDF skirting boards
Everyone is probably familiar with MDF boards, used as a facing material and widely used in furniture production. They are produced in a wide range of thicknesses and shapes, most often decorated with a special polymer film with a pattern, usually imitating various wood textures. MDF skirting boards are their closest “relatives”.
What is MDF? No matter how hard they try to freely decipher this abbreviation! Some argue that this is a designation for “fine fraction” or “modified fiberboard.” Interestingly, both options are quite close to the truth.
Indeed, MDF is a step forward compared to the usual fiberboard. And in the production of this material, wood fibers are ground to very small sizes. But still, in fact, this is the Russified English abbreviation MDF: “Medium Density Fiberboard”, literally translated - “medium density fiberboard”.
MDF boards are made from crushed wood fibers, which, when heated and pressed, release natural glue - lignin, which is an excellent binder for the created mass. Manufacturers position MDF as an environmentally friendly material, but in fact, to bind fibers, some companies sometimes use formaldehyde resins, which are not at all beneficial to human health. This factor must be taken into account when choosing this material for finishing - it is better to give preference to manufacturers with a consistently high reputation.
MDF skirting board production line
MDF skirting boards are made from boards that are not yet decorated with film. The blanks are cut and processed on special milling equipment, where they are given the intended shape and relief pattern. After this, the skirting boards are cleaned of dust, and their front surface is laminated with a self-adhesive polymer film.
Taking into account the manufacturing technology, MDF skirting boards most often have the form of a profiled smooth board, which is sometimes also decorated with simple reliefs, without any special frills.
MDF plinth with an insert, which is designed to mask the points of its attachment to the wall.
Variants are produced with an insert-bar along the entire length of the plinth. This detail allows you to simplify installation as much as possible - it will perfectly hide all the heads of the fasteners after installing the plinth on the wall.
In addition to lamination, natural veneer and painting are used to decorate the front side of MDF skirting boards.
Prices for MDF plinths
their MDF plinth
Veneered MDF plinth - Italian walnut look
Veneered plinths, instead of PVC film, are covered with veneer made from natural wood of expensive species. Therefore, in appearance they are almost impossible to distinguish from real wooden ones.
Painted MDF plinth
Skirting boards can also be sold in painted form. For such decoration, special paints are used, which are designed to reliably protect the material from moisture, as well as from the effects of household chemicals. If you want to give the products individuality, that is, paint them yourself, you can purchase a baseboard primed with a neutral white or light gray color, prepared for painting.
MDF skirting boards, like products made from other materials, have their own advantages and disadvantages, which you need to know about before purchasing and installing them.
- The MDF plinth has an easy-to-install design, so even a novice craftsman who is inexperienced in construction can handle its installation.
- The products are very well fixed tightly to a flat wall surface.
- The aesthetic appearance of plinths made from this material brings neatness and sometimes exclusivity to the interior design. Especially if the products are made to order or painted independently.
- The fairly high moisture resistance of MDF allows the material to be used in rooms with slightly higher humidity levels. But direct ingress of water should still be excluded.
- The products have a certain flexibility, so they can be attached even to a slightly curved surface.
The disadvantages of products made from this material include instability to fracture, that is, they can easily be broken by hand. Therefore, during installation you should act carefully, without applying excessive force.
Although buyers are assured that MDF is an absolutely pure, harmless material, this statement should be treated with a certain degree of caution. In order to save money and speed up the manufacturing process of boards, some manufacturers (90% of the world production of this material comes from China) additionally use phenol-formaldehyde resins as a binder. And products may have a negative ability to emit toxic free phenol.
How to lay a cable under the baseboard
If it is necessary to lay the cable in the baseboard, it is better to do this during installation. When a cable channel is provided in the design, you need to remove the decorative strip and place the wires in the channel. Then tuck the bar on one side and the other, and using light pressure, return it to its seat.
If the cable channel is not provided for by the design, but there is a free cavity, then the wires are tucked under the baseboard at the time of fastening.
It should be noted that the cable must be taken from the input to the place where electrical appliances are connected. There are cases when the connecting elements do not have holes for the wire; you can make them yourself, using a knife or drill. The main thing during installation is not to damage the communications that are laid in the baseboard.
At the final stage of finishing work, along with the installation of baseboards, plastic thresholds for interior doors are also installed. The difference in installation is that they are mounted on a horizontal surface and have a largely decorative function.
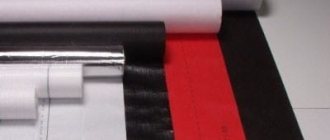
Installation of PVC fillets and its features
Ease of installation, low price, practicality and a huge range of models make PVC baguettes incredibly popular and in demand today.
It is also worth noting several more design advantages of such products:
- presence of a removable panel;
- cavity for placing wiring;
- increased flexibility;
- ease of cutting.
You should know: thanks to the ability to imitate other materials, PVC baguettes are suitable for any type of floor.
There are three options for how to properly nail a plastic baseboard. We will consider them.
Fixation with clips
This method is especially beneficial if there are several cavities for wires. Also, when using it, there are no visible marks of attachment.
No traces of attachment
Here are detailed instructions for carrying out this method of installation work:
- we adjust the fillets to the required dimensions;
- We apply the inner part to the wall and mark the places for the dowels;
- drill holes with a hammer drill;
- drive in plastic dowels;
- We apply the inner part again and this time firmly fix it with self-tapping screws;
- lay all the necessary cables;
- we install the external part of the decor.
Tip: Make sure the end caps and transition corners are the same color. For cutting, it is best to use a miter box and a hacksaw. This will help make everything smooth and neat.
Especially if you do the work yourself
This will help make everything smooth and neat. Especially if you do the work yourself
For cutting, it is best to use a miter box and a hacksaw. This will help make everything smooth and neat. Especially if you do the work yourself.
The front panel can later be removed for cleaning or work on the built-in wiring.
In the case where the product does not have cavities for wires, it may be necessary to purchase clips for fastening separately.
Advice: calculate the feasibility of purchasing additional fastening systems in monetary terms. This is not always beneficial or justified.
Installation with glue
The option using glue is easier to use. In this case, we are not interested in how to nail the baseboards, because we will be gluing them.
No additional electrical tools are required here. But you won’t be able to remove the panel either. The frieze is glued once and until new repairs.
- we cut the baguettes to the required length, creating corners if insert corners are not used;
- apply glue to the inside of the panel and the joint on the wall;
- press and hold until hardened;
- We remove the excess liquid released from under the edges with a rag prepared in advance.
Try not to stain the floor with glue during installation.
You can purchase specialized adhesive for ceiling or floor plinths at any hardware store.
Tip: for gluing the frieze, it is recommended to use glue brands such as “Dragon”, “Titan”, “Moment”.
Installation using self-tapping screws and finishing nails
The cheapest way to nail plastic skirting boards is to use self-tapping screws or finishing nails. This option will be quite reliable and practical, but not very neat. The attachment points will be visible even after they are masked.
Now, in order, how to do it yourself:
Using a drill with a diameter of a couple of millimeters, we make holes in the fillets at the same distance of 30-60 centimeters;
Advice: be sure to maintain the same spacing between the fasteners, so that even if they are noticeable, they are at least located symmetrically.
- countersink the holes with a sharpened knife so that the heads of the screws can sink into the surface of the frieze;
- We apply the panel to the installation site and, through the holes made, mark the places for subsequent drilling;
- We drill holes with a hammer drill;
- we hammer in plastic dowels if using self-tapping screws or wooden dowels for finishing nails;
- install the fillet, tightly fixing it with fasteners.
You should take into account the fragility of the material and, at the moment of final fixation, screw in self-tapping screws or drive in nails with special care so as not to press through the surface.
Screwing in a self-tapping screw with a screwdriver
Tip: screw in the self-tapping screw in the area of the panel adjacent to the wall.
Hats are usually masked with special corks or wax, the same color as the baguette.
Required Tools
To work you will need:
- A screwdriver with a set of bits or a screwdriver, for fastening using screws or dowels;
- A tape measure and a pencil are necessary for marking the walls, determining the required dimensions in individual installation areas, as well as calculating the amount of material required. For ease of marking on a concrete or brick wall, you can use a marker;
- A hacksaw for metal, for cutting plastic, and you can also cut off a plastic baseboard using a grinder or a knife, it all depends on the rigidity of the product. In general, the master decides how to cut plastic skirting boards himself, the main thing is that the chosen tool can do the job and not spoil the finishing material;
- Hammer, for fastening with dowels and regular nails;
- Drill with a hammer drill and a set of necessary drills, for holes when fastening with dowels in concrete and brick walls;
- You may also need: an awl, for making holes in plastic and a miter box, for cutting planks at an angle, if attached with glue, a gun for liquid nails and a rubber spatula.
Wallpaper
0 votes
+
Vote for!
—
Vote against!
In order to obtain aesthetically attractive walls after wallpapering, you need to pay special attention to the baseboard. In addition, the joints between the wallpaper must also be properly connected to each other. Otherwise, air bubbles may appear under the wallpaper. We will learn further about how to technologically correctly glue wallpaper and level the baseboard.
Table of contents:
- How to level a wall under a plinth: features of installing a floor plinth
- Align ceiling wallpaper: align walls under wallpaper
- How to align wallpaper joints: features of the work
- How to glue skirting boards to wallpaper with your own hands
How to level a wall under a plinth: features of installing a floor plinth
Before you start wallpapering, you need to level the walls. Only in this case will it be possible to obtain an aesthetically attractive coating. The final stage of finishing the room is the installation of plinths - both ceiling and floor. It is the plinth that gives the room nobility, and with its help it is possible to get rid of minor imperfections. Most often, wooden or plastic products are used as floor plinths.
There are several options for fixing the plinth to the floor:
- nails or screws;
- special fasteners;
- using glue or liquid nails.
Depending on the type of wall finishing and its preparation for installation of the plinth, one or another method of fastening is selected.
A wooden floor plinth requires a perfectly flat wall for its installation. Therefore, such designs are used less and less. The most popular options for skirting boards are plastic products. They are able to imitate surfaces of various compositions, including wood. Skirting boards made from MDF are unstable to moisture and quickly deteriorate. For a floor on which tiles or natural stone are installed, a marble type of plinth is suitable.
At the same time, plastic skirting boards are particularly popular, as they are suitable for wooden, laminate, and carpet floors.
Before purchasing a plinth, you need to determine the amount of material to work with. Most often, the length of the floor plinth is 250 cm. To calculate the amount of materials, use the formula according to which the perimeter is divided by the length of the plinth, thus obtaining the total number of plinth strips.
If you receive a whole number, we recommend purchasing one more skirting board. This is necessary in order to compensate for the joints between the baseboards. Pay special attention to the color of the baseboard. It should fit harmoniously into the overall interior of the room. When choosing the shade of the baseboard, consider factors such as the color of the walls and floor, color sources. We recommend taking a small portion of wallpaper and finishing material for the floor with you to the store; applying the baseboard to these sections, you will be able to choose the ideal option.
Another advantage of plastic skirting boards is that there is no need for precise sawing. This version of the plinth has additional fittings that hide all the joints. When calculating the fittings, determine in advance the number of right and left plugs for the baseboard. Docking elements also connect two slats to each other. To fix the corner fragments, corner pads are used, ensuring equal pressing of the corner to the wall.
Before starting work, make sure the wall is level. A plinth installed on an uneven wall will look aesthetically unattractive. Prepare your work area and sort all the fittings according to their intended purpose. It is advisable to use a special box for it.
Before installation work begins, skirting strips are cut in relation to the size of the room. Initially, those slats are installed that will not be cut. Try to place the joint elements behind furniture or other interior items. Do not overdo it with joining elements, as they are quite expensive and reduce the aesthetic appeal of the plinth. If the length of the wall is less than 250 cm, then use a tape measure to measure the length of the wall and add 1 cm to this value. Use a pencil to mark the baseboard and cut off the required element.
Cutting a plastic skirting board is quite simple, since it is closed with plastic nozzles. All ends are cut at right angles. However, if there is a curved end of the rail, skew of the internal corners is possible. Therefore, do this work slowly and with extreme care.
For a more accurate and simpler cutting of the baseboard, use a hacksaw. Using a miter box to cut the material allows you to get perfectly right angles. To remove the formed burrs from the baseboard, use a regular knife.
Next, you need to drill holes for installing the baseboard. Precise drilling ensures the quality of installation of the plinth. Take your time with this process, carefully measure and mark the drilling locations.
To perform this process, you will need a conductor and a hammer drill with a drill-type attachment. If the walls are particularly flat, then it is enough to fix the plinth at intervals of 500 mm. otherwise, the interval between fasteners must be reduced. After drilling the holes, remove dirt from the floor with a broom or vacuum cleaner and begin fixing the baseboard to the wall.
Align ceiling wallpaper: align walls under wallpaper
The type of wallpaper that will be pasted on the wall determines the nature of the alignment of the walls. The first method is easier; it involves visually aligning the walls. That is, after the work, the walls will look smooth. At the same time, the maximum horizontal differences are 2 mm for every 200 cm.
The second method involves the complete absence of differences. Right angles must be maintained in full. Also, the walls must be absolutely vertical.
Getting started on wall leveling begins by installing a cord or level on the wall, checking that it is vertical and level. To check the geometric parameters of a room, it is enough to stretch the diagonals across its area. The ideal option is complete coincidence of the diagonals. If the diagonals deviate by 1 cm, it is enough to level the walls using a thin layer of putty.
To work on leveling walls, you need to purchase sandless gypsum putty. It is sold both in dry form and ready to use. The first option must be diluted with water. In this matter, the main thing is not to overdo it with water, since the composition will not stay on the wall and will lose strength. In order to find out the proportions for diluting the mixture, read the instructions first.
During the work you will need two spatulas. Using the first spatula, the putty is taken from the container and applied to the second spatula. The larger spatula, which is the second one, is intended for leveling the wall with putty.
The starting putty must be applied in several layers. Before applying the second coat, be sure to wait until the first one has dried. To prevent cracking of the putty, install a paint net between layers. In order to level the wall in all directions, apply the putty in mutually perpendicular movements.
Before starting work, apply an antifungal solution and a deep penetration primer to the surface. With their help, it is possible to improve adhesion between the putty and the wall. Please note that the thickness of the putty layer that is applied to the wall depends on the angle of inclination of the spatula.
Next, you should apply finishing putty to the wall, leveling it with fine-grained sandpaper. Applying finishing putty before wallpapering is not necessary. However, some types of wallpaper require a perfectly flat base. In this case, the finishing putty is applied to the wall.
There are wallpapers that even out uneven walls. In this case, capital leveling will not be required.
How to align wallpaper joints: features of the work
Before you read the tips for aligning joints on wallpaper, we suggest studying the reasons that cause them to appear. It is not difficult to level out uneven wallpaper, however, it is better to prevent their occurrence.
First of all, joints in wallpaper appear when two panels diverge. All paper wallpaper or wallpaper with a textile backing swells when exposed to moisture. Then, gradually drying out, they begin to diverge. Therefore, when gluing wallpaper, leave 1-2 mm of margin to compensate for the drying of the wallpaper. If the sheets get too wet during the process, wait a little before gluing them.
The presence of a large amount of glue on the wallpaper also leads to further separation of the seams. Otherwise, as the glue dries, it first sets, and then the fabric shrinks.
Some wallpapers have dark and uneven joints after purchase. Therefore, before purchasing wallpaper, carefully inspect all rolls. It is also recommended to buy wallpaper from the same batch so that there are no visible differences in color. In this case, the joints also become visible.
If the wallpaper can be painted after gluing it to the wall, then fixing the joints will not be difficult. After painting, the wall will acquire the same color and the joints will be invisible. Also, a special sealant is used to seal the seams between the wallpaper. Next, it is tinted in relation to the color of the wall.
Using putty to hide seams between wallpaper is unacceptable, as after a while it will begin to crack and crumble. In some cases, it is necessary to re-glue the wallpaper joints. To do this, you will need a brush, a spray bottle, water, a sponge, a brush, a rubber roller and glue. Initially, wet the edges of the joint with water, using a brush. Press the sheets together, then apply glue to the surface of the wallpaper and glue the two sheets to each other as close as possible. Next, use a rubber roller to fix the wallpaper in the desired position, remove the air and wait for it to dry. You should not over-wet paper wallpaper, as it may tear or become deformed.
If the joints between the wallpaper are too large, then you will need to resort to more radical measures. To do this, you will need a stationery knife, wallpaper scraps, tinting paste, sandpaper and edging. Using sandpaper, wipe away any crumbs from the wallpaper trim. Combine this powder with glue. This paste is applied to the wall surface; if there are discrepancies in color, apply tinting paste in accordance with the tone of the wallpaper.
If it was not possible to fix the joints in the wallpaper using the above methods, then work with furniture and interior items. With their help, it is possible to visually hide unattractive joints.
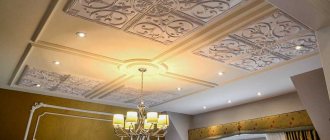
How to glue skirting boards to wallpaper with your own hands
Most often, polystyrene options are used as ceiling plinths. Paper skirting boards are becoming less popular due to their impracticality. After purchasing a ceiling plinth, you need to choose the technology for its installation.
Installing skirting board wallpaper on the ceiling after gluing the wallpaper. This method of installing a plinth is less labor-intensive and involves installing the plinth on already pasted wallpaper. To fix the plinth to the wall, use special glue or putty. This method is highly popular due to the ease of its implementation and high-quality results.
Some professionals install baseboards before wallpapering. In this case, it is not possible to level the wallpaper walls. Aligning wallpaper under the baseboard is quite difficult and it is not always possible to achieve perfect alignment.
With the help of a plinth it is possible to create the impression of absolutely smooth, geometrically correct walls. Wallpaper adhesive for ceiling plinths comes in several types:
- glue based on polymers;
- glue installation moment;
- putty, for mixing which PVA glue is used.
While working, prepare tools in the form of:
- assembly knife;
- miter box;
- hacksaws;
- sandpaper;
- hermetic composition;
- putties;
- brushes;
- rulers.
In order to determine the number of ceiling plinths, it is enough to find out the width and length of the ceiling, sum them up and multiply by two. Next, the resulting value is divided by the length of one baseboard. To the result obtained, add another plinth to compensate for joints and certain installation moments.
On a piece of paper, make a ceiling design, observing a certain scale. First place whole skirting boards according to the diagram, and then determine where the trim will be located. At the same time, try to arrange them behind furniture or other interior items.
Choose the side to glue the plinth, try to place the wide side of the plinth in the place where there are a large number of flaws. Cut the baseboard according to specific angles. For these purposes, you will need a miter box and a hacksaw. Be careful when determining the angle of the baseboard. Apply glue to the baseboard on both sides, do not overdo it. If there is a small amount of excess glue, remove it with a dry, clean rag. Hold the baseboard on the wall for a few minutes to allow the glue to set. Seal parts are installed using the same principle. Next, using the sealant, apply it by hand to the joints between the baseboard and the wall. After the sealant has dried, paint the baseboard the desired color.
Calculation of the required material
To make a correct calculation, it is necessary to measure the entire perimeter of the room, take into account the adjacent ledges and niches, and divide the size by the length of one plinth element, usually two and a half meters.
Getting ready for marking
Connecting elements must be taken according to the number of entire plinth panels. The required amount is rounded up to the nearest whole number.
The corners for the plinth are set according to the number of all corners in the room, taking into account internal and external ones. The number of plugs depends on how many times the baseboard will break: two plugs are needed per door. Note that they are right and left.
The entire quantity is selected with a small margin based on the fact that some elements may be damaged during operation. The amount of fastening material is taken from the calculation of the length of the plinth panels and the number of connecting elements, as well as the installation method.
Please note the shades of individual elements; the same color may be different in different batches; all decorative elements must match in color.
The cost of installing plastic skirting depends on:
- Mounting method;
- Skirting models;
- Conditions of the surface on which installation will be carried out;
- Room area.
After installation is complete
Installation prices may vary in each region. In Moscow, the average cost is about 150 rubles per linear meter. But you can save money on these works: the ease of installation allows you to carry it out yourself without special skills; it is enough to have the necessary tools and be able to use them correctly.
How to properly attach a floor plinth without a hammer drill
When completing an apartment renovation or finishing a built individual house, we must correctly install floor skirting boards. They are usually divided into three types:
- made of wood,
- from MDF,
- made of polyvinyl chloride (PVC), so-called plastic.
We fasten the baseboard without a puncher In this article we will look at fastening a plastic baseboard that can imitate any building materials - wood, metal, plaster, or remain itself. A positive aspect of their design is that they have special cable and wire channels that allow you to hide the web of wires inside them.
- they are easy to install,
- they are highly flexible,
- the design has a removable panel,
- there is a wide range of models and colors,
- They have a low price compared to other types.
All these characteristics make plastic baguettes extremely popular and in demand among different segments of the population.
Varieties
Modern skirting boards are made from different building materials. But the largest group consists of products made from wood, as well as its derivatives.
Today, many different skirting boards are produced, each of which has its own positive and negative sides Source masterskayapola.ru
Wood
The classic plank is made of natural wood, is environmentally friendly and high cost. Under the influence of temperature fluctuations and moisture, it loses its shape, rots, and often turns into a breeding ground for mold. The main advantage of such a plinth is its natural attractiveness; it well emphasizes the beauty of expensive parquet.
Veneered
Made from coniferous wood. Thin layers of the latter are glued together, resulting in a material that is quite strong and resistant to external influences. This type of plinth is not considered environmentally friendly because it contains a lot of glue. When purchasing such products, it is important to pay attention to the presence of a quality certificate so as not to purchase a counterfeit containing formaldehyde, which is dangerous to the human body.
From MDF
The plank is made of particle board, covered with decorative paper and natural veneer. It is characterized by sufficient strength, easy to use, and easy to match to a specific interior. Among the disadvantages of such a plinth, it is worth noting poor resistance to moisture, environmental pollution, and difficulty of installation due to its heavy weight. Advantages: wide range of sizes, affordable price.
Three main ways to properly attach plastic skirting boards
Clip mounting
By choosing such fasteners, we get a plinth on which no traces of fastening are visible. It is also suitable if it has channels for cables and wires.
Sequence of installation work using clips:
- We adjust the material to size;
- Then the inner fillet strip must be attached to the wall to mark the places where the dowels will be attached;
- We remove the disassembled fillet and drill holes for fastening with a hammer drill;
- We hammer in the dowels;
- After this, we fix the inner strip using self-tapping screws;
- We lay all wires and cables through internal and hidden channels;
- We complete the work by installing the external front part, which determines the aesthetic appearance of the entire floor structure.
If necessary, it can always be removed for a good wash or for any actions with the wiring. During installation, you need to cut the material with a hacksaw using a miter box. The quality will be guaranteed. If the product does not have cable channels, mounting clips must be purchased separately.
Main functions
The main task of the plinth is to hide the gaps between the floor and the wall along the entire perimeter of the room. The presence of such cracks allows you to get rid of the negative effects of swelling and shrinkage of the building material (boards, wooden panels) from which the floor is made. As a result, no bulges form at all on the floor surface, even with a significant change in humidity. When purchasing skirting board products, it is important to consider that the thickness of the strip should be sufficient to cover expansion joints.
Additionally, the plinth performs the following functions:
- Protects walls from dirt, mechanical damage during cleaning and mopping the floor.
- Allows for the distribution of cables in the house due to the presence of a hidden recess on the reverse side.
- Helps to aesthetically decorate a room: it gives the interior an appropriate character and ensures the creation of harmony.
Today it is difficult to imagine any renovated room without a plinth. In order to properly select such an element for the interior, you should find out in more detail what types of planks exist.
Installation of special skirting boards allows for discreet distribution of cables in the house Source td-neko.ru
Additional components
Additional components for plastic skirting boards include plugs, joints, as well as internal and external corners. Each element is selected depending on the color of the baseboard.
The areas of application of the components are:
- Corners serve to give the structure integrity at the joints in the corners of the room.
- To combine two adjacent pieces of plinth along one wall, interplinth joints are used. They look like a small piece of plastic with grooves on both sides.
- The edges of the baseboards are covered with plugs so that the cut area along the edges and at doorways is not visible. They make two types of plugs - right and left, which are often included with the baseboards.
Fasteners for fixing the plinth to the wall are also additional materials.
Should you choose to dismantle it yourself or entrust this task to specialists?
Are you still thinking about dismantling it yourself, because your neighbor Petrovich’s job turned out pretty well (if you don’t take into account the fact that he had to plaster the walls again and buy new boards for the floor)? Well, then you really should try to do everything yourself, because, as you know, we only learn from our mistakes.
If you value time and effort, then the best option would be to use the services of professional specialists. They will efficiently and quickly dismantle your baseboards, repair or replace the floor and return everything to its place in the best possible way! Another pleasant bonus when using the services of specialists is the presence of a guarantee. As a rule, many companies provide guarantees for their services, which only speaks of their professionalism and complete confidence in their strengths and abilities.