What is liquid glass
Liquid glass is a silicate-based adhesive. Recently, you can often find that treating a body with polish is called liquid glass. The remedies actually vary.
When the material dries, a layer is created that does not allow liquids and air to pass through. In liquid form, it penetrates well into the surface to close all pores.
When the material dries, a layer is created that does not allow liquids and air to pass through.
Preparation of the solution
The procedure for producing such glass involves fusing a mixture of quartz sand with potassium at temperatures from 1300 to 1400 °C. After this, the solution is cooled and liquefied with steam under pressure in an autoclave.
This substance begins to harden upon contact with oxygen. The very essence lies in the fact that the water begins to evaporate, the concentration of free colloidal silica increases. As a result, we obtain its compaction.
In fact, such a substance hardens for a very long time. This is due to the fact that a film forms on its surface, which does not allow air to penetrate inside and allow the entire mass to dry.
Catalysts are used for quick drying. They help the glass harden faster.
Soda glass is the most popular. It is cheaper than potassium, although the latter is more valuable in its properties.
Features, characteristics and composition of liquid glass
Sodium or potassium silicate is introduced into the base; microcrystals, which are responsible for closing the structure of the material, and quartz sand are also added. Coloring is not used, because coloring leads to deterioration of properties, and the seam will not be beautiful. A good waterproofing result is obtained due to the technical characteristics of the product:
- Moisture-repellent property;
- Antiseptic protection;
- Antistatic effect;
- High level of curing;
- Protective property against the harmful effects of alkaline acid substances;
- Fire resistance.
Coloring is not used, because coloring leads to deterioration of properties, and the seam will not be beautiful.
How to paint polystyrene foam - is it possible and with what paint, recommendations
Why paint foam?
Foam-based products are used for both interior and exterior finishing and insulation work. It is used for heat and sound insulation of interior floors, partitions and walls, and in addition, many parts for decorating the interior of premises are produced from it. Often in the process of finishing work there is a need to paint polystyrene foam for one reason or another.
The first thing you need to think about is why paint polystyrene foam at all? This operation is performed in two cases:
- Firstly, to create the effect of visual completeness and a holistic, harmonious interior, which consists of a combination of finishing elements, both among themselves and with the style of the room. It is unlikely that there will be connoisseurs of an interior in which white material with a bubble texture would be present as decor. Most, as a last resort, will prefer another type of finishing material that would fit more harmoniously into the decoration, please the eye and be combined with the surrounding environment. But polystyrene foam has too significant advantages over other finishing materials, especially in terms of price and ease of installation, that, as a rule, it is more rational to cover it with a paint coating than to look for a replacement in the form of another material.
- Secondly, a significant reason for painting is undoubtedly the need to protect it from the destructive effects of an aggressive external environment. For example, from exposure to bad weather in the form of precipitation, temperature changes, stormy winds and, ultimately, banal physical deformation of the material. All these factors seriously reduce the lifespan of foam products. As a rule, an unprotected foam coating very quickly, literally in one season, loses its original appearance.
Thus, applying paint and varnish to polystyrene material can be considered a logical continuation of finishing and decoration work.
What to paint
Construction foam is deservedly considered one of the most versatile materials. It is used for insulation, cladding and as a material for the manufacture of most decorative elements.
At the same time, due to its low cost, products made from it have an affordable price:
- Ceiling tiles based on polystyrene foam are an excellent choice as a finishing material for the ceiling, providing an aesthetic appearance and not requiring major investments. It is not afraid of water, so it can be installed in rooms with high humidity, such as a kitchen or bathroom, but unprotected foam itself is very fragile and can be easily damaged even by accident with bare hands. In addition, under the influence of direct sunlight, such tiles will certainly fade and acquire a yellowish tint.
- Also, foam panels are one of the most popular and widespread options for organizing thermal insulation of the walls of residential buildings. As a rule, they cover the outer parts of the house, its facade, which, unlike the premises inside the building, is constantly exposed to the negative influence of nature in the form of frost, ultraviolet radiation, and precipitation. Therefore, such a coating, which has a relatively fragile structure, requires not only careful handling during installation, but protection in the form of a paint coating for the period of operation.
- Today, very often for interior decoration, skirting boards are used for the ceiling, made on the basis of foam plastic. When purchasing, the color of such a decorative element is usually white. But often it is not the most suitable for a particular interior, and almost always the uncoated material is not very practical. Therefore, in some cases there is a need to change its shade to something other than white. In addition, sometimes the surface of such a plinth has defects, which can be especially visible after installation, when the light in the room is on. In this case, painting is the only alternative to redoing all the finishing work and replacing the baseboard. It will not only mask imperfections, but also add strength to decorative elements. One of the features of the plinth that is conducive to painting it is that during its installation, joints are formed between its different parts, which have to be primed with putty, and in order to hide all traces at the final stage, the plinth is covered with paint along the entire perimeter. Sometimes the need for painting arises suddenly, some time after installation, for example, after a roof leak, when stains appear on the white decor that cannot be cleaned. Then either buy and replace decorative elements, or paint everything and forget.
Paint requirements
Despite the huge variety of types of polystyrene-based foam, there is a problem of its compatibility with paints and varnishes. The fact is that this material is susceptible to the negative effects of organic solvents, precisely those that are part of most paints and varnishes. Thus, in order to coat a foam product with paint and give its surface a beautiful structure, without harm to the material itself, you need to know the features of its compatibility with different coloring compositions.
Expanded polystyrene is resistant to most substances; it can be coated with mixtures of bitumen, lime solutions with water, and also painted with compositions that have a water-dispersion base. But compounds included in the class of organic solvents, for example, ethyl acetate, toluene or the well-known acetone, present in many types of paints, cause a change in the properties of this material, leading to its softening, shrinkage and ultimately dissolution.
Therefore, paints and varnishes for polystyrene-based materials must meet the following general requirements:
- the absence in their composition of substances capable of dissolving foam plastics;
- increased adhesion coefficient to penoplex and PSB;
- stability under the influence of destructive atmospheric factors, insolation;
- providing an aesthetic elastic coating.
Painting foam
In most cases, paints based on water emulsion and acrylic suspension are used for painting foam plastic. The choice of one type of paint or another depends on the location of the foam materials: inside or outside the building.
Inside the building
Inside the building, water-based paints and varnishes are almost always used. They are characterized by low cost, about 25-40 rubles per liter, but are unable to withstand moisture and heavy dust, which determined their specific use only for indoor spaces.
When applying such paint to the interior decorative elements of a room, the optimal viscosity of the paint is ensured, allowing you to hide the pores in the material under a uniform layer of coating. Before painting ceiling tiles, moldings, baseboards and rosette decorations, it is recommended to wipe them from cobwebs and dust with a dry cloth.
The joints between elements and technological seams are puttied or sealed with special compounds. To ensure a high-quality, uniform coating with a rich color on the ceiling plinth made of foam plastic, it is recommended to paint it in several layers, without fail starting to apply the next layer only after the previous one has completely dried.
Painting is usually done with a brush and roller. However, in the case of painting decorative elements with a thin and intricate relief, not a brush is used, but a spray gun, which allows you to quickly apply a uniform layer of coloring pigment to the material. To avoid paint getting on the wallpaper, it is best to paint the moldings and foam cornices before installing them.
Outside the building
On the outside, acrylic-based solutions are used, which are highly resistant to the influence of aggressive external environments, but they are much more expensive - from 50 to 50 rubles and are not durable. That is, they need to be updated from time to time.
For the use of paints as a coating for polystyrene foam boards that provide thermal insulation for the external walls of a house, the characteristics of increased elasticity, resistance to precipitation and contrasting temperature changes are very important.
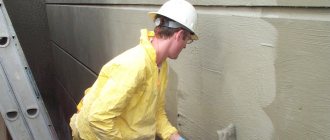
Modern paint and varnish materials provide a wide choice for organizing outdoor work, but, unfortunately, almost all of them contain aggressive components that corrode polystyrene foam products. Therefore, before regular painting, the foam material is coated with an additional protective layer of sodium or potassium silicate solution, called liquid glass in the professional environment.
This composition is first diluted with water or a primer, due to which it acquires increased elasticity. Thorough mixing is required until a homogeneous consistency without lumps is required.
Another protective coating option for polystyrene materials is a thin layer of putty, after drying, which can be painted with any paint containing acid.
Tips/Tricks
- To prevent streaks and drips from appearing on the foam, you should always move the brush in one direction.
- If you are painting the baseboards that have already been installed on a wall decorated with wallpaper, it is recommended to use masking tape to protect them.
- If it is not possible to use paint that does not contain solvents or gasoline to paint polystyrene foam, you can always use a layer of ordinary plaster to protect it. This way, corrosive chemicals will be isolated from the material.
0.00, (ratings: 0)
househill.ru
The main pros and cons of liquid glass
The choice of whether to treat a surface with liquid glass is easier when the positive and negative aspects of the process are known. The following advantages of the material can be noted:
- Creating a film that does not allow moisture to pass through;
- High level of adhesion, penetration into any surface cracks;
- Economical consumption, can be added to cement mortar;
- Reasonable cost;
- Long service life;
- Resistant to a variety of substances.
The presence of a large number of advantages does not exclude the disadvantages:
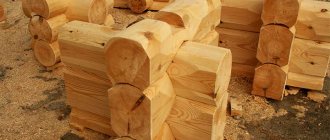
- Incompatible with all materials, can only be applied to concrete and wood;
- The layer is brittle, additional product should be applied on top;
- It is not possible to apply over another finishing material; paints and varnishes do not adhere to it;
- Carrying out the application requires special skills; it is almost impossible for a beginner to do the job with his own hands;
- The product cannot be tinted.
The product dries very quickly, so the work requires a fast pace from the master.
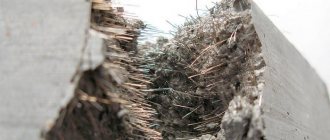
The surface is rarely covered with liquid glass separately; it is usually combined with another waterproofing material, but the product helps to obtain high-quality protection on concrete and wooden bases.
The surface is rarely covered with liquid glass separately; it is usually combined with another waterproofing material.
Foam varnish for painting concrete floors
Due to numerous requests in the comments to my videos, today I will try to make a composition of polystyrene foam and solvents for application to concrete. I would like to see how it will behave, because car owners are interested in cheap varnish to cover the garage against dampness. I’ll start by dissolving polystyrene foam in gasoline. I should also check it in acetone and solvent, but I think that acetone dries too quickly. I pour 92 gasoline into a clean, empty metal can. You will need a little more than half the can of gasoline. I cut a piece of polystyrene foam approximately 1500 mm long and 40 mm thick into strips and lower them one by one into a jar of gasoline. The width of the strip should be chosen according to the size of the can. My goal is to see how the resulting composition will behave on concrete (I don’t need a lot of varnish). The polystyrene foam easily enters the can, melts and compresses into a fairly dense lump at the bottom. Note: in this case, gasoline will bubble and splash out of the can. The resulting composition has the appearance of a gel and is similar to napalm (when ignited, it immediately flares up, burns for a long time, the flame is high). It is not possible to regulate the viscosity of the composition by adding gasoline - it reaches a certain thickness and the process stops there. I leave the jar for a while so that the air bubbles come out and all the pieces of foam dissolve.
Covering the concrete floor
I take out the gel-like mass from the bottom of the jar and transfer it to another container. I clean the area of the concrete slab with a wire brush and blow off dust with a spray gun. I prepared a brush and a spatula for work, which I lightly greased with oil. This way the varnish will not stick. It turned out to be more convenient to work with a spatula. I pour the varnish onto the concrete and with a spatula I begin to apply it to the surface with movements in different directions. After finishing the job, there is practically nothing left on the spatula. When applying the varnish you immediately smell the smell of gasoline. I leave this area for about an hour to dry.
Dissolving polystyrene foam in xylene
I will conduct the second experiment with xylene (one liter costs 110 rubles).
If you cover the entire garage with this composition, then its cost will be 2.5 times more expensive than polystyrene foam varnish dissolved in gasoline. To dissolve in xylene, I chose denser and more expensive fine-grained foam, from which the protection of the computer system unit is made. When xylene is added to the jar, the foam dissolves almost completely, the viscosity of the composition becomes less, and the thick lump disappears. A composition of this viscosity can be applied in a much thinner layer. It looks like xylene is better for making foam varnish. Note: I was also advised to use solvent 647, but I didn’t have it on hand.
I'll try using xylene as a wood varnish. I take a walnut branch peeled from the bark and apply a thin layer of the composition with a brush. It turns out very well, but you need to wait for the varnish to dry. I also apply a layer of the composition onto the concrete with a brush. The layer turns out to be very thin and there are no air bubbles in it. I leave it to dry. The first section did not dry completely in an hour - a film with a very large number of bubbles formed on the surface. Huge bubbles formed on the sides. To the touch it looks like the well-known packaging film with bubbles. However, as an option, this composition can be used after complete drying. The area coated with xylene varnish turned out better. The composition is well absorbed into the surface of the concrete and looks like real varnish. The only negative is the high cost of xylene compared to gasoline. To reduce the cost, you can first dissolve the foam in gasoline, and only then add xylene and achieve the desired viscosity. It will be inexpensive to prepare a composition based on bottled xylene, which is sold in cans and costs less.
Note: the composition dried on wood in 10 minutes and is indistinguishable from real varnish. In the future, for an experiment, I can take a board polished on a machine from a nearby furniture workshop and apply 3-4 layers of xylene varnish to it.
Watch the video
sdelaysam-svoimirukami.ru
Areas of application of liquid glass
There are three main areas of use of liquid glass. The following areas can be identified for use:
- To treat the base to create a barrier from liquids and other environmental influences;
- Used together with a concrete mixture to improve waterproofing properties, the drying process will be shortened;
- For the production of various types of concrete.
It is used together with a concrete mixture to improve waterproofing properties and the drying process will be shortened.
Types of liquid glass
The constituent elements are potassium or sodium silicate. It is impossible to create a rating based on the type of this element that is selected for production and the funds are divided, because they differ in a number of properties:
- The first element has a protective property against alkalis, has a high degree of adhesion, and does not form a glass sheen on the surface;
- The second creates the same protection, but shines.
There is a granular type; water is added to the composition before use.
The constituent elements are potassium or sodium silicate.
Primer for foam plastic - types and application
Recently, cladding the external walls of buildings from foam has become increasingly popular. Such measures make it possible not only to carry out external repairs, but also, more importantly, to increase the heat-saving properties of the structure. In order for the work on insulating external walls to be carried out efficiently, you need to know which primer is suitable for polystyrene foam.
For exterior and interior use, the priming (and primer) of the foam is different, be careful
Since the work takes place entirely outdoors, it is necessary to use construction and finishing materials of appropriate quality and purpose. Installation and finishing solutions must have certain operating temperatures, moisture and heat resistance, strength and durability. That is, their task is to provide reliable protection of surfaces under the influence of atmospheric phenomena.
Let us note that experts in construction and repair issues definitely recommend using primer mixtures at intermediate stages. How and how to prime a foam surface, more on that later.
Types of primer mixtures
Primer mixtures differ in quality (composition), properties, and purpose. There are universal solutions suitable for both different types of work and for treating surfaces of various structures. Basically, all compositions are divided into strengthening and adhesive.
- Strengthening agents are used on porous structural surfaces. The main properties of such solutions are deep penetration into the base layers (up to 10 cm deep), the formation of a firmly protective film after drying.
- Adhesive solutions are applied to surfaces before plastering and other types of decorative cladding in order to improve the adhesion of materials. That is, here the primer serves as an intermediate layer that improves the physical and technical qualities of the finish.
The composition of the primer can be alkyd, acrylic, glyphthalic, phenolic, polystyrene, polyvinyl acetate, perchlorovinyl. Both the performance qualities of the solution and the possibilities of its use already depend on the composition.
For facade work, a material with the following properties is used:
- increased water resistance;
- moisture resistance;
- frost resistance;
- heat resistance;
- deep penetration, but also excellent grip;
- chemical inertness;
- biological inertia;
- ability to resist and neutralize efflorescence.
Primed polystyrene foam has a number of advantages, including the saving of solutions subsequently applied to it.
For the initial treatment of surfaces before applying the subsequent coating, a primer is simply necessary. Decorative wall cladding will subsequently hold up much better. In addition, deep-penetrating primer mixtures prolong the durability of base materials and improve their technical characteristics. Another useful property is a reduction in the consumption of subsequent solutions applied over the primer (glue, putty, paint, varnish).
Priming when insulating walls with foam plastic
Before attaching foam plastic to the walls, you need to do a number of preparatory work. It is imperative to clean off the old decorative coating, no matter what it is. Check the surface for damage.
Next, it is recommended to apply a deep-penetrating primer. Such preparatory work is especially important when reconstructing the facades of old buildings. This will not only compact the structure of the construction materials, but will also provide protection from further destruction. A material with a dense structure (for example, brick) is primed once, porous mineral materials - from two times.
After the primer has dried, seams and cracks are sealed. Next, the starting profile is installed and you can proceed to gluing the insulation boards (foam plastic). When all the foam boards are glued, they are additionally fixed in the corners with dowels (after the glue solution has almost completely dried). Then a layer of reinforcing mesh is attached to protect the coating from destruction. All this is covered with a layer of adhesive solution and left until tomorrow. The next day you need to repair the unevenness.
Before plastering, the surface is sanded and primed (you can read about how to properly prime walls before plastering here). A mixture is used that increases the adhesive properties of finishing materials. Next, a leveling layer of plaster is applied. Before grouting, it must dry (1-4 days). Grouting is carried out until a perfectly flat surface is formed.
But that's not all. Now you need to apply the decorative (finishing) finishing material. To ensure that the finish sticks well, we will use a primer again. Depending on what exactly the decorative coating will be, the composition of the primer mixture is selected.
This is how foam plastic is primed during façade insulation of walls. By the way, in some cases, foam insulation is installed not outside, but inside the room. There are some peculiarities here, for example, installation mixtures and solutions for intermediate work must be selected taking into account the permissibility of the application.
Rules for applying the primer mixture
- The mixture used must be diluted and mixed thoroughly. Breeding instructions are indicated on the packaging.
- Application can be done with a paint brush or a regular brush. Sometimes by roller or by spraying. After completing work, tools must be cleaned.
- The primer layer must dry well. Once dried, it will become resistant to mechanical damage.
- Do not neglect personal protective equipment.
By observing the manufacturability of finishing work, polystyrene foam wall insulation will perform its protective and insulating function for a long period. Again, cosmetic repairs and restoration of the facade will not be needed for a long time.
kraska.guru
How to choose liquid glass for waterproofing
There are several types of liquid glass on sale. They are selected for different needs. The presence of sodium silicate in the composition is better suited for creating a barrier against water. Potassium silicate is better suited to create fire protection against fire on wooden material, it also has antiseptic and vapor permeable properties.
Potassium silicate is better suited to create fire protection on wood material.
How to glue wallpaper onto wallpaper: video
There is one good idea on how to simultaneously insulate and cover a wall without removing the old layer of wallpaper. A new material has appeared on sale that can be used for internal insulation of premises. See how to install it in this short story:
Related article:
Wallpaper for walls: catalog of photos of interesting solutions for the living room, bedroom, children's room, kitchen and corridor. Read our review for basic rules for selecting canvases and designers’ recommendations.
How to work with liquid glass for waterproofing: general application recommendations
To treat the surface with this product, you need to prepare the surface first. It must be clean and grease-free. The product is used after the walls are painted. The tool used is a roller or a brush.
For the cement mixture, use a wide spatula.
All layers must dry well. How long liquid glass dries will depend on the environment. It takes a little time, but to get the best result, it is advised to wait a day for active use, especially when it comes to the field.
All layers must dry well.
Making at home
Let us immediately make a reservation that this is only possible if there is an autoclave or crucible.
Two recipes:
- (anhydrous sodium carbonate) ground in a mortar There it dissolves, forming sodium silicate. Bake the mixture until completely melted. Remove the resulting sodium silicate from the oven and add hot water. The resulting solution will be liquid glass. You can also treat silicon-containing raw materials in an autoclave with a concentrated solution of sodium hydroxide.
- Silicon raw materials are dissolved with alkali . Conditions for the process: normal atmospheric pressure plus the boiling point of the alkali used (depending on the concentration, for a 0.05% NaOH solution it is 101.3 °C).
How to prepare a solution with liquid glass
The ratio of solvent to glass can be varied. Here you should study the instructions on the packaging. Because an individual brand may have different requirements. It is better to dissolve the material using a construction mixer, then it will be easier to obtain a homogeneous solution.
It is better to dissolve the material using a construction mixer, then it will be easier to obtain a homogeneous solution.
Methods of using liquid glass
ZhS can be used in different ways. They are suitable for different tasks, knowing them will help you choose the right option:
- Coating method, pure liquid iron is used, most often sodium. It is used for surfaces that attract dirt and are porous. Drying takes half an hour or an hour;
- The penetrating method involves the same process as the previous one, but water is added to the composition. It is used to cover hard-to-reach areas and requires prompt work;
- Application in concrete mortar.
It is used for surfaces that attract dirt and are porous.
How to prepare walls for wallpapering on the old layer
The task of the preparatory work is to ensure high-quality fixation of the new decorative coating. In addition, during the preparation process, it is necessary to eliminate fungus on the walls, if any, and insect breeding sites. Doing this without removing the old layer is problematic. Can you imagine how many bedbugs, ants and cockroaches can form colonies in places where wallpaper is loose? If there is any hint that the previous layer has moved away from the wall, ruthlessly remove it.
The resulting bald spots need to be treated with a primer and lightly rubbed with a plaster mixture.
After processing, it is necessary to sand the treated areas with fine sandpaper. In places where mold spots have appeared, you need to carry out the same procedure, additionally treating the wall with an anti-fungal compound.
Advice! For priming, use a universal primer; it will ensure high-quality adhesion of the wallpaper.”
Before finishing the processing, conduct one small experiment: in one place, spread the glue with which you will glue the new layer and leave it until it dries; if the base does not bubble or fall off, you can start working.
Why do you need to prime the walls before wallpapering?
A primer is necessary for better adhesion to the new layer. In construction stores you can find a large selection of primers for various purposes.
For wallpaper you should choose universal compositions
The primer is applied only to a clean surface, so old coatings should be wiped off or wiped with a rag. In case of gluing the second layer of wallpaper, a specialized primer can be replaced with a layer of PVA glue. This will not affect the quality of adhesion.
Liquid glass for concrete waterproofing
In construction, they often resort to diluting liquid glass in a concrete mixture to improve its quality. To obtain the desired high-quality effect, the features of the process should be taken into account:
- It is unacceptable to add liquid glass to the finished mixture; they start by preparing the mixture, and add glass to the water, mix them, then pour them into the dry mixture;
- The ratio of materials can be varied in order to obtain various properties, so the recipe is selected according to the situation, and then strictly adhered to;
- Adding liquid glass helps improve the solution, but the curing process will be shortened, so it is recommended to prepare a small amount at a time.
The ratio of materials can be varied to obtain different properties.
Insulation with liquid foam plastic
Penoizol is widely used when insulation measures are required for houses and other objects. They can be used to treat walls, roofs, and floors.
Walls in houses are insulated in three ways:
- during the process of building a house, they fill the gaps between the walls layer by layer;
- in a finished house, they heat-insulate walls that have at least a 3-5-centimeter space behind them: drill holes in a checkerboard pattern at a meter distance, then pour penoizol into them;
- when there is no space behind the wall, a false wall made of plasterboard or plastic is used.
The insulation is applied vertically, so it is advisable to clean the surface before doing this and then wet it so that the substance adheres more firmly to the surface. When you have to work in cold weather, there is no need to wet the wall. Then it’s better to warm up the foam cylinders. A bucket of warm water is suitable for this. They should not be heated too much, as the container may explode if overheated.
Before use, you need to shake the container, after which you can use it. The supply of the substance is regulated by a special dosing screw. When attaching the cylinder to the mounting gun, keep the container upside down. If breaks are required between work, there is no need to detach the cylinder. You just need to clean the gun nozzle.
The ability of penoizol to penetrate into all cracks and voids allows you to save time and efficiently insulate the facade of a house or cottage at minimal cost. For example, to process a building of 100 square meters. m can be spent only 3-4 hours - significantly less than when working with other insulation materials.
However, penoizol is used not only for thermal insulation of walls. It also does an excellent job as an adhesive for slabs intended for insulation.
The work is performed in the following sequence. First, the surface is cleaned, and the slab is also inspected for errors (defects, contaminants) and, if necessary, they must be eliminated. Then you need to moisten the area where the adhesive will be applied with water. And this is done in two ways:
- distribution of foam mass over the surface;
- applying liquid foam around the perimeter and diagonal of the slab.
Both options are used. True, the second one does not provide such high-quality grip; it makes it possible to save on foam insulation.
Next, the prepared slab must be immediately pressed well against the wall. As you continue your work, you must not forget about the need to apply foam to the joints between the slabs. This technique will allow them to be firmly fixed.
Wall insulation work is best done when there is no frost.
Penoizol is considered a fast, high-quality and inexpensive roof insulator. This is one of the most popular insulation methods used for pitched and flat roofs. Foam is also used to insulate attic floors. Its best advantages are revealed on the roof: it does not weigh down the structure, does not rot and is not destroyed by microorganisms. Moreover, it is durable and easy to use. Even inexperienced builders can build a roof of 150 square meters. m insulated with penoizol in three hours.
Penoizol, informally called liquid foam, is also indispensable for floor insulation. Work can be carried out in two versions:
- when a plank floor is installed;
- if it is impossible to free the room for insulation work.
When a house is just being built, usually the entire surface area that the floor will occupy is covered between the joists with foam insulation. After it hardens, the boards are laid.
For a building in which people already live, foam insulation is used to insulate not only a wooden floor, but also any other floor that has voids. For this purpose, 25 mm holes are drilled in a checkerboard pattern over the entire area occupied by the floor, placing them at a two-meter distance. Next, insulation foam is introduced into these holes, which then spreads throughout the underground space, filling it and possible cracks. After the liquid foam has hardened, the holes are closed using appropriate materials (wood plugs, cement, etc.).
Thermal insulation of houses with liquid foam in cylinders is gaining popularity. And this is understandable. After all, the composition makes it possible to insulate a room most effectively due to the ability to fill even small cracks.
Application of liquid glass by coating method
The coating method is considered the simplest. It can be done using a roller, brushes or spray gun. Proceed as follows:
- Clean the surface and degrease. Concrete must be brushed to obtain an even coating.
- For a concrete surface, usually 1 layer of the product is sufficient; if a deeper finish is necessary, more layers are made, each one must stand and dry until the next half hour to forty minutes.
For a concrete surface, 1 layer of the product is usually sufficient.
Glass wallpaper for walls - photo
At the end of our review, we invite you to familiarize yourself with the photo gallery.
Today it is fashionable to install glass panels or aprons in the kitchen
If you paint embossed glass wallpaper in some calm color, it will turn out very interesting for the bedroom
Who said that wallpaper has to be painted? Glass wallpaper in the bathroom
To paint glass wallpaper like this, you need to work long and hard
Glass wallpaper with an emblem - and this is possible
Glass panels reflect light, making the room appear larger
It is recommended to paint glass wallpaper with light paint for the first time - to make it easier to paint over later
Glass wallpaper with vertical stripes - for a classic interior
The feasibility of waterproofing with liquid glass at various sites
It is popular to create waterproofing from this material, and the result is effective. It can also be selected in the following cases:
- Treatment of a concrete product located outdoors helps to obtain moisture protection, after which the item can be used under water;
- Waterproofing pools is easier with this substance;
- Treatment of basement structures helps to obtain antiseptic and moisture protection;
- Treatment of the foundation forms a film-like coating against water to protect the rest of the structure.
Waterproofing pools is easier with this substance.
Foundation waterproofing with liquid glass
The foundation is usually treated with the coating method described above. Seams can be processed using a penetrating technique. Work stages include:
- The seam and joining parts are embroidered, U-shaped grooves are made in the area of the cracks, and all debris is removed from them.
- A 5% concentrated solution of glass and water is prepared and poured into the cement.
- The prepared solution is used to close the recesses.
The foundation is usually treated with the coating method.
Waterproofing a well with liquid glass
The well must be protected from the inside. The main thing is that its rings are well secured. To improve fixation, you can cover the seam areas with ropes made of flax or jute, coated with liquid glass. They proceed to applying LC, the first layer consists only of glass, the second of cement mixed with sand and glass.
The well must be protected from the inside.
How is the waterproofing procedure performed?
Waterproofing with liquid glass requires some preparatory work with the surface to be coated. If dust or dirt comes across during application, the quality of the work will be spoiled and nothing will be able to be glued. Therefore, this stage must not be missed and taken responsibly.
Waterproofing technology consists of the following stages:
- Take a roller or brush and apply the first layer to the surface. This stage is very simple and does not require unnecessary details.
- After 30 minutes, it is necessary to repeat the first stage: the next layer is applied to the insulated concrete base. It is important to apply the flowing glass evenly, without making any breaks.
- After this, we prepare the protective layer. First, we make a regular mortar from cement, which is usually used for plastering walls. Once the mixture is prepared, pour flowing glass into it, maintaining a 1:1 ratio. Everything is mixed very well and the required base is covered. It makes no sense to re-dilute such a solution; in this case, the substances lose their necessary properties. Because of this, it is recommended to prepare the mixture in small portions. This procedure is usually carried out with a construction spatula and applied in a thin layer.
- The last stage of insulation will be insulation. Polystyrene foam or basalt wool are suitable for this. We choose what suits best.
Do-it-yourself waterproofing with liquid glass: general recommendations
Carrying out waterproofing work yourself begins with cleansing and removing fat. The mixture is prepared and the product is applied to the material using a roller, brush or spray. There can be several layers, then each should dry for about 30-40 minutes before moving on to the next one.
There can be several layers, then each should dry for about 30-40 minutes before moving on to the next one.
Liquid glass for waterproofing: useful tips and safety rules
Recommendations from specialists will be useful to obtain good properties from the coating. And the application will be carried out at the proper level. They advise:
- The material cannot be used for bricks, it will lead to destruction of its structure, and the answer to the question whether liquid glass can be applied to glass will be no;
- Prepare the solution in small portions, the hardener acts quickly;
- The proportions must be strictly observed.
The technician must wear protective gloves and clothing to avoid contact with the skin.
Prepare the solution in small portions; the hardener acts quickly.
Liquid glass is the best option for waterproofing various surfaces. Suitable only for concrete and wood, but on them the coating will serve as a reliable layer against water that lasts for a long time. The process must be carried out in compliance with all the rules, otherwise the result will not be of high quality.
Advantages and disadvantages of wallpapering wallpaper
So, what can be considered an incentive for such a non-standard solution as re-pasting an existing layer of wallpaper? There are few versions:
- you have little time to thoroughly clean the walls of the old layer;
- you do not have the skills and experience of leveling walls, and for this reason you do not dare to completely remove the old covering;
- you think that another layer of wallpaper will make your walls warmer;
- you think you'll save money by not having to thoroughly clean the surface.
Let's look at these theses in more detail. So how long does it take to remove the old coating layer? If these are ordinary paper or non-woven products, a maximum of half an hour or an hour.
The material can be easily removed from the wall without the use of any special tools
It is more difficult with liquid wallpaper - it needs to be soaked and scraped off with a spatula. But this work will not take much time. It is possible that in the process of cleaning the walls you will be faced with an unpleasant reality: low-quality plaster will fall off along with the sheet of wallpaper. This is really sad.
Any irregularities that arise will have to be plastered again and carefully leveled.
This is not such an impossible task: there are many detailed master classes on the Internet that will help you quickly master this type of work. As for some insulation of the walls, this thesis makes some sense. Indeed, multi-layer protection will help retain some heat. But if you really have a problem with cold walls, you need to solve it differently. The room should be insulated from the outside, not from the inside.
Modern manufacturers offer a huge number of different insulation materials that are easy to install on the facade
Do you have an apartment in a multi-storey building, and you won’t be able to insulate the outside? Do this from the inside, but definitely not with wallpaper. This is the worst insulation option. And the last thing is the issue of savings. The success of the event depends on many factors: how firmly the old layer “sits”, how it reacts to moistening with glue and whether it can withstand the weight of the second layer. A small mistake - and your new expensive panels will have ugly bubbles, or even slide down in folds. Then there will be no question of saving: get ready to buy everything again.
Before deciding to re-paste, examine the condition of the old layer