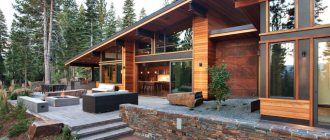
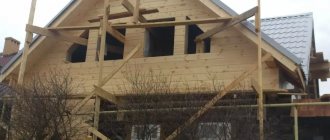
The modern building materials market offers a wide range of different finishing options. A fairly new design solution is lining in the interior of an apartment, which previously could only be found in the design of country houses or dachas. At the same time, following the rules, with its help you can easily achieve not only the usual country atmosphere, but also get an urban modern style.
Lining is used for finishing walls or ceilings, as well as for decorative purposes.
Basic properties of lining in the interior
Lining has many valuable properties:
- ease of processing;
- good sound insulation;
- high thermal conductivity.
Additionally, using this material you can hide any defects in the walls, as well as hide electrical cables behind the sheathing.
A lining ceiling is an excellent solution when you want to diversify the interior, but stretch fabrics seem banal
Using shunt connections, the lining can be attached to any surface, both external and internal.
Application
More and more residents of private houses are choosing the interior of walls made of lining inside the house. This is explained not only by the comfort and magnificent beauty of the interior, which are achieved through the use of wood, but also due to the presence of certain properties that the lining has.
Among them:
- Excellent sound insulation;
- The surface does not require further leveling;
- A wonderful aroma of wood that will appeal to all residents;
- Biological features and high environmental friendliness of the tree;
- Various methods of laying the lining, as well as its different widths and other basic parameters of the panels, allow you to visually change the proportions of the space.
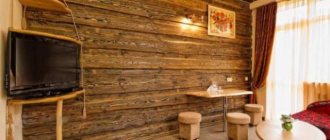
This is what clapboard cladding on the inside of a house looks like
. Let’s say a few words about the space-changing properties of clapboard:
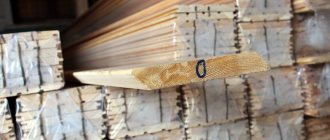
- To begin with, it is worth noting that any decorative lining for interior decoration is made of wooden panels, the width of which is usually 8.8 cm, this in turn is the standard working size. The length of the slats will vary (from 1 to 6 meters), their variation depends on the dimensions of the room and installation methods. Before purchasing sheathing material, it is necessary to make accurate preliminary measurements;
- Another important point is the method of laying the slats on the walls. They can be located vertically or horizontally. The horizontal position expands the space of the room, while the vertical laying increases the height of the room.
Pros and cons of lining in the interior
Among the advantages of lining in the interior are:
- Environmentally friendly - as a natural material, lining does not contain harmful inclusions, and therefore can be used in any residential premises.
- Affordable cost - the price of the material is quite suitable for budget repair options.
- Many processing methods - boards can be coated with any paints, varnishes or oils, depending on the interior idea.
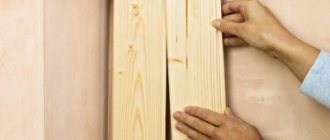
- Easy installation - all work on decorating walls with clapboard can be done with your own hands, without resorting to the services of builders.
Another advantage is the constant relevance of natural materials, which allows lining not to go out of fashion, despite the frequent change of trendy styles in the interior.
Lining can be an excellent alternative to plastic slopes, if the interior style requires it.
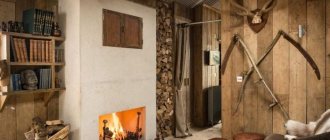
A wardrobe on a balcony made of clapboard is a simple, inexpensive and practical solution
The disadvantages of this type of finishing include:
- The nuances of installation work - this cladding can only be attached to concrete walls using sheathing. This leads to inevitable loss of room area.
- Low moisture resistance - like all wood, lining absorbs moisture well, and therefore it should be used in “wet” areas (for example, baths) with extreme caution, having previously treated it with special impregnations.
- Fire hazard - wood is a flammable material, and therefore must be coated with fire retardant compounds.
- Texture and shades - the method of coloring the boards will depend on the type of wood (for example, it is very difficult to lighten oak or cedar, while it is easy to give almost any color to pine or aspen).
- Difficult replacement - dismantling the lining is quite a painstaking job, after which you still have to prepare the surface for a new finish or plaster.
How to cover a “block house” with decorative clapboard?
Particular attention should be paid to the decoration for the house - “block house” . This finish is suitable for the living room, kitchen, hallway, and will be an excellent solution for the attic. An important advantage is that the “block house” technique allows the walls to breathe and create a pleasant microclimate for the inhabitants of the home. This type of fastening will create improved sound insulation compared to the above methods.
Read more about the “block house” in our article.
Before performing work, the calculation of fittings and quantity of material is carried out. But an even more important process is to let the freshly purchased material sit without packaging for about three days in the room where it will be installed.
Preparing the walls
The panels are installed on dry and level walls, so the surface should not contain defects. The walls must be waterproofed using a special film or deep impregnation.
Without this procedure, wooden panels may not withstand the increased moisture content, and the work will have to be redone.
Areas with fungal infections on the wall are treated with an antiseptic. It is better to treat all the walls with it. After thoroughly impregnating the walls, they will become resistant to the negative effects of fire and mold. Impregnation with a water-repellent composition is required before starting such work.
Find out how to level walls with plaster from our article.
If desired, additional materials can be installed for thermal and sound insulating construction. Expanded polystyrene or mineral boards are installed as sound insulation.
A vapor barrier film can be purchased when purchasing facing material. The work begins with covering the walls with film, which in the future will serve as vapor insulation.
Frame making
The production of the frame occurs in the following stages:
- The selected vapor barrier material is attached to the wall with an overlap at a distance of 10-15 cm .
- Lathing bars are attached on top of the waterproofing material .
- Thermal insulating material is attached to the sheathing, and a waterproofing film is laid on top of it (see photo). The materials are secured with a stapler and staples.
- Another layer of sheathing is attached to the main frame, this time vertical.
Staples and a stapler will help create the desired fixation.
The sheathing will be more reliable if installed horizontally. The timber is fixed to the base using nails or self-tapping screws.
If the wall consists of brick blocks, fixation is carried out with frame dowels, and holes for fastening are made in the wall surface.
The second lathing is checked for level; it is on it that the blockhouse panels will be installed. To give the panels a smooth and finished look, a sheathing is created, since the panels are attached to it.
Wooden panels are heavy, so for high-quality sheathing you will need to make a reliable frame.
For a frame using the block house technique, a wooden base is suitable. The frame must be made of slats, the distance between which does not exceed 65 cm .
Before installing the frame, you need to mark out the places where sockets, switches and other electronics will be located. These marks are needed to make cuts in the cladding before installation.
The bars can be secured to the wall using either nails or mounting strips. After completing the frame manufacturing work, you can begin finishing it in the block house style with your own hands.
See the video for installation of the sheathing:
Panel installation
For accurate measurements, a plumb line, square and level are used. To calculate how much board will be used, you need to make simple calculations: divide the total area of the room by the area of one board.
By calculating the area of one board, it is easy to find out how much material will be needed to cover the entire surface. If there are not enough panels, additional clamps to eliminate the problem.
Fastening the wooden panels begins on the pre-installed sheathing. The initial strip is installed from below, with an indentation of up to 1 cm , this procedure is done to actively ventilate the walls and avoid further deformation of the material. A similar indentation is made at the top of the wall.
The block house is installed only in the horizontal direction. Sometimes craftsmen choose a vertical installation, but this method has a lot of disadvantages.
Fastening to the frame is carried out using self-tapping screws at an angle of 30-45 degrees. A hole is made on the surface of the panel with a thin drill, and then a self-tapping screw is screwed into it.
The screw head should not go deeper than 3 mm.
Next, the panels are gradually installed from bottom to top. The tenon should point upward when installing the panel. The wood is connected to each other using tenons and grooves. If desired, corner joints are fastened with corners.
Once the installation of the panels is complete, it is recommended to install skirting boards at the bottom and top of the walls. When the stage of fixing the main part of the sheathing is completed, you should disguise the screws to make the walls look beautiful.
There are several ways to hide screw heads:
- Using material left over from work.
- You can use “wood paste” made from PVA glue and sawdust.
- Special plugs, which can be bought at a hardware store, can easily cover the unevenness.
Plugs are formed from the scraps and secured in the recesses with PVA glue. Uneven places are smoothed with sandpaper.
The thick composition is poured into the holes. The disadvantage of this method is the possible discrepancy between the color of the composition and the wood.
Attached using PVA glue .
For detailed installation of the panels, watch the video:
Decoration of corners
Decorating corners using the block house technique makes it difficult to do it yourself.
You can purchase “boats” in advance for finishing internal corners and elements specifically designed for external corners. The finished baseboards will be in close contact with the block house only at the top point, as a result of which the cladding will have unclosed gaps, and this is unacceptable.
It is much more convenient to use planed timber measuring 5x5 . Its installation is carried out before the sheathing begins. The block house is attached to the timber and the finish will look much smoother and more professional. This method is effective for interior and exterior corners.
The final stage is grinding the surface, but such work should be done with caution. One awkward move can ruin the structure of the board.
How to carefully make corners, watch this video:
Options for choosing colors for lining in the interior of an apartment
There is a wide range of colors that can be used when choosing the desired shade of finishing material. This approach will not only achieve the desired effect, but also make the material resistant to the negative influence of the external environment.
The natural color of wood will add coziness to the interior
Painting is carried out before installing the boards on the ceiling or walls.
Thus, a transparent varnish will give the wood texture greater clarity and will contribute to the zoning of the room. The lining on the ceiling, painted white, in combination with dark beams, will give the room a country or Provence style. In general, light matte or varnished wall and ceiling cladding will make the space visually more open and spacious. And warm shades with varnish applied on top can emphasize style and comfort.
With the help of painted lining it is easy to diversify the interior with beautiful colored walls
Oil paints create a textured structure on the surface of the boards, which can be enhanced by applying paint with your hands instead of brushes. A trend in design is the covering of individual surface areas with clapboards (for example, in a herringbone shape or at different angles).
Special treatment of the antique lining will add the charm of a country house to the interior of the apartment.
In natural styles, the surface of the wooden cladding is processed using the Japanese method, using a blowtorch and applying oil paint on top. An unexpected solution would be a combination of pastel wood tones and bright colors of the ceiling.
Unusual lining designs will add brightness and originality to the interior of the apartment
Which fixation option should I choose?
It is important to decide on the method of fixing the board materials. You can sheathe a wall using several methods:
- Through view of fasteners. This is the simplest solution that does not require much effort. The idea is that the screws are screwed directly through the front side. This method involves applying markings so that the fastening points are located on the same line. In addition, holes are drilled on the carriage board in advance, which will prevent the wood from deteriorating and cracking. When screwing in the screws, make sure that their heads are completely recessed into the wood. This can be easily achieved if you pre-drill out a place for the head with a large-caliber drill. The resulting holes are masked with special eraser plugs or filled with putty. Among the disadvantages, this method significantly disrupts the external aesthetic appeal of the coating.
- The lining can be attached to the wall using decorative nails. Their hats were initially decorated to match the color of the material.
- Hidden nails without heads would be an excellent option. The peculiarity is that such nails can only be driven at an angle of 80 degrees. This will make it possible to hide those areas that have been violated.
- If you have a professional stapler on your farm, you can use staples for fastening.
Important! You should not buy a manual tool for driving staples, which is sold on every corner, since its use does not provide reliable fixation.
- For the smallest thickness of the carriage board, clamps are used. The main advantage is that the fastenings are invisible.
The method of attaching the lining to the wall is selected individually, based on the specific situation. But we note that recently it is the clamps that have become the most popular.
Designer tips for using lining in the interior of an apartment
To create an individual interior in your apartment, designers advise:
- use a combination of lining and phytowall slabs;
- A combination of shades of blue and pink decoration and bright furniture facade will help give the atmosphere of the house coziness;
- to achieve an unusual effect, you can install profiles at a distance of several millimeters from each other, and install colored lighting behind them;
- lining is an excellent option for finishing the ceiling in combination with wallpapered walls.
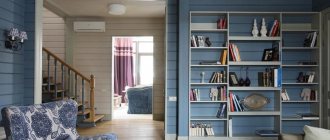
Lining is perfect for the role of a zoning tool in the interior of an apartment
An accent wall with clapboard attracts attention and sets the tone for the entire interior of the room.
You can make unusual decorative elements from wooden lining and decorate any room in your apartment with them.
Despite some misconceptions, lining in an apartment allows you to realize the creative ideas of the owners and achieve an unusual and stylish effect in the decor. Moreover, the original properties of the natural material will add comfort and warmth to the living space, and its cost and the possibility of self-installation will allow you to save money and get a real budget repair option.
Finishing after installation
If PVC or MDF panels do not require finishing, the wood is treated to prevent premature destruction in order to provide additional fire-retardant and decorative properties.
The first method is coating with protective impregnations. They protect wood from photoaging, moisture, damage by fungi and insects. They are made on the basis of bitumen, acrylic, solvents, oils or minerals. During production, lining produced in Europe is subjected to impregnation - treatment with compounds in autoclaves under pressure. The substances penetrate wood to a depth of 20 mm.
The second type is treatment with tinting agents or stains. The structure of the wood is emphasized by pigmented water, alcohol, oil, acrylic or wax compounds. The whitening effect is achieved by stains based on acids or hydrogen peroxide.
Water-based varnishes are popular for finishing wooden lining indoors. Glossy, matte or semi-matte surfaces are protected from the harmful effects of moisture, but at the same time can “breathe”. Alkyd and polyurethane varnishes are durable, do not fade in the sun, and form a water-repellent film.
A popular type of finishing is painting with oil, latex, acrylate enamels, decorative glazes, and water-based compositions. The rich range of shades, resistance to external influences, and moisture-proof properties of the dyes allow them to be used for decorating linings inside the dacha. Before painting, it is recommended to prime wooden surfaces. Apply the compositions in several layers.
Photos of examples of using lining in the interior of an apartment
Keep the intervals
American designer Jason Arnold loves to make plank walls in modern houses or city apartments. He claims that only with the help of a coin can the lining be made stylish: insert coins between the boards when leveling, so that they are attached at equal intervals.
In the interior in the photo below, Arnold used lining for an entire wall, and covered the doors with it, visually hiding them in the wall. The stripes of the lining echo the headboard of the bed and, you see, look modern. Metal fittings and sophisticated furniture also take the room away from the country style.
Ceiling
In wooden houses, ceilings in bathrooms are usually suspended or suspended. For tension ones, PVC film is used, and for suspended ones, PVC panels are usually used.
This finish reliably protects the main structure from moisture. Under suspended and suspended ceilings, you can aesthetically hide electrical wiring and ventilation ducts.
When using plasterboard for ceiling installation, use a metal profile coated with zinc or a polymer material that prevents the development of corrosion. GKL is often finished with glass wallpaper; for rooms with high humidity this is one of the most practical finishing options.
Some laying rules
In order not to spoil the finished repair, when installing the lining, follow some rules:
- Do not install lathing directly on a damp, porous wall;
- The wall must be properly prepared;
- The best option is cement plastering;
- If the room is dry, there are smooth walls plastered with concrete - the bars are secured with EC staples (which are used for drywall). These are plates that have been perforated.
To ensure that everything is done masterfully, the bars are chosen as smooth as possible. The staples are attached to the walls, the middle block is installed (placed first), along the edges of which the staples are bent, and the ends of the blocks are secured. Next comes the bending of the intermediate brackets, the block is mounted completely (without deformations). Subsequent bars are leveled with the middle one and placed evenly along this plane.
The surest preparatory method for walls under lining is to carry out a vapor barrier. For some rooms this is extremely necessary (kitchen, bathhouse, hallway, etc.).
Decorating walls with clapboard with your own hands requires care.
The wall must be completely leveled, insulation must be placed on top, with the foil side facing out. The insulating material (on special tape) is placed with an overlap (15 cm). Next comes the fastening of plywood pads (of the required thickness, at least 8 mm) to the wall under the bars. Then sheathing beams are attached to them.
This results in a well-ventilated spatial gap (between the lining and the insulating material).
The basic principle of laying lining is to start work from the most difficult small places; finish in large, simple sections.
When the wall is already covered with clapboard, the baseboards are attached. Covering walls with clapboard yourself helps you save money and find interesting solutions. An analogy with laminate flooring is appropriate here.
Classifying the material
When purchasing lining, the quality, cost of the material, and the room where the walls will be finished with lining will be taken into account. There are many options.
Natural lining is made from the following wood species:
- Conifers;
- Deciduous.
For example, hardwood panels are suitable for saunas and baths. Since they do not emit resin, like conifers, at high temperatures and significant temperature changes. Coniferous walls will not look neat and will be sticky. It is also easy to get burned by tar discharge.
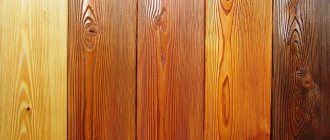
Among conifers, only cedar from Siberia is a pleasant exception. Its wood is of a high class. The cost of such panels is decent. But the quality and durability will justify all the costs. Trees such as cedar, larch, pine, eucalyptus, and spruce are considered soft. Below is the wall decoration with clapboard in the photo, which will help you choose the design that you like best.
The most persistent are deciduous (ash, aspen, linden, alder). Linden is recognized as the best for baths. When the air temperature rises, it begins to release a slight odor, which has a positive effect on the human nervous system. According to quality, wood is divided into classes: premium/extra, a, b, c.
Caring for new upholstery
Wooden sheets should be coated with a layer of colorless varnish. It will protect the tree from destruction and swelling from moisture. The varnish also gives the coating a pleasant shine. Please read the materials documentation carefully before use. If the factory did not apply an antiseptic solution to the wood, this must be done. To ensure that the solution covers all corners and planes of the sheet, apply an antiseptic before installation.
PVC sheets are not afraid of either moisture or bacteria. But plastic can “catch” an unpleasant odor, especially if the bathroom and toilet are combined. It is better not to line the space behind the toilet with clapboard. It is worth limiting yourself to tiles. Frequently washing the plastic prevents unpleasant odors. When choosing a detergent, you need to make sure that it does not react with the plastic - the lining may be damaged by the chemicals.
Finishing the bathroom with clapboard from the photo involves taking care of the pattern. Blistering, air bubbles, or discoloration of the pattern indicate that it needs to be replaced.
Advantages of the material
Lining made of natural wood has a number of advantages that are known to many. Let's look at the main ones:
- Environmentally friendly finishing material;
- There are no emissions of substances that negatively affect humans;
- Allowed for use in children's rooms and rooms where allergy sufferers live;
- Duration of operation (if you periodically carry out special processing of wood, it is maintained in ideal, new condition);
- Wood paneling does not burst or scratch;
- Not afraid of damage (minor mechanical);
- It is easy to realize any design fantasy (due to different wood species, their coating with varnish and paint);
- Withstands temperature fluctuations (certain types of wood);
- It is moisture resistant;
- Modern types of panels have high fire safety;
- Withstands significant influences both indoors and outdoors (one of the main differences from plastic lining).
Water supply
In wooden houses, condensation often forms on cold water supply pipelines. Therefore, you should not use steel pipes.
The best option would be plastic pipes. Condensation usually does not form on them or is present in smaller quantities, which eliminates the risk of damage to the wood.
You can minimize the likelihood of the development of putrefactive processes in a tree in the following ways:
- do not install pipes close to walls;
- secure the pipes with rubberized clamps;
- thermally insulate the pipeline with tubular polyurethane foam insulation;
- install a drain valve that drains accumulated water on the floor.
Destroying stereotypes and dispelling myths
Doubts about the reliability, strength and durability of the finishing material are completely justified. Any choice should be approached responsibly, having first weighed all the positive and negative qualities of the lining.
Main problems:
- Deformation;
- The appearance of mold;
- Moisture.
Having dealt with each problem separately, you can quickly choose the appropriate option for using the lining for finishing.
Ventilation arrangement
To protect wood from rot and fungus, it is necessary to equip an effective ventilation system. A constant flow of air should be ensured. To do this, you can create a gap under the door by installing a decorative grille.
Exhaust ventilation plays an extremely important role. It can be taken out into the attic or mounted under a suspended or suspended ceiling, if there is one.
It is recommended to equip ventilation ducts with fire-resistant valves, fans and other equipment. The power of the exhaust fan depends on the area of the room.
Common questions about installation and their answers
- How to place sockets in the bathroom and make nests for them in the lining?
- A: According to TB, there should be no outlet at all in the bathroom. However, modern materials make it possible to conduct electricity and protect it from moisture. The socket should be placed as far as possible from the water source (shower, tap), located 1-1.5 meters above the floor level and protected by a “curtain” - a plastic cover. To install the socket, before installing the lining, it is necessary to run the wires along the wall to the required location. Afterwards, mark the space for the box on the sheets of lining and carefully cut out (plastic) or drill (wood) this hole. After installing 1-2 sheets of lining, it is necessary to assemble the box (so that it can be accessed from the side), and then continue installing the sheets. Finishing a bathroom requires careful calculation of communications. It is easier to place the rosette between two sheets. This way you can avoid cracks when there is a through hole in one sheet.
- A couple of years after installing the finishing coating, the lining began to “spin.” What to do?
- A: One or two sheets can simply be replaced. The process will not take more than one day, taking into account the complete dismantling of the fragments and reinstallation. When replacing damaged boards, it is worth inspecting the frame. It is quite possible that the reason for the rotation of the sheets was a loose frame or improper distribution of the load on the fasteners.
- Is it worth covering the ceiling with clapboard?
- A: This can be done, but is not required. A simple painted ceiling will last longer and better than one covered with clapboard. A lightweight, durable frame is simply necessary for such a design, so it’s worth thinking about a high-quality profile.
- Q: How can I use leftover clapboard?
- A: The remains of plastic lining are of little use. With wooden lining everything is much better - it can be used to construct simple cabinets, shelves and other fittings. Many craftsmen, along with the walls, sew up the space from the edge of the bathtub to the floor. There you can also make a secret door behind which to store household chemicals. Thus, you can rationally use every corner of the room.
- Tired of the monotony. How to add colors without changing the paneling?
- Wooden lining can be repainted at any time. Wood paints are good for adding color. It is not worthwhile to completely paint over the lining with enamel - the material will become unusable.
For plastic lining there is a technology for applying patterns. Finishing the bathroom with PVC clapboard has a “photo design” function. Using regular glue, you can apply a printed design, photograph or pattern. Thus, it will be possible to update a boring interior without serious financial investments.