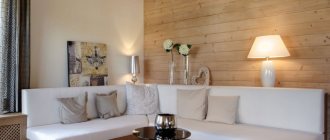
Wooden lining is often used for interior or exterior decoration of housing. Its main advantage is the excellent type of coating with the highest environmental friendliness. Particular attention should be paid to the type of product, as well as the type of finishing material. This will make it much easier for the individual panels to fit together lengthwise and with each other. The article describes how to properly fasten the lining and what nuances should be taken into account so that the fastening retains its strength for a long time.
Installation technology
The width of the canvases is very easy to join, since they have corresponding grooves and protrusions. As a result of fastening to the sheathing or wall, various devices are used :
The latter allow you to obtain an even, continuous coating without visible traces of fixatives. This is achieved by the technology of fasteners, which are placed on the inside of each groove at several points on the canvas. They are attached to the wall surface or sheathing with studs, leaving the groove accessible for joining with the adjacent panel.
The advantage of this method is the excellent aesthetic qualities of the coating. Of course, if category B or even A lining is used, then marks from special nails are almost invisible , but in the case of Extra class material it is worth ensuring a clean surface without any damage or marks. This increases the strength and protective characteristics of the material, since high humidity causes areas with a damaged fiber structure to be most susceptible to rotting and darkening.
Option #3
Installation in a running manner. This option is the most difficult to install with your own hands.
It is being built in several stages:
- No one is going to hide the joints; on the contrary, they are highlighted , so they must be perfectly even. To do this, the ends are cleaned and ground at 90º before installation.
- To ensure that there is no gap at all when joining, lay the planks on top of each other and use a miter saw to cut off the edges of both at once.
- A grinder or electric planer is used to chamfer the outer part of the cut ; the bevel should be the same as the side bevels on the plank itself.
- The planks are connected end-to-end and the cut no longer spoils the view, but is part of the interior.
When installed staggered, symmetrical seams look better
You can do it simpler - when you reach the end of the row, you cut off the excess plank and start the next row with this trimming. But here it will not be possible to build a perfectly symmetrical picture of the joining seams.
Horizontal lining
The sheathing is mounted vertically from the corners, observing a step of 40-60 cm. To fix the insulation, additionally nail horizontal jumpers every 1.2 m or arrange an additional frame so that the slabs do not slide down. Before attaching the lining, a vapor barrier, heat insulation and waterproofing are laid.
Installation of lamellas begins from the top element, since the last bottom strip is usually trimmed. At the ceiling level, a whole lining looks visually better, and a non-standard width board near the floor will be covered with a plinth.
When fastening the lining horizontally, the tenon is directed upward. Gently tapping a piece of wooden profile with a mallet with a rubber tip or a hammer, install each subsequent board in place and secure it with fasteners from below. The first and last element, as well as short pieces less than 10 cm long, are nailed or secured with self-tapping screws.
If the wall is sheathed from the bottom up, the board is secured to the sheathing from the bottom side, and a self-tapping screw is screwed into the tenon along the top, flush with the surface.
The next panel is placed on the ridge and secured with hardware into a tenon. The last lining is fixed in the same way as the first.
Choice: wood or metal?
Professional craftsmen consider timber to be the most popular building material for sheathing under lining. Ease of use during installation work, small “weight category” - and creating a frame with your own hands will be easier and faster. This material also has sufficient functional durability. So we choose a wooden beam.
Timber for lining
We will use standard size bars - 50 by 25, 60 by 27 millimeters. This building material is almost ideal both externally and internally. But when purchasing, make sure that there are no defects or chips on it. It is also important to know the moisture level of the wood. Recommended – 16 percent, no more.
Sequence of finishing work
The first step is choosing a wall decoration option. Fastening the lining can be done in two ways:
- Along the walls;
- Along the sheathing.
The first option is preferable in a wooden house, since wood tends to expand or shrink in size and “breathe”. If the base material is the same as the coating, their joint oscillatory motion will not cause multidirectional stresses leading to deformations and the appearance of defects on the surface.
In brick and concrete houses, before attaching the lining, a sheathing is installed, which can also serve as a frame for laying thermal insulation. It is convenient to place corrugated hoses for electrical wiring and heating pipes in the space between the covering and the wall.
The second is the correct measurement of the room and calculation of materials. This will help you avoid unnecessary expenses or waste time on additional trips to purchase missing components. The amount of lining is determined based on the area of the walls, excluding openings. The length of the ceiling and floor plinth is equal to the perimeter of the room. To decorate the corners you will need shaped strips. Materials are purchased with a margin of 10-15% for defects or other defects.
Wood is a living structure, sensitive to fluctuations in humidity and temperature.
Before starting work, it is unpacked, allowed to “get used” to the new conditions, and treated with antiseptics and fire retardants, if there is no factory preparation.
Before installing the sheathing or directly attaching the lining to the wall, prepare the surface - clean, level, seal the cracks, and coat with antiseptic compounds. This will protect the structure from the appearance of mold and fungi.
The third step is installing the sheathing. Most often it is made from wooden blocks with a cross-section of 20x30, 40x50 or larger. The thickness of the element depends on whether insulation will be laid under the lining. A ventilation gap is left between the thermal insulation layer and the coating, which prevents condensation from accumulating.
The frame pitch is 40-60 cm, the direction is perpendicular to the finishing boards. The space between the bars should be filled tightly with insulating roll or slab material. For residential premises this is usually mineral wool; outside, expanded polystyrene foam or other polymers are more often used. They are not afraid of moisture. Before attaching the lining, perform a vapor barrier and waterproofing. A film or membrane is used that allows the liquid to evaporate, but does not allow it to pass in the opposite direction.
The geometry is controlled using a bubble or laser level. Dowels or construction nails are used as fasteners for the sheathing.
Required: processing solutions
Do not neglect antiseptics and insecticides. This step extends the durability of the sheathing. The minimum level of treatment is a solution against fungus, rot, and mold. And insect control products should be used in houses standing on the ground - dachas, utility rooms. By the way, the cost of the compositions is not too high, and the right thing to do would be to play it safe and treat both the wooden frame and the wall with the ceiling in any room where the sheathing under the lining is being installed. The rules for using solutions are usually written on the packaging - read before you start spraying.
This is what a timber frame looks like
How to do something yourself, with your own hands - home craftsman website
AN EXCELLENT TOOL FOR CRAFTERS AND HANDCRAFTS AND EVERYTHING FOR THE GARDEN, HOME AND Cottage LITERALLY FOR FREE - SEE FOR YOURSELF. THERE ARE REVIEWS.
Covering walls and ceilings with wooden clapboard is one of the simplest and cheapest methods of interior decoration.
Lining is not a scarce commodity, and its use does not require professional skills or complex tools. However, as in any business, there are subtleties and peculiarities here. Dmitry Tokarev shares some of them. Wood is a capricious material. Even if you buy the lining in a package during the dry season and make sure of its ideal geometry, do not rush to rejoice. In a room with new temperature and humidity characteristics, this material quickly takes on the shape it needs, not you. The longitudinal planes are bent, and the worst trick is to tighten the paneling with a screw.
Trick 1 – Conditioning the lining
My first trick. Having printed the lining, I put it in piles, lay it with spacer boards and tape it together along the edges and in the middle. Sawn strips of fiberboard are convenient as spacers. In this form, the lining remains for 6-7 days in the room where it is planned to be used. In the future, the geometry of the aged material will not float away.
TOOLS FOR HOME AND GARDEN, HANDCRAFTS, ETC. PRICES VERY LOW
Trick 2 – Crooked lining
And yet crooked lining comes across. During installation, it does not obey and fits into the joint with difficulty. For installation, it is sometimes necessary to apply impact forces, and this can lead to damage to the fragile side ends.
ADVICE It is easier to install curved lining in places where it will come in pieces - corners, window openings, short partitions.
If, after all, the curved lining is long and needs to be driven into the groove of the previous one, I use a simple tool. The weighty beater is assembled from a 60 * 60 mm block and a wooden railing trimmed from a staircase. As practice has shown, working with such a mallet is a pleasure. It is especially convenient when working on the ceiling. The impressive width of the impact surface does not allow the side end of the lining to be crushed. You can hit with all your heart - even the most obstinate lining will fit tightly into the groove.
Trick 3 - so that the lining does not warp
It’s easier and faster to fasten the lining with nails with a small head.
However, this is not always the best option. In rooms with variable humidity (baths, bathrooms, open verandas), lining fixed in this way begins to swell or dry out over time. And no nails will hold it.
A lining that is completely dry to the touch, unpacked and immediately installed, can shrink up to 12% in width. Unfortunately, to correct such defects, the work will have to be redone.
Outdoors, the situation can be even more complicated: the lining gets wet and swells so much that it comes off, squeezed out by its closest neighbors. The torn element will no longer fit back into place, so it will be necessary to trim (move, reattach) it or the remaining planks.
In saunas and steam rooms, clamps are often used when finishing: in rooms with high humidity, rusty halos and streaks stretching down quickly form around the heads of nails and screws. In addition, you can get burned on protruding metal parts.
TIP: Before using the clamps, they should be wiped with a dry cloth to remove a layer of protective lubricant and metal dust. Otherwise, you can stain the snow-white linden lining, which will not be easy to wipe off.
Trick 4 – to avoid chipping
Chips and burrs around the heads of screws can be avoided if you pre-drill a hole with a diameter of 3/4 of the diameter of the screw at the fastening point. In this case, it will tighten so that the head is pressed into the body of the wood without the formation of defects.
If there is a large amount of work, this operation can be simplified - just mark the place of fastening with an awl. We insert an awl and countersink the injection site in a circular motion.
Trick 5 – lining with screws...
In rooms with unstable humidity, it is advisable to fasten the lining with self-tapping screws: screw it on and it won’t go anywhere. And so that the heads of the screws do not spoil the appearance, you can use yellow screws 41-45 mm long. Curled exactly under the cut of the wood, they are almost invisible.
Trick b - pin in the clasp A small nail securing the clasp is nailed close to the edge, so there is a high risk of hitting the edge with a hammer and leaving a dent or chip. For comfortable fastening of the clamp, a small 50 mm pin or a center punch with a sharpened tip will help.
Option #1
Connection of plastic and MDF panels:
- H-shaped PVC profile. Most often, joining along the length of plastic and MDF linings is done using H-shaped PVC profiles, as in the photo below. In this version, the planks are simply inserted into the profile on both sides. The downside is that such a profile is visible, and in the case of MDF it also differs in texture.
The H-shaped profile is considered universal, but it is visible
- Thin straight and corner strips. Manufacturers of MDF panels produce thin strips that are glued to the connection line; these strips can be straight or angular.
- T-shaped moldings . They are inserted into the gap between the panels.
T-shaped moldings for hiding the joints between MDF panels are very easy to use
How to install panels if they are short?
When using short sheets to create a continuous coating, you will have to join them together. To do this, a method is used in a checkerboard pattern, with seams staggered or along one line of the ends of the strips. Each of these methods has its own differences, which require either additional equipment or good skills in working with wood.
- In the first case, the seams are located chaotically , which slightly distracts from the integrity of the canvas and creates the impression of an idea. Here the main difficulty lies in finishing the end of the lining of each contacting material. The smoother the cut, the less noticeable are the gaps and cracks at the joint.
- In the second case, a special additional device will be required to connect different lengths of canvas . If the strips are connected without an H-shaped profile, then they can even be positioned offset, but covered with thin wooden slats or planks. However, installation of continuous decoration of seams is a simpler and less labor-intensive process.
Option No. 2
A decorative overlay at the joint is considered the simplest way to connect wooden cladding along the length. You simply fit 2 rows of planks and nail a piece of wood on top. The configuration and dimensions of the slats can be any, and most importantly, there is no need to adjust the slats too precisely; the slats will cover the entire defect.
To decorate the joint on the Blockhouse lining, a planed board with chamfers is usually used
Craftsmen use wooden T-shaped slats, they are also called mushrooms. There the rail is inserted into the gap, which must be precisely adjusted to the size of the fungus. Plus, this joint must be on the supporting lath of the sheathing.
The gap between the slats should correspond to the thickness of the fungus stem
Methods for covering a room
Length joining is most often done when the ceiling is sheathed. In this case, there are several docking options:
- The joining takes place along one line; when using this method, the joints are covered with decorative overlays or special slats.
- The so-called seam spacing, when the end is sanded, thereby obtaining a neat and unprotruding seam, and each board that is placed is further trimmed. Docking with this method is neat and economical, since almost all the material is used.
During installation, you need to take into account that the joining of the lining in the corners must be of high quality so that air does not pass through the cracks. Laying the plank in a corner can also be done in two ways:
- Fasten two small pieces of suitable size into the corner (as well as the sheathing strip). Before this, the log needs to be sanded and prepared for installation. The log should be small in size so that subsequent joining occurs at the correct angle. In the corner, which was made from logs, attach a plank, a little thicker than the lining. Join the elements with the plank. Next, the plank is joined to the lining. Then the element is fixed to the inner beam.
Conclusion
Each of the above-described options for joining the lining along the length is available to the amateur. To make everything work out beautifully, the video in this article provides general instructions on how to traditionally cover a room with wooden clapboard. There the process is shown more clearly.
- Author: Maria Sukhorukikh
Rate this article:
- 5
- 4
- 3
- 2
- 1
(0 votes, average: 0 out of 5)
Share with your friends!
Lathing for lining: step-by-step instructions
Preparation of the bar
The material for work should be prepared in advance. The timber should be kept for several days in the room where the finishing will be done. This will allow the building materials to acclimatize, and their temperature and humidity will become similar to that in the room.
Next, the sheathing elements are treated with an antiseptic compound (if possible and, if necessary, with an insecticide). This can be done either using ordinary brushes, processing everything in order and carefully. If the volume of work is large enough, then you can build a small trough from boards and cover it with polyethylene. We pour an antiseptic composition there and dip each of the bars. This option will provide high-quality protection against mold and mildew.
Antiseptic trough
Preparing the walls
While the timber is drying, we prepare the surface of the walls. To do this, mark the width of the racks using a pencil and using a level so that all the lines are as even as possible. Such a “drawing” will allow you to clearly see how the entire structure will subsequently look, simplifying the work and controlling the correct location of the sheathing elements.
You should also determine the starting point for installing the sheathing. It can be the lowest corner available in the room (we find it using a water or laser level). After the necessary measurements, we draw out the wall and draw a horizontal line.
Marking Lathing with timber
How to hide wall defects
If the unevenness is significant, then it is necessary to secure the beam using special hangers, which should be positioned in a line (every half a meter) and secured perpendicularly. The prices for this type of fasteners are low, so the costs will not increase significantly. When fastening, the ends of the hangers are bent in the direction of the bar, after which it is leveled and fixed. This option is convenient due to its simplicity and accuracy: you can level surfaces quite quickly and easily.
Wooden wedges can also be used: they are the most important element for leveling significant unevenness in the surface of the walls. Prepare a certain number of wedges of different sizes in advance and treat them with antiseptics. As practice says, they tend to come in handy in most cases.
Hangers will help align the frames evenly
The installation of the sheathing under the lining is constantly monitored by level. We check the position of the bars and only then fasten them. To strengthen the angle, you can install a jumper in these places. This ensures maximum rigidity of the frame and simplifies fastening in corners.
Plaster
Plastering the ceiling surface in wooden houses used to be in great demand.
Plaster is often used in modern cottages, however, it is gradually becoming a thing of the past, since there are enough other materials in the assortment. The plaster is applied to a mesh of shingles, which was stuffed between the beams. The solution firmly adheres to the relief mesh and shingles, which ensures the strength and durability of the coating. It is almost impossible to plaster the ceiling with your own hands without a certain skill. Plastering is a complex and time-consuming procedure that must be performed by professionals. The advantages of this option are:
- affordable cost of both the material itself and plastering services. And if you do the finishing yourself, you won’t have to endure large expenses;
- high attractiveness, wide color palette and the ability to create a surface with a variety of relief;
- durability and practicality.
The disadvantage of such finishing of ceilings in a wooden cottage is the need for thermal insulation of the walls, carried out from inside the room. After all, thermal insulation boards act as an excellent basis for the subsequent fastening of reinforcing mesh. But such technology hides the usable area of the room, which is undesirable if it is not very large anyway.
Useful tips
Despite the simplicity of processing and ease of installation, there are several useful tips for lining to ensure that the coating turns out beautiful, durable and with the necessary properties of the finishing material. Some useful tips:
- To ensure that the size and shape of the canvas do not change as the material is used, it should be kept with a layer between strips of thin fiberboard in the room in which it is planned to cover the surfaces.
- If a batch comes across a “crooked” fabric, then due to the fragility of the connecting side grooves and protrusions, it is very difficult to insert it into a flat product. It is better not to use such canvases, but to use them for sealing places where trimmings are required.
- When using clamps, the protective oil coating containing metal particles must be removed from their surface. This will protect the wooden panels from accidental contamination (how to clean dirt on the lining?).
- To prevent burrs or chips from appearing on the canvas when self-tapping screws are used for fastening, you need to drill a hole with a thin drill at the site of the upcoming fixation.
- To disguise chips, joints and other damage between the canvases, you can use various paints and varnishes, wood putties or decorative elements, for example, thick twine or cord.
Wood is considered a very capricious material , which during operation is capable of changing its dimensions and shape. This must be taken into account when installing canvases on wall surfaces, especially in rooms with high humidity.
For the best result and invisibility of seams between strips of lining along the length, it is necessary to use an H-shaped profile or special thin wooden strips. However, installation with staggered seams will significantly save material, reducing its consumption due to the use of all scraps.
Unusual ways
If laying on flat surfaces usually does not raise any questions, then joining the lining at an angle of 120 degrees is considered quite difficult even for specialists in this matter; here you need to accurately measure the parameters, since the length of the strip may be longer or shorter than expected.
To install the lining at 120 degrees, you will need a special j-lining, the length of which differs from the standard one. This material is more convenient to work with corners and you can carefully lay the lining at 120 degrees.
Docking at 120 degrees
Docking at 120 degrees occurs in several difficult ways:
- One plank is placed next to another so that there is no gap between them, so with the help of special objects you can measure any angle that you need.
- The fastening is installed through the upper points of the fastening corner using special roofing felt nails.
Docking at an angle requires the presence of a sheathing on which decorative lining is attached. What to do if the joints at the corners are very noticeable and are located with a large gap? Specialized stores sell a plinth-type plank that covers the joints and does not allow wind, moisture and air to pass through. The lining can also be painted with special wax paints, which are well absorbed into the wood and form a moisture-proof layer, again protecting against bad weather conditions if you live in a private house.
Ceilings in bathhouses and saunas are sometimes finished with lining; this material is moisture-resistant and unpretentious, mold does not form on it, which means it is well suited for rooms with high humidity. The material is considered a universal finishing material, which is why it is so often used in construction. You can choose material of different colors and lay it out in a checkerboard pattern so that the room is not only warm and dry, but also comfortable to be in. You can also choose lining from different materials, for example, oak, cherry; these types of trees themselves look beautiful and noble.
Thanks to the tongue-and-groove system, covering the surface with clapboard is easy. Most often, problems arise when joining planks at the ends, when the base is longer than the length of the plank. We will analyze in detail how to join the lining along the length in 3 options.
Tools and Fasteners
During the installation of wooden panels, various fastening methods are used:
- clamps , which are inserted into grooves and attached to the wall surface with studs;
- self-tapping screws , screwed directly into the canvas, fixing it to the sheathing made of wooden blocks (what is it for and how to make the sheathing?);
- nails designed specifically for fastening lining, with very small heads, 2.5-3 cm long and approximately 1 mm thick.
For cutting canvases the following is used:
- electric drill;
- jigsaw;
- regular hacksaw for wood.
The result is not always a perfectly even cut, so it needs to be carefully sanded using sandpaper.