In some cases it is necessary to place the film under the laminate:
- The foundation of the room is not sufficiently insulated from ground and atmospheric moisture; it can absorb it from the air and ground.
- The premises initially experience increased humidity due to the geographical location of the building or the characteristics of the room (basement, bathroom, kitchen).
- The floor has a concrete base or a self-leveling mixture has been used.
The last factor is the most common, since laminate can only be laid on flat floors. Therefore, in most cases, a concrete or self-leveling screed is first installed.
Vapor barrier film under laminate - for warranty service
The inserts in the packages with the material happily announce that they provide a 10-25 year warranty. If you take a little time and find the manufacturer’s website on the Internet, you can find conditions that the obligations apply exclusively to damage to the panels due to wear. Moreover, coverage with scuffs along the edges of the boards, where, in general, the deterioration of the material begins, is not subject to warranty service.
It turns out that the warranty obligations of the Classen plant, for example, extend only to the surface of the laminated floor and not the entire surface. Not a word is said about the vapor barrier film; it is only mentioned that when laying the laminate, all the conditions described in the instructions must be observed. And the manual states that it is necessary to lay a waterproofing film with a thickness of 200 microns.
The use of film under the laminate to maintain the manufacturer's warranty is a complete fiction and is only one of the additional necessary conditions. It makes no sense to use a vapor barrier just for this purpose.
There are no cases known to me of warranty replacement of laminate by the manufacturer. During my career, I have never encountered flooring film on orders where old flooring was dismantled, including in new buildings.
In my apartment, one room is covered with laminate laid on a regular foam base. In the second room, a locking plug was laid directly on the concrete base of a multi-story building. The cork was once replaced after 3 years, this was due to wear on the surface from the legs of the sofa. Accordingly, I paid attention to the back of the coating - no problems were found.
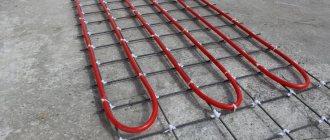
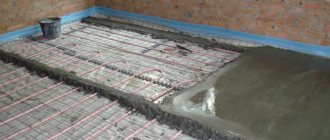
If using a water heating system
An important condition for successful floor heating is to ensure good thermal insulation, so that heat is not wasted. If the base of the heater is pipe, then the lining will provide proper waterproofing in the event of an accident.
Under the water heating system, a lining is usually used, which is based on a material such as isoplat. This material is made from rolled cork, or from expanded polystyrene or polyethylene foam.
Isoplat looks like this
This material can be combined with any alkaline materials used in construction work. In addition, he is not afraid of exposure to chemicals and microorganisms.
Laying the substrate: step-by-step instructions
The amount of substrate is calculated based on the length and width of the room, as well as the dimensions of the coating. It is recommended to purchase the product with a margin of 5-10% to eliminate material shortages due to inaccurate measurements.
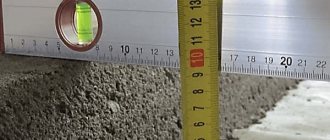
Before laying the underlay under the laminate, it is necessary to level the floor and install waterproofing. The fewer irregularities, the thinner the base can be applied (2-3 mm). On the one hand, this is cheaper, and on the other hand, the floor covering will last longer.
Preparatory work can be done in several ways:
- Concrete-sand screed. This design is the most popular, smoothing out floor unevenness in the horizontal plane up to 80 mm. Filling is carried out according to the “beacons”, the base is mounted after the mixture has completely dried.
- Self-leveling floor. In this case, specialized stabilizing solutions are used, which include plasticizers. The mixture is well distributed over the floor and left to dry the residual moisture.
- Dry screed. This method involves leveling the floor by installing a frame of wooden beams, onto which sheets of plywood, fiberboard or gypsum fiber board are attached. The space inside is filled with a special dry backfill (most often expanded clay).
- Use of chipboard or plywood sheets. The fastest way to prepare flooring. The thickness of the leveling depends on the height of the particle boards.
After the preparatory work, laying the substrate under the laminate with your own hands is carried out using the following technology:
- Use a vacuum cleaner or broom to thoroughly clean the surface of small debris and dust. Otherwise, after installation of the entire structure, unpleasant creaking sounds will be heard.
- A primer is applied to the base prepared floor. The operation is performed 2-3 times with an interval of 3-4 hours. If the base floor is lined with plywood or chipboard, this step can be skipped.
- Install the waterproofing (after the primer has completely dried). All parts of the sheets must be carefully and carefully glued together so that there are no gaps.
- Then you will need to lay the underlay correctly. The sheet base is mounted in a checkerboard pattern, natural analogues are mounted at 45 degrees to the direction of the laminate boards, rolls are mounted transversely in relation to the future coating.
The material begins to be laid from the far corner of the room, continuing until the entire surface is covered. Adjacent sheets or ends of the roll are mounted end-to-end (without overlap) and carefully secured with tape.
To match the geometry of the room, rolls or sheets are cut to size using a square and a knife. The base, like the boards of the future floor, is placed under the door jamb, for which it is filed (if necessary).
Knowing how to correctly lay the underlay and laminate, anyone can handle the process, regardless of how laborious the procedure is. All stages must be approached responsibly. If everything is done correctly, the new floor will last for decades.
Insulation of wooden floors
The situation is quite rare. The construction of the structure on logs allows the use of budget building materials for insulation, because the main and most valuable quality of penoplex is rigidity; in such a floor it does not matter at all.
The exception is the installation of insulation over a plank floor and the installation of floors on joists in a house on stilts. In the latter case, insulation is done according to the following scheme:
- the rough flooring is being laid from boards;
- film waterproofing is laid;
- Penoplex is laid with shifts along the seams;
- insulation boards are screwed around the perimeter of each sheet to the rough base;
- seam gaps are filled with foam;
- a vapor barrier is placed on the insulation;
- lay the sheet base over the finishing coating. For more information about floor insulation using joists, watch this video:
When laying insulation on an old plank floor, it is necessary to secure all the boards to the joists: the floors should not sag or creak. Rotten or damaged boards should be replaced. Wooden floors should be treated with at least 2 coats of primer. Penoplex is laid on the dried base. Further, all work is carried out by analogy with a house on a pile foundation.
No matter how high-quality the laminate is, the service life of the flooring largely depends on the quality of preparation of the floor base. If the installation is carried out incorrectly, even after a short period of use, the locks will begin to come apart and other typical problems will appear. Correct installation involves leveling the base on which the laminate is laid and insulating the floor with penoplex. As a result, the house becomes cozy and comfortable. The main thing is to choose the right size penoplex depending on the place of work and the type of screed used.
Penoplex
What is a vapor barrier?
Insulation is a film or foil material that prevents the smallest particles of water vapor from entering building materials. It also prevents moisture from condensing and damaging the flooring.
The vapor barrier under the laminate works in both directions: that is, it prevents moisture from being absorbed into the board from underneath, and in the event of a leak, it helps prevent flooding of the neighbors.
How is installation done?
Let's consider the main stages:
- The concrete floor is leveled using specialized mixtures.
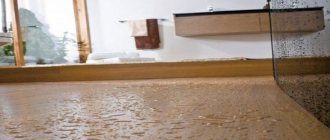
- After drying, a vapor barrier is installed. As protection, you can use ordinary polyethylene film no thinner than 0.2 mm. Vapor barrier is installed over the entire area of the room. The film strips are overlapped by 200 mm, and the joints are carefully glued. The vapor barrier should also extend 100 mm onto the walls and be fixed there with adhesive tape. If this is not done, steam will seep through the cracks in the film (like from under the lid of a kettle) and have a detrimental effect on the floor covering.
- A soundproofing underlay under the laminate is laid on top of the vapor barrier.
- The laminate is directly installed on top of the substrate.
If plywood is used as a backing, a vapor barrier is still needed. Since this material is an excellent conductor of moisture and dampness.
Do you need a vapor barrier for laminate flooring in a wooden house?
Now there are many questions on the forums about the need for vapor barrier under laminate flooring in a wooden house. In such “living” houses there is a natural circulation of air and water vapor, since the wood is constantly “breathing”.
However, a wooden floor is usually located directly above the ground. This means that moisture evaporation from the ground will be absorbed into the boardwalk and then into the laminate. To avoid this, the floor is insulated and a hydro and vapor barrier is required.
Vapor barrier structure for laminate
For wooden floors on interfloor ceilings, vapor barriers are not always used. Above dry, warm rooms in a wooden house this may not be necessary.
A useful video on the topic of the article is below. Be sure to watch it.
We hope that the article was useful to you, we will be grateful if you share it on social networks with your friends.
Why choose penoplex?
The popularity of penoplex is due to a number of important advantages:
- Fine cell structure . The presence of many cells increases the effectiveness of penoplex, aimed at retaining heat in the room.
- Moisture resistance . This property is maintained even with prolonged use of the heat insulator. Thanks to its ability to resist fungi and mold, penoplex retains its performance and characteristics for a long time.
- High level of strength . Penoplex has an increased compression resistance. Thanks to this property, sagging of the laminate can be prevented.
- Compatible with underfloor heating system . Contact with hot surfaces does not negatively affect the performance of the insulation. The exception is temperatures above 80 degrees. In this case, deformation of the heat insulator and partial or complete loss of its properties is possible.
- Fire resistance . Thanks to this property, penoplex can be used in wooden houses.
- Versatility . Penoplex is used for insulating floors placed on the ground, above basements, on floors, balconies and loggias. In any conditions, the material is able to provide an optimal level of comfort for people to live in.
- Relatively low cost.
Due to its characteristics, penoplex can be effectively combined with laminate of any thickness.
When choosing penoplex for laying laminate, it is important to consider that this heat insulator loses its properties under the influence of ultraviolet radiation and has lower sound insulation rates than other heat insulators, for example, fiberglass or mineral wool.
Technical characteristics of penoplex of different brands
| Penoplex brand, properties | 31 | 31С | 35 | 45.45С |
| Density (kg/m3) | 28-30.5 | 25-30.5 | 28-37 | 35-45 |
| Compressive Strength(MPa) | 0.20 | 0.20 | 0.21 | 0.41 – 0.50 |
| Flexural strength (MPa) | 0,25 | 0,25 | 0,4 | 0.4-0,7 |
| Water absorption coefficient, % | 0.4 | 0.4 | 0.4 | 0.2 – 0.4 |
| Fire hazard | G4 | G1 | G1 | G4 |
Video: Laying laminate flooring on penoplex - without screed
Penoplex has many positive properties and high performance characteristics. Therefore, novice builders assume that it can be installed without it. In reality, this opinion is incorrect, but although the video shows how to do it.
DIY waterproofing under laminate
The technology of laying film on a screed is so simple that waterproofing a floor under a laminate with your own hands is possible even for a person without basic construction skills.
Laying film on a concrete floor
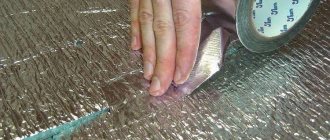
The film is spread over the entire surface of the room, extending 2-3 cm onto the walls along the entire perimeter. The rolls are rolled out with an overlap of 15-20 cm. The edge joints are glued together with tape. Sometimes a special mastic or a construction hair dryer is used (the film layers are fused over the overlap).
- Before starting insulation work, it is advisable to tape a plastic film with an area of at least 1 m2 to the surface of the screed. If condensation forms on it after the night, the room must be dried for 2-3 days.
- Using tape to hold the layers of film together is the most effective option. It’s simple, accessible to a novice builder, affordable in price, and the quality is not inferior to alternative options.
Waterproofing on wooden floors
Waterproofing under laminate on wooden floors is not carried out. There are two reasons:
- the film will certainly be damaged when attached to boards or joists of plywood with fiberboard or chipboard with self-tapping screws, namely they serve as a backing for the laminate on a wooden floor base;
- wood absorbs moisture well, as a result of which there can be no condensation on it, and, therefore, water protection is not needed.
It should be noted that among builders there is an alternative point of view - waterproofing the top of the screed when laying laminate flooring leads to early replacement of the floor. The rationale is this: when the air temperature in the apartment is above 20 degrees Celsius, the laminate begins to dry out due to a decrease in the level of humidity in the room and creaks.
The lamella locks break and do not hold the floor panels tightly together. There is no need to explain the end result - the flooring will have to be replaced before its intended service life. The absence of an insulating film does not allow some of the moisture to be transferred into the laminate from the screed, as a result of which its humidity does not change. The above situation is typical for winter (good heating) and summer, when it is very hot.
In spring and autumn, the situation is the other way around - high humidity in an apartment or house (no heating and nothing dries out) leads to swelling of thin sheets of lamellas. Hygroscopic concrete screed absorbs excess moisture and swelling does not occur.
If infrared heating is used
When laying an infrared heated system, a lining is also used to eliminate heat loss. It will need to be placed under a layer of film on which there are infrared resistors. Then magnesite slabs or fiberboard sheets will act as a substrate.
Simple option
The instructions for lining under such floors state that this product can be made in the form of penofol (metalized polymer film). This lining, along with other types of this material, performs heat-reflecting functions. During its application, foamed polyethylene is used as the base.
The heating elements are clearly visible in the photo.
On one of its sides there is a polymer metallized film. This material is quite flexible, elastic and thin, environmentally friendly. Its main function is to stop the spread of heat along all three of its paths: radiation, conduction and convection.
Stages of work
Instructions for laying insulation under laminate
It is not difficult to insulate a laminate floor on a balcony or in a living room if you follow the instructions. Features of the work depend on the base material - wood or concrete.
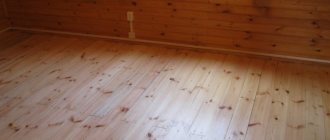
How to insulate a wooden floor under laminate
Insulating a wooden floor under a laminate is easier if everything happens in a new house, since you can immediately begin the main work. In other cases, the algorithm is as follows:
- Dismantle the old covering. This measure can be dispensed with if the surface is smooth and durable.
- Inspect the logs. They may need to be replaced. Treatment with a protective agent is effective for the prevention of mold and mildew.
- Clean out the space. It is advisable to use a vacuum cleaner.
- Lay or pour thermal insulation material.
- Make waterproofing. If it consists of strips, lay it with an overlap of 15 cm.
- Make a subfloor using boards, fiberboard, chipboard or plywood.
If you need to install logs, then waterproofing should be laid before so that the surface is solid. Lay the film in two layers.
When used as insulation under laminate substrates, the operating algorithm is different. It is not necessary to dismantle the wooden flooring if it is relatively smooth, durable and free of traces of mold and mildew. Proceed like this:
- Inspect the subfloor.
- If necessary, level the surface and fill chips and crevices.
- Treat the wooden surface with an antiseptic.
- Install waterproofing. Apply the film in two layers and apply it to the walls to the level of the finishing coating.
- Lay the insulation, retreating from the walls by 1 cm.
How to insulate a concrete floor under laminate
There are two ways to insulate a laminate floor on a concrete floor - make a wooden frame or screed. The first option is more labor-intensive. The algorithm is like this:
- Lay a layer of vapor or waterproofing with an overlap of 10 cm on the wall. If several strips are used, overlap by 10-15 cm.
- Install wooden slats and secure with dowels. The distance between the frame elements is based on the size of the insulation. When using bulk materials, this parameter is not important.
- Treat the sheathing with an antiseptic.
- Spread or pour sealant. It should not protrude above the sheathing.
- Lay a waterproofing film.
- Make a subfloor from wood sheets or slabs.
- Lay out the backing.
- Lay laminate.
All joints and chips on the wooden base under the laminate must be puttied.
If you choose not a wooden frame, but a screed, then proceed as follows:
- Clean the surface.
- Make a leveling layer of cement and sand, wait until it dries completely.
- Lay a hydro- or vapor barrier.
- Lay insulation. When using bulk material, place a metal mesh on top - a reinforcing frame. In this case, there is no need to pre-level the floor.
- Install beacons.
- Fill the screed.
Floor insulation for concrete under laminate can be of different thicknesses. You need to focus on the evenness of the surface and the permissible height of the finished floor. The wooden frame significantly reduces the height of the room, and self-leveling mixtures create a minimal layer.
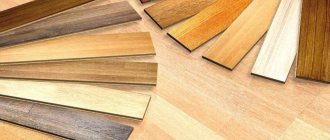
Laminate is sold in the form of planks, which are a multi-layer cake of a load-bearing wood base, a decorative coating and a protective layer on all sides. If these lamellas are produced with high quality and technology, then moisture is not too dangerous for them. They can be safely washed when cleaning the house.
Floor construction with waterproofing
It is even allowed to spill water on the floor in small quantities, the main thing is not to let it stagnate on the laminate. On top and bottom, each lamella is protected by films of resin, acrylic and melamine, which do not allow moisture to penetrate inside and reach the fiberboard base.
Problems with swelling of laminate planks arise when the protection is damaged and prolonged exposure to moisture from below. It is the second factor that waterproofing on the floor under the laminate is designed to combat. However, it should not be confused with a soundproofing substrate made of foamed polyethylene. These underlayment materials are designed for different purposes and are not interchangeable.
The waterproofing layer under the laminate must be laid:
- in the presence of gypsum or concrete screed, as well as on concrete floors;
- when laying cork or chipboard (fibreboard) underlayment;
- if on the floor below there are rooms with high humidity (bathrooms, kitchens, etc.);
- on the first floor, when there is a basement without heating underneath or a pile foundation without insulation along the base.
Waterproofing is unnecessary only when laying laminate flooring on a wooden floor or linoleum, which itself already serves as a moisture-proofing material. A separate point is with the underlying rough flooring made of wood boards. If you plan to attach fiberboard or chipboard to the base with self-tapping screws, then the waterproofing coating will be of little use. It will inevitably be damaged in such a situation.
Ground installation: step by step
The design thickness of such a floor cake is 60-70 cm. The base must be dry and thoroughly compacted.
- A layer of gravel 30 cm or more thick is laid alternately with a layer of fine sand about 10 cm thick - both layers must be thoroughly compacted.
- Carefully level the installation location.
- They are alternately covered with expanded clay and sand to a height of 40 cm.
- Then thermal insulation boards with a thickness of 5 cm or more are laid. The insulation sheets are neatly connected without gaps. The joints are sealed with adhesive tape. Penoplex is suitable for the first floor.
- The entire base is covered at the edges with tarred paper (roofing felt) or polyethylene. They are mounted on penoplex.
- Then a metal mesh is laid for reinforcement and the whole thing is filled with concrete. The layer thickness must be at least 5 cm.
- To avoid problems when laying the floor, the pouring is carefully leveled over the entire pouring plane.
Video: DIY ground floors
When can you do without it?
- the laminate is laid over chipboard/fibreboard and attached to them with self-tapping screws - they will still cut through the waterproofing, so there is no point in laying it down;
- laminate flooring is installed in an apartment of an apartment building, not on the ground floor, where people live all year round and there is centralized heating (or other heat sources that work in cold weather);
- there is a wooden floor under the laminate - in this case, waterproofing is needed already under the wooden floor (because if moisture gets on the wood from below, the laminate will survive, but the wood underneath will rot).
Recommendations and tips
There should not be any particular difficulties with laying the insulation material. Connecting a dishwasher to water supply and sewerage or installing a thermostat for a gas boiler is even more difficult. In the case of thermal insulation under laminate, the main thing is to do everything consistently and without haste.
In this case, the soundproofing substrate, insulation, polyethylene waterproofing and laminate lamellas should be laid in strips perpendicular to each other in adjacent rows. This will prevent the joints from spreading under future loads.
Advantages of foil cork backing
When is it necessary to use film under laminate?
There are cases when you need to use film under laminate, and we suggest considering all options.
- There are different situations. One specialist’s story: “There was a situation when a master went to a country house to measure something in the winter. The cottage that was built was of the summer type, the foundation stood on screw piles, but the screed was made of cement. And the customer asks - they need to lay laminate, and the master said that in such conditions it is impossible to lay the floor, since mold quickly begins to spread from below. The answer was that after the work of previous specialists, the cork substrate under the coating rotted and became covered with fungal colonies.
- It is difficult to say what guided the customers when they tried to re-lay the floor covering, stepping on the same rake. But a vapor barrier film would then prevent mold from getting onto the cork backing. But such a situation would act like a time bomb. The fact is that the presence of a large amount of moisture under the film and a complete lack of ventilation, in any case, could contribute to the appearance of fungus.
- An example story. Given - the apartment was flooded (completely), because the tap in the people's bathtub broke out and an accident occurred. The owners of the apartment were not at home, water leaked into the rooms below the floor. The disaster had to be stopped by turning off the water supply through the common riser. Having arrived at the address, we had to dismantle the laminate and coniferous underlay a week after the flood occurred. The lining had rotted and become covered in fungal colonies, even the concrete base had turned black. I had to dry the concrete screed for about a week before starting to lay the laminate flooring.
Would a vapor barrier film help in this case and how much? Let's say a black protective film of 0.02 cm is laid overlapping the walls, on top of each other and well taped with wide stationery-type tape, creating a trough shape. Naturally, it would not be possible to close all the cracks and gaps - they are located near heating pipes, in doorways, and the polyethylene can tear due to small pebbles. For this reason, we assume that polyethylene will only delay the entry of water into the screed for a certain time and further down to the neighbors.
Naturally, in the short term, for example, if a hose is tagged in time and has jumped out of a washing machine, a moisture barrier film will help, but no more.
Vapor barrier perforated film for laminate
Sometimes customers ask to lay a vapor barrier film that has perforations under the foam backing. You know, there is a deep meaning in this waterproofing. If the first floor of the building is well insulated and residual moisture enters the final layer on the subfloor, and the vapor insulation can dissipate this remaining moisture in measured doses. Remember that pine and cork substrates and teplex can by design handle a small amount of moisture, dissipating it within the personal structure. It is up to you to decide whether to lay vapor insulation under the laminate or not, and below is a brief table of the use of protective film.
| The need for vapor barrier film | Old concrete base | New cement screed | Wood base | Vacation home |
| synthetic backing | — | — | — | ? |
| Natural substrate | — | + | — | — |
Conclusion
Using a substrate when working with heated floors of all types, you will be able to reflect up to 97% of thermal radiation. Thus, you will significantly reduce energy costs. You will get more detailed information from the video in this article.
Characteristics of extruded polystyrene foam
How to lay laminate correctly
Most often, underlays made from this particular material are used under the laminate. The peculiarity of its structure lies in evenly spaced closed cells, which ensures the moisture resistance of the material. The substrate is manufactured using an extrusion molding machine, where polystyrene along with a foaming agent is fed through a narrow nozzle under high pressure and high temperatures. The result is a material with low density (30-40 kg/m³).
Expanded polystyrene backing
Grooves on one side of the substrate are necessary for natural air circulation
The material does not rot and does not absorb moisture. When wet, water does not penetrate further than the open side honeycombs at the cut. It is distinguished from its analogues by its greater strength and thermal insulation properties. Substrates made from this material are produced in rolls and in the form of sheets, measuring 1000 x 500 x 3 mm.
Table 2. Characteristics of polystyrene foam
| Technical properties | Unit | Meaning |
| Moisture absorption | % | 0.08 |
| Operating temperature range | °C | from -50 to +75 |
| Density | kg/m³ | 35 |
| Soundproofing | dB | from 5.5 to 22 |
| Thermal conductivity | W/(m*°С) | 0.035 |
Polystyrene foam substrates combine high quality and affordable price