Are you developing an interior design yourself, but don’t know if it’s possible to hang cabinets on a ventilation duct? On the one hand, you will be able to use the space of your home more rationally, but on the other hand, you absolutely don’t want to become a criminal because of a few square centimeters, right? So is this procedure legal and what should be done to avoid penalties?
We will help you find answers to your questions - in the article below we will tell you in detail whether it is possible to drill a box and hang cabinets and shelves on it, as well as change its design in any other way. We will also figure out what actions may be considered unlawful and what risks the violator bears.
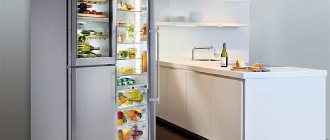
Hanging kitchen cabinets on drywall - 5 reliable options
Features of attaching wall-mounted furniture to plasterboard are related to the design of the walls and the characteristics of the material itself:
If you make a mistake with the fasteners or choose the wrong fastening method, something like this may happen.
Used as a decorative element
The principle of the method is decoration. This applies not only to the ventilation duct itself, but also to the adjacent part of the wall (in some cases). You need to make sure that the box becomes a stylish accessory to the interior of the room. The following techniques are used for this:
- Fixing the mirror will not only have a functional purpose, but can also visually expand the space.
- Sticker of wallpaper, photo wallpaper, panels. Any of the options suits the style of the room.
- Continue finishing the work apron. It could be tiles, porcelain tiles, mosaics, melamine surfaces or something else. The goal is to blend the ventilation duct with the rest of the kitchen.
- Assembling a frame from gypsum board allows you to change the configuration of the box and give it the desired shape.
- A similar situation applies to cladding with PVC and MDF panels. The sub-cladding system covers visible imperfections.
- Organization of the slate board. Simple and tasteful, it will be possible to leave messages and wishes for household members, and write down important reminders.
- Decoration with artistic painting is suitable for rooms that already have such decorative techniques. You can emphasize the decorative significance of the ventilation duct by highlighting it with lighting. The ideal option would be spotlights recessed into the ceiling or a diode strip located there.
An example of the correct layout of a kitchen space Source stosastudio.ru
Extremely inconvenient location of the ventilation shaft Source esen.ucoz.net
Method 1. Installation of embedded beam
The embedded elements are pre-installed into a wall or partition made of plasterboard at the required height during the installation of the frame.
A huge advantage of this method is the ability to securely screw the cabinet fastenings anywhere along the entire length of the embedded elements.
Mortgages do not require any additional costs. Essentially, these are additional horizontal jumpers of the frame made from scraps of a rack profile with wooden blocks embedded in them.
The combination of profile and timber has a number of advantages compared to purely wooden mortgages:
The method with embedded elements is often used if it is necessary to hang kitchen cabinets (especially on a plasterboard partition), when there is simply no possibility of attaching to a solid wall.
The disadvantage of this fastening method is the need to know in advance the dimensions and location of the wall cabinets, which is not always known at the installation stage.
Hanging height
Consider the distance from the countertop to the bottom of the cabinet. Minimum – 45 cm, average – 90 cm. At a height of 110 cm, hang only one shelf.
You can also use the formula:
H=h1+h2+h3-45mm, where the letters are the height:
- H – from the lower stop (table top, floor) to the bar;
- h1 – furniture above which the box is hung;
- h2 – kitchen apron;
- h3 – wall cabinets.
Subtract 45 mm from the resulting sum of all heights - this is the standard indicator of suspension shrinkage.
Focus on the height of people who most often use things from the closet. The optimal distance would be when a person reaches with an outstretched arm to the top shelf and takes the item without the risk of dropping it. But also leave enough space above the countertop.
Standard parameters of a kitchen set
Expert opinion
Bashir Rabadanov
Technologist at the furniture company Woodband
If it is necessary to hang over tall equipment, place the lower part of the cabinet in close proximity to their upper limits, almost close to the ceiling. This applies to refrigerators and ovens.
Find out more about hanging heights for kitchen furniture.
Method 2. Mounting a horizontal bus
Sets of modern kitchen sets and wall furniture often include metal rails - a rigid shaped strip with holes and bends for hanging kitchen cabinets on special hooks.
For tires, the universal rule for attaching hanging elements to a plasterboard wall is applied - distribute the load as much as possible along the plane of the sheet and, if possible, transfer it from the plasterboard to the frame.
Installation is carried out in a combined way:
You can find frame elements under drywall using a magnet. To do this, it is held a few millimeters from the surface of the plasterboard - at the location of the metal element, the magnet will be attracted to the metal.
Another way is test drilling. Using a screwdriver with a very thin drill, the plasterboard is drilled without pressure in the places where the profile is supposed to be located. The drilling height is chosen such that the “unsuccessful” holes are subsequently hidden under the tire. The drill easily passes through the gypsum board and “falls” into the void. The drill will rest against the profile and will not drill through the metal without noticeable pressure.
Wooden blocks or planks can be used as tires. In this case, it should be taken into account that the wooden block is noticeably thicker than the metal strip, which is why the wall cabinets will move somewhat away from the wall. To fix this, you will need to install a stop of similar thickness under the bottom edge of the furniture so that the kitchen furniture elements do not hang forward on the wall.
Typical sizes of kitchen units
Collections of modern kitchen furniture are developed taking into account the laws of ergonomics and consumer convenience. The average physiological indicators of a Caucasian person are taken as the standard in Russia, Europe and North America. If the parameters of the owner of an apartment or house are very different from the average, experts recommend making furniture to order or looking for exclusive models with dimensions changed up or down. Otherwise, working in such a kitchen will be uncomfortable.
Method 3. Plastic and metal wrap-around dowels
This is the fastest option for hanging a cabinet from a plasterboard wall. The downside is a significant limitation on the maximum load. The video below demonstrates what load different types of dowels can withstand:
For fastening, special roll-up dowels for DRIVA plasterboards are used. They come in metal and plastic, with or without a drilling tip, and have large external threads and a cross slot for screwing into drywall with a screwdriver. In contrast to previous methods, these fasteners should not get into the metal frame profiles.
DRIVA is simply screwed into the plasterboard sheet in the right place, its end is flush with the plane of the wall. The force when screwing should be controlled so that the dowel does not “fall” through the gypsum board. To fasten hanging furniture, self-tapping screws or self-tapping screws are screwed into DRIVA.
Advice! To avoid distortions when screwing in dowels, you can pre-drill the gypsum board with a regular drill of a smaller diameter.
The declared maximum load on DRIVA fasteners is 25 kg. At the same time, we should not forget about the additional dynamic loads that arise during operation. Craftsmen recommend using DRIVA for attaching small cabinets, shelves, plasma panels and paintings to drywall.
Another innovative solution is the use of the Fischer DuoTec self-aligning dowel. The principle of its operation and installation technique can be seen in the video:
Rules for choosing the decoration of the ceiling surface for the kitchen
On the market, manufacturers offer slatted, panel, tensioned options, but professionals recommend a simple plastered look.
What is the reason for this choice:
- the classic version has a white and smooth surface, has aesthetic characteristics, and is suitable for any modern interior;
- this material is safe from an environmental point of view;
- the absence of additional hanging systems will visually expand the room;
Plastered ceiling
Among the disadvantages of a plastered ceiling covering, we note:
- complexity of creation, the need to obtain a perfectly smooth surface;
- labor intensity of work (time and resources), preliminary cleaning of the ceiling covering, its puttying, whitewashing (painting);
It is much easier to level the surface by using moisture-resistant ceiling wallpaper intended for painting.
Method 4. Expandable anchor fastener
Expandable fasteners are more difficult to install, but are much more reliable. When tightened, the part of the dowel located behind the drywall is compressed along its length, spreading widely to the sides. Even a strong accidental tug will not pull the tightened expansion fastener out of the wall.
This approach allows you not only to hang cabinets on gypsum boards, but also to attach pendant elements and lamps to a plasterboard ceiling - one dowel will support a weight of up to 35 kg.
Attention! With multi-point fastening, the load per square meter of drywall should not exceed 50 kg. Therefore, you should not load single dowels to values close to critical.
Expandable anchor fasteners for hollow-core walls consist of two elements:
Two types of expansion fasteners are most often used:
To attach cabinets to drywall, a hole with a diameter corresponding to the diameter of the fastener is drilled in the places marked for fasteners using a conventional drill. It is inserted into the holes in a straight, loose state, and a small side at the end of the dowel will not allow the fastener to fall inside the wall.
After this, a screw or self-tapping screw is screwed into the dowel all the way through the furniture's mounting lugs. There is no need to apply excessive tightening force - overtightening the “butterfly” can lead to the screw turning in the plastic, and the fastening element will have to be changed. It is difficult, but possible, to break the thread on a metal Molly dowel.
Options for organizing supply ventilation
You can increase the air flow into the apartment in a natural or forced way.
Natural supply ventilation is organized by means of valves inserted into windows, balcony doors or directly into the wall of the house through a ventilation hole:
- The window valve is inserted into plastic windows either at the manufacturing stage, or is cut into existing window frames by specialists and allows air access through hermetically sealed sashes.
- The wall damper is mounted in a specially made technological ventilation hole in the wall. On the domestic building materials market there are numerous options for wall valves designed for natural ventilation. Structurally, they consist of a pipe with thermal insulation, an external protective grille and a filter, an air flow volume regulator. The regulator allows you to simply turn it to increase the flow of outside air in warm weather, or reduce it to a minimum in winter or in rainy weather.
Forced supply ventilation devices are more numerous and varied. Their distinctive feature is the presence of a fan that creates a forced flow of air through the ventilation hole. Devices are divided into several types:
- Mechanical ventilation devices. They are the same wall filters, only equipped with an inside fan connected to the power supply. If necessary, they are equipped with heating of external air and filters for cleaning it.
- Breezers. These units are a ready-made mechanism equipped with a forced-air fan and a fine filter, which allows you to retain not only large debris, but also dust, pollen, etc.
- Supply air ducts. The most complex design, consisting of a branched system of hoses. Allows you to distribute fresh air throughout all rooms of the apartment. Air ducts are laid under the ceiling and masked with suspended ceilings or decorative ducts. Air injection is carried out by ventilation units mounted near the inlet openings.
The choice of one or another option is made based on the volume of the ventilated room, the financial capabilities of the customer and other nuances.
An integrated approach to fixing to drywall
For starters, why can't drywall hold hanging objects? In fact, plasterboard sheets are quite strong and can withstand high destructive loads from 15 to 60 kgf, depending on the thickness of the sheet. Also, partitions are usually made in two sheets, which further increases their strength.
However, the density of plasterboard is only 80 kg per cubic meter, which is 6-8 times less than the density of wood. This means that you can drive a screw into a plasterboard wall, but the screw will not hold a heavy object. To attach heavy objects to drywall, special technologies must be used.
Reasons why a mine may stop working
A typical air duct problem is air flowing backwards. It all depends on the features of the system used. For example, all shafts in an apartment direct waste streams to a common channel.
If an individual channel in one of the apartments fails, this will not affect the performance of the entire system. But if there are several such apartments, then the air flow simply will not be able to push itself further, and accordingly, it will go down. The last floors will draw in the exhaust air. Usually in this case they decide to bring their channel directly to the roof. The culprit for air exchange problems in individual apartments may be plastic double-glazed windows or the lack of a gap between the floors.
Attaching heavy objects to plasterboard using embeds
Mortgages are also used to install the inside of air conditioners. Frame designs with embedded parts make it easy to install an air conditioner in a room without special fasteners for hollow structures. Also, embeds allow you to quickly remove and repair refrigeration equipment and air conditioners, just like on a regular wall.
I described the essence of the technology in the article installing a sink on drywall. At the stage of installing the frame for the partition, a proprietary wooden traverse is installed between the racks or boards are simply mounted. After sheathing with sheets, the embedded elements are not visible and, if necessary, they are used as platforms for a canopy.
This technology is the most reliable, but requires prior coordination and planning. Mortgages must be installed exactly at the location where heavy objects are installed and during installation of the structure.
Conclusions and useful videos on the topic
The video below describes what can happen if you redesign a duct to compromise its structural integrity. And although the video talks about the very fact of complete disassembly, in essence it does not matter. Since any changes in the design of the ventilation box are considered redevelopment:
By hanging a cabinet or shelf on the surface of the ventilation duct, the owner of the room will be able to more efficiently use several tens of square centimeters of living space. Sometimes such a solution can improve the aesthetic qualities of the room. And this is where all the benefits of changing the design of the ventilation duct end.
Therefore, you should not make rash actions or unauthorized changes in the registration of joint property. Since there can be many times more unpleasant moments than benefits.
Have you hung cabinets on the ventilation duct and coordinated your actions with the housing inspector? Share your experience with other users: talk about the difficulties you encountered and how much time it took you to prepare all the necessary documents. If you still have questions, ask them to our specialists and other site visitors in the comments section under the article.
Source – https://sovet-ingenera.com/vent/raschety/mozhno-li-veshat-shkafy-na-ventilyatsionnyy-korob.html
Fastening without embedded traverses
The planning of repairs does not always coincide with its implementation, and it is often necessary to attach heavy objects to drywall after finishing work, when it is no longer possible to install the mortgages. What to do?
In this case, you need a fastener that will create a support platform on the end side of the sheets. The support will rest on a large surface of the sheet and will make it possible to attach (hang) a heavy object.
For such fasteners, special folding fasteners are used. If desired, you can make them yourself.
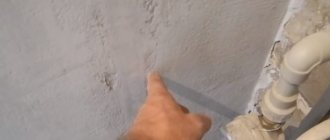
I showed an example of such fasteners in the photo. This is how the fastener works. A hole is drilled in the plasterboard wall according to the diameter of the folded fasteners. The fastener is inserted into the hole, opens there, and the mounting bolt or hook remains on the surface.
Who can detect the demolition of a ventilation duct?
Of course, sooner or later, specialists discover the absence of a ventilation duct. Among them may be a BTI technician, an inspector from the Moscow Housing Inspectorate, or a building inspection engineer. You can also discover the absence of a ventilation duct yourself.
In order to understand and determine whether the ventilation duct has been demolished, you will need a BTI floor plan. The box is always reflected on it, its dimensions are drawn to scale. Thus, you can measure the ventilation duct with a ruler and, through simple calculations, determine the size of your duct and its presence in the apartment.
The consequences for the owner when the box is demolished can be different. It all depends on how the place where the ventilation duct was is used.
READ MORE: DIY TV antenna 7 working methods
Other mounting methods
To reduce the expected load, you can use special dowels. They are suitable for mounting on drywall in one layer, paintings, prints, and decorative elements. This type of fastener is called a spring crepe dowel. It can be a plastic butterfly dowel or a metal spring dowel. The principle of operation is the same, insert the dowel into the hole, when screwing the screw (bolt) into the dowel, the “ears”, the “wings” of the dowel move apart, creating a support platform.
Features of drywall
Drywall is a material now known to everyone. It is made from compressed gypsum, and the word “cardboard” in the name is due to the presence of ordinary thin cardboard on one and the other side of the gypsum sheet. This is an absolutely safe and environmentally friendly material that helps maintain an optimal microclimate in any room, does not emit toxic substances into the air, is easy to use and is not flammable. It also has a good level of sound insulation, can bend if necessary (just moisten it with water), and can be painted and pasted over. Drywall is usually used during major renovations of premises to create arches, suspended ceilings, level walls and build partitions.
The history of the appearance of plasterboard boards
Physical and technical characteristics of plasterboard sheets
Drywall also has its disadvantages, which limit the possibility of using the material in repairs and construction. So, it does not like high humidity and is picky about storage conditions . It should not be used for finishing ceilings if there is a risk of flooding of the apartment from above. This material is quite fragile and cannot be used as horizontal shelves.
What types of ventilation ducts are there?
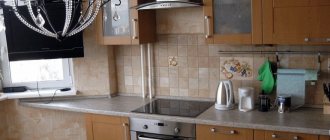
The box may have modest dimensions and take up little space. Or have a large size, which causes a lot of inconvenience. It is important that the structure cannot be dismantled for safety reasons. The box can be located in a corner or at the entrance. Most of them are rectangular in shape.
The presence of such a detail confuses many people, because it does not allow the use of headsets created for a standard layout and the implementation of many ideas.
The design of a kitchen with a ventilation duct requires a special approach and a non-standard solution to the problem of an unsuccessful layout.
Fastening objects to drywall: features
Important! If light objects are fixed to drywall using conventional dowels, then it is important to choose one so that it does not go right through the sheet.
However, due to the fact that drywall is far from the most durable material, it is not so easy to hang heavy objects on it. More precisely, there are no particular difficulties in the process, but there are certain features of carrying out such work and rules that must be followed. Otherwise, there is a great risk that the same kitchen cabinet or heavy shelf, if not fixed correctly, will simply fall down, at the same time ruining the drywall itself. There are certain ways to attach cabinets to such surfaces, and it is them that we will now study.
Fastening light items to gypsum boards
Characteristics of the painted coating
When choosing paint, choose products from well-known manufacturers that allow you to carry out wet care of the coating.
The painting algorithm involves several basic actions:
- leveling the ceiling surface;
- puttying uneven areas and crevices;
- sanding protrusions;
- applying an evenly distributed layer of paint.
High-quality painting of the ceiling surface is a difficult job, the degree of difficulty is determined by the area of the ceiling and the amount of experience. In the worst case, painting can take 18-20 hours.
Paint lasts a long time
The presence of stains from soot and smoke is unacceptable; they must be removed before painting begins. If the stains were not removed before applying a coat of paint, they will appear, leaving the kitchen covered in unsightly yellow stains. To remove stains, use matte alkyd paint. The cost of painting (provided you do the work yourself) is an inexpensive pleasure.
Types and methods of fastening cabinets to plasterboard
The plasterboard sheet inside is loose and soft compared to the same concrete or wood. And this is the whole difficulty of hanging cabinets on walls and partitions made of this material. Here it is important not only to choose the appropriate fixation method, but also to be able to correctly identify the attachment points. If you just screw the first self-tapping screw you come across into the material, then even a small load will be enough for it to break out of the wall. By the way, even to hang a light painting on a plasterboard wall, you need to use special screws that have a very large thread pitch.
Self-tapping screw and expansion dowel
On a note! Craftsmen note that with the right approach and selection of fasteners for drywall, you can hang anything on it, no matter what the weight of the object being hung. Drywall can withstand very serious loads if done correctly.
So how can you mount a cabinet on a plasterboard wall? There are several options and we will explore them all. Much will depend on the weight of the hanging furniture, as well as how it will be used.
Mortgage beam
Perhaps, in order to hang something heavy on a plasterboard wall, installing an embedded beam is the best and most reliable option, and also quite simple. However, this method can only be used if the location of the furniture is thoroughly known already at the stage of repair and finishing. Otherwise, the embedded beams cannot be used. Also, the installation procedure is carried out even before the drywall sheets themselves are fixed.
Using mortgages for attaching cabinets to gypsum plasterboard walls
On a note! The technology at first glance seems troublesome and complicated, but in fact it is very simple. And it will allow you to mount several heavy objects on the wall at once - for example, a kitchen set.
Let's see how to fix the embedded beam for placing cabinets.
Step 1. The first step is to install the profiles on which the drywall itself will be fixed.
First, profiles are installed
Step 2. Next, you need to apply markings to the profiles, focusing on which the timber will be fixed.
Markings are applied to the profiles
Step 3. To attach the cabinets, you need to select a dry wooden beam or board. It must have an optimal cross-section - such that there are no mistakes later when attaching furniture. Thus, its optimal width is 8-10 cm. The thickness is also worth paying attention to, but in general it depends on the width of the free space between the wall and the sheet of drywall. Moreover, after fixing it to the profiles, the sheet of drywall must lie so that it is pressed tightly against the block.
Board for fastening the cabinet
Step 4. The beam or board needs to be cut into pieces that will fit between adjacent profiles.
The length must correspond to the profile pitch
Step 5. Next you need to install the bars between the profiles. To do this, you will need screws and metal profiles for fixation. When attaching profiles, you need to focus on the markings - the line should be approximately in the middle of the profile being attached. It is attached using self-tapping screws to the end part of the plasterboard profile. On the adjacent drywall profile you also need to fix a similar profile with self-tapping screws. Fixation is carried out at 2-3 points.
Self-tapping screws are used for fixation
Fastening profile sections
Profiles are fixed at 2-3 points
Step 6. Now you can fix the beam itself. You need to insert it into previously installed small profiles and screw them to them with wood screws. It is best to level the wooden part using a building level.
The embedded beam is inserted into the profiles
Wood screws are used
Attention! The height of the placement of the timber must be determined depending on what level on the wall the cabinet should ultimately be located.
Next you need to cover the wall with plasterboard and that’s it, you can hang the cabinets. It is important to get into the wooden beam when making holes for fasteners. The length of the screws should be such that they do not go right through the beam and do not rest against the main wall.
Horizontal bus
The method described above is ideal if the repair has not yet been done and the walls are not covered with plasterboard. If the situation is the opposite, then it is not recommended to take risks and hang cabinets on the wall using only plasterboard. You need to use another method - installing a horizontal bus. It will allow you to secure several pieces of furniture in one row at once.
A horizontal bus is a long but narrow metal profile with holes for screwing in self-tapping screws, which must be fixed to the wall along its entire length (two profile units are fixed parallel to each other).
Mounting rails for wall cabinets
Interestingly, the guide rail is attached directly to the drywall (it will be located at the top and bottom of the cabinets), but still has a high holding force and will not fall, since the load will be evenly distributed over the entire surface of the material, and not concentrated only in the area of the screws that are screwed in. But it must be securely fixed - the step between adjacent screws in the tire must be at least 5-8 mm, and the screws are screwed in in two rows.
Installing a kitchen on plasterboard using a metal rail
Advice! It is recommended to screw several self-tapping screws holding the tire directly into the guides that hold the drywall itself on the wall.
Drywall dowels
This option, such as using only drywall dowels, will most likely only be suitable if a very light cabinet or shelf is attached to the wall - heavy furniture will not always be supported with their help. But point fastening also has its place, so it must be considered, because not only kitchen units are always hung on the wall.
Types of dowels
On a note! Each point of single-point fastening, using the correct dowels, can withstand a load of up to 10 kg without breaking. Thus, two dowels screwed into drywall will completely support a small cabinet weighing up to 20 kg.
Drywall dowels can have different lengths, but their diameter is always the same. The length can vary from 25 to 32 mm. The shorter ones can be used for one layer of drywall, and the longer ones can be used for two-layer wall coverings. There are also different types of drywall dowels, differing in holding power and appearance.
Butterfly dowel
Let's look at ways to fix lightweight cabinets to drywall using various types of dowels.
Screw dowel
One such dowel can withstand a load of up to 6 kg with single-layer sheathing, and up to 15 with two-layer sheathing. It is very easy to use.
Step 1. You need to mark the place where the dowel will be screwed in and just start screwing it into the sheet of drywall using a regular screwdriver.
Mark the place where the dowel will be screwed in
Step 2. The dowel may come out on the other side of the sheet - this is normal. You need to screw it all the way.
It is important to tighten the dowel all the way
Step 3. Now you just need to take a self-tapping screw of a suitable diameter and screw it into the installed dowel.
Self-tapping screw is screwed in
Dowel "butterfly"
This type of dowel is more reliable than a regular screw dowel. It can withstand a load of up to 10 kg with a single-layer wall covering and up to 25 kg with a two-layer wall.
Step 1. You should mark the place where the fasteners are screwed in and drill holes for the butterfly dowel.
First a hole is drilled
Step 2. Next you need to start inserting the plastic dowel.
Dowels are inserted
Step 3. After the dowel goes completely through the hole, “wings” will open on its body.
The wings have opened
Step 4. Now you need to start screwing in a self-tapping screw of a suitable diameter. While screwing in the self-tapping screw, the “wings” of the dowel will begin to open and press against the surface of the drywall sheet on the other side, ensuring reliable fixation of the fastener.
At the end a self-tapping screw is screwed in
Is it possible to demolish a ventilation duct in an apartment?
A ventilation duct in an apartment often seems like a simple protrusion in the wall that can simply be demolished and a new space created in its former place. Unfortunately, such decisions always end badly. To avoid misunderstandings, we immediately want to answer the question “is it possible to demolish the ventilation duct?”
Our answer: if we consider this issue from the point of view of building codes and regulations and from the point of view of the prospect of approval of this redevelopment, then it is definitely impossible to demolish the ventilation duct.
If you are planning to remodel your apartment, but the ventilation duct is in the way, then before cutting it out, carefully study the conditions for its elimination. Designers often encroach on ventilation ducts. Before you approve the design project, ask the designer to evaluate the consequences of removing the ventilation duct and only then make a decision.
- This is an inconsistent redevelopment. The main and direct reason why the decision on demolition is negative is that the ventilation duct cannot be demolished, otherwise it will be an illegal redevelopment.
- The ventilation duct is not your property. By eliminating the ventilation duct, you are violating the boundaries of someone else's property. This fact makes you powerless in relation to this section of the apartment: you will never be able to agree on redevelopment in your apartment in this form.
A ventilation duct is a general building communication consisting of an air duct that provides residents with normal ventilation. If you cut it, then at the same time you are cutting off oxygen to your neighbors. And this is air stagnation, which causes the appearance of mold and other harmful fungi and bacteria. And this, in turn, is the cause of allergies, shortness of breath and other unpleasant diseases in children and adults.
Photo of a room with a ventilation duct
Of course, sooner or later, specialists discover the absence of a ventilation duct. Among them may be a BTI technician, an inspector from the Moscow Housing Inspectorate, or a building inspection engineer. You can also discover the absence of a ventilation duct yourself.
In order to understand and determine whether the ventilation duct has been demolished, you will need a BTI floor plan. The box is always reflected on it, its dimensions are drawn to scale. Thus, you can measure the ventilation duct with a ruler and, through simple calculations, determine the size of your duct and its presence in the apartment.
Normative base
Definitely yes! We talk about this on our page here: Read
The management company accepts complaints that there are problems with ventilation. If she does not respond, then the next stage where you can contact is the Moscow Housing Inspectorate.
If all your complaints have “sunk” into the abyss, and the competent services do not respond, then you should write to the mayor’s office, a local deputy or the Moscow Control Committee.
Many services accept requests from citizens online on the website. You can leave a request or complaint without leaving your home.
READ MORE: All about soft roofing types and features photo device
Demolition of a ventilation duct in a house
The consequences for the owner when the box is demolished can be different. It all depends on how the place where the ventilation duct was is used.
Negotiations with neighbors angered the neighbors even more, and the Moscow Housing Inspectorate, doing its job, was ready to take the case to court.
The case ended with the restoration of the ventilation duct, another month of construction in the apartment, the loss of 700,000 rubles for remodeling the entire kitchen and 150,000 rubles for coordinating the redevelopment.
An example of an apartment layout with a ventilation duct
Recommendations
If you decide to make a renovation with redevelopment, it is better to think ten times whether to demolish or leave the ventilation duct. To avoid problems, we recommend not changing the parameters of the ventilation duct. If you have an apartment with a dismantled or partially dismantled frame, we recommend restoring it.
It is impossible to coordinate the dismantling of the ventilation duct!
We described in detail the problems that the owner may encounter without agreeing on the redevelopment in the article “Why do you need to approve the redevelopment?”
If you have any questions, you can ask them in the form below. We will be happy to help you understand your problem. To receive a complete free consultation, you can call us during business hours or leave a request for a call back. We will help you!
- This is an inconsistent redevelopment. The main and direct reason why the decision on demolition is negative is that the ventilation duct cannot be demolished, otherwise it will be an illegal redevelopment.
- The ventilation duct is not your property. By eliminating the ventilation duct, you are violating the boundaries of someone else's property. This fact makes you powerless in relation to this section of the apartment: you will never be able to agree on redevelopment in your apartment in this form.
A ventilation duct is a general building communication consisting of an air duct that provides residents with normal ventilation. If you cut it, then at the same time you are cutting off oxygen to your neighbors. And this is air stagnation, which causes the appearance of mold and other harmful fungi and bacteria. And this, in turn, is the cause of allergies, shortness of breath and other unpleasant diseases in children and adults.