Selection and preparation of glue
The quality of wall decoration with trellises is primarily influenced by the type of wallpaper glue. The correct choice of composition allows you to glue walls without bubbles and air pockets, with invisible joints, and uncontaminated canvases.
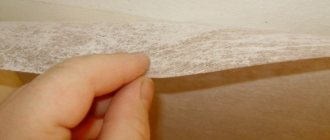
When choosing an adhesive composition, it is necessary to take into account the type of wallpaper base. So, for paper wallpaper, glue KMC, “Moment”, etc. is suitable. For vinyl wallpaper, special types of glue are produced, as indicated on the packaging. Non-woven ones can be glued with a special adhesive for non-woven fabrics.
You can read about the types of glue, methods of their preparation and application, as well as their suitability for different types of wallpaper in the material “How to choose wallpaper glue.”
Different variants
Wallpaper can be glued end-to-end or overlapping. The first option is more common. Thick wallpapers are always glued end to end; thin wallpapers can be glued overlapping. With the docking method, it is better to start from the window or door. The appearance will not be spoiled if the drawing is preserved. Consistent gluing in one direction should be adhered to.
Advice! You need to glue in a well-lit room, then all the imperfections will be visible. If detected early, they can be eliminated without consequences.
Preparing walls for wallpapering: step-by-step instructions
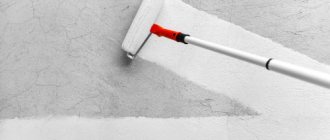
High-quality gluing of new finishes is impossible without proper surface preparation. The wall must be level, clean and dry. Decorative coating will not hide large defects; they will be very noticeable. In addition, an untreated surface holds the finish worse and absorbs a large amount of adhesive solution, which increases its consumption. We will step by step explain how and what to treat the walls with before wallpapering.
Removing old coating
To begin with, the base is completely cleaned. The technology depends on the type of design. The old design is completely removed. To make this easier, the finish is pre-moistened with warm water from a spray bottle. To speed up the process of softening the glue, add shavings of laundry soap, 9% vinegar, fabric softener or a special preparation. The soaked strips are lifted with a spatula and removed. The remains are soaked and removed.
The water-based emulsion or whitewash is washed off. Oil and similar paints can be removed in different ways. The cheapest and most labor-intensive is mechanical. It involves scraping off the paint layer. This is done manually using a hammer and chisel or using a grinder, hammer drill or drill with special attachments. You can use a special remover that dissolves old paint, or a thermal method. In the latter case, the paint layer is heated with a hair dryer and then removed from the base.
The plastered wall is carefully inspected for cracks and other defects. It is advisable to tap it to identify areas with peeling coating. They need to be cleaned. After all fragments have been removed, the condition of the surface is assessed. If there are many defects, the old plaster is removed completely.
Interesting to know .
Well, where to start. I think because I did this job of wallpapering for the first time. And let me tell you, it was very interesting to watch how everything began to look like something interesting. If you think that it is easier to paste the air conditioner into the joint and not fool yourself, then you are mistaken. You will spend more time and the result will not please you. So, after you have torn off the old wallpaper or whatever you had before and are ready to wallpaper, do the following: 1. Drill a hole in the ceiling with a diameter of 6 or 8 mm with an impact drill, insert a dowel and screw in a self-tapping screw or hook. 2. Find a rope the size of a meter or a little more, it can be an ordinary clothesline or wire, there is no difference, the main thing is that it is strong. 3. We tie the rope in the middle to a screw or hook. The two ends of the rope are hanging to tie around the air conditioner. In the process, you yourself will understand how it is more convenient for you to do this, with or without an assistant. I did everything myself. A little inconvenient, but quite doable =)
In the photo you can see the place where I twisted the screw for fastening. In fact, this is a hole left from the cornice =) Well, that’s how it turned out for me. The air conditioner can be removed without any problems; it is held in place by latches. To remove it, just lift it vertically upward by 2-4 cm and try not to damage it)) If you have an assistant, then simply after removing it, take the air conditioner to the side and ask the assistant to tie it up. Take it to the side without fear; a connection made of copper pipes will withstand this without any problems.
Features of pasting corners
Gluing corners is not as easy as it might seem. This process needs more attention. The corners must be glued correctly, otherwise wrinkles may occur.
The gluing in the corners will be smooth if the following conditions are met:
- On the back side of the canvas there is a line along which you need to glue.
- No more than 5 centimeters of sheet will go to the other wall.
- Lubricate the recess well with glue and press the sheet down when gluing.
- In places of small folds, make small cuts.
How to remove the air conditioner
The design of the device is simple enough for independent dismantling. On the side of the living room there is an internal block, which is connected to the external one by a corrugated pipe. The transition is covered with a decorative box.
- Remove the box. Inside there is a mounting plate to which the air conditioner unit is attached.
- Dismantle the bar so that the unit does not hang on its own freon tubes, this will lead to damage to the device. Place the air conditioner unit on a stepladder, securing it with reinforced tape.
- Pull out the block completely and glue wallpaper in its place. It is better not to leave the air conditioner in a “suspended state”: any mistake will lead to microcracks in the tubes and problems with the electronics.
For a non-specialist, removing the air conditioner on your own will cause problems, especially at the stages of installing/dismantling the strip. We recommend calling one or two people for help and stocking up on tools: stepladder, tape, scissors, soft cloth.
Difficult places
Problem areas are considered to be the lines of wires running to the outlets. During wallpapering, everything is removed and insulated. After the repair and the glue has dried, windows of the required size are made. For protruding corners, it is recommended to choose corners that match the color of the wallpaper. In this way, the integrity of the canvas can be maintained and the defect can be eliminated.
Solution if there are uneven corners:
- Each wall needs a separate reference point.
- At the junction, the sheet should move to the adjacent wall, approximately 7-10 centimeters.
- The approach strip should be exactly vertical, and not correspond to the degree of an uneven angle.
Regardless of the type of wallpaper and where you started gluing, air bubbles may appear. It is important to remove them correctly so as not to damage the canvas.
Advice! You can remove the bubble after the glue has dried with a medical syringe into which the glue is drawn. The swollen area is pierced with a needle, and the contents are injected inside. This method is suitable for any type of material. However, it is better to expel the air immediately after gluing, using a spatula or roller.
Combining wallpapers
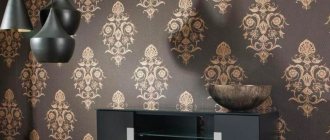
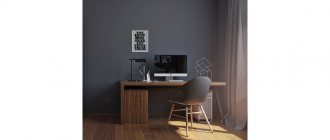
When creating a unique design, you cannot do without a combination of wallpapers of different textures and colors. Zoning can be done vertically or horizontally, as well as by insertions. In this way, you can visually divide the room into several blocks.
Reference! The combination of different colors and inserts allows you not only to embellish the room, but also to change its size in perception, which is especially important with low ceilings.
When combining different tones, the lighter wallpaper should go higher, and the darker wallpaper should be glued lower. Regarding texture, denser ones look better from the floor. The joining areas will then be securely hidden by moldings.
