Even before buying an apartment in a new building, the question of repairs arises - when and how to do it, is it worth fearing natural and inevitable changes in the structure of the building, namely its shrinkage and settlement.
When to make repairs in a new building?
Are these processes really that scary? Should I wait two years before a major overhaul? Which solution is optimal?
We tell you in our article.
Finishing of apartments in a new building
Decorating an apartment in a new building has its own characteristics.
Before moving on to the key details of the work, you should understand the features of the new multi-storey building. In modern construction, the construction of houses of three main types is practiced:
- Panel;
- Brick;
- Monolith or monolithic brick.
Regardless of construction technology and classification, all new buildings have one unpleasant but common technological feature - the inevitable process of shrinkage. This factor must be taken into account when planning the start of work in order to avoid troubles and wasted funds.
Causes of cracks
Defects in the form of cracks most often appear in old buildings, because... Over time, the structure settles, the ceiling tiles begin to move and also shrink. This is what leads to the formation of irregularities.
In addition, ceilings and walls experience enormous loads during the winter and spring periods; such temperature changes can cause all ceilings to become deformed and become covered with cracks.
It should be clarified that the design of the ceiling greatly influences whether cracks appear in your home or not. So, for example, if the ceiling is made of a solid reinforced concrete slab, then cracks are unlikely to appear there. But if the ceiling is made of two slabs, then cracks will appear at the joints.
The heaviest option is with structures that have wooden partitions, which are not very rigid, and the ceilings themselves are plastered. In such buildings, imperfections in the form of cracks can most often be seen on the ceiling.
Cracks also form on plasterboard ceilings. In this case, cracking occurs at the joints, and even the highest quality putties will not save your ceilings from cracks that may appear over time.
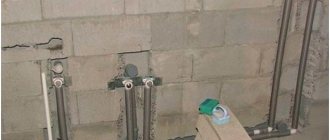
Installation of floor slabs
To install the floor slab you will need: a crane, a crowbar, cement mortar, and a trowel.
It is impossible to install a floor slab without special equipment. Systems with small dimensions weigh more than 500 kg and cannot be done without a crane. For installation, four mounting loops or free fittings located in special recesses are provided.
Tools, materials, and installation equipment:
- Crane.
- Scrap.
- Cement mortar.
- Master OK.
Cracks in the walls of a panel house
Has a crack been discovered in your home?
Cracks in panel houses are not uncommon. Almost everyone has seen buildings with grouted seams, and these houses have been standing like this for decades. Of course, if the split is through, and it blows, or moisture gets into the apartment, you need to do repairs, but in general, there is no particular reason to worry. Let's figure out why cracks can occur in panel walls, how dangerous they are in general, how to identify the risks, and what to do as a result.
Why do cracks appear in the walls of a panel house?
There is not and cannot be one reason. But there are the most common ones that most often cause cracking.
- House shrinkage
. The most common reason is in new buildings. On average, a house lasts about 5 years, and if you are planning a very expensive and complex renovation, it may be worth waiting this time so as not to have to redo everything later. - Redevelopment
. Most often, in panel houses, it is the internal walls that are load-bearing, and therefore it is not recommended to touch them at all - move openings, demolish them, etc. But the residents do this, and as a result the house warps from the uneven load. The problem especially often arises if redevelopment is done on the lower floors. - Violation of
construction technology. Sometimes a house is delivered with uneven panels and holes filled with caulk or other materials. For this reason, cracks appear at joints and corners. It happens that panels are already delivered with cracks, or they appear during the construction process. - Construction work next to the building
. When residential complexes are built, it happens that a dug ditch, foundation, or simply powerful vibration work causes problems with the foundation, and it begins to sag. - Grooving walls for hidden wiring
and air conditioner routes. The problem exists in many modern homes, and new residents are usually warned about the ban, but few take it seriously. As a result, cracks appear not only where the house shrinks logically, but also in unexpected places, and the load only increases.
How dangerous is a crack in the wall of a panel house: what to do to determine the risks?
The complexity of the problem depends on where exactly the crack originated: in an external or internal wall, or on the ceiling.
- Small external cracks
are not dangerous, and panel houses do not collapse from them, especially if the crack is on an external wall. Yes, it’s uncomfortable, it’s windy, but there’s no risk. Cracks that arise from the demolition of load-bearing walls on the first floors are dangerous. This happens when the first floors are purchased for a store or similar premises, and then redevelopment is done. - If a crack has occurred in the load-bearing wall between apartments
, you need to determine its depth to find out whether it is through, in which case it may be necessary to strengthen the wall. However, there is usually so much reinforced concrete that it can easily withstand a fault. Such cracks usually cause maximum excitement, and in this case, of course, there is no point in delaying. - Cracks in the ceiling
are not dangerous in principle, and usually cause only aesthetic indignation: no matter how hard the plaster is, it will break through under the wallpaper and paint. In this case, a suspended ceiling is usually recommended.
To determine the risk of developing and increasing a split, you can install a plaster beacon
. It should be about the size of your palm, and if the crack is tortuous, you will need to place several pieces in different places.
If the lighthouse does not collapse in 2-3 months
This means that the crack is not developing and can be repaired. If the crack grows, you must contact the appropriate authorities - the HOA or the Management Company, who will solve the problem, identify the cause and eliminate the risks.
Before taking any action to repair a crack, you need to identify the cause, so you will have to go through your neighbors’ apartments and be sure to see if any redevelopment has been done there. If you have a good relationship, they will probably let you in anyway, otherwise you will need to collect a commission.
Please note: representatives of the management company and the HOA must at least draw up an act, or better yet, install beacons and monitor their condition. If the situation is critical, the crack is large, and the management company and the HOA are doing nothing, file an application with the City Housing Inspectorate and wait for the commission to arrive.
How to repair cracks in panel walls yourself?
Previously, rubber and cement were used as sealing materials, today there are many modern solutions - polyurethane foam, mastics, sealants
. They fill the space and prevent water and wind from entering the house, and some also further strengthen the panel. You can find the right product at a hardware store.
To fill a crack, you need to clean it thoroughly
, it is possible to remove the old seam, wash and dry the edges, and beat them with a hammer for better bonding. Large cracks are usually foamed, small ones can simply be sealed with sealant, allowed to dry, and a solution applied. Depending on the situation, it is possible to use a construction mesh so that the wall does not collapse and the wallpaper does not lag behind it.
Please note that temperature is important
environment if you are repairing a crack in an exterior wall. It is advisable to do this in a warm house, but at least +5 degrees is already good. This is not the temperature outside, but rather the temperature of the panel itself. This way, all the products will adhere well, dry and not come off over time.
What problems might arise?
One of the problems that may arise at the stage of reconstruction of the floor is an incorrect inspection of the slab, and as a result, meaningless repairs. It happens that the cracks found at first glance seem harmless and builders easily seal them with sealant, mortar and other materials, but everything turns out to be more complicated. An unexamined defect actually results in negative consequences that lead to emergency conditions of the building.
For example, a longitudinal crack was discovered on the ceiling. It was not measured with a special device, and the strength of the concrete around the defect was not measured. It was decided to cover the crack with concrete solution.
After the repair, for several months everything met the standards, but six months later the crack appeared with renewed vigor and it had to be repaired with other materials and using other tools.
Another problem is the use of low-quality consumables that do not meet the stated standards. This can also include improper preparation of a solution for concreting a crack or incorrect technology for sealing the defect. All this leads to the fact that after some time the floor will have to be repaired again.
Features of shrinkage in different types of houses
House shrinkage is a change in the geometric parameters of building elements due to the drying of the materials from which they were made. This process must be taken into account when constructing a structure, since it is natural and impossible to do without it. With proper calculations, shrinkage will occur harmoniously and without consequences for the structure.
Settlement of the building, with which shrinkage is sometimes confused, is, on the contrary, not natural and signals instability of the soil in the selected area or weakness of the foundation. Settlement can cause not only cracking of walls, but even their collapse.
The degree of shrinkage of a building directly depends on the material chosen for construction. Wooden buildings are considered the most problematic in terms of shrinkage. Concrete, foam blocks and brick are also susceptible to this process, but not in such a pronounced form.
Panel
Shrinkage of a panel house occurs on average per year. The changes occur so noticeably that the rough coating will in no way be able to hide traces of deformation. For the first renovation, it is recommended to use coatings that can then be easily dismantled - laminate or linoleum. The main part of the shrinkage can be quite noticeable in relation to changes in the geometry of the planes of the walls, floor and ceiling. The result may be noticeable cracks and distortions in the area of corners and tile joints. The slabs themselves remain unharmed. Very often, after shrinkage, apartment owners have to think about the need to level the floor. Ideally, of course, it is better to wait with repairs until the active stage of shrinkage has passed. It may not be so comfortable, but the financial losses will be minimal.
Brick
In the production of building materials, technology includes so-called shrinkage protection. Therefore, if shrinkage has a significant percentage, this indicates low quality of the material, or that the builders violated standards during the construction of the building.
At the production stage, the brick undergoes a drying procedure, due to which the percentage of moisture in the product is reduced to zero. This means that further evaporation, which could lead to shrinkage of the material, is eliminated. Concrete does not hold water in itself. In this case, the cause of shrinkage may be freezing during the cold season or improper load distribution within the structure. If the building was erected in the autumn-winter period, there is a high probability that the materials may get wet, and when saturated with moisture, freeze. As a result, inside the cracks and pores, the moisture turns into ice, which tends to expand. This can lead to severe external cracks.
Another disadvantage of brick buildings is the large number of seams. These gaps, if the masonry was not of sufficient quality, can accumulate moisture inside them, which will expand or contract under the influence of temperature changes. The porosity of brick, in comparison with other types of building materials, is its advantage and disadvantage at the same time. When building brick houses, builders must be very careful to ensure that all gaps are minimal and well-designed. The degree of shrinkage of a brick house compared to a wooden one is minimal, but it will take 3-4 years.
A crack in the ceiling is the first sign of building shrinkage
Monolithic frame
The basis of a monolithic frame structure is a load-bearing frame, made not using welding, but made using vertical columns. This is a solid system in which the frame plays the role of support for the structure as a whole. With this approach to construction, the risk of cracks is minimized.
Shrinkage in monolithic houses is minimal compared to other types of buildings, since the solid structure qualitatively distributes the load on the foundation, due to which shrinkage occurs evenly. For people living in the house, the changes are almost invisible compared to a brick building. However, there may be subsidence of soil under the monolith. In this case, a strong frame protects the building from significant deformations. This makes it possible to carry out repair work in a new building almost immediately.
True, if sufficient geological and geodetic research was not carried out or there were serious violations in construction technology, then even a monolithic structure can exhibit unusual miracles of shrinkage.
When is repair and reconstruction needed?
It is important not to miss the moment when it is necessary to repair the floors for their further use.
To do this, a number of activities are carried out, for example, inspection of the slab. A visual inspection can reveal some problems :
- nature of crack propagation;
- exposure of reinforcement;
- determine the location of cracks relative to the load-bearing columns;
- make photographic records of all defects.
Thanks to such work, it is possible to draw up an action plan and determine whether the slab requires repair or whether this procedure can be postponed. It is necessary to immediately understand which defects can be eliminated even before a problem arises. To determine this, it is enough to take measurements of the cracks during a visual inspection and survey , and measure their depth, if possible.
You can also invite specialists who, using equipment, will determine how dangerous this defect is and whether it will entail more serious consequences.
Repair and reconstruction can still correct the situation when cracks and splits are very small, when they can be restored with special mixtures. For example, slab deflections greater than the permissible norm due to loads cannot be corrected : most likely, the conclusion will include a recommendation to completely replace the floor slab with a new product.
Causes of cod
It's quite simple. The problem lies in the interpanel seams, which are the weak point of such houses. As for the sounds themselves, they become stronger with a sharp temperature change, which can be observed in the summer. The walls get very hot in the sun during the day and cool down quickly at night. In such a situation, we can say with 90% confidence that the interpanel seam has exhausted its service life and has collapsed.
The cause of cracking in the walls can also be a slight movement of the panels that are connected to each other by welding. To find out exactly what is causing the unpleasant sounds, it is better to immediately call industrial climbers to inspect the wall. If the problem lies in the seams, it is necessary to seal them and restore them to their original condition. You will have to pay a lot for this, but now you can sleep peacefully.
Tools and Supplies
To begin with, we can say a few words about what tools are useful to fix defects. These include a measuring tape, an optical level, a laser range finder, a crack gauge, a measuring ruler, a caliper, a metal detector and an ultrasonic device for determining the strength of concrete. When the defect is found, you can begin to prepare tools for repair:
- putty knife;
- construction syringe;
- sanding paper;
- perforator;
- screwdriver;
- level;
- chisel;
- hammer;
- welding machine.
Consumable materials for work may require concrete mixtures of cement and sand , which can be purchased ready-made or made independently using a drill and a bucket of water, as well as using a concrete mixer. You will need primer material, plaster, and reinforcement of the required size.
The last consumable is needed when corrosion of the metal inside the slab is detected and the fittings need to be replaced. For this, welding work is used, but this must be done by an experienced craftsman.
Note ! To protect the remaining fittings from corrosion, it is necessary to use special impregnations against metal rust. Where possible, the reinforced fiber should be impregnated with compounds.
Checking the apartment
What should be in the apartment is written in the DDU. Look for the item “Characteristics of the object” in your contract - usually at the very beginning, in the section “Subject of the contract”.
1.3. The apartment is transferred to the Shared Construction Participant with partial finishing and the following types of finishing work: finishing the walls with plaster; floor covering - cement screed; installation of plastic windows and balcony doors; glazing of the loggia; installation of a metal inter-apartment (entrance) door. Installation of an electric stove, as well as horizontal wiring of the water supply system are not included in the price of the contract and are carried out by the Participant in shared construction independently and at his own expense.
If you have something in the DDU, but in fact it is not, write everything down in the defect report.
The first leaders of Moscow are big people. They treat with contempt the cheap low-rise construction proposed by deputy Alexander Lebedev, believing that the panacea for solving the problems of affordable housing is the construction of concrete high-rise buildings. As Moscow Mayor Yuri Luzhkov stated in one of his recent interviews, the modern urban development trend is super-tall buildings made of glass and concrete. The mayor ignored the well-known fact that up to 70% of the population of developed countries live in low-rise cottages. Following the tastes of the mayor, in Moscow they build and sell at exorbitant prices outdated boxes made of concrete lined with marble for the rich, and concrete decorated with cheap brick-like tiles or simply painted for the common people. However, it turns out that this housing may be downright dangerous.
Small cracks
Sealing small cracks is not a lot of work, but it requires thoroughness. Even if only spot puttying is required, it must be done competently, without neglecting the details and not limiting ourselves to masking imperfections.
The sequence of actions is as follows:
- Anything that crumbles, chips, or peels off must be carefully removed. In some cases, until the concrete layer is exposed. The edges of the crack must be perfectly clean. Here you will need to actively work with a spatula or even a wire brush. Remove dust with a dry brush.
- The prepared, cleaned surface is moistened with water. Spraying is preferable to brushing.
- Application of gypsum mixture. It will not stick to a dry surface due to low adhesion, which is why it is necessary to moisten the repaired area well. The putty is applied with a small spatula along the entire length. The movements are smooth, with pressure. The main thing is that the putty fills the entire crack. It is advisable to avoid it falling on the floor; it is difficult to remove dried material, so there is no need to take a lot of it on a spatula. The finished mixture contains PVA, which makes the composition quick-drying. Therefore, when working with him, you cannot hesitate.
- The putty layer must dry for at least 24 hours.
- Leveling the surface until smooth. For this purpose, a skin or a grater is used.
Useful information: “How to putty the ceiling yourself”
If the cause of cracks is falling off plaster or peeling of paint material, it is practiced to seal the defects using primers. Before applying the putty, the cleaned area is primed in 1-2 layers (the first layer must be completely dry). The best choice is a deep penetration primer. It is required for wet rooms and ensures the quality and reliability of the putty fastening.
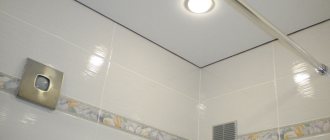
How to insulate walls, floors, ceilings, and how much it costs
There are frameless and frame sound insulation. Frameless ones are assembled from multilayer panels. They are mounted directly to the wall using fasteners that do not conduct sound. In frame systems, the insulating material is fixed using a structure made of metal profiles. Essentially, this is a modification of plasterboard walls that are installed to, for example, divide a room into two.
When choosing, keep in mind that insulation differs not only in design. The frameless system is three centimeters thinner than the frame system, and it is no less effective. If you want to lose less space, choose panels. But there are limitations. Firstly, they are mounted on walls with a thickness of at least 80 cm. Secondly, objects weighing more than 35 kg cannot be attached to a linear meter of panels. Installing air conditioning, cabinets or shelves will not be a problem.
But if you plan to mount something heavier on the wall, then it is better to choose frame sound insulation; depending on the design, it can withstand from 70 to 150 kg per linear meter. It is also easier to route wires in it, since you don’t have to hide them in the wall. It is enough to place the cables in a polymer corrugation and lay them behind sound insulation.
The most reliable materials for soundproofing are: mineral and stone wool, plasterboard with acoustic properties and acoustic panels.
Chat rooms and forums are full of stories about how thin roll insulation, such as cork or vinyl, saved you from noise from a neighboring apartment. Don't believe it. Sound waves are well damped only by massive materials that can simultaneously absorb and reflect them. Lightweight thin structures are almost useless.
Frame wall insulation
Frameless wall insulation
Soundproofing walls
Frame method. A frame of metal profiles is erected at a short distance from the wall; slabs of sound-insulating material, such as mineral wool, are inserted into the space between them. Then drywall is attached to the profiles. The seams between the sheets and along the perimeter of the insulation are treated with vibration-isolating sealant. Ready. You can wallpaper or paint.
Frameless method. Soundproofing panels are fixed to the walls with special fasteners and do not require the installation of a frame. Fasteners can be of different designs. The ones you need are included, so you don't have to look for them.
The places where the ends of the panels come into contact with adjacent surfaces - the floor, ceiling and walls - must be taped twice with vibration-isolating tape and sealed with vibration-acoustic sealant. It also processes all the seams between the panels.
If you are renovating a secondary home, frame sound insulation is more appropriate. Since you don’t need to ditch the wall to make electrical wiring. The wires can be routed inside the structure, in a corrugated structure. Plus the wall is immediately flat, which is very convenient when finishing. And of course, you get good protection from external noise.
Technical Director
Here and below, the cost of sound insulation is calculated based on data from the portals profi.ru, youdo.com (work of private craftsmen) and specialized companies Tiho74, Besshumov.ru, Maxforte
Soundproof the wall yourself, cost 1 m²
Soundproofing a wall by a private master*, cost 1 m²
Turnkey wall soundproofing** in a specialized company, cost 1 m²
* You buy the materials yourself, but the master can help with the choice.
** Companies purchase materials themselves.
One ZIPS panel measuring 1.2x0.6 m weighs about 20 kg, the additional load on the wall is up to half a ton. To securely fix such panels, you need to deepen the screws into the wall by 60 mm. Therefore, it is not recommended to install the system on walls thinner than 80 mm. If the partition is thin or cannot withstand heavy loads, you will have to choose a frame method of sound insulation.
ZIPS - soundproofing panel system
Frame ceiling insulation
Frameless ceiling insulation
Ceiling soundproofing
Frame method. A frame made of metal guides is attached to the ceiling using vibration suspensions. The space between the guides and the ceiling is filled with mineral wool slabs. Acoustic plasterboard sheets are mounted from below to the frame. Along the perimeter, the ceiling is separated from the wall by vibration-isolating tape. The seams between sheets of drywall, as well as along the perimeter of the insulation, are treated with vibroacoustic sealant.
Frameless method. Frameless structures for ceiling insulation are assembled mainly from soundproofing panels. They are attached to the ceiling through vibration units (the places where fasteners should be placed are marked on the surface of the panel), and are hemmed underneath with acoustic plasterboard sheets. The joints with the wall are treated with sealant. A finishing layer of drywall is attached over the panels, which is usually painted.
Soundproof the ceiling yourself, cost 1 m²
Stages of work when installing floor slabs
Floor slab installation diagram.
- The surface on which the floors will be laid is covered with cement mortar, which is designed to ensure the strength of the connections of the building elements and prevent the appearance of cracks. The solution ensures the transfer of the entire load from the floor to the support. The solution must be applied to the surface immediately to prevent the solution from hardening. To prepare the solution, only sifted sand is used. A small pebble can disrupt the even plane of the ceiling and ruin the whole job.
- Four slings with hooks are put on the crane hook, which are threaded into the mounting loops of the ceiling and thereby create a horizontal position of the slab during installation, which eliminates rotation.
- In addition to the crane, 2 installers are required for installation. They level the structure suspended from the crane and lay it on the surface.
- A distance of approximately 60 mm is formed between the mounted devices; it is filled with solution to form a monolith.
- The mounting loops located nearby are connected by a metal rod, the ends of which are bent inward and connected by welding. This ensures a strong connection between the slabs lying next to each other.
- The support of the slabs on load-bearing walls should be 12 -15 cm for brick walls and 7 cm for concrete ones.
- The systems are adjusted to each other along the bottom side.
- Upon completion of installation work, the end sides are sealed to protect them from freezing.
Sealing is done in several ways:
- Fill the voids with mineral wool to a depth of 30 cm.
- Fill the voids with concrete mortar to a depth of 25 cm or install concrete plugs.
- Fill the voids using backfill brick and mortar and then seal the top with mortar.
The ends are also sealed in slabs resting on internal main walls. It is better to carry out these works before installation. Floors are laid in smaller sizes.
It should be remembered that floors can only be laid on internal load-bearing walls and external ones. All others are erected after the installation of floor slabs. The lower surface is the ceiling for the lower floor, so it is mounted with the smooth side down and the rough side up.
The support must be leveled in height until it is flat. This is achieved using a level.