During operation, various microdamages appear on interior doors, which lead to malfunction of the structure and affect its external aesthetic appearance and functioning. To prevent complete destruction of the door frame or leaf and restore their original properties, interior doors are repaired.
Most defects can be eliminated yourself. The main thing in this problem is to understand the structure of the door, identify the cause of damage, cracks, scratches and remove them in time. Repair work can be carried out so that the process does not take much time and costs minimally.
This instruction will help you figure out how to independently repair interior doors if there are defects, cracks and scratches, and how they can be eliminated without the help of a specialist.
Door frame components
First of all, you should familiarize yourself with the structure of the interior door frame:
- hinge beam - this is the part on which the hinges are cut and the door is hung
- the false beam is the part that meets the door. The counter part of the lock crashes into it.
- lintel - upper “ceiling” beam
- threshold - lower part
Thus, in order to assemble the door frame, you need to correctly connect all its parts. But before you start, you need to decide on the dimensions and choose the appropriate material. Doors should look aesthetically pleasing and be easy to clean.
Sequence of work using putty
The scope of work depends on the curvature of the slopes. First, it is plastered with cement or starting gypsum mixture, and then puttied with finishing putty.
A primer is required between different layers - it prevents the next layer from peeling off.
When making slopes on doors with plaster or putty, it is important to protect adjacent walls, flooring and the doors themselves from the putty mixture. To do this, they must be covered with masking tape, stretch film or other protective materials.
The sequence of work performed is as follows:
- The surface is cleaned of all existing contaminants, including dust. Finishing the slopes of interior doors necessarily includes priming, so the cleaned surface is primed.
- The mixture for leveling is prepared in a clean bucket. It can be a cement mixture (if the slope is very crooked) or starting gypsum. When kneading, pay attention to the manufacturer's recommendations regarding how and in what proportions to knead the mixture.
- Using a trowel, a rule and a spatula, apply and level the mixture onto the slope. Wait until it dries completely, even if it takes a few days.
- This layer is also primed. After this, finishing gypsum putty is applied to it.
- After the finishing mixture has completely dried, the slope must be sanded using sandpaper number 150 to 240.
In this condition, the hand-made door jamb is ready for painting or wallpapering.
Choosing material
I don’t have a definite answer here, since the choice depends on your preferences and budget. I will give examples of the most common materials used for door frames.
MDF doors
MDF is a wood fiber board. The doors are cheap, but they look good. The advantages include lightness and environmental friendliness. The disadvantages are reduced impact resistance, poor noise insulation and short service life.
Laminated solid wood
Glued board or "euro-timber".
These doors are not made of solid wood, but of parts glued together under high pressure. The joints on them are practically invisible. The doors are quite durable and cost a little more than MDF. Price and quality are acceptable.
Solid wooden doors
Doors are much more expensive than glued ones. Strong and durable. The disadvantage is incorrect processing by the manufacturer, as a result of which the wood is excessively saturated with moisture.
Doors made of chipboard and fibreboard
Wood-fiber or wood-pressed boards. These doors are very cheap as they are made from leftover material. The advantage of these doors is good mechanical strength and fairly good sound and sound insulation. The disadvantage is low moisture resistance, as well as the presence of a volatile substance in the glue, which has a detrimental effect on health. Another aspect is the complexity of installation, since the screws in such doors do not hold well.
In addition to those described, there are also plastic, glass, aluminum, and veneered ones. Doors with honeycomb filling, laminated, etc.
The choice of material is up to you, but it should be appropriate and practical.
How to do it yourself?
Ideal for decorating slopes:
- plastic panels;
- overhead strips;
- decorative plaster;
- drywall;
- wallpaper;
- tile.
Panels and sheets of plasterboard have become popular materials. To choose the appropriate option and choose how to seal the slopes after installation, you need to familiarize yourself with the advantages of using one or another method and the installation features.
How to trim doorways with plastic?
Plastic is a budget option that can perfectly replace expensive MDF panels or drywall. But sandwich panels are in great demand. They allow you to make additional layers for insulation and sealing of slopes. The structure consists of:
- side PVC linings;
- layers of insulation (usually ordinary polyurethane foam).
Plastic finishing has a number of advantages:
- Ease. The light weight of the material does not weigh down the doorway and allows you to save on fastenings.
- Availability. You can buy plastic at any hardware store for a low cost.
- Range. The consumer is presented with a wide selection of panels made in various colors, sizes, and textures.
- Simple processing. The material is easy to cut and install.
- Easy care and durability. Plastic is resistant to ultraviolet radiation, moisture, dust, mold, and mechanical stress. The material does not require the use of cleaning agents - just wipe the panel with a clean cloth and it will become attractive again.
Important
When choosing plastic for finishing a doorway, you should pay attention to the color and texture of the door itself. Ideally, the overall design should be harmonious and seamless.
Today there are several ways to install plastic slopes. The finish might look like this:
- Straight overlays. Simple option. You need to select plastic pieces of suitable sizes. Fasten them vertically on the sides, horizontally along and on top in the opening.
- Horizontal. The segments are laid on the frame across the wall. This way you can achieve maximum masking of the joints.
- Lamels. It is necessary to create a frame, then put lamellas on the slats as in the previous version.
Before installing the plastic, the opening should be treated with antiseptic impregnation, putty, or sandpaper. These measures will help prevent the appearance of dampness and create a smooth surface.
Installation of overlay panels
MDF panels are used here. They are perfect for any type of interior door. Prepare for finishing:
- panels;
- wooden blocks for arranging the frame;
- self-tapping screws;
- roulette;
- level;
- screwdriver;
- hacksaw
To install the panels, you must perform a number of steps, such as:
- On a previously prepared surface, form a frame of bars according to the level. Be sure to level out any distortions on the walls using a board or pieces of plywood, if any.
- Lay mineral insulation.
- Cut the panels to fit the slopes. Try it on to make sure it fits, then secure it.
Advice
It is recommended to choose liquid nails as fasteners. They are easy to apply to guides and have a long service life.
If laminate was chosen instead of MDF panels, then it is mounted according to the same principle. It is better to purchase laminate with a moisture-proof layer to reduce the amount of work.
How to plaster and putty?
This method requires a lot of time to complete each stage. However, it is popular due to the achievement of an even, reliable, durable, full-fledged layer. To plaster slopes, it is recommended to choose one of the following types of mixture:
- Cement-sand mortar (CSM). The recipe is to pour water into a container (less than one part of the composition), add 1 part cement and 3-4 parts sand. The result should be a solution whose consistency resembles thick sour cream.
- Additives in the form of alabaster. A small amount of this composition paired with CPS makes it possible to obtain a quick-setting solution with high plastic properties.
- Special mixtures. For example, Rotband, MP 75.
Before applying the plaster layer, the surface should be prepared. Additionally, remove the old layer of plaster down to the main base.
Step-by-step instruction:
- Installation of guides: Install a perforated paint corner on the outside of the doorway to obtain a smooth and rigid edge.
- The element must be cut to the height of the opening. Cut the top edge down at a 45 degree angle.
- Fix the corner with cement mortar: apply the mixture to the corner of the opening and press the element so that it is level with the main wall. Remove excess with a spatula.
- Use a straight bar to check that the corner is correctly aligned.
- Repeat the procedure on the opposite side.
Attention
When using any construction mixture, you should take into account the manufacturer's recommendations for preparation and application. If you want to add originality to the interior, then additionally use textured plaster after puttying.
How to sheathe with plasterboard?
This option is perfect for arranging interior doors that are located in a room with plasterboard finishing. The material will also reduce the cost of purchasing putty.
The formation of slopes from plasterboard looks like this:
- Cut the plasterboard sheet into elements with a slight slope and dimensions that correspond to the dimensions of the slopes.
- Prepare a dry mixture according to the instructions to fix the material.
- Apply the solution in an even layer on the panels and press against the slopes. Start from the side surfaces.
- Then secure the panels with masking tape.
- After drying, fill the seams and sand with fine-grained sandpaper.
- Next, apply another layer of primer and wait for it to dry.
Additional decorative trim can be installed on top of the drywall. Below we describe how to design door slopes.
Proper sizing is the key to success!
The standard sizes of door leaves are
- height 2000 mm
- width 600 mm, 700 mm, 800 mm and 900 mm
All other sizes that go beyond the scope are usually custom-made items. (I mean single canvases, not swing ones)
You need to add 70 mm to the size of the door leaf - this is the standard width of the door frame. If the dimensions of the door frame are different, then the size will naturally change up or down. And we also add 6 mm - this is the technological gap between the leaf and the door frame.
Now you need to check how the door frame fits into the doorway. If it needs to be expanded, then we are not in a hurry to break everything at once. We soberly assess the situation - we may have to strengthen the opening with lintels. If you need to reduce the opening, then we fill it with bricks, or “sew on” bars - it all depends on the situation.
IT IS IMPORTANT TO KNOW:
To help you understand what size doorway is needed, look at the formula:
Door leaf size + door frame size + 6 mm tech. gap + 60 mm (30 mm on each side for mounting foam and wedges that will be needed when installing the box)
Usually the dimensions of doorways are controlled at the construction stage, but in older private houses (like mine) there are “hard” discrepancies.
The next important dimension is the gap from the floor to the door leaf. Before calculating it, you need to check the level of the floors for the width of the door “swing”.
You can do this in two ways:
- Using a hydraulic level
On the side walls of the opening we place marks at the same level. We measure the distance from each mark to the floor plane. The difference that you get when measuring should be added to the minimum height of the posts so that when opening the door does not rest on the floor. If you still “miss” this moment, then you can eliminate it only by trimming the door leaf, and this is still a “handjob” :(
2. Using a laser level
If you are the happy owner of a laser level, then everything becomes much simpler. We set the level and, using a construction square, determine the curvature of the floors. The obtained values are taken into account when setting sizes.
The minimum gap is 10 - 15 mm, depending on what kind of floor covering is planned. But it is better to immediately lay linoleum, or carpet, or laminate, and then carry out the installation.
See the table of correspondence between door blocks and openings.
And here is another table of typical door frame sizes
Types of problems and damage
It is recommended to adjust the doors in advance, when no obvious damage is yet visible. In order for the structure to last for a long time, it is important to operate it correctly and carry out preventive measures.
All types of internal door problems are divided into two categories: damaged appearance of the product and improper functioning.
To correct defects in the decorative cladding, reconstruction of the canvas will be required. Such work is carried out in the same way as restoration of cabinet wooden furniture.
Malfunctions of the door are expressed as follows:
- The sash closes unsatisfactorily and loosely, resulting in abrasions on the floor covering. It is necessary to repair the hinges and adjust the position of the blade;
Important! When the sash often comes into contact with the frame, it is necessary to adjust the position of the leaf relative to the frame.
- Uneven gap around the circumference of the vestibule (slits appear on one side, and on the other the panel rubs against the frame);
- Sagging of the sash. Its own weight causes such deformation. If the deformation is not corrected for a long time, this will lead to distortion of the box;
- When the blade moves, a creaking noise is heard. In this situation, you simply need to lubricate the hinges. If the creaking does not go away, then it is worth checking the frame for distortion;
- The door doesn't open. If the humidity in the room is high, this will negatively affect the door frame. Moisture causes the frame to deform and misalignment occurs. A breakdown of the locking device can also lead to such a malfunction.
Sometimes a specific type of door deformation becomes a consequence of several factors, so you need to consider all the options for problems that arise with the doorway and be able to eliminate them yourself.
Assembling a door frame without a threshold
Let's look at assembling a door frame with your own hands using an MDF frame as an example. We will connect the upper parts at 45°, as this is the most aesthetic way.
1.First of all, you need to trim the parts of the box. This is done in order to eliminate irregularities or manufacturing defects.
IT IS IMPORTANT TO KNOW:
If you have to use hand tools, it is better to use a fine-toothed saw or a hacksaw. Start making cuts from the veneer side so that chips, if any, remain on the invisible side.
2. We “saw” the loop beam and the vestibule at 45°. It is best to do this with a miter saw, but if you don’t have one, you will have to work with a miter box. To avoid unevenness when cutting, the miter box must be secured. We use a hacksaw with a fine tooth.
3. Next we move on to the most difficult part - “sawing” the top of the box - the lintel. You need to clearly set the size and not miss the corners. You can use a tape measure, but there is an easier way. To do this, we apply the lintel to the top of the door and mark the marks “in place” with a sharp pencil. To maintain the technological gap, you can use packaging cardboard - its width is just 3 mm.
4. Mark the height of the loop and false beams. I told you how to find out the required height a little higher. This is the height of the door leaf + the top gap of 3 mm + the bottom gap. If the floors are level, then 10 mm is enough. When opening, the door leaf should not catch or rest against the floor. You should not create a very high gap - 10 - 15 mm is enough for normal air circulation. If the room is damp, then larger values are allowed.
IT IS IMPORTANT TO KNOW:
If there is a difference where the doors are installed and there is no way to correct it, then the height of the racks may be different. The highest point of the difference is taken as zero.
Next, we cut off the racks according to the marks.
IT IS IMPORTANT TO KNOW:
We constantly and meticulously check all the applied dimensions before washing down. If the box turns out to be smaller than the canvas, you will have to buy a new beam.
5. After all the components have been sawed down, we assemble the MDF door frame together, having previously drilled holes with a drill of a smaller diameter to prevent the frame from splitting. For connection we use 50 cm wood screws. It is more convenient to carry out work on the floor, placing cardboard or other material under the box.
IT IS IMPORTANT TO KNOW:
When you tighten the door frame, press its parts as tightly as possible, since the screws will stretch them.
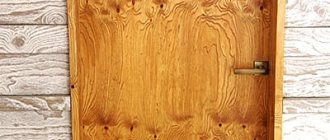
Well, this is approximately the result you should get.
When is repair needed?
If damage is detected in a timely manner, minor repairs to wooden doors are performed.
Experts recommend that after installing the door block, periodically conduct a thorough inspection of the structure for damage, clean the frame and leaf from dirt and dust, adjust and lubricate the hinges and trims, and coat them with special anti-corrosion compounds. If you neglect preventive measures, it will be much more difficult to repair a wooden door, and you may have to completely replace it.
If there is no maintenance of the interior door, problems such as:
- the sash sags and scratches the floor;
- creak;
- the canvas wobbles on its hinges;
- the doors do not close well and fit tightly into the frame;
- cracks in the door block due to excessive drying;
- the veneer has come off;
- paint comes off from the surface of the canvas.
The causes of such problems are improper operation of interior doors, low-quality cheap products and violation of production technology.
Required tools and materials
To repair a wooden door with your own hands, you need the following tools and consumables, such as:
- roulette;
- sharp knife;
- Phillips or flathead screwdriver;
- chisel;
- simple hammer;
- hammer with rubber gasket;
- screwdriver;
- plane;
- drill;
- fasteners;
- screws;
- dowels;
- wooden wedges;
- axe;
- polyurethane foam;
- rags for cleaning the canvas;
- WD-40 spray to remove plaque.
Assembling a door frame with a threshold
The easiest way to assemble. The fact is that the threshold is usually mounted at 90°.
The threshold is mounted on the entrance or “entrance” doors, separating the cold room from the living room. In addition, the threshold gives the door frame additional strength.
Preparing the doorway and checking the floor level are absolutely identical to assembling without a threshold, but further steps have their differences.
So, here are the step-by-step assembly instructions:
1. File the lintel to its original dimensions. The length of the lintel will be equal to the length of the door leaf + 6 mm for the gap. You need to make two such blanks - this will be the threshold. Do not forget to trim the workpieces, since the factory cut may not be even.
2. On loop and bevel beams, it is necessary to remove the thrust quarter.
To do this, we connect the end of the vertical post and the horizontal one and put a mark with a sharp pencil.
IT IS IMPORTANT TO KNOW:
The size must be transferred with maximum clarity so that there are no gaps. Repairing them in the future is not problematic, but it will ruin the aesthetic component of the doors.
We make a cut to a depth of a quarter with a hacksaw or jigsaw. Be extremely careful not to touch the work surface. It is not possible to fix the “jamb” on MDF doors.
Then, using a chisel or a utility knife, carefully remove it. We repeat the operations for all angles.
IT IS IMPORTANT TO KNOW:
If you use a chisel, then under no circumstances turn it over with its top sharpened side down. When carrying out work, the working part will crash into the material and all the work will go down the drain. The same rule applies when inserting loops.
3. Connect the box. We also drill holes and tighten them with self-tapping screws. The only difference is that galvanized screws are used for the threshold if it is the threshold of an entrance door. They are less affected.
Door glazing
Glazing of internal doors is similar to glazing of windows, but has its own characteristics. For door glazing, thicker, sometimes reinforced or corrugated glass is used.
Reinforced glass has a frame made of fine wire mesh inside, and it is cut only with a slightly dull roller of a roller glass cutter. After a piece of glass of the required size is separated from the main sheet, it is necessary to bend it up and down several times so that the reinforcement wire breaks off. The protruding ends of the wire are cut off with wire cutters or side cutters and the ends of the glass are ground with a coarse abrasive stone. Corrugated glass is also cut only with a roller glass cutter, and, if possible, with a slightly dull roller.
In some older apartments, doors have glass inserts of various shapes and sizes. Therefore, sometimes it becomes necessary to insert a new round glass to replace the broken one. Thin round glass is cut with a diamond glass cutter according to a pre-made template. A square is cut out of the main sheet of glass, the sides of which are equal to the diameter of the future circle. A template made in advance from cardboard or paranit is placed on a square piece of glass and traced around the template with a diamond glass cutter. Radial cuts are made at the protruding corners of the glass and the edges are broken off. The edges of the cut glass are ground with an abrasive, constantly moistening it with water.
Thick round or grooved glass is cut with a roller glass cutter. First, cut out a square and trim its corners to form an octagon. Then the corners are cut off again and continue to do this until the glass takes on a shape close to a circle. The corners of the glass are broken off, the uneven edges are cleaned with abrasive.
Round glass can be cut with scissors by holding the glass and scissors in water. In this case, the scissors should be oriented tangentially to the future circle. But keep in mind that the scissors quickly become dull.
Door frame tenon connection
One of the ways to assemble door frames is a tenon joint. It's not as common as 45° and 90° assemblies, but it does exist.
The joining of parts occurs through tenon joints (see picture)
Usually the achieved rigidity is quite sufficient, but galvanized nails can be added to enhance the strength characteristics.