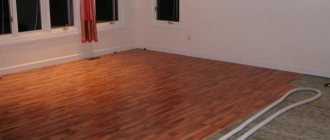
Whenever it comes to the next renovation and re-laying of linoleum covering is required, concerns arise as to whether the risk of laying linoleum on OSB is justified. There are no serious reasons not to use OSB, but there are vague doubts whether laying linoleum on OSB will damage the wooden base, for example, it may rot, as is usually the case with plank floors.
The material can even be installed in the bathroom
Is it necessary to glue linoleum?
Note
Those who risk laying the covering without fixing it face:
- fungus formation
- waves on the carpet,
- bubbles with folds,
- damage when moving furniture.
If we consider harder PVC coatings, then unevenness and swelling can be observed in those places where the coating does not have a strong bond with the base. Such areas are the first to suffer from wear and tear.
Soft household coverings are subject to change in size due to fluctuations in humidity and temperature. During the winter season, when the rooms are heated, linoleum shrinks. If the coating is not glued, then gaps will form between the joints. With the onset of spring and increased air humidity, the linoleum stretches again and then bubbles appear on the surface, which are almost impossible to fight.
To avoid defects when installing the floor covering, it is recommended to use the adhesive method.
Advantages of the method
There are three ways to lay linoleum:
- Gluing with special adhesives;
- The flooring is not rigidly fixed, the material is pressed only by skirting boards around the perimeter;
- Partial temporary fixation with adhesive double-sided construction tape.
Fixation with glue is recommended by manufacturers of linoleum coverings if the room is more than 20 square meters. It must be remembered that the manufacturer provides a guarantee only for the glued material.
Linoleum must be glued when there is heavy furniture in the room and is often moved. This will prevent deformation and damage. Gluing minimizes wear and tear, the floor covering will last 40% longer.
In the off-season, linoleum is subject to compression and expansion due to changes in temperature and humidity. This can be avoided if the linoleum is properly secured with glue.
You need to apply glue along the edges, in the doorway and at the joints of the panels especially carefully. It is in these places that a strong connection is needed.
Is it possible to lay linoleum on OSB?
The most ardent opponents of the use of particle board give the following arguments against its use as a substrate for linoleum:
- The material does not provide reliable insulation from condensation formed under the floor covering. As a result, the pressed sawdust will overheat and the surface will crumble;
- The highly porous structure of OSB, like a sponge, absorbs moisture, so an odor will appear, possibly mold, with all the ensuing consequences.
This problem is usually associated with the fact that linoleum is an absolutely vapor-proof coating based on PVC, polyurethane and polyester film. But the point here is not even in the structure or properties of linoleum or OSB; the problem is in laying it in compliance with the technology and using the right materials. OSB board for flooring under linoleum fits perfectly. When compared with a plank base, chipboard or fiberboard, OSB turns out to be much better and more reliable.
Laying OSB under linoleum is beneficial
Advantages of a rough base made of OSB
Laying linoleum on an OSB board is even easier than on a plank or concrete floor. The structure and characteristics of a slab made of pressed sawdust are such that, if the technology for laying it is followed, this method guarantees two quite significant advantages:
- The OSB board itself has enormous strength, therefore, even if the base is assembled with minor flaws, the floor will withstand the load from furniture or household appliances without deformation or seam breakage;
- The surface for laying on laminate turns out to be perfectly flat, and most importantly, there will be no guillotine effect at the joints between OSB boards, which is typical for plank floors.
This means that the coating will not experience shearing and bending loads, which means that after 10 years of operation there will be no cracks or breaks in the linoleum on the surface.
As for the poor resistance to water vapor and condensed moisture, this problem can be solved either by double-sided treatment with special wood impregnations, or by using a waterproof modification known as OSB 3. It does not contain harmful phenols or formaldehydes, as in the case of chipboard, and the material withstands direct contact with water and can be used both indoors and laid on a veranda or covered terrace.
tongue and groove OSB-3 with locks
The only significant disadvantage of OSB 3 is the high cost of the material. It makes sense to use the third version of OSB if you have to lay linoleum directly on a concrete floor. The strand-oriented board simultaneously acts as a heat insulator and a vapor barrier. In other cases, without any particular concerns, we lay linoleum on OSB 2.
Why is it needed, what types are there?
The underlay prevents the material from coming into contact with the floor. It serves for:
- Compensation for unevenness of the base. If the base has defects, they will be reflected in the coating. All the depressions, cracks and tubercles will be drawn on its surface. This will subsequently lead to destruction. The material underneath, by compensating for small irregularities, will protect the linoleum from premature wear.
- Soundproofing. This is especially helpful in apartment buildings, where noise from the lower floors is clearly audible.
- Thermal insulation. In rooms located on the first floors, the floors are always cold. The same applies to apartments under which non-residential premises are located. Floors in houses built on the ground also require additional insulation. In this case, it is an excellent insulation.
There are several types of insulating materials
Jute
Jute backing consists of fibers of plant origin. This is a unique material made from natural jute fibers. It contains a fire retardant that prevents rotting and burning. It is able to absorb and remove moisture over time without getting wet.
Jute backing
Cork
This type consists of crushed tree bark. Its production process eliminates the use of synthetic substances. However, it has the best thermal and sound insulation properties.
In addition to its high price, cork material has another significant drawback. Due to its low rigidity, its surface bends under heavy furniture. And this leads to deformation of the linoleum.
Cork backing
Linen
The linen underlay maintains natural ventilation between the floor and the floor covering. And this prevents the appearance of moisture and fungus. Since flax is used in the manufacture of this material, it is an absolutely natural product.
During the production process, the material is treated with fire retardants, which prevent insects from infesting and prevent rotting.
Linen backing
Don't know what to use to keep the room warm and dry? Use a backing that contains equal proportions of linen, jute and wool. It has additional wear resistance and thermal insulation properties.
Linoleum backing made of flax, jute and wool
Foamed
Regarding this type, experts have long come to the conclusion that it is not suitable for linoleum. It quickly wrinkles and loses its shape without performing its functions.
Video: what should be the base for laying floor coverings
In order to unambiguously answer the question about the base, you need to know exactly the technical characteristics of a properly constructed floor base, intended specifically for installing linoleum. So the basis should be:
- durable;
- as hard as possible;
- absolutely dry;
- flat – smooth changes of 2-7 mm are acceptable;
- without oil and grease stains;
- no traces of old paint.
Tools and materials
The purpose of laying the slabs is to “reanimate” the old floor, leveling the base, which will allow the linoleum to lie without any complaints.
What will be useful for this work, which precedes the lining of linoleum:
- hammer;
- nail crowbar;
- drill, drills, and hammer drill;
- screwdriver;
- laser/bubble level;
- the plates themselves;
- fasteners – usually these are hardened self-tapping screws, the length of which is from 45 mm;
- washers for screws (if possible).
There will be additions to this list, because the installation principle depends on the type of floor. For example, for a concrete floor you will need to purchase additional glue.
It is imperative to ensure that the OSB itself is ready for installation. The slabs are laid on the floor in the room before they are fastened. It is necessary to pay attention to the fact that when laying there are no straight cross-shaped seams - for this, the slabs are laid staggered, offset - 50%. There must be a gap of at least 10 mm between the wall and the slabs. The sheets should not touch each other closely. The minimum gap that must be between them is 3 mm.
It is necessary to make gaps, because they prevent the slabs from creeping onto each other and do not allow the coating to deform. And the material can change if the humidity of the room changes.
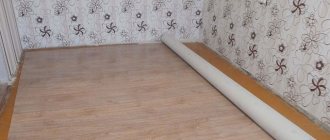
In order to lay linoleum, you will need:
- the coating itself, checked for defects, acclimatized indoors for 2-3 days;
- double-sided masking tape;
- wallpaper knife, stationery knife, blade;
- long ruler;
- cold welding.
Nailing and gluing linoleum is not at all what should happen. This is the wrong technique, although it is still used “to be safe.”
Multilayer wall of a frame house - “frame pie”
This structure is called the “pie” of a frame house. The main purpose of a multilayer wall is to protect OSB from condensation. Improper design leads to the development of mold and damage to the entire structure.
Roof installation - oriented slabs are the basis for subsequent fastening of the roof; the sheets are installed on the rafter system. The thickness of the sheet is selected depending on the pitch of the rafter leg. At 60 cm, it is optimal to use slabs with a thickness of 12 mm, at 80 cm - 15 - 18 mm, for larger rafter pitches, 22 mm OSB is used. Fastening is done using screw nails, since shear fastening is important on a pitched roof. The longitudinal axis of the slabs is located perpendicular to the rafter system. The layers of material are connected to each other in two ways: tongues or staples. If there is a tongue-and-groove connection, there is no need to make an expansion gap, otherwise the gap should be 3 mm, and fastening is done with H-shaped brackets.
When installing the roof, the slabs are laid with the rough side out to make it easier for builders to move
Preparation of materials and tools
To install OSB boards on the floor, you must have a set of tools.
A set of woodworking tools
From this set you will definitely need:
- jigsaw or fine-toothed hacksaw;
- hammer;
- hammer drill or drill with operating modes for concrete and wood;
- a set of twist drills for wood and impact drills for concrete;
- nail puller or pliers;
- screwdriver;
- laser or bubble building level;
- grinding machine;
- gun for working with sealant.
In addition to the plates themselves, consumables are needed:
- material for sealing joints (acrylic putty, parquet varnish, acrylic or silicone sealant);
- dowel-nails or self-tapping screws for fixing the slabs to the base base.
To lay linoleum on OSB, the base should be prepared:
- roulette;
- steel guide bar or long ruler;
- masking and double-sided tape;
- roller (disc) knife;
- month-shaped knife;
- regular and serrated spatula;
- adhesives - construction adhesives for fixing sheets to OSB and “cold welding” for joining sheets;
- rolling roller;
- skirting boards.
For the final installation of plastic skirting boards with cable ducts, you will additionally need fittings (corners, plugs, transitions) and dowels and nails.
Dowel-nails and corners for skirting boards
To glue or not
Before laying linoleum, you need to decide whether you will glue it or not. There is an opinion that it is not necessary to glue it in houses and apartments. It is pressed against baseboards, furniture, large appliances, etc. All this “holds” him in place. Sometimes it works, sometimes it doesn't. It usually works on hard semi-commercial and commercial types of coating, but does not work on softer - household ones.
It's a matter of thermal expansion. In the summer, when it’s hot, linoleum expands, “creeping out” from under furniture and appliances. In the fall, it shrinks to its previous size, but does not return under the furniture. Waves and bumps form. Therefore, the majority agrees that it should be fixed.
If you don't glue it, it might look like this
Just keep in mind that linoleum either does not need to be glued at all, or glued completely. Glue it in some places - you are almost guaranteed to get humps and swelling after a while.
Leveling the OSB floor with a linoleum board
The most difficult task is leveling the base for the future linoleum covering. If the slabs are planned to be laid directly on a wooden floor, then the surface of the floorboards is sanded or milled in order to increase the contact area and level the base horizontally.
The gaps between the floorboards are not sealed; if there are “weak” boards, they are nailed “crosswise” together. The situation is considered more complex when there are rotten or destroyed joists under the wooden floor. In this case, it will be necessary to remove the floorboards, sew repair beams onto the supporting beams and lay the material back.
Before laying linoleum, the seams must be filled with sealant.
On uneven concrete foundations, it is most often necessary to lay a self-leveling layer; using a simple concrete screed it is quite difficult to adjust the surface to a more or less horizontal state.
Firmly and firmly types of fasteners
Oriented strand board can be used in a variety of construction applications. Depending on the application, the fastening elements vary. Nails, self-tapping screws, screws and staples are commonly used.
Nails are a fastening element in the form of a rod, most often used for fastening OSB to an external frame (when building a frame house) and to roof sheathing. In this regard, nails have a serious advantage over self-tapping screws, since they keep the slabs from moving. The self-tapping screw will simply break off under the weight of the vertical slab, and the nail may bend, but will continue to hold the wall of the house. Screw nails work best when working with flexible materials. Ruff and ring nails are also used and are more common for roofing work. It must be remembered that it will be difficult to pull out such nails. In finishing work, hardware with a small head is used.
For fastening it is necessary to use galvanized fasteners so that it does not corrode.
- Screw connections - these include wood screws and self-tapping screws. The fasteners are easy to tighten and unscrew without causing harm to the material. Screw connections are used when attaching OSB to concrete using dowels (laying a subfloor on a concrete screed). Screws and self-tapping screws provide better tear-off fixation, therefore they are more often used on horizontal connections.
- Staples - H-shaped fasteners are used to connect the edges of particle board on a roof. Pneumatic or electric construction staplers are used to fasten surfaces.
- Gluing is not used as the main method of fixation; more often, the application of adhesives is used as additional fastening when laying slabs on joists. Usually any wood glues are used; they are selected depending on the method of fastening and the humidity in the room.
Choice of coverage
Now it would be appropriate to express a few thoughts on the issue of choosing linoleum itself. It’s better to immediately forget about cheap household coatings with a pungent, specific odor. Not only is this, so to speak, linoleum of extremely low quality, it is also toxic, and therefore harmful to health. High-quality items rarely have low prices. This also applies to floor coverings.
In rooms with low traffic, for example, in the bedroom, on the balcony/loggia, it is advisable to lay household linoleum. Its top coating (protective layer), which “takes upon itself” all mechanical impacts, ranges from 0.1 to 0.3 mm.
In rooms where traffic is higher - in the living room, hallway, kitchen, install semi-commercial. It is more durable and wear-resistant thanks to a protective layer of 0.4–0.6 mm. Keep in mind that thickness is not an indicator of quality. It is needed only to hide minor irregularities.
So, for a coating 4 mm thick, the protective layer can be only 0.2 mm (or even less). And with a thickness of ±1.5 mm, the top layer can be 0.5 mm or even 0.6 mm. Accordingly, the second option is preferable.
If we talk about manufacturing companies, the brands Tarkett (Germany), IVC (Belgium), Sinteros (Germany-Russia) have proven themselves well in Russia and Eastern European countries. The latter is a subsidiary of the Tarkett brand. Of course, there are other brands in Russia that produce high-quality products, but, as a rule, the presence of these three companies in stores is wider than others.
Now you have some knowledge of how to install OSB under various types of floor coverings. Remember that the expression “change floors” in most cases is not limited to replacing the old linoleum/laminate with a new one. Its meaning lies deeper, and in the literal sense too.
All the best, and see you again!
In accordance with applicable law, the Administration disclaims any representations and warranties that may otherwise be implied and disclaims liability in relation to the Site, the Content and its use. More details: https://seberemont.ru/info/otkaz.html
Was the article helpful?
Tell your friends
Today, many people choose OSB boards as the basis for their floors, and this is not surprising because this material has many positive characteristics. In addition, it paints well, you can apply varnish, plaster and even tiles on it.
The first step is to ensure that your floor is reliable, you need to choose the correct size of the OSB sheet so that it does not deform under loads. And only then start laying linoleum on the floor.
When your base is made of a suitable material, it’s time to find out how to lay linoleum on an OSB board.
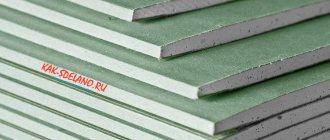
What is OSB?
Pox is, let's say, a sandwich that can consist of 3 or more layers. Two (top and bottom) layers are pressed boards made from wood chips. The chips are laid lengthwise in the outer layers of the slabs and across in the inner ones. Therefore, the board as a whole is called oriented strand board. The shavings can be impregnated with boric acid, wax, and formaldehyde resins. Between the layers there is insulation, which can be used as polystyrene foam, as well as polyurethane foam.
Osp board (OSB)
Price for OSB board
pox plate
| Manufacturer | Length | Width | Thickness | price, rub. |
| Arbec LP Norbord | 2440 | 1220 | 6.3 | 390 |
| Arbec LP Norbord | 2440 | 1220 | 8.0 | 435 |
| Arbec LP Norbord | 2440 | 1220 | 9.0 | 450 |
| Arbec LP Norbord | 2440 | 1220 | 9.5 | 450 |
| Arbec LP Norbord | 2440 | 1220 | 12 | 620 |
| Arbec LP Norbord | 2440 | 1220 | 15 | 860 |
| Arbec LP Norbord | 2440 | 1220 | 18 | 990 |
| Kronospan | 2440 | 1220 | 9 | 420 |
| Kronospan | 2440 | 1220 | 12 | 540 |
| Kronospan | 2440 | 1220 | 15 | 695 |
| Kronospan | 2440 | 1220 | 18 | 820 |
| Kronospan | 2440 | 1220 | 22 | 995 |
| Kronospan | 2500 | 1250 | 9 | 440 |
| Glunz | 2500 | 1250 | 9 | 680 |
| Glunz | 2500 | 1250 | 12 | 890 |
| Glunz | 2500 | 1250 | 15 | 1120 |
| Glunz | 2500 | 1250 | 18 | 1330 |
| Glunz | 2500 | 1250 | 22 | 1620 |
| Kalevala | 2500 | 1250 | 9 | 460 |
| Kalevala | 2500 | 1250 | 12 | 600 |
| Kalevala | 2500 | 1250 | 18 | 910 |
| Kalevala | 2800 | 1250 | 12 | 730 |
OSB is mainly used in construction and furniture production. Marked and used as follows:
- OSB-1 – for the production of furniture, packaging or surface covering;
- OSB-2 – in dry rooms for the installation of load-bearing structures and surfaces;
- OSB–3 – in rooms with high humidity;
- OSB-4 - for structures that are subject to heavy loads, as well as those located in places where humidity is high.
OSB can be varnished on one side, covered with laminate, tongue and groove, or on two or four sides.
OSB (Oriented Strand Board)
The plate is a rectangle with the following dimensions:
- thickness from 8 mm to 38;
- length – 2440 mm;
- width – 1220 mm;
Above we have given the dimensions of a standard slab. Sometimes you can find OSB on sale with dimensions of 1.25 meters by 2.5.
The advantages of OSB are as follows:
- low cost;
- light weight;
- easy and well processed;
- durable;
- moisture resistance;
- does not dry out, does not delaminate, does not rot;
- mold and insects are not infested.
Unfortunately, there are restrictions on the use of OSB. During pressing, the chips are impregnated with resins that contain toxic substances. They constantly release volatile compounds of these substances into the environment
Therefore, when choosing a stove, you need to pay attention to how much of these substances is released by a particular brand of stove, and in what area it is allowed to be used
Comparison table of building materials
How to glue linoleum to OSB board
Linoleum flooring is usually laid over oriented strand board without the use of adhesive only if the flooring needs to be replaced in a small area. In this case, only the joint lines between the OSB boards are glued.
For gluing linoleum, you can use water-based acrylic adhesive compositions, both domestic and foreign. For example, the excellent Italian glue “POVICOL PROBOND” or the Soviet PVA-M.
The best solution is considered to be polyurethane adhesives, for example, Legnopol 2000, Basf Fast 3000, Ecosimp. It is worth considering that the strength of these adhesive compositions is so great that it will be impossible to tear off incorrectly glued linoleum from the particle board.
You need to lay linoleum towards the exit, as you will still need to roll and squeeze out bubbles
Popularity of tongue and groove connections
Not ordinary, but tongue-and-groove slabs have gained particular popularity. It is explained by the presence of the tongue-and-groove system, which allows you to create the most durable and motionless base. Due to the fact that there are no gaps between the slabs, the subfloor is as durable as possible. Especially if the joints of the plates are glued with a special glue - in this case the structure will be as airtight as possible, not requiring the installation of waterproofing.
Tongue and groove connection
Thanks to the tongue and groove, another goal is achieved - uniform distribution of the load across the entire floor. And this type of connection is much stronger and more reliable than between sheets of plywood nailed to the floor.
Step-by-step instruction
And now it’s worth saying in more detail about such an item as correcting substrate unevenness. The presence of seams from slabs is a problem that is almost impossible to get rid of. But you can minimize visual issues by eliminating differences in heights of adjacent panels. The edges must be carefully rubbed or sanded. A sander will be the best assistant in this matter.
It makes sense to check the entire area of the substrate, since bulges are sometimes found on the slabs. They are “organized” by incorrect transportation of the slabs, but sometimes it is also due to illiterate installation. And these irregularities also need to be eliminated.
So, if the substrate is prepared with high quality, all irregularities are eliminated, there should be no problems with laying linoleum. The installation itself starts with the need to decide how the material will lie, because every owner wants there to be less waste.
Laying plan for linoleum.
- The area of the room is measured , a plan is drawn, and the location of the material is determined on paper.
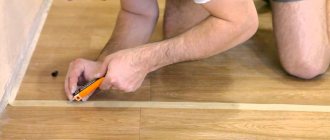
- The linoleum is laid out so that the material extends 5-10 centimeters onto the walls. Take a sharp knife (you can use a wallpaper knife, or even a blade). Using a ruler, cut off the places where the entrances to the walls are located, exactly where the entrances lie in a straight line.
- Once the straight spots are trimmed, you can move on to the door frames. There you will have to cut along a different vector, more complicated. There is no need to rush; you will have to cut linoleum with almost pinpoint precision. That is, the tactics of small, leisurely cuts will be optimal.
- If there are semicircular areas, you need to make cuts straight from the edges. That is, first the linoleum is laid on the slab, and only then the material is cut off.
- If the linoleum installation will consist of a number of pieces, you will definitely have to stick adhesive double-sided tape under the joints. The evenness of the joints must be clear. But if it doesn’t work out that way, you can overlap the edges of the linoleum. This will be within 3-5 cm. You can fix them with double-sided tape so that they do not move. You can make a double cut by making a cut at the jointed edges.
- By removing the cut fragments, you can form beautiful joints. It will be very difficult to notice them.
Many people are interested in the topic of fastening joints using cold welding. When the material is laid, masking tape is glued to the edges. The tape will act as a protective layer.
If the tape has sealed the seam, you need to go over it with a blade, freeing up space. And then the cold weld is carefully squeezed into the seam. After 10 minutes (approximately), the composition will harden, and the masking tape can be easily removed.
How to lay linoleum on OSB
In order to correctly lay any linoleum on OSB boards, you need to know well how to prepare the base and how best to glue this material.
General operational requirements, recommendations for choosing the type of base, underlying layer, coating are prescribed in building codes and regulations (SNiPs 3.04.01-87 and 2.03.13-88).
Preparing the surface of OSB boards for laying linoleum
Like any base base, an OSB board floor is prepared for finishing. To do this you need:
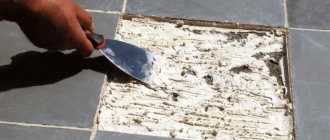
- Carefully check the condition of the surface of the sheets for damage. Use elastic dispersion putty to fill indentations from self-tapping screws, chips and cracks in the material.
The use of leveling mixtures allows you to smooth out large defects in OSB boards and obtain a flat surface for laying linoleum.
Leveling screed on an OSB board.
Finally, you need to thoroughly clean the surface of debris and vacuum it. The resulting dry and clean base is ready for laying linoleum on it.
How to glue linoleum to OSB board
Despite existing opinions about the possibility of glue-free (dry) laying of linoleum on OSB boards, professionals clearly recommend gluing the coating over the entire floor area. The consequences of simplifying the work technology may be displacement of the canvases and the formation of folds on unfixed material.
One-component water-dispersion emulsions of a universal type adhere well to wood-based materials. Their compositions may be based on:
- Acrylic copolymers.
- Polyvinyl acetate (PVA).
- Styrene latexes with the addition of chalk (bustilate).
- Bitumen.
- Rubber and latex (humilax).
Acrylic adhesive works well with concrete and wooden bases and is widely used for laying PVC coverings in high-traffic areas.
Acrylic glue
PVA is a universal adhesive mixture. Its thick consistency has good adhesive properties. The glue is environmentally friendly, does not have a sharp unpleasant odor, and does not lose its fluidity and adhesive properties when temperatures change. Coverings glued with this composition can be easily dismantled.
PVA glue
Bustilate is one of the most time-tested multifunctional adhesives. There are many varieties of this glue that have been improved for fixing linoleum. In terms of its performance characteristics and scope of application, it is similar to PVA, but is stored longer and has slightly better adhesion.
Bustilat
Bitumen mastic has high adhesive ability and is widely used for laying linoleum on a fabric basis.
Adhesive bitumen mastic
Gumilax has high peel strength. High-quality fixes heavy thick PVC coatings and marmoleum on OSB.
All these mixtures have a paste-like consistency.
Installation features
Installation of OSB differs depending on the type of work. General recommendations include the presence of an expansion joint and protection from contact with water.
Expansion (expansion) seam - this element is called differently, in fact it is a regular seam. As we know from the characteristics of the material, OSB boards tend to swell, change their shape and volume depending on temperature conditions. When installed without an expansion joint, waves and bumps appear on the surface of the slabs over time. The seam between the slabs should be 3 cm, next to the walls - 12 - 15 cm, to the foundation when installing the wall - 10 cm. If the length of the mounted plane exceeds 12 m, then make a gap of 25 cm.
When installing tongue-and-groove slabs, an expansion joint is formed itself due to the tongue-and-groove design.
An example of creating expansion joints when installing a floor
Now let's look at the installation features using specific examples.
- Installation of a subfloor - oriented strand boards are laid for subsequent placement of laminate or parquet on them. Installation is carried out on logs or on a concrete screed. The thickness of the sheet when installed on a concrete screed is 8-10 mm; for logs, a slab of up to 22 mm will be required, depending on the distance between the supports. Fastening is carried out using nails or dowels with self-tapping screws; sometimes glue is used as an additional means of fixation.
- The floor is on a strip foundation - in this case, installation is also carried out on logs made of timber, but the side of the OSB facing the ground is treated with bitumen mastic. It is possible to lay two layers of slabs; in this case, they are laid “staggered” so that the seams are not on top of each other.
Features of the installation of rough floor coverings made of particle board materials depend on the subsequent finishing treatment. For example, tiles will require a solid base, so it is better to use tongue-and-groove designs; when using rolled material (carpet), the gaps must be sealed using adhesive-sealant.
Installation of the ceiling - in the ceiling, schemes are used, as in the case of fixing the floor on joists, only beams are used for the ceiling. To ensure structural rigidity, the main axis must be perpendicular to the beams. The ceiling is covered with a waterproofing film to protect it from water, and special holes are made to drain liquid. Fixation is carried out using self-tapping screws, screws or nails.
Ceiling installation using OSB
- The walls are mounted on the racks of a frame house. The task of the particle board is not to clad the structure, but to give rigidity to the structure and create the power contour of the house. Fastening is carried out on three frame posts using screw nails, which are driven in around the perimeter every 15 cm, in the central part of the sheet - every 30 cm. When the distance between the posts is 50 cm, slabs with a thickness of 12 mm are used. The nail should be 2.5 times the thickness of the sheet itself and should be driven in at a distance of 1 cm from the edge. To prevent water from the house from condensing on the insulation and on the stove, the material is protected from the inside using a vapor barrier.
- On the outside, the OSB is covered with a windproof film; it prevents moisture from precipitation from reaching the material, while allowing the wall of the house to “breathe”, organizing air exchange inside the wall. Steam escapes from the room unhindered, but moisture remains on the outside.
Calculation of linoleum
To ensure that there is not a large amount of scrap left after laying the roll covering, you need to correctly calculate the footage. How is it defined?
First, measure the floor area and draw up a floor plan, taking into account possible unevenness of the walls. It is not enough to simply know the distance between them. Measurements are taken at a minimum of 3 points for each direction.
The results obtained are transferred to the plan. Be sure to measure niches and doorways. Taking them into account, the maximum width of the room is determined and taken as a basis. It is better to lay linoleum in one piece so that there are no joints. Fortunately, construction stores now have a large selection of rolled materials up to 4 m wide.
If you cannot do without joints, try to make sure that there are as few of them as possible. And don’t forget about drawing in such a situation. You may need to purchase extra roll material so that the image does not break at the joints.
Initially, linoleum is laid over the walls. Therefore, it is recommended to add 5-10 cm to the estimated length and width.
In order for the flooring to be perfectly smooth, it is necessary to correctly lay the OSB on the floor. The surface under linoleum is carefully leveled, cleaned and puttied. If you follow all the recommendations exactly, then even after a few years the coating will not swell, but will delight you with its ideal smoothness.
Practical use
Using OSB, you will get a smooth and rigid base on which you can safely lay linoleum, laminate, parquet and even tiles. Here are the main functions of this material:
- installation of subfloor. OSB-3 and OSB-4 are quite often used for this purpose. Note that slabs can be laid on both the top and bottom sides of the joists,
- surface leveling. We already know that any floor covering requires a level floor. By installing OSB on top of a wooden or concrete floor, you will make the surface perfectly flat,
- heat/sound insulation. OSB consists of 90% natural materials (wood chips). Thanks to this, OSB boards have thermal insulation properties and can be considered as a universal insulation material. And thanks to the multilayer structure, the plate perfectly absorbs vibrations (noise).
Reviews of OSB board for linoleum flooring
Vasily Stepanovich Lun, 64 years old, Moscow:
From experience I can say that OSB under linoleum can only be laid in heated rooms. It is easy to work with the sheet, it sands perfectly, you just need to avoid allowing individual sections to hang and remain without support on the concrete or board. Otherwise, a crack will appear, and the linoleum may crack. It crumbles a lot if you cut it with your hands, so before laying it, you need to sweep the floor until it shines.
Kapitonov Sergey Pavlovich, 38 years old, Chelyabinsk:
They laid OSB directly on the concrete; there was no money for linoleum, and it took them a long time to choose. After a month, they wiped the path on the lining with their soles, tried on the linoleum, and it was visible on the surface. I had to putty and sand. The material is soft, so you need to immediately lay both the substrate and linoleum.
- DIY self-leveling floors
- PVC floor tiles
- How to make dry floor screed with your own hands
- DIY dry screed Knauf: instructions, reviews
How to glue linoleum to plywood
Any base under linoleum must be strong, level and dry. Laying sheets of plywood is often chosen as one of the methods for leveling the floor. After installation, the plywood is sanded to remove burrs, the screw heads are puttied, as well as the seams between the panels.
With proper preparation of plywood sheets, the base becomes durable and moisture resistant. After cleaning the base, the linoleum is spread and left for 2 days to acclimatize.
A suitable adhesive for gluing linoleum to plywood is a water-dispersible adhesive for absorbent substrates.
Useful tips
Algorithm for performing operations:
- Linoleum is laid out for acclimatization for 1-2 days;
- the base is prepared (cleaned of dust and dirt, cracks are sealed, the surface is leveled);
- primer is applied;
- linoleum is cut in place (leaving gaps around the perimeter between the canvas and the walls);
- linoleum is glued;
- pressed and smoothed (to remove air). Adhesive compositions must reliably fix the linoleum, prevent it from shifting, the appearance of fungus, bubbles, ensure the removal of the coating (if necessary) and not destroy the base.