The quality of a major renovation of an apartment and the durability of the finishing coating are largely determined by the order of work performed (this thesis fully applies to new buildings, where apartments are rented without finishing). In this regard, builders adhere to the golden rule: first the ceiling is finished, then the walls, and only after that the floor is laid , although Russians are accustomed to doing everything the other way around: half-wall-ceiling, and then deal with difficulties head-on. This is clear. How to plan work if it relates to walls? For example, what comes first - wallpaper or doors?
Let us immediately note that neither among specialists nor among those who carried out repair work on their own, there is no consensus on this matter: some believe that wallpaper needs to be glued first and give reasons for their point of view, others - on the contrary, that doors first, and then wallpaper.
Let's try to critically evaluate all the pros and cons and figure out whether they glue wallpaper first or install interior doors.
Main nuances
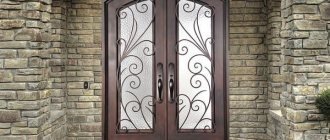
From the above rule, the sequence of actions is unclear - should you install the door first or hang the wallpaper? In the case of entrance doors, their installation should be provided for at the very first stages of repair. In the case of interior doors, the opinions of finishers and door installers are concentrated around the following facts:
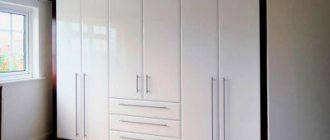
- The easiest way: install a turnkey door, hang wallpaper and cover it with wide decorative trim. In this way it is possible to hide the trim line of the wallpaper, but thereby the aesthetics are lost. This method will not work if the door is installed close to the partition.
- If the repair process involves pouring screed at one level throughout all rooms, then installing the door leaf is done last. Depending on the design of the door, decorative elements are installed before or after installing the hinges, which means that wallpapering the walls will have to be completed before the final installation of the door.
If you plan to pour a concrete screed in one level, then installing the door frame should be done last, otherwise errors are inevitable that cannot be hidden either behind wallpaper or platbands Source Nikastroy.ru
Ceiling finishing
You have already become familiar with the fact that doors or wallpaper come first. But this knowledge is not enough to carry out quality repairs. You will also need to select materials. As for the ceiling, suspended structures are the most popular. Among their main advantages are:
- a light weight;
- ease of installation;
- long service life;
- environmental friendliness;
- ease of care.
But the main advantage is the speed of installation. The main rule when working with such ceilings is fastening after wallpapering.
Video description
At what stage of repair are doors installed?
- If you use wallpaper for painting, it is more convenient to install the door after painting.
- As work progresses, the humidity in the room rises. If doors made of non-laminated solid wood (for impregnation) are used, their installation is carried out after wallpapering and drying the room. This is done to avoid swelling of the door leaf. This advice does not apply to all other types of doors: those made of laminated solid wood or filled with corrugated cardboard.
- When installing expensive doors, it is better to play it safe and install them after all finishing work has been completed.
Ventilation device
Installation of utilities is perhaps one of the most important stages of repairs. But, as practice shows, not many people pay due attention to it. For a comfortable stay, the cooking area and bathroom must be equipped with a ventilation system and air exhaust, and the main room must be equipped with air conditioning. It is recommended to carry out installation work in the following sequence:
- The layout of the apartment is determined.
- Openings are made in the interior partitions.
- Installation of the external and external air conditioner unit is in progress.
- Ventilation is being installed.
- Electrical wiring is supplied to the devices.
Once you are done with this, you can start decorating the interior of the premises.
Wallpaper first
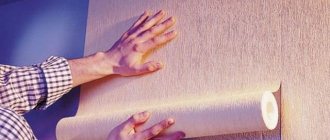
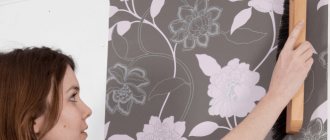
Anyone who has glued wallpaper at least once in their life knows how difficult it is to do it around the door. Pasting the corners will look like flowers. A free opening from the door frame is a definite plus when doing the work yourself.
Wallpapering should be done after all the “dirty” work has been carried out, while the installed doors should be gradually covered with plastic film Source Rerate.ru
Trimming wallpaper immediately after gluing is not an easy task. When installing a cheap door, there is a risk of delamination of the materials of the door frame and leaf when wet wallpaper comes into contact with its surface.
Return to contents
Wallpaper for the ceiling can be paper - domestically produced. They are glued together from two layers of paper, one of which has a fairly deep relief embossing.
The undoubted advantage of such wallpaper is that it conceals quite serious unevenness in the ceiling. They can be used to cover an unputtyed ceiling; the relief and thickness of the wallpaper will hide the flaws. A significant disadvantage of this material is that it is quite heavy and becomes even heavier when it is soaked in glue before gluing.
And the only way to hang wallpaper is to first apply glue. The next drawback is that such wallpaper cannot be painted, and it is only available in white. And to complete the list of shortcomings, there is one more fact: the service life of such wallpaper is no more than five years.
Non-woven wallpaper is completely free of such shortcomings. They are made from long cellulose textile fibers and special additives that combine it all into a non-woven, smooth fabric. Thanks to this production method, this product has acquired very useful properties:
- they are non-toxic and hygienic;
- have sufficient thickness to hide some unevenness in the ceilings;
- they are convenient to glue, since you need to apply glue to the ceiling, and this makes the work much easier;
- when glued they do not stretch;
- With this well-fitting and durable wallpaper, it is easy to glue surfaces made of any materials;
- they do not fade in the sun;
- such wallpaper can be painted, but you can also buy ones that match the color or pattern;
- their service life is limited only by your desire to change the type of ceiling finish again.
You can glue the ceiling with non-woven wallpaper using any wallpaper glue, but it would be wise to choose a special one, since they are available for sale.
https://youtu.be/GHKO4QiD1QY
Return to contents
Preparing the ceiling surface for tiles is the same as for wallpaper.
All ceiling tiles are divided into three main groups:
- pressed;
- injection;
- extruded.
Pressed tiles are usually white.
It is pressed from foam blocks and usually ranges from 5.5 to 8.5 mm thick. An absolute drawback is fragility. An undeniable advantage is the low price.
The injection one has a more significant thickness from 8.5 to 14.5 mm and perfectly smooth edges, which allows you to achieve the illusion of a continuous sheet with careful joining on the ceiling. It is made using the technology of sintering polystyrene foam raw materials, which makes it durable. The thickness and deep textured pattern allows you to hide almost any ceiling imperfections.
Extruded tiles are pressed from polystyrene strip to a thickness of 3 mm. Despite the visual fragility, the tiles are very strong and durable. As a rule, it is covered with a film, which later allows for wet cleaning of the ceiling.
You can glue the tiles with “Installation Moment” panel adhesive. It really glues instantly, but you need a special gun to work with it.
You don’t need a gun for “Titan” or “Master” glue, but in order to properly glue the tiles, you need to apply it and wait about 10 minutes. Then you will need to press the tile to the ceiling and hold it for 10-15 seconds.
Video description
When should interior doors be installed?
The “first wallpaper, then doors” method also has disadvantages:
- Installing a door is a messy and dusty process. After installation is complete, the wallpaper will have to be washed, and in the worst case, vacuumed.
- When forming the desired geometry of a doorway in a concrete wall, damage to the wallpaper is inevitable. If there are defects, the concrete may fall off in large pieces.
- No one is safe from human mistakes. Incorrect measurements, negligence of the door manufacturer and other factors lead to the fact that in some cases the doorway has to be reduced. After building up with a cement-sand mixture, an additional, unpasted wall surface appears, very different in color from concrete. Most often, decorative trims cannot cover this deficiency. There is a need for puttying and additional wallpapering, and with them a lot of difficulties: adjusting the pattern, a large number of scraps, etc.
- When finishing a doorway, it is almost impossible to avoid splashes of cement-sand mixture and other materials. Unlike dust, such contaminants are very difficult to remove. In addition, some door models do not have trim, which means you will have to tear off the wallpaper around the perimeter of the opening to form a solid corner.
To wallpaper a room with old doors, you need to remove the trim and restore the corners of the doorway to allow the work to be completed with the highest quality and accuracy Source Remontnik.ru
What to do if the interior door is larger or smaller than the doorway
The proportionality of the doorway and the door block largely determines how correctly they are installed and how long they will last. But if the sizes do not match, they are larger or smaller, how to correct this situation?
Widening the door opening - just from the side
How can you increase the doorway? The first thing you should pay attention to is the type of walls. If it's a wall, there won't be any problems.
- If the wall is load-bearing, it is important to prevent the ceiling from collapsing from above, creating an emergency situation and causing casualties.
- If there is a wall, the solution to the problem is described below. Which one to choose is chosen individually in each specific case.
How can I widen the opening? Just complete a series of activities.
- Strengthen the top of the opening. This point can be skipped if the expansion is wide, and then by no more than 100 mm, 50 mm on each side.
- Next is the marking. Having calculated exactly the width of the new door opening, markings are applied to the wall using a pencil or marker.
- Next comes the removal of unnecessary material in the opening - a hammer and sledgehammer, an angle grinder, and so on. Exceptional physical strength.
Everything is quite simple, but only in appearance - it is important to entrust all the work to the masters.
Reducing the doorway - possible variations
For some, work such as reducing a doorway may seem simple, but on the other hand, this, for the most part, leads to many problems if done incorrectly. And, first of all, these are cracks in the wall itself, and then – loosening of the door block.
- How can you reduce the door opening by no more than 100 mm? Such gaps are simply distributed on both sides of the doorway - regardless of the material of the walls, you can insert a batten or board of appropriate thickness into the free space. Alternatively, you can reduce it using plaster or drywall - reducing such volumes will not be difficult.
- If the opening is more than 100 mm? And for the most part, many craftsmen today use drywall. This is a technologically simple solution and a fairly clean technique, but it does have one drawback - the doors slam and can damage the structure by causing cracks to appear on its surface. And therefore a more reliable solution is to lay bricks.
Doors first
Proponents of the “doors first, then wallpaper” method give a generalized, powerful argument: installing a door is a rough job, and gluing wallpaper is a finishing job. According to the general principle of performing repairs, rough work is performed first. There are other arguments:
- Bare walls allow you to install doors quickly and without the need to constantly monitor the condition of the wallpaper.
- When carrying out repairs on a large site, pre-installation of doors allows you to isolate further work. Dust from one room can interfere with finishing work in another.
- Defects in the doorway that arose during the door installation process can be completely hidden without deteriorating the appearance.
- High-quality doors (with the exception of non-laminated solid wood) are not afraid of fluctuations in humidity in the room, which means they will not swell and will not warp.
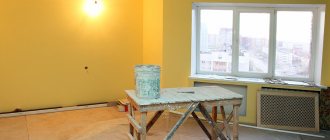
When performing finishing repairs without installing doors, it is necessary to cover all doorways Source Drive2.ru
How much expanded clay is needed per 1 square meter?
How to calculate the required amount of expanded clay?
First, we calculate the total square footage of the room; to do this, you need to multiply the width by the length. Next, you need to decide on the thickness of the expanded clay layer. All that remains is to multiply the quadrature by the thickness, we get the cubic capacity.
What layer of expanded clay is needed to insulate the floor?
The main rule when performing thermal insulation of a floor is the accurately calculated thickness of expanded clay. It should be enough to provide thermal protection for the house: for concrete, a layer of at least 10 cm is used, and for soil – up to 30 cm.
How much expanded clay is needed per 1m3?
For a sandless mixture, based on 1 m3, the following proportions are used: 720 kg of expanded clay brand M200; 250 kg of cement sand; 100-150 liters of water.
How to calculate the amount of dry screed?
We calculate the backfill based on the volume of material; to do this, the area of the room must be multiplied by the thickness of the screed layer. It is advisable to take all dimensions in meters, for example - 60 m2 (total area of our premises) * 0.08 m (layer thickness 8 centimeters) = 4.8 m3 of dry backfill.
How much expanded clay is needed for 1 block?
For a sandless mixture, based on 1 m3, the following proportions are used:
- 720 kg of expanded clay brand M200;
- 250 kg of cement sand;
- 100-150 liters of water.
What is the consumption of screed per 1m2?
To calculate the amount of dry mixture for floor screed, you need to know the expected layer thickness, room area, and material consumption per 1 m2. Depending on the manufacturer, you will need 18–25 kg of mixture per square meter with a layer thickness of 1 cm.
How to properly fill a floor with expanded clay?
Dry expanded clay as floor insulation is used not only with wooden sheathing, but also with cement screed.
- The backfill is leveled and covered with plastic film with an overlap of 10 cm. ...
- Reinforcement mesh is placed on top. ...
- The mixture is prepared from sand and cement in a ratio of 3:1.
How to insulate a concrete floor with expanded clay?
Insulating the floor with expanded clay in an apartment
- Dismantle finishing materials (linoleum, laminate).
- Remove the old screed. ...
- Clean the surface from dust and dirt.
- Cover existing cracks and defects with cement mortar.
- Set the guides (beacons) to 10-12 cm.
Which fraction of expanded clay is best for floor insulation?
For full-bodied individuals, the 10-20 mm fraction is most suitable (but it is not necessary to use only this). For hollow ones - expanded clay 5-10 mm. This material is used not only in construction, but also in: - gardening (insulating the roots of garden plants, a fraction of 10-20 mm will provide a drainage system, for indoors - 5-10 mm);
How much does 1 cube of expanded clay weigh?
As practice shows, the weight of 1 m3 of expanded clay varies from 200 to 400 kg. For a visual representation, in order to understand how much 1 cube of expanded clay weighs, we can say that it is 20 bags of 50 kg each, 25 bags of 40 kg each, or 40 bags of 25 kg each.
How much does a cube of expanded clay 20 40 weigh?
Expanded clay fraction 10-20 is recommended to be purchased for thermal insulation of floors and ceilings. Large granules (20-40) are used to insulate water mains. One cubic meter of the most common brand M450 in this range weighs no more than 350 kg; it is well suited for insulating roofing systems and basements.
How much does 1 cube of expanded clay cost?
Expanded clay in bags and in bulk Name Unit of measurement Price per cube Expanded clay in bulk fraction 0-10 m3 from 2330 rub/m3 Expanded clay in bulk fraction 10-20 m3 from 2015 rub/m3 Expanded clay in bulk fraction 20-40 m3 from 1970 rub/m3 Expanded clay in bags fraction 10- 20m3from 130 rub/m31 more line
How much does a square meter of dry screed cost?
The cost of installing a dry floor screed in an apartment averages about 300–400 rubles per square meter. The materials themselves - dry backfill, floor covering elements, screws, edge tape, plastic film - will cost approximately 600-800 rubles per square meter, this price includes delivery.
How to calculate how much GVL is needed?
It is necessary to take the total working surface area and divide by the sheet area, you will get the quantity in pieces, and add 5% for trimming. GVL has a size of 2.5 by 1.3. Divide your square footage by 3.25 m2 + 15% percent if you are sewing up the ceiling or walls.
Conclusion
The accumulated experience allows us to assert that the correct sequence of repairs will be “first – doors, then – wallpaper.”
The reasons for this lie not only in theoretical aspects, but also in the practical sense of this method:
- Construction dust has a completely different structure than household dust. If it gets on wet wallpaper, it is not possible to remove it, and after drying it turns out that it is very strongly stuck to the wallpaper.
- Repairs are most often carried out in stages. Before wallpapering, a lot of “dirty” work is done: plastering, puttying, grouting, etc. If there is no door in the room, then all the dirt will quickly spread to the neighboring clean rooms.
- There is no risk of damaging the wallpaper during the process of replacing or installing a door.
Wall painting option
What is the best thing to do if the walls are painted rather than papered? Here, too, it is better to first install the door frame, without the door leaf and trim. Then proceed to decorative finishing. Just first seal the cracks and arrange the platbands. In addition, the surface of the door frame should be covered with protective masking tape.
After the paint has dried, hang the canvas and install the trim. This technology reduces the risk of possible wood swelling, and damage to the door block is reduced to zero. In addition, the process of painting the wall near the platbands is greatly simplified.
Advantages of laying flooring over wallpapering
Laying laminate flooring requires cutting the boards. A jigsaw is usually used for this. As a result, a large amount of fine wood dust is formed, which can settle on the uneven surface of profiled (embossed) wallpaper if it is already pasted before finishing the floor.
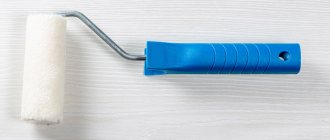
On clean linoleum (laminate), you can safely roll out rolls of wallpaper and lubricate the sheets before gluing them to the wall, without fear of staining them with cement from the screed.
It is more comfortable to work on a clean linoleum or laminate floor than on a concrete screed or get confused in the constantly clumping plastic film that can be laid on the screed before gluing the wallpaper.
4 x pitched roof house plans
Recommendations from professionals
It is more practical to glue the wallpaper first, and then proceed to install the laminate. Dirty work must be completed before the finishing procedure begins, then the original appearance of the coatings will be preserved. The trellises are cut in another room, and it is better to cut the boards on the street or balcony.
The maximum humidity level for standard quality laminate is 60-70%, for cheap types it is below 45%. When choosing a model, it is better not to save money and take a good coating that is resistant to moisture. If you do not disturb the top protective layer, the product will withstand several days in moisture.
To avoid damaging the surface of the laminate, furniture legs are additionally wrapped in soft cloth. You can put felt caps on the lower parts of a table or chair, and rubber gaskets for stepladders. The material protects the top thin layer from being pressed under the weight of the worker or scratches.
To protect the laminate during renovation, old wallpaper is often used instead of film. Paper actively absorbs moisture when exposed to water, which is invisible to people. If the raw materials lie on the floor covering for a day, then there is a danger of the boards swelling.
During repairs, polyethylene with a thickness of 80 to 150 microns is used. It is not advisable to use types that are too dense or thin. After covering the walls with trellises, it is better to remove the film. Condensation forms under the material, which is destructive to the decorative floor.