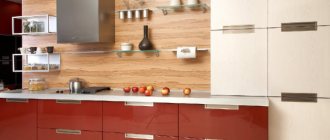
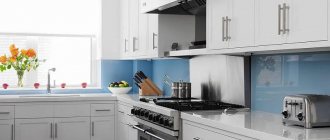
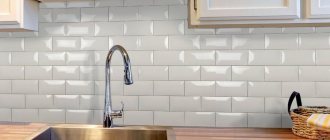
A kitchen apron made of tiles protects the wall from exposure to steam, grease, and dirt, so it is made of waterproof and easily washable material. The best is ceramic tiles. Its huge selection offered by the modern market will allow you to create any kitchen apron design that will easily fit into the overall interior.
Can a beginner lay out a tile backsplash for the kitchen work area on their own? Of course, to make this process easy, we have prepared this material.
Features of a kitchen apron made of ceramic tiles
The tiles allow you to lay out an apron of any size and shape (unlike the same MDF panels or skins). The modern building materials market provides the consumer with the widest choice of colors, decor, frieze and texture of piece material . It can be matched to almost any interior.
The material is quite strong, wear-resistant and durable. It is not afraid of moisture, temperature changes and heat. Of course, tiles cannot be called fire-resistant: near an incorrectly installed slab, the enamel will still crack, but such a wall coating will not allow a fire to spread in the event of an accidental ignition.
Advice . When choosing tiles for a kitchen backsplash, pay attention only to the enameled glossy finish: this material is easier to clean.
The main mistakes when choosing, installing and using a tiled kitchen apron, which we advise you not to repeat:
- Irregular cleaning. After each cooking, simply wipe the tiles with a damp sponge or cloth to remove soot and dirt that has not yet dried. Many housewives do not do this, and then set aside several hours separately (about once a year) for general cleaning of the apron. Such cleaning takes much more time and effort, since dirt, soot and grease dry out and accumulate.
- The joints between the tiles are too thick . During operation, the joints become clogged with residual grease, which is practically not washed off. When laying the apron, it is recommended to use crosses that set the minimum thickness of the seams (1 mm), since tiles cannot be laid on the wall using the seamless method.
- Using textured tiles without glossy enamel . Ceramics is a porous material, and without a protective layer, dirt will clog into the texture of the piece material, which is practically not washed out from there. When choosing, give preference to tiles that have a smooth decorative and protective layer.
- Laying tiles on uneven walls. In this case, if you glue the tiles directly to the wall, the masonry will turn out crooked. And if you level the walls with tile adhesive at the same time as installing the apron, the difference between the apron and the base surface will be too noticeable.
Even knowing about all the listed disadvantages of a tile kitchen apron, 50% of the Russian population prefers this particular material.
Are you planning to install the kitchen splashback yourself?
Not really
Decorative rock
Suitable for aesthetes and connoisseurs of brutal textures. Natural stone is the most durable, but has a high cost. A more affordable option is artificial agglomerate, as well as colored concrete that imitates shell rock.
In addition, the apron can be laid out from budget gypsum tiles “like stone” or “brick”, but their textured and porous surface must be protected with varnish or glass. You can lay such an apron yourself.
Tile selection
The future interior of the kitchen largely depends on the color of the tiles. It should be combined with the surrounding environment, not draw attention to itself, but at the same time be catchy and memorable. The variability of shades depends on the chosen material.
| Material | Advantages | Flaws |
| Ceramic | Environmental friendliness, low price, variety of shapes and sizes, patterns. Ease of treating walls with ceramics. | The weak point is the seams; you will have to tinker with the grout, especially if you do not have the proper experience in the work. A messy installation process that requires a level base. |
| Mosaic | Durability, suitable for the design of non-standard shaped surfaces, the ability to create complex compositions. | A large number of seams, complex and expensive installation, |
| A natural stone | Strength, density of the material, expensive and attractive appearance, variety of shades, high degree of resistance to external factors. | Opportunity to buy from an unscrupulous manufacturer, high price, possibility of radioactive exposure. |
| Marble | Low price, beautiful appearance. | High level of moisture absorption. |
| Fake diamond | Does not require special care, durable, seamless apron, a variety of shades. | High price, rough appearance. |
| MDF and chipboard | Low price, variety of colors and shades, ease of installation | Strength is lower than other materials |
We determine the dimensions of the apron and calculate the material
Before you begin laying the apron, you need to calculate the amount of materials and determine the size of the occupied area. Standard parameters of a kitchen apron:
- 55-75 cm vertically. You can navigate from the level of the countertop or furniture.
- It is recommended that the tile border be at least 20mm below the level of the worktop to prevent dirt and moisture from accumulating in the joints.
- The upper border of the apron is the hood.
- Horizontally, the kitchen apron occupies the entire wall, from one corner to the other.
Depending on the interior, the kitchen apron can reach the very floor. Horizontally, it can be limited to one work area, where the stove, sink and kitchen table are concentrated.
No. 7. MDF panels: a budget and practical option
You can make a kitchen apron from MDF panels: it will not cost much, but will be much more practical than finishing it with film or PVC boards. The main advantages of this method of finishing a working wall:
- moisture resistance and strength;
- quick production , because, as a rule, such an apron is created together with a kitchen set;
- ease of installation . The walls do not require careful preliminary preparation, and the panels can be fixed either to the frame or using liquid nails. If you need to replace the apron, this can be done very simply - you don’t even need to remove the furniture;
- seamless coating , and this is important in a kitchen work area;
- beautiful appearance : such panels can imitate ceramic tiles, stone, wood, brick, and recently a bright pattern has been applied to the material so that the apron becomes a real highlight of the kitchen.
But the material, unfortunately, has disadvantages:
- Not all detergents be used to clean the surface . Too active substances can negatively affect the material, ruining its appearance and performance;
- flammability , so it is better to use MDF panels only in kitchens where an electric or induction stove is installed.
Preparing for work
This stage includes preparatory work for laying the kitchen apron. The walls must be treated with plasterboard or plaster in advance to make them smooth and hide small cracks. The glue is applied less easily to curved walls; in some areas it may not adhere well.
You need to remove whitewash or old plaster from the wall. You will have to make notches on the oil paint using a grinder.
It is important to mark the bottom level of the tiles so that the rows are even. It is better to install a profile at the bottom to prevent the tiles from slipping in case the glue does not dry completely. A laser hydraulic level is best suited for this purpose.
Necessary materials for work
For construction work of this type, the following materials will be required:
- A tile of a suitable material with a selected pattern. The recommended resistance level is at least AA; such tiles are resistant to external influences and can withstand any household chemicals.
- Putty and primer to get rid of cracks and uneven walls.
- Glue.
List of tools for work
Tools required for construction work:
- Hammer (the main task is to help remove the old coating to apply a new one).
- A screwdriver will be required if you intend to install the socket and run the wires.
- The adhesive solution is mixed with a special mixer.
- Buckets for diluting glue and water.
- Three types of spatula: narrow, serrated and rubber.
- Level for determining the angle of inclination and even placement of the tiles.
- Laser hydraulic level for adjusting the lower level of the tile and protecting it from falling in case the glue does not dry completely and it starts to fall.
- Crosses and also pegs.
- Pencil for marks.
No. 6. PVC film - temporary solution
If you need to make quick and inexpensive temporary repairs, then it makes sense to take a closer look at PVC film. For a while, just before you do normal repairs, it can serve normally. Its main advantage is low cost . In addition, the range of colors of such films is simply huge: natural materials, landscapes, ornaments, etc. You can handle gluing such material yourself; the film is resistant to mechanical damage, but that’s where its advantages end.
This material can gradually fade under the influence of sunlight, it is afraid of high temperatures, and if damaged it cannot be restored. It can be used as a temporary kitchen decoration, but is not suitable for permanent use.
Installation instructions
- The first stage is to make markings using a hard pencil, a cord with a weight for a perfectly straight vertical line, and a plasterboard sheet for the bottom border.
- Dilution of the adhesive solution . It is important to maintain all proportions so that the glue holds the tile firmly and prevents it from falling to the floor. After two hours, the glue will begin to dry and lose its important properties, so you need to use it up as quickly as possible. The thickness of the adhesive layer should not exceed 10 mm.
- Laying the apron . An adhesive solution is applied to the wall, the lower border is marked with a profile. It is important to press the tile firmly against the wall so that the adhesive adheres firmly.
- You can start laying from the edge, then you will have to install a special corner in the corner. If any part lies unevenly, it can be disconnected and reinstalled.
- The first row is the most important; you can proceed to laying the next one when it is completely dry. You need to install crosses between them so that the seam spacing is uniform.
- The final stage is cutting the tiles and grouting them to give the backsplash its original appearance.
Preparing the wall surface
Before you move on to laying a tile backsplash in your kitchen, it is important to properly prepare the wall. First you need to remove the previous coating - paint, wallpaper, decorative material. To clear the wall of old tiles, you will have to use a hammer drill. Fill all irregularities with primer and putty so that the surface becomes smooth and the tile lays on it without problems.
The angle when moving from one wall to another should be perfectly even. Professionals advise making small notches so that the adhesive solution adheres better. To remove fungus, mold and salts from the surface, it is better to use a high-quality fungicide so that the dirt does not spread further and spoil the materials.
Marking
Particular attention should be paid to the markings so that the pattern is not disturbed and the tiles lie flat. The standard distance from the tile to the floor is 70-85 cm, the recommended height is 55-65 cm. The upper edge of the tile is marked with a hard pencil, the lower edge is limited by an even wooden beam, which will support the tile if the glue does not have time to dry.
The wooden beam can be replaced with a metal profile or sheets of plasterboard. A vertical mark can be made with a special cord with a weight. It is mounted under the ceiling and goes down in a straight line, marking the border. Under the force of gravity, the cord will create a perfectly straight line. You can start laying from the edge or from the center.
Preparing the adhesive solution
Before laying kitchen backsplash tiles, the wall should be treated with a primer so that the adhesive adheres better and adhesion increases. The adhesive solution must be diluted according to the instructions, observing the proportions and dosage.
First, a small amount of glue is applied to the wall itself. The surface should be covered with a shiny film. The remainder is applied directly to the tiles. For better adhesion, the adhesive is removed from the tiles with a knife or scalpel; the residue should be left in the recesses and cracks to ensure better adhesion.
Using a notched trowel, spread the adhesive evenly over the wall. The composition will begin to harden in 15-20 minutes, during which time you need to start laying the tiles. The adhesive solution can remain in the bucket for no more than two hours.
Trimming and styling
Anyone who has tried to lay a tile backsplash in a kitchen with their own hands knows that in most cases it has to be cut to fit the dimensions of the room and the features of the walls. For convenience, it is recommended to use a special tile cutter, however, there is no point in buying one specifically for laying a kitchen apron.
How to cut tiles for a backsplash:
- This can be done with a regular glass cutter. Use a marker to make the necessary marks and draw the tool along the line, pressing firmly on your hand. Separate the unnecessary part with your hands, placing it on the corner of the table.
- To make it break better, it is recommended to place it in water at room temperature for 10-15 minutes before starting.
- If you have a grinder, you can cut it with it. However, in this case, you will have to get a tight respirator to protect your respiratory system from fragments.
The next stage is laying the tiles. You should start with whole pieces; it is better to place them in the center so as not to spoil the integrity of the design and the appearance as a whole. Leave the trimmings at the very end, for example, along the edges, under the tabletop, where they are not so visible.
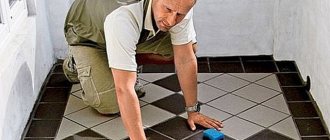
It is extremely important to lay it in even rows. Vertical and horizontal marks are made differently. The first tile will act as a kind of beacon, relative to which the remaining elements will be aligned.
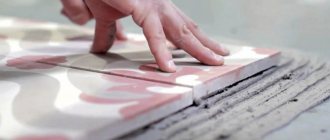
The tile must be pressed tightly against the wall so that all the air escapes and the glue sets well. Then the material will not peel off and will last for many years.
How to lay a backsplash tile in the kitchen:
- The pattern should be uniform; its integrity should not be violated, otherwise the apron will look untidy. To make the installation process as simple as possible, on the back of each tile, manufacturers mark with arrows which direction the pattern is located.
- The profile is screwed to the edge of the picture. It is on this that the horizontal mark of the tile is placed. It is better to place plastic wedges under the first element so that you can adjust its position until the glue dries.
- After the first row is completed, plastic crosses should be placed in place of future seams. The thickness of the seams depends on the depth of their immersion.
- The undercuts are attached at the very end in the free areas.
Grout
The kitchen apron will take on its final appearance at the very end. Grouting is carried out upon completion of all work. It is important that the composition does not contrast with the color of the tile, so that the design does not turn out faded. The grout is applied with a rubber spatula; excess can be removed with a sponge.
To protect the seams from fraying, they can be additionally treated with a water repellent.
We also recommend watching: Removing grout from tile joints at home
Output of wires and sockets
The outlet for the wires is installed at the very end, after grouting. The hardest part is making the holes for the socket. The lining of the future location for wiring should be done carefully. If the wires have already been laid, while laying the tiles they should be protected from glue and other liquids using film or a plastic bag.
Once it is installed, you can proceed to marking the location for the future outlet. Mark the boundaries directly along it with a marker or paint and drill holes with a tile drill. Remove dust. It is important that during the process the tiles do not crack or begin to crumble.
If glue gets on the wires, it should be quickly removed with a dry sponge.
Methods for laying tiles in corners
So, how to lay tiles in corners? There are two options for combining it:
- rectilinear - elements are placed one to another at right angles, so that one end is visible, the other is hidden by the top element. When the tile needs to be adjusted to size, the cut edge is placed on the bottom. The disadvantage of this method is the formation of a seam at the joint. Although it is masked with white or colored grout, the appearance of the surface is not ideal;
- perpendicular at the corners - suitable for decorating protruding borders. The main thing is that the cladding is not visible from below. To do this, the tile is glued in such a way that the horizontal tile “hangs” over the edge. Note that the designed corner will look neat only if the canopy width does not exceed six millimeters and the edge is intact.
Trimming edges
To obtain an even seam at the joint, a bevel for the internal corner is possible - trimming the end of the tile at 45°, which is performed:
- angle grinder;
- roller tile cutter;
- fine sandpaper.
The ideal solution is to use an electric tile cutter with an inclined bed design.
How to make a neat corner of a kitchen apron? To do this, the tiles are cut, laid on the mortar in a corner so that the ends coincide and form a solid coating. It will not be easy for novice craftsmen to complete such work. First, they need to practice.
Important! Laying tiles in the corners must be done on a perfectly flat wall surface, otherwise the width of the adhesive composition will be different, which will negatively affect the position of adjacent elements.
Application of trims
They are decorative PVC profiles that allow you to form a corner of a certain direction. The outer protrusions are covered with L-shaped overlays, and the inner ones are covered with pressed-in arc-shaped overlays. Convex narrow tapes are also widely used.
Let’s answer another question: how to glue a decorative corner to a ceramic tile? Used for this:
- liquid nails;
- silicone sealant;
- glue.
Typically, such overlays have a special design that allows them to be laid on the solution. A special plate goes under the slab and is secured with glue. This method of installation is easy and simple, as a result the surface of the apron acquires a neat, beautiful appearance, while the joints are reliably protected from the ingress of microbes, dirt, and water. To attach trimmers to external corners, silicone or acrylic-based sealant is used.
L-shaped tile
To decorate the kitchen apron in the corners, you can use specially shaped ceramic tiles. Many modern manufacturers produce special corner parts from clay, which are connected to each other at 90°, forming perpendicularly connected parts. Laying such tiles is an extremely simple job. It is attached to a flat surface with a special solution.
Important! When you use L-shaped pieces, they are laid first on the leveled wall, and the rest of the tiles are laid out from them.
Differences between interior and exterior corner design
When doing work, it is important not to forget about the differences between external and internal L-shaped parts. Some are protruding areas, others form a space in which the surfaces of the adjacent kitchen walls intersect.
The greatest difference between external and internal corners is noticeable when installing decorative PVC corners. Trims vary in shape and size, are installed in different areas of the apron, and simultaneously perform decorative and protective functions.
It is worth considering that it is easier to stick the internal trim tiles, because... with a slight deviation from the norm, the situation can be corrected with grout or adhesive.
Note that colored fillers look beautiful only on the inner corners, due to the fact that over time they crumble and fall out, they are additionally covered with profiles that not only protect the surface from external damage, but also wonderfully decorate it.
Elimination of defects
Novice tilers rarely manage to lay tiles on a wall correctly. But it is still possible to eliminate some defects. So, when it is not possible to tile a corner evenly, you can eliminate the defect by adding a small amount of cement mortar under the element.
When trimming the end, a slope of 45° is not always obtained - the excess is ground off manually with fine sandpaper. When you get an uneven joint, you can fix the problem in two ways: mask the gap with colored grout or, after setting the mixture, attach a decorative profile to the outer corner using liquid nails or silicone.
Hemming the edges
To obtain an even seam, a bevel is made at the junction of the fragments - cutting the ends at 45°. This can be done with an angle grinder, a roller tile cutter or fine-grained sandpaper. The trimmed pieces are placed in the corner end to end so that they coincide and form a solid transition. To do this, the wall at the corner must be perfectly evenly processed.
Recommendations from experts
Some expert advice on how to lay a tile backsplash in the kitchen:
- The grout will have to be updated regularly so that the apron does not lose its attractiveness and does not fade.
- After calculating the amount of materials needed, it is worth adding another 10-15% to this figure in case during the repair process some of the tiles deteriorate and become unusable.
- Installation should start from the center if the tiles for the apron are the same size on the left and right.
- Laying from the edge is suitable for corner kitchens and the edge of the apron in a visible place.
In conclusion
A kitchen apron is regularly exposed to negative influences: splashes of water, drops of fat and various products, high temperature, frequent washing. All this makes us look for the most practical and resistant material to all this. Everyone wants the kitchen to be attractive, stylish and harmonious, so another requirement is put forward for the finishing material - a pleasant appearance. In addition to ceramic tiles, there are many other ways to decorate a kitchen working wall: when choosing one option or another, it is important to compare all the pros and cons, think about how the material fits into the kitchen conditions, and only then make a decision.
The article was written for the site.
Tags:Kitchen
