Optimal size
In construction, determining any parameters is a compromise between functionality and cost.
This is the search for what is necessary and sufficient. There is a certain best overhang size. Its decrease entails moistening the wall. Exceeding the optimum increases the cost of roofing materials.
An increase in area means an increase in wind and snow loads. There is also such a phenomenon as icing. The calculation should be based on the sum of these factors. An increase in the safety margin of the roof will be required, which means additional cash injections. The architectural style can be the main criterion for choosing the length of the overhangs. The picture shows Alpine chalets. According to tradition, the roof extension is from 1.5 to 3 meters.
Device
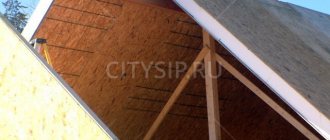
Fillers are bars or boards with a cross-section of 50x100 mm, which are used to lengthen the rafters of the roof frame necessary to form the eaves overhang. They are cheaper, lighter and more convenient to install than elongated rafter legs, for the manufacture of which thicker boards are used. The advantages of such a constructive solution are considered:
- Low weight. The roof fillet has a smaller cross-section, since less load is placed on the roof eaves. Due to this, the total weight of the roof rafter frame is reduced, unloading the foundation and load-bearing walls of the structure.
- Favorable price. Adding rafters to the required length using fillets is much cheaper than using longer rafter legs, since the price of lumber directly depends on their length. And boards longer than 6 meters are generally considered non-standard, and therefore are rare and very expensive.
- Ease of installation. Raising rafter legs to the height of the roof is already a certain difficulty, but moving large frame elements and weight can generally result in a global problem that cannot be solved without special construction equipment. Therefore, it is much more convenient to increase the length of the rafters with fillets.
- Aesthetics. Roof caps can act not only as a functional element, but also as decoration. Carved fillies, characteristic of traditional Russian architecture, help to form a fairly wide cornice, at the same time being a decoration of a wooden house.
Rafter fillies
Wooden house with large roof overhangs
Authors of the project: architects Alexey Pomelov, Svetlana Pomelova (Architectural Studio of A. Pomelov), Moscow
The site on the high bank of the Volga with a strong slope towards the river is divided into horizontal terraces descending to the pier and embankment and reinforced with retaining walls made of gabions. It was here, along the fairway, that it was decided to build a house that would resemble a ship.
Initially, the customer planned to build a log house in the Log House style, but during a discussion with the architects, they decided that a structure resembling a ship would look more expressive in such a landscape.
The house will organically fit into the terrain with the help of terraces and stairs, and natural materials such as wood and stone will strengthen its connection with the surrounding nature. The result is a unique project, which is a modern half-timbered structure.
The image was based on a traditional Alpine wooden chalet with large overhangs, but a half-timbered structure and a ship-like design. Its configuration is tied to the existing foundation made of a reinforced concrete slab with a grillage, the walls are made of laminated veneer lumber, and Tegola flexible tiles are used as the roofing material.
The customer wanted the house to be filled with the aroma of cedar, so all the walls in the interior were lined with wide cedar boards with a beautiful texture and coated with a natural honey-colored compound that sets off the smoky gray tone of the half-timbered frame.
The authors of the project tried to make maximum use of the entire volume of the three-level house, so the layout was thought out in the most careful way. Thus, most of the first floor is occupied by a public area with a living room, dining room and kitchen, adjacent to storage rooms.
In addition, there is a guest bedroom and a sauna with shower. The second level is for children, with a spacious hall and five bedrooms. Under the sloping roof of the third floor there is a master bedroom with a balcony - a captain's bridge, overlooking the Volga.
Several buildings were erected on the site, including a covered terrace with a barbecue area. Its façade, facing the Volga, was completely glazed, and trees were integrated into the structure of the building.
The living room and dining room with access to the terrace are oriented towards the river - the space with continuous glazing to the height of two floors opens like an amphitheater towards the Volga. The kitchen is separated from the dining room by a bar counter.
The beams that hold the entire structure are an integral element of the interior. They have become an attribute that emphasizes the style and special charm of a half-timbered house. All rooms are connected vertically through the halls by stairs.
The structure of the half-timbered structure includes a fireplace with a glazed firebox, lined with natural stone with a pronounced texture.
The interior uses mainly natural materials. The ceiling and walls are covered with cedar planks. Staircase with oak steps on an open black metal frame.
As in the representative space of the first floor, the windows of the bedrooms on the second and third levels overlook the Volga: panoramic glazing creates a feeling of maximum participation in the movement of the river.
Downstairs, in the public area, a “warm floor” system was installed, so porcelain stoneware with a wood texture was used as flooring, and laminate was used in the halls and bedrooms on the second and third floors.
The third, master floor only seems compact, but in fact its area is more than 100 m². It is divided into a sleeping area and a bathroom located behind a low partition. The intimacy of this space, oriented on two sides, is given by a large slope of the roof with a significant ridge height, and frameless continuous glazing instead of gable walls makes the room quite bright.
In order for the central part of the floor to be better illuminated, skylights were installed above the hall, where the dressing room is located, and the rafter system was equipped with multi-colored lighting.
The calling card of half-timbered wood is its decorativeness. This technology involves the use of a variety of materials in the design of the facade. In this project, the base and pylons are lined with natural stone, the steps and terraces are lined with clinker, the walls are lined with cedar boards, and the gutters and ebbs are made of copper.
The residential building is connected by an open gallery with a service building and outbuildings
A volume with a barbecue terrace has been designed separately - it has important compositional significance as an art object that cannot be missed from the water
The house fits perfectly into the existing landscape. It decorated the slope and became an integral part of the landscape of the Volga bank.
Photo: Valery Peshkov
Finishing materials
The most common cladding option is softwood boards. The material must be dry, since wet wood will dry out over time and become deformed, which will worsen the appearance of the roof. The recommended thickness of wooden cladding is 17-22 mm, the length and width are selected based on the existing dimensions of the roof. Boards intended for cladding are treated with an antiseptic compound, varnished or painted. The fastening of the sheathing elements is carried out in 1 m increments. Boards less than 6 m long need to be fixed in two places - at the edges. This design requires restoration every few years.
Galvanized steel sheets are also suitable for sheathing roof eaves. The thickness of the steel should be in the range of 0.6-0.8 mm. Installation of steel sheets must be carried out using special equipment; first, marking and cutting of the material is carried out. All edges are treated with paint to protect against corrosion.
Aluminum sheets coated with a protective layer by spraying are also suitable for finishing roof overhangs. It is better to choose a thickness of 0.6 mm, and a length of no more than 6 m. Aluminum plates are fixed using special latches, so skin elements that are too long will sag.
Design of eaves overhangs
Depending on the structural types, overhangs are divided into the following types
- overhangs made flush
with the walls of the external facade; - open
overhang structures; - closed cornices
Open overhangs are a continuation of the rafter legs extending beyond the vertical plane of the external walls. With this arrangement, it is convenient to install a drainage suspension system, which is attached to the side of the rafter system or to the top side of the rafters.
Open overhang system Source stroyfora.ru
Most often, such an open overhang system is used in individual construction.
Open eaves overhangs provide ample design opportunities for creating a unique architectural appearance of a building. The open lower part of the roof, lined with a solid board and the “protruding” rafter legs of wide overhangs look impressive and catchy.
High-rise and multi-storey buildings, as a rule, are not equipped with open eaves.
Currently, closed eaves overhangs are most often used in construction, with the help of which they give the building a neat and impressive modern look. For ease of use, closed overhangs are equipped with soffits that create additional lighting at night. To hem roof overhangs, special siding is most often chosen, which has a perforated structure in the form of tiny holes that helps solve the pressing issue of ventilation of under-roof spaces.
When choosing the design of the eaves overhang, it is important to take into account possible loads from snow, wind and its own weight. If this is not done, the eaves overhang may be overloaded, which can lead to irreversible deformation of the eaves elements
When arranging cornices, you need to take into account the maximum load that can be placed on them in winter Source red-price63.ru
A significant element is also the places where the eaves overhangs are secured and connected to the elements of the rafter system, as well as the organization of the correct ventilated under-roof space and continuous eaves sheathing.
Organization of ventilation
If the roof overhang is completely closed, it is important to consider its ventilation. If gable eaves do not require the installation of additional holes for ventilation and are hemmed “solid”, then hemmed eaves overhangs should provide for the natural organization of ventilation of unused attic and under-roof spaces. The incoming air flows move from bottom to top, and so that warm air leaves and does not settle as condensation on the structures of the rafter system, special small holes are made in the upper part of the roof - vents, and for influx, supply air holes are made in the eaves overhangs.
Ventilation is not the last element when organizing a roof Source penzatile.ru
To calculate the number of supply ventilation openings, technical recommendations are used: the size of the openings depends on the overall projection of the roof area and is taken equal to 1/500 of the entire area. The size of the supply vents, naturally, should be equal to the number of vents in the upper part of the roof. To prevent small birds and various insects from flying under the eaves of the roof, the ventilation openings are covered with protective nets.
Various design solutions
In order to organize a gable overhang, various methods are used in practice. When considering the lining of the roof gable, the options may be different:
Part of the sheathing
When a roof is being built, you can see how complex its structure is. One of its parts is the sheathing. The gable overhang is attached to the edge. To do this, the rafters must be slightly longer than usual. The increase in length is usually from 30 to 50 cm.
This method is convenient in cases where the roofing covering is light. Typically, this situation occurs in cases where:
- European slate;
- soft roof;
- metal tiles.
In this case, there is a limitation that is imposed on the width of such an overhang. The extension of the roof beyond the gable cannot exceed 50 cm. If you make the overhang wider, then as a result its mass will be such that the rafters may bend as a result.
Minimalist solution
Although a gable overhang is necessary for a house, there is nevertheless a class of buildings where it is absent.
Gable overhangSource assz.ru
In this case, as a rule, the gable and eaves of the roof are at the same height. This design, although acceptable, is less reliable than in other cases.
Overhang parallel to rafters
Although the gable overhang is usually located in a vertical plane, a design is also used when it is located horizontally, continuing in the plane of the roof.
In this case, the edge of the roof protrudes above the gable more than usual. Moreover, the design provides that such an overhang is attached horizontally to the rafters.
This method is used in cases where the roof has a heavy structure. This option allows you to withstand significant weight.
Here we mean the following types of roofs:
- using concrete tiles;
- when ceramic tiles are used;
- slate covering.
Installation methods
According to the rafter structure
The lower plane of the rafter structures is leveled by installing overhead boards according to the markings. First, the outer parts of the structure are mounted, then the final installation is made using a fishing line or rope stretched between them.
According to the prepared frame
In this option, the rafters are first cut in the vertical and horizontal planes. A beam is fixed on the horizontal cut; the same beam is attached to the wall 10 cm higher than the front board (to ensure natural removal of moisture).
Installation of the front overhang
The frontal board of the front overhang is fixed on the sheathing parallel to the pediment of the building.
See about lining the roof gables. What and how to hem the pediment. For information on installing a valley when roofing with corrugated sheets, follow the link. Also about the construction of a valley on a soft roof. Find out how cheaper it is to roof a house here. How to cover the roof of a private house.
A beam is mounted on the wall, which also serves as a support for the lining material.
The influence of the type of roofing material on the roof slope
When choosing a material for roofing, you should carefully read all the characteristics of each material. In addition, recommendations from experienced builders may be useful. This is necessary in order to choose a truly high-quality roofing material that can provide a long service life.
Here are some guidelines on how to determine the minimum roof pitch depending on the material chosen:
- for piece typesetting materials (tiles, slate), the minimum angle is 22 degrees. It allows you to effectively remove moisture from the surface, preventing it from seeping through the joints;
- for rolled materials, the angle is selected depending on the number of laid layers. So, if the roof consists of 3 layers, then the angle should be 2-5 degrees, for a two-layer coating - no more than 15 degrees;
- for corrugated roofing, the minimum angle is 12 degrees. If the roof has a lower value of this parameter, then it is necessary to seal the joints with sealants (read: “The slope of a corrugated sheet roof”);
- for metal tiles, the minimum angle is 14 degrees (more details: “Minimum angle of inclination of a metal tile roof”);
- ondulin can be laid on a roof with slopes of 6 degrees or more;
- for soft tiles this figure is 1 1 degrees, and, regardless of the selected angle, it is necessary to ensure the installation of a continuous sheathing;
- membrane materials (more details: “Membrane roofing”) can be laid on flat roofs with a minimum angle of 2-5 degrees (read the article: “What is the minimum slope of a flat roof”).
When choosing a roof slope, you should calculate the load-bearing capacity of the rafter system and walls. It is necessary that they can easily withstand static loads, as well as any additional loads caused by rain, snow and wind. Static loads are considered to be the weight of the roof, insulating materials and additional structural elements. Dynamic loads are the intermittent effects of snow, rain and gusts of wind.
Do not forget that I choose the pitch of the sheathing and its type in accordance with the slope of the roof and the selected roofing material. For small angles, it is recommended to use continuous sheathing.
If we take into account the fairly high cost of roofing materials, then it is necessary to weigh the pros and cons, as well as performance characteristics and service life. Only in this case will it be possible to choose a solution that will satisfy the home owner in terms of its economic indicators and reliability
Building a roof is a complex step that requires careful planning. This is due to the fact that even the slightest error in calculating the load-bearing capacity or placement of load-bearing supports in the future can cause a number of problems, the elimination of which can be no less expensive than the construction of the roof itself.
What roof shape to choose is detailed in the video:
Architectural design and geometry of the roof overhang
Modern style and modern interpretation of classical styles are of keen interest today. New technologies allow you to boldly work with forms, and the analytical thinking of designers helps you get rid of roof overhangs (description in paragraph 3)
As an example, let's take our barn-house project from 2015. , in which one detail defines the modern sound of the house’s silhouette. This, of course, is the merit of a hidden drainage system and a roof without overhangs.
And, in 2021, we completed another barn house project, inspired by the project above. Despite the same preferences in facade cladding (tinted wooden planks and seam roofing), the organization of the general shape of the house, planning solutions and open spaces of the entrance group, terraces are very diverse .
Here are the possible options in terms of the shape of the roof overhang.
Let us agree that the minimum roof overhang is determined by a complex architectural solution - the angle of the roof slope, the roofing material, the façade cladding material (primarily its hydrophobicity), the correct use of all the “little things” of the roof (drips, membranes). If all the factors in the architectural solution are selected correctly, then the minimum roof overhang can be considered the overhang of the gutter.
It is interesting that the above example seems risky to many, but at the same time, engineers have already developed, applied and tested similar solutions to the project of a small modern house, it looks like this:
This drainage system takes into account all functional aspects, such as: organizing the necessary ventilation gap in the design of the insulated attic roof. Visual characteristics are also taken into account - the gutter itself is made of PVC materials, and the facade overlay is made of factory-painted steel, which looks impressive as the outline of the building, this is described here, and photographs of the real object can be seen in the article about the building of the architectural bureau.
If we return to traditional gutters, then to simulate a roof without overhangs, you can disguise the protruding gutter with a decorative element. The decorative element can be in a modern style, for example, a classic cornice:
The task becomes more complicated if the architectural design involves the transition of the roof covering to the wall. An effective and simple solution for countries (localities) with a mild climate and is actively used in traditional buildings, for example in France. For central Russia, this solution is not entirely acceptable due to the formation of icicles at the bending point of the roof. This option can be used by providing for electrical heating of the roof edge in the project.
It should be noted here that the indicated rupture of the roofing material at the bend is a necessary measure for two reasons:
– for a combined attic roof, it is necessary to provide ventilation for the insulation (this is generally the most important condition for the functioning and durability of such a roof). For ventilation, air intake from the street must be ensured, and for this a gap is necessary
– the nature of the roofing material used. Materials such as metal tiles, seam roofing due to the surface topography or ribs (locks) cannot be bent simply technologically. Roofing made from piece ceramic or cement-sand tiles, as a rule, does not have such additional corner elements (corner adapters of 30, 45 or 60 degrees). The only type of material that can bend is bitumen shingles; this type can be laid if for some reason there is no need to provide a ventilation gap.
The problem of transition of roofing material from the roof plane to the wall plane can be solved by combining several technical solutions, for example, a seam roof with a ventilation gap and a hidden drainage system.
This solution is the purest from the point of view of the architectural design and technology of the mansard roof; the decorative cornice is shown conditionally:
It is important that each decision depends on a number of factors and cannot be used as a clear recommendation for action. It is also important to understand that the architect not only comes up with an attractive picture, but also must provide a competent technical solution. And the technical solution is more important than the visual one, since in design beauty does not require sacrifice and does not doom the house to fragility.
I wish you reasonable and effective architectural solutions and invite you to cooperation.
Beautiful wooden houses in the chalet style, which came to us from the alpine corners of Switzerland, Germany and France, are increasingly appearing in our open spaces. What are their charms and features?
Our dachas and country houses are usually built with fairly high gable roofs. In winter, when the roof is tilted at an angle of 30–45°, the snow will fall off the roof under the influence of its own gravity, and summer rains will not form stagnant water.
But still, projects of wooden chalet houses are becoming more and more relevant among home owners. The first floor is built from cellular blocks or bricks, and the second floor is made from wooden building materials. A characteristic feature of such houses is a sloping gable roof with a canopy and large overhangs covering a balcony that stretches the entire width of the building.
Such a house looks beautiful and elegant, and at the same time it is very solid and durable. The attic, built of wood, has a favorable microclimate for living. The bedrooms breathe very easily, and the interior decoration is pleasing with natural wood.
But at the same time, the wooden part of the house is protected from moisture by the first floor made of stone, and everything is protected from rain by large roof overhangs, typical of a chalet house. That is why combined stone-wood chalet-style houses are considered stronger and more durable in comparison with models built entirely from wood.
This style came from the Alps, where they began to build such houses in the mountains for shelter from bad weather and robbers. Moreover, often both people and their animals lived in the same house. To build a traditional Alpine chalet, wood and stone were used, of which there was a lot around. The stone was used for the foundation and first floor, and the attic part was built from wood.
The flat roof, with large wing extensions, protected not only the walls, but also the adjacent area from precipitation and bad weather. Previously, as a rule, it was covered with shingles, pressing the wooden covering with stones for reliability. Such a roof retained the snow cover well, a thick layer of which provided additional thermal protection and kept the house warm.
In today's combined chalet house, the features of the historical prototype also remain, from the shape of the roof to the design of the facade of the house. Its calling card was its wide, beautiful terraces on stilts and balconies stretching from slope to slope. You can admire nature from the balcony at any time of the year.
But wooden chalet-style houses are most fully characterized by roofs.
Kinds
Many homeowners are interested in whether it is possible to design a roof cornice with their own hands, since visually its design seems extremely simple. Experienced craftsmen believe that this is a job that even a non-professional can do. The main thing is to understand the purpose and types of cornices. In the design of pitched roofs, the following 2 types of overhangs are distinguished:
- Pedimental. The gable overhang is the part of the roof slope that protrudes beyond the outer walls of the house from the gable side. Typically, this type of cornice is short in length and is formed by the sheathing and fascia that gives it its shape.
- Cornice. The eaves overhang or cornice is the lower part of the slope, starting from the intersection of the roof plane with the external load-bearing walls. These cornices are usually much larger than gable cornices as they prevent splashes of water flowing from the slope from hitting the wall finishing.
Types of overhangs
Important Details about Pediment Architecture
There is a big difference whether the pediment will be a visual continuation of the wall, or whether it was originally designed as a separate architectural detail - an accent of the overall exterior.
Thus, in modern construction, the height of the pediment varies from 0.7 m for a non-residential attic and up to 2 m if we are talking about the construction of an attic. But first of all, even at the foundation stage, figure out the shape of the future pediment, on which the structure of the roof will also partially depend.
After all, what exactly the type of pediment will be is laid down in the house design, and upon completion of construction you can only decorate this part of the building, but will not change its shape in any way. The very shape of the pediment always depends on the design of the roof and the selected angle of its inclination.
Here are the main types of gable architecture of all times:
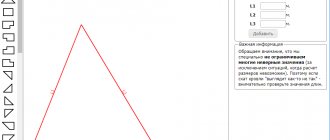
- A triangular gable, which is a simple isosceles triangle that is easily obtained under a regular classic gable roof. This is the most popular today.
- Interrupted. This is a pediment that is equipped with a horizontal cornice. It is in these gables that windows are most often installed. If there is no cornice, then such a pediment rests on only two columns and is already called a semi-pediment. Or the cornice transforms into a gable, or if we are talking about Gothic architecture.
- Another popular type is the semicircular pediment, which is possible due to the main and shape of the structure. It is often used in the construction of country houses in order to favorably emphasize the desired style of architecture.
- Stepped pediment, most popular in timber buildings.
- Trapezoidal pediment, which is installed in attic roofs.
- As a separate type, the pediment was also popular, which consisted of large steps and was called voronim. This design obscured the straight lines of the roof edge.
To summarize: the shape of the pediment is determined by the shape of the roof, or, conversely, in some projects you have to start from the initial sketch. But, in any case, before you decide what exactly the decorative finish of your pediment will be, choose its type and shape. And today, the pediment is most often finished with carved wood, siding, mosaics or beautiful tiles. Sharp edging is especially in fashion.
Optimal size
It is often difficult for non-professional craftsmen to determine what size cornice should be made
This is indeed a very important design decision, because if it is too small, then melt or rain water from the slope will fall on the lining of the external walls, on the foundation blind area, leading to destruction and also damage to the appearance of the structure. When choosing the length of the cornice, the following factors are taken into account:
- Climatic conditions. The optimal size of the roof eaves depends on the amount of precipitation falling in winter and summer. In snowier regions, roofs with wide eaves are traditionally used to protect the walls and foundation from snow. For example, alpine chalets located in the mountains usually have eaves overhangs at least 1 meter wide.
- Roof slope. The greater the angle of inclination of the roof slopes, the smaller the cornice can be made. This is explained by the fact that with a flat roof shape, the trajectory of falling snow and water goes far from the outer walls of the house. If the slopes are steep enough, then it is better to make the cornices wider to protect the structure from splashes of water that can reach the wall during intense snowmelt or rainfall.
- Proportions of the house. A wide cornice with a flat roof makes the building visually lower, squat, distorting the optimal proportions. A narrow overhang with a high, steep roof, on the contrary, elongates the silhouette of the house.
Optimal overhang size
Selecting the overhang width
What is this
If you look at a gable roof from the gable side, the overhang is a continuation of the roof slope. It runs along its entire length and at the bottom turns into a cornice.
There are no rules in regulatory documents that strictly regulate the dimensions of this architectural detail. In practice, the width is 40 - 70 cm.
Hemming the gables helps improve weather protection. In addition, thanks to a beautifully made slope, the house will look more stylish.
In the absence of this architectural detail, the edges of the roof and the insulating material that is located there may become wet in bad weather.
A well-made gable roof overhang allows for an airtight roof.
Materials for filing
When choosing a material for covering an overhang, you need to coordinate it with the style of the house. Agree - lining the roof with white plastic will not look particularly aesthetically pleasing if the house is wooden, and even dark.
Planed board is better, but edged board is also suitable
It is better to take softwood boards with a width of 5 to 25 centimeters and a thickness of 1.7 to 2.2 centimeters. Before installation, treatment with antiseptic, varnish or paint is required. Before work, you need to let the board lie outside under a canopy for a month - otherwise, if it is too dry or wet, it will warp later.
When sheathing the overhang, gaps of a centimeter or one and a half are made between the boards for ventilation. When installing boards perpendicular to the walls, they are fastened on both sides (if the overhang is wide, then in a third place - in the center of the board). If the boards are mounted parallel to the walls, they are secured every meter.
It is inexpensive, from $120 per cubic meter, or from $2.2 per square meter.
Wooden lining
This material is good because it has already been processed (unlike boards), which is why it is in great demand. To cover the overhang, it is necessary to take moisture-resistant lining designed to work in these conditions. Like the board, this material must also be left in the open air for a month before installation. The installation methods are the same as for the board, only there is no need to leave gaps. Instead, they use ready-made ventilation grilles, spaced 1.5 meters apart.
Cost – from $6 per square meter.
Photo: hibara.net
Polyvinyl chloride (PVC) siding
For filing, you need siding that is protected from moisture. Everything you need is included in the kit: these are strips in the shape of the letter “P” for finishing the edge, and corners for fastening the joints of the planks, and grilles for ventilation. Mount the planks perpendicular to the walls, fastening them in two, three or four places. The number of attachment points depends on the width of the overhang. It is not recommended to fasten PVC panels along the roof overhang since it is not as rigid as wooden planks and requires a large number of fastenings and can sag.
Cost – from $4 per square meter.
Corrugated sheet (profiled sheet)
This material is easy to install - after all, it can be laid in large planes and fastened with the same distance as a board. The height of its profile can be from 0.8 to 2 centimeters. When hemming roof overhangs with corrugated sheets, a gap of 0.6 to 1.2 centimeters is left (depending on thermal expansion). Ventilation is done using special grilles.
Cost – from $9 per square meter.
Photo: www.ruspolekb.ru
Sheet metal
This can be galvanized or polymer-coated steel, as well as aluminum or copper. The thickness of the sheets is from 0.6 to 0.8 millimeters, and the length is up to 6 meters. For ventilation, you can either insert ready-made grilles or perforated pieces of sheets. Where the cutting line runs, steel sheets are treated against corrosion (this is not necessary for aluminum and copper). The disadvantage of using such materials is that cutting requires a special tool.
Cost – from $5 per square meter.
Plywood and OSB
For filing overhangs, use brands of materials that are waterproof. These slabs are quite rigid and can be installed in large pieces. To do this, make a box of wooden blocks and screw the slabs to it. They are fastened every 1 - 1.2 meters. For ventilation, ready-made grilles are installed. An overhang made of this material definitely needs to be painted, otherwise it doesn’t look very nice.
Plywood costs about $6.5 per square meter, OSB is about 2 times cheaper.
Roof lining with soffit - fast, simple and reliable
Soffits are strips produced specifically for lining overhangs. They can be made from a variety of materials. In particular, from such materials as PVC, steel, copper, aluminum. Having a large palette of colors and different textures, soffits can be matched to the design of any home.
The kit contains the following main parts:
- Soffit panels;
- frontal strips (otherwise, chamfers);
- J-shaped profiles with grooves;
- finishing strips.
The appearance of the soffit and additional elements may vary depending on the manufacturer and material of manufacture.
Soffit panels can be triple, double and single, solid (for gables) and perforated (for cornices).
It should be noted that lining the roof overhangs with soffit greatly simplifies the work. You don’t need to involve experienced builders for this – you can do it yourself. Cut the planks according to the width of the overhang and secure them perpendicular to the walls on profiles with grooves - that’s the whole installation trick.
PVC strips cost from $4 to $8 per square meter, and fastening strips and chamfers are 5 times cheaper.
Prices for soffits for roofing:
Construction of a pitched roof - mistakes
No connection
1. You might think that the boards from which these rafters were prepared were sawn with a dull saw. But most importantly, a clear connection of the load-bearing elements of the rafter structure, on which the well-being of the pitched roof directly depends, is not ensured. The rafters are connected in a clumsy way, which can provoke the occurrence of internal stresses not taken into account by the design. The consequences of such omissions are unpredictable. Cracks in the main load-bearing elements - rafters, purlins, wind connections - are another alarming symptom.
Imprecise cutting
2. Here the builders missed the cut. As a result, the rafter leg was not secured to the purlin. To ensure the stability of the element, a piece of wood was placed under the supporting part of the notch. After some time, the rafter lost its saving support (the chips simply fell out), and is now in an unstable position. Just a moment, he’ll slip off the run. It would be nice if the builders made a mistake in one place, but no. They managed to ruin all the rafters. There is an emergency situation.
Bouquet of errors
3. Wood-boring beetles will thank the builders who erected this roof. After all, a board with wane (that is, with remnants of bark at the ends) is a favorite delicacy of bark beetles. In addition, they breed offspring under the bark. As they say, both the table and the house. The rafter structure also causes a storm of indignation. The rafters are not joined and not united in the ridge assembly by overlays. The racks are installed at random. The stability of the roof is highly questionable. Well, geometric errors are visible to the naked eye.
Dangerous combination
4.Wood and metal do not get along well with each other. The fact is that these materials have diametrically opposite thermal conductivity coefficients. Cold steel, when there is a sharp change in temperature, becomes covered with “perspiration,” that is, abundant condensation, but warm wood does not suffer from such an ailment. But in direct contact with metal elements, the wood becomes damp. This leads to mold, mildew and rot. This is precisely the development of events that awaits the wooden beams of this mansard roof. After all, their ends are not insulated.
Incorrect installation of a gable window
5. An example of incorrect installation of a window in the gable of a mansard roof. The installers went too far with the foam. According to current standards, the installation seam (the junction of the window frame to the walls of the opening) must be made in three layers. Polyurethane foam serves as thermal insulation. It should be applied gradually, carefully filling the gap. The foam is protected from rain and snow by a vapor-permeable self-expanding tape (PSUL), which is attached externally. To prevent vapors from penetrating into the polyurethane foam, the seam must be covered from the inside with vapor-insulating tape.
Reference by topic: Types of structures and roofing
Poor quality roofing
6. The builders were not embarrassed by the gaps between the sheets of metal tiles that formed when laying the roof. What is the use of such a coating if it is full of leaks? Before installing the metal tiles, it was necessary to verify the geometry of the slopes. This material cannot be laid on an uneven base. After all, metal tile sheets are joined together so that they form a single waterproof sheet.
How is the rafter system attached?
Now let's say a few words about fixing these systems. The legs of the hanging rafters are attached to the mauerlat by means of notches; in addition, it is necessary to provide additional fixation; for this, brackets or special brackets are used. The layered structure can be attached in several ways - spacer or non-spacer. So, in the first case, “sliders” are installed in the lower part of the rafter legs, and the upper ones are connected to each other. But if the bottom of the legs is rigidly attached to the mauerlat using notches, then you will get a non-thrust rafter system.
The upper parts of the diagonal rafters are fixed with nails to the console, a truss structure or a hammer. In some cases, to ensure greater reliability of the structure, additional wire twists or metal clamps are used. The corner and diagonal legs are joined by sawing and fastening them with nails. The rafter system of a hip roof, a photo of which is also not hidden from the average person on the World Wide Web, is a rather complex structure, so it is better to entrust its construction to craftsmen who know their job.
- 5
- 4
- 3
- 2
- 1
Classification
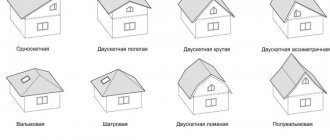
Usually 4 overhang options are considered.
- Unfiled. Good for hip, single and gable roofs.
- Hemmed. Common for gable and hip roofs.
- Box-shaped. The area of use is similar to the unfiled one.
- Shortened. Convenient for builders, but poorly performing the function of water protection.
There are design solutions for increasing the load-bearing capacity of overhangs using brackets or similar structures. The principle is the creation of triangles of rigidity. Such solutions are suitable for houses that do not shrink. With a sliding rafter system, any rigidity is a problem.
Always a cornice wall overhang is the basis for attaching ebbs.
Structural differences of frames - popular configurations
Despite the high interest in flat roofs, the leader in popularity is still pitched roofs, which, with some stretch, can also include hip roofs. Therefore, when determining the optimal design, one primarily chooses from the following options:
Single-pitch
This design is an inclined plane that rests on external load-bearing walls of different heights. It is supplied to outbuildings (garage, veranda, barn). Its advantages are ease of installation, cost-effectiveness and ease of repair. Disadvantages: choosing such a roof excludes the construction of an attic; strong winds can tear off even a well-secured roof. But modern materials significantly increase both the beauty and strength of pitched roofs of private houses - the photo below shows one of the solutions that allows you to make a two-story house with an attic.
Modern style pitched roofSource houzz.es
Gable
Classic roof options for a private house, reliably protecting from bad weather in various climatic conditions. Such designs are easy to install and reliable in operation; You can select any material for the roof. The base consists of 2 slopes (slopes), resting on two walls of equal height.
Advantages
:
- Self-cleaning from snow, low probability of leakage.
- Large selection of available materials for production.
- Possibility of arranging an attic space.
Flaws
:
- Difficult installation due to the slope of the roof.
- The weakest element of the structure is the valley (the internal corner at the junction of the slopes), which experiences the maximum climatic impact.
Multi-gable roofSource vermonttimberworks.com
Combined (multi-pincer)
Multi-gable (valley) frames are among the most complex. The need for such a configuration arises if the layout of the building does not allow the use of a simpler design. The features of multi-pincer forms are:
- Complex installation of additional intersections, requiring professional knowledge and good weather.
- Additional costs of materials and time, a large amount of waste material.
- To eliminate problems with condensation, high-quality vapor and waterproofing is carried out, and high-quality ventilation is installed.
Hip and half-hip
The hip roof consists of four surfaces (slopes). The two large slopes have the shape of an isosceles trapezoid, the two side slopes are triangular (hips). In half-hip roofs (they are also called Dutch), the hip takes on a truncated appearance, which is why overhangs with a small overhang and a smaller angle of inclination are formed at the ends of the building.
These types of roofing for the roof of a private house are complex in design and installation (they require reinforcement of the rafter system), but are economical in terms of material consumption; they are justified in northern areas with strong winds.
Hip roofSource roofsrustulsa.com
Tent
The roof consists of slopes in the shape of isosceles triangles, converging at one point. Such a structure, which involves the construction of an attic floor, is difficult to design; A mitigating circumstance is a minimum of consumables. The aerodynamic shape of the roof helps to withstand winds.
A special class of roofs consists of round (dome) roofs, repeating the shape of a figure of rotation. Similar roofs can be seen on religious buildings; they are installed in stadiums, swimming pools, industrial buildings, verandas and winter gardens, and increasingly in private construction.
Vaulted (arched)
A vaulted (arched) roof can be designed over an attic space, a hall, a winter garden or an entrance. A supporting structure made of metal, concrete or wood is placed at the base. The coating is galvanized steel, shingles (shingles), glass, polycarbonate, transparent slate. This solution is practical and original; the coating is wind-resistant, and the use of transparent material saves energy.
Vaulted roofSource superfb.site
Geodetic
A conventional dome roof is created on the basis of a curved frame.
A geodesic dome roof allows you to get a spherical structure without the use of rafters and vertical stops. The frame is assembled from triangular elements assembled from bars. The bars are connected to each other by metal connectors; A connecting beam is installed between the rows.
Photo report from the construction site: a pitched roof on a house made of aerated concrete
A house was built in St. Petersburg. There was no project, there was a general idea, which is presented in the photo. The house is made of aerated concrete, the finishing is plaster, the roof is seam, chosen on the basis of low cost, reliability, and ease of installation.
Idea of a house with a pitched roof
After the walls were removed, an armored belt was poured into them, into which studs (Ø 10 mm) were installed every meter. When the concrete in the armored belt reached the required deterioration, a layer of waterproofing (“Gidroizol”, cut lengthwise into strips of the required width) was laid on the bitumen mastic. A mauerlat - 150-150 mm timber - is laid on top of the waterproofing. All lumber used for roofing is dry and treated with protective impregnations and fire retardants.
Beginning of installation of a pitched roof - laying the Mauerlat
First, they put it in place (lying on the pins, held by assistants), and walk along it, hitting with a hammer on the places where the pins are. The places where the studs stick out are imprinted in the timber. Now they drill holes and simply push it onto the studs.
Since the span turns out to be large, supports made of timber (150-150 mm) were placed on which the purlin was laid, which will support the rafter legs.
Installation of racks and purlins
The width of the roof is 12 meters. This takes into account a 1.2 meter offset from the front side. Therefore, the Mauerlat bars and the purlin “stick out” beyond the walls exactly at this distance.
To ensure the removal of the roof, the mauerlat and purlin stick out from the walls
At first there were doubts about such a large offset - the rightmost beam hangs 2.2 meters. If this offset is reduced, it will be bad for the walls, and the appearance will deteriorate. Therefore, it was decided to leave everything as it is.
Laying rafters
Rafters are laid from two spliced boards 200*50 mm, with a pitch of 580 mm. The boards are nailed together in a checkerboard pattern (top-bottom), with a pitch of 200-250 mm. Nail heads are sometimes on the right, sometimes on the left, in pairs: Two on top/bottom on the right, two on top/bottom on the left, etc.). We space the joints of the boards by less than 60 cm. The resulting beam is much more reliable than a similar solid beam.
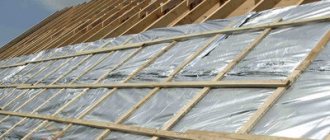
The rafters are laid
Method of fastening the rafters
Next, the pie of a pitched roof for this case is as follows (from the attic to the street): vapor barrier, 200 mm stone wool, ventilation gap (lathing, counter-lathing), moisture insulation, roofing material. In this case it is dark gray pural.
An example of a roofing pie for a pitched roof (it’s actually standard)
We will carry out insulation from the inside later, but for now we are laying a Tyvek Solid hydro-windproof membrane (vapor-permeable) on top of the rafters.
We lay a waterproofing windproof vapor-permeable membrane
The membrane is laid from bottom to top and secured with staples. The fabric that is rolled out higher overlaps the one already laid by 15-20 cm. The joint is sealed with double-sided tape (bought together with the membrane). Then the planks are placed on top of the membrane, and on them is a sheathing for a standing seam roof.
Lathing made of boards 25*150 mm
First, the sheathing was made from 25*150 mm boards in increments of 150 mm. After installation, walking around the roof, it was decided to strengthen the sheathing. To do this, we fill 100 mm wide boards between the already laid boards. Now there is a gap of 25 mm between the boards.
Sheathing a pitched roof as a result
Next, hooks were placed on the lower gable for installing the drainage system. They are filled unevenly, since due to the large length of the pediment, it was decided to make two receiving funnels at a distance of 2.8 meters from the edge. To ensure drainage in two directions, such a relief was made.
Filled hooks for the drainage system
Next, you need to bring in pieces of metal (pictures) 12 meters long. They are not heavy, but they cannot be bent, so the “sled” disappears. For lifting, a temporary “bridge” was built connecting the ground and the roof. The sheets were lifted along it.
Lifting sheets along the bridge
Next comes roofing work, which differs depending on the type of roofing material. In this case, it was necessary to solve the problem of thermal expansion of the material - galvanized steel (pural) significantly changes its dimensions when heated/cooled. To ensure freedom of expansion, it was decided to fasten the material to the sheathing by the seam using movable clamps with a freedom of movement of 15-20 mm.
Installation of clamps for seam roofingInstallation of seam roofing from pural
After laying the roofing material, what remains is the lining of the overhangs, and they are no different.
The roof needs to be brought to perfection - the overhangs need to be hemmed, but basically it is already ready
Well, the photo below shows what happened after finishing. Very modern, stylish and unusual.
House with a pitched roof - finishing is almost finished
Materials used for covering overhangs
Popular materials used for covering roof eaves include wood and metal.
Board overhang
In most cases, this material is obtained from coniferous trees; it has moderate wood moisture content. The thickness of such cladding, according to GOST, is 17-22 mm, and the width and length are selected individually for each specific case. Fastening is carried out on both sides in increments of up to 1 m, before which the wood is pre-treated with impregnation from a moisture-resistant composition. A special protective varnish or moisture-resistant paint is used as impregnation.
Wooden roof overhangs require constant maintenance. Treatment should be carried out every 3-5 years. In this case, they will last longer and retain their original appearance. In addition to the protective coating, the structure must be well ventilated. For this purpose, inlet openings are arranged at a rate of 1:400 of the ventilated weight area. With proper organization of ventilation, air exchange is carried out through drilled holes and holes in the roof ridge. Protective nets are used to protect against birds and insects.
Made from galvanized steel
This type of roof overhang lining takes the form of a steel sheet, the thickness of which is up to 0.8 mm - flat or perforated. Anti-corrosion paint is applied to the edges of the sheets.
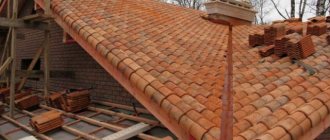
Photos
Varieties of execution from various materials are shown in the photo below.
Roof cornices made of corrugated sheets