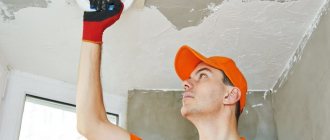
Tongue-and-groove slabs are often used to create a partition in a room. They are distinguished by their ease of operation, weigh little, and last for many years. But for the durability of the structure, it is necessary to use high-quality adhesive seams so that they can withstand the load. For this purpose, a special glue for PGP is produced, but you need to choose it carefully, then the installation process will be easier and faster. The choice of glue will be discussed in detail below.
The main components from which it is made
Glue for tongue-and-groove slabs can create the necessary level of adhesion to the gypsum base, thanks to its constituent elements. The composition may vary slightly among different manufacturers, but the main elements most often used are the following:
- Gypsum, the main element necessary for adhesion strength, when contact with water occurs, crystals form on the layer, facilitating the reliable connection of two blocks to each other. The fixation rate can be improved by using smaller fractions of gypsum;
- Sand with tiny particles serves as a filling agent, helping to apply substances evenly over the surface, increases strength, and due to the presence of sand, the price of the product itself decreases;
- Modifiers play the role of a plastic agent, the service life of the layer becomes longer, and they create protection against biological formations.
Glue for tongue-and-groove slabs can create the necessary level of adhesion to the gypsum base, thanks to its constituent elements.
Construction of a doorway
Installation of partitions made of tongue-and-groove slabs also involves the construction of a doorway. To do this, at the marking stage, it is necessary to indicate the location of the opening. It is up to this point that the partition will need to be assembled: on one side or on both. The main task after assembly is to mark and form the top row located above the doorway. To do this, grooves must be made in the two erected walls for the embedded beams (lintels). They are simply cut out with a hacksaw.
The jumper is placed on the adhesive composition, and the groove is completely filled with it. It is important at the stage of marking the grooves to align them so that the embedded part lies horizontally in them. After which you can proceed to the installation of the slabs. Everything is the same here, the beam end of the adjacent wall is coated with glue, after which the tongue-and-groove slabs are installed at their destination.
When the doorway is finished, you can move on to the last installation stage - sealing the gap between the partition made of tongue-and-groove slabs and the ceiling. Usually the gap is not very large, so the easiest option is to foam it with polyurethane foam. You can use adhesive or putty.
If it is necessary to bring a wall made of tongue-and-groove slabs exactly to the ceiling with subsequent finishing, then on one side the gap is covered with plaster mortar, on the other side it is filled with foam, and there it is covered with plaster. Simple foaming is used only when the room, divided by a partition, will be decorated with a suspended or suspended ceiling structure.
A partition made of tongue-and-groove slabs is a flat surface that does not need to be leveled with plaster. It is prepared with a small layer of putty, which gives the surface maximum smoothness.
The main purpose of glue for pgp
Tongue and groove adhesive can glue not only this material in order to obtain a variety of designs for their slabs. The scope of application of the product is wider; builders also use it for other materials.
You can glue plasterboard sheets to create a flat surface on the wall or ceiling. However, it is important to look at the permissibility of this action; manufacturers indicate on the packaging whether these materials can be bonded with the composition. The use of the product is limited to indoor work, because it is not moisture-resistant and will not be able to withstand natural influences.
You can glue plasterboard sheets to create a flat surface on the wall or ceiling.
Interior walls based on metal frames
And yet, the best option for interior walls in an apartment is plasterboard partitions with sound-absorbing boards inside. Photographs of the construction of such a partition in one of the Moscow new buildings are given at the beginning of the article.
Such interior walls, even in the basic version, will provide significantly better sound insulation between rooms than partitions made of tongue-and-groove (or foam block). The sound insulation of interior walls made of plasterboard 100 mm thick is Rw
= 50 dB
and -groove and 13 dB better than foam blocks)!
But the most important advantage of this solution is that virtually no vibrations from the floors are transferred to the frame structures and the problem of noise re-radiation from neighbors above and below is automatically solved!
There are several common misconceptions associated with plasterboard partitions:
Weak load-bearing capacity. Fragility
In fact, partitions on a metal frame are very durable. You just need to do them correctly:
- use only branded KNAUF
or Gyprok profiles with normal metal thickness and reinforcing longitudinal grooves. - the rack profiles are fastened with their backs to each other to form an I-beam.
- inside the partition, sound-absorbing plates are tightly inserted between the profiles.
- on both sides the frame is covered with cladding made of 10 mm GVL + 12.5 mm GKL.
Such a wall will be very strong and have a high load-bearing capacity: cantilever loads up to 70 kg! You can safely hang a TV, an air conditioner or shelves with books. You can read more about the load-bearing capacity of partitions here.
Large thickness
This myth is easily refuted. We count the thickness from left to right:
GKL 12.5 mm + GVL 10 mm + KNAUF profile 50 mm + GVL 10 mm + GKL 12.5 mm = 95 mm.
The finishing surface of such a wall is smooth; it is enough to apply a thin layer of putty to hide the joints between the sheets of drywall. Add another 5 mm and get a final thickness of 10 cm
with finishing.
This is the standard thickness for interior walls in an apartment.
High price
A square meter of conventional KNAUF PGP slabs, calculated per 1 m2, costs 700-800 rubles. You also need to add to this: tile adhesive, metal reinforcing corners, plaster and other little things. As a result, a square meter of such a wall rarely costs less than 1000 rubles.
Let’s now calculate the cost of a metal frame partition:
- metal frame KNAUF ~150 RUR/m2
- GVL 10 mm - 2 x 160 = 320 rub./m2
- GKL 12.5 mm – 2 x 100 = 200 rub./m2
- sound-absorbing boards ~ 200 rub./m2
The total is 870 rubles/ m2
.
Let's add screws, silicone sealant and other little things. As a result, the amount will be the same (~1000 rubles/m2) as in the case of a conventional wall made of plaster/foam blocks.
Those. there is no difference in cost, and the sound insulation of interior walls on a metal frame will be noticeably better!
| If you need high-quality sound insulation and professional installation, please contact us! Our specialists will put together proven circuits that will reliably protect you from the noise of your neighbors. The visit of a specialist for measurements and consultation is free in Moscow and the region! Dmitriy. Installation engineer Nikita. Physicist-acoustics |
Which glue to choose
There are many adhesive mixtures on sale; dry types are most often chosen, but it is more convenient to work with foams. When choosing what to glue tongue-and-groove slabs onto, care should be taken that the product has high adhesion rates.
Special compositions are distinguished by the speed of complete hardening, which speeds up the process of constructing the structure, but this also requires a fast pace of work from the master. It is worth studying in advance on the packaging how long this process lasts.
If we talk about foams and mixtures, the former can be used immediately, you just need to shake the container, but they also dry out very quickly, which requires some skill from the master to cope quickly enough with the installation of partitions. But their cost is higher than mixtures, which must be properly prepared before use. Also, more dirt will be generated during operation.
To get a truly high-quality product, it is imperative to request a quality certificate from the seller.
Special compositions are distinguished by the speed of complete hardening, which speeds up the process of constructing the structure, but this also requires a fast pace of work from the master.
Preparing the installation site
PGPs are universal in use and can be installed in almost any construction environment. Due to their low weight, they do not require a foundation and can be installed directly on a screed or even on a solid wooden floor.
The only requirement for the location of the partition is that the base should not have a horizontal height difference of more than 2 mm per 1 meter. If the floor in the room does not meet these requirements, then a leveling screed 20–25 cm wide is made.
The surface of both the screed and the floor must be coated several times with a deeply penetrating primer, then dried and cleaned. It is optimal to install the PGP before plastering the load-bearing walls, so the finishing coating will be more seamless.
Calculating consumption
When you are planning to create a structure from gypsum concrete, it is important to immediately prepare the materials necessary for the work. If there is not enough adhesive solution for the entire structure, the already erected part may suffer.
For this reason, it is better to make the calculation in advance; first, measure how many slabs will be used in order to understand what total area will be treated with an adhesive layer to connect the parts together. The manufacturer always prescribes the average glue consumption on the packaging; operation under optimal conditions is taken into account. But application tools, the experience of the technician, and layer thickness can affect the consumption.
To calculate approximately how much product you need to buy, the easiest way is to enter the resulting numbers in special cells in the online calculator, which companies usually have on their website. As a result, the number of kilograms of mixture that will be required is obtained, the calculation is made taking into account 5% for the reserve.
When you are planning to create a structure from gypsum concrete, it is important to immediately prepare the materials necessary for the work.
Installation of the first row
Installation of PGP is carried out strictly in rows, starting from the bottom. The first row is basic and must be correctly oriented in space, vertically and horizontally. The most common error during installation is “waviness” of the partition, which occurs due to a slight displacement in the grooves. To eliminate this phenomenon, when laying each slab, you need to use a rule strip and check the general plane of the partition against it.
The first row should be laid from the corner. The area where the slab touches the floor and wall is covered with GGP glue, then the block is installed with the ridge up and its position is leveled. It is convenient to use a rubber mallet to move the slabs. Be sure to fasten the first block to the wall and floor using L-shaped plates, the role of which is successfully performed by direct hangers. To use them, you need to cut off the toothed comb from the edges and bring the thickness of the plate to the width of the comb. The plates are first attached to the base using quick-installation dowels with a length of 80 mm or more, then to the slab with black self-tapping screws no less than 60 mm long.
Subsequently, the slabs are attached through one side: on one side to the floor, on the other - to the previous slab, with a preliminary coating of the joint with a thin layer of glue and strong pressing. To control the placement of slabs according to the project, it is convenient to use lacing or a laser level. It would also be a good idea to mark the partition on the floor and walls indicating the locations for the doorways.
Preparation of mounting solution
The properties obtained from it as a result depend on the correct preparation of the solution. Be sure to follow the manufacturer's recommendations on this issue. High-quality products are accompanied by detailed instructions, where some points may be reflected.
In any case, take a clean container where the components will be mixed. First, water is poured, it should be at room temperature, after pouring it is left to sit for half an hour. Then, having measured the required amount of mixture per serving, add it to the water, slowly, then it will be easier to avoid the formation of lumps.
It is advisable to mix with a construction mixer or a drill with a mortar attachment. When you have a homogeneous mass, you can apply it to the surface.
It is advisable to mix with a construction mixer or a drill with a mortar attachment.
Interior finishing options
With proper installation of the PGP, the curvature of the surface is no more than 4–5 mm per meter of plane. This is an acceptable indicator for wallpapering walls. The outer corners of the partitions must be protected with a perforated corner profile placed on the starting putty. The internal corners are also puttied, strengthening them with sickle. The joints between the plates are cleaned with an 80 grit abrasive mesh, then the entire surface is coated twice with a high-adhesion primer.
Leveling walls made of PGP can be done with any finishing putty, but the coating will need to be reinforced with fiberglass mesh. Often, puttying partitions is used only to hide seams; as a rule, the layer does not exceed 2–4 mm. The tiles can be laid directly on the surface of the PGP with preliminary priming.
rmnt.ru
What can be replaced
The cost of special adhesives is not budgetary, for this reason many are looking for options to replace the product with a cheaper composition. And there is such an opportunity, for this you choose ordinary tile adhesive, to which you need to add PVA. The components are mixed thoroughly to obtain a finely dispersed mass that can reliably adhere to the GGP slabs.
You can also replace tile adhesive with cement mortar, this is an even more affordable option.
The components are mixed thoroughly to obtain a finely dispersed mass that can reliably adhere to the GGP slabs.
You can reliably glue tongue-and-groove slabs using special adhesives that have been developed for them. These adhesives create a reliable and durable adhesion that will not damage the gypsum material itself. But when choosing, it is important to pay attention to the instructions on the packaging, which indicate the possibility of operation. You should also purchase glue from trusted stores so that the composition is accompanied by a certificate of quality, and you do not have to use low-quality types. It is also possible to make a suitable composition yourself.
Types of adhesives
The adhesive is selected taking into account the operating conditions.
Adhesive foam for GGP comes in two types based on performance characteristics: regular and frost-resistant . The first is used in apartments and private houses where heating is available and the air temperature does not reach critical levels. Frost-resistant adhesive is used to create partitions in production facilities, warehouses, and industrial halls. It contains special protective components that allow the slabs to withstand frosts down to -15 degrees without losing their strength properties.
Depending on the characteristics of the room in which the renovation will take place, the glue may differ. There are two main types: based on gypsum and made from sand and quicklime . Construction mixtures are also classified according to moisture resistance .
They produce foam adhesive that can be used to connect tongue-and-groove slabs, bricks, and stones.
The most popular brands that produce glue for PGP are: Volma, Knauf, Bolars, IVSIL, ILLBRUCK.
Cost of glue for tongue-and-groove slabs
Low density
To begin with, it is worth noting that the low density of the GWP is not a disadvantage, but an advantage of this building material. Due to its low density, PGP has high thermal insulation performance. An 80 mm thermal insulation slab corresponds to a 400 mm concrete wall.
With GGP sound insulation the situation is not so clear, but it complies with regulatory requirements.
However, GGP slabs are fragile due to their low density. The fragility of the slab and its low density become clear when you start sawing the slabs during installation. They cut easier than wood.
Detailed Specifications:
| Consumption of dry mixture per 1 m2 when installing single partitions made of PGP | 1.5-2.0 kg | Consumption per 1 m2 when installing gypsum plasterboard (GVL): on level foundations | 0.3-0.5 kg |
| on bases with unevenness up to 20mm | 3.5-5 kg | on bases with unevenness more than 20mm | 4-6 kg |
| Water consumption per 1 kg of dry mixture | 0.5-0.55 l | Viability of the solution in the container | 60 minutes |
| Drying time | 24 hours | Compressive Strength | not less than 6.0 MPa |
| Strength of adhesion to the base | not less than 0.5 MPa | Base temperature | from +5 to +30ºС |
| Manufacturer | Volma |
The manufacturing company reserves the right to change the configuration and place of production of the product without notifying dealers! If the configuration or manufacturer’s warranty is not specified, you can check this and other information with our managers or on the website of the product manufacturer. This information is not a public offer
| Packaging, kg | 30 |
| Color | white |
| Consumption, kg/sq.m | 1,5 — 2 |
Material cost
You can buy dry mixture for 160-500 rubles. The price depends on the volume of the package and the number of components the material contains. The properties of the mixture also play a role: strength characteristics, elasticity, temperature conditions at which it is permissible to carry out work.
The higher quality the material, the higher its price. Often the consumption of such compounds is low and their service life is long. In addition, frost-resistant adhesives belong to a higher price category.
How many pieces of foam block are in a cube?
| Block size, mm | volume, m3 | Quantity per 1 m3, pcs. |
| 600x200x200 | 0.024 | 41.7 |
| 600x250x200 | 0.03 | 33.3 |
| 600x300x200 | 0.036 | 27.8 |
| 600x350x200 | 0.042 | 23.8 |
| 600x375x200 | 0.045 | 22.2 |
| 600x400x200 | 0.048 | 20.8 |
| 600x450x200 | 0.054 | 18.5 |
| 600x500x200 | 0.06 | 16.7 |
| 600x250x250 | 0.0375 | 26.7 |
| 600x250x250 | 0.0375 | 26.7 |
| 600x300x250 | 0.045 | 22.2 |
| 600x350x250 | 0.0525 | 19.0 |
| 600x375x250 | 0.05625 | 17.8 |
| 600x400x250 | 0.06 | 16.7 |
| 600x450x250 | 0.0675 | 14.8 |
| 600x500x250 | 0.075 | 13.3 |
| Block size, mm | volume, m3 | Quantity per 1 m3, pcs. |
| 625x500x75 | 0.023 | 42.7 |
| 625x500x100 | 0.031 | 32.0 |
| 625x500x125 | 0.039 | 25.6 |
| 625x500x150 | 0.047 | 21.3 |
| 625x500x175 | 0.055 | 18.3 |
| 625x250x100 | 0.016 | 64.0 |
| 625x250x125 | 0.020 | 51.2 |
| 625x250x150 | 0.023 | 42.7 |
| 625x250x175 | 0.027 | 36.6 |
| 625x250x200 | 0.031 | 32.0 |
| 625x250x250 | 0.039 | 25.6 |
| 625x250x300 | 0.047 | 21.3 |
| 625x250x375 | 0.059 | 17.1 |
| 625x250x400 | 0.063 | 16.0 |
| 625x250x500 | 0.078 | 12.8 |
How to work with it
When starting to work with Perlfix, it is necessary to determine the volume of work, the area of the working surface and how much material will be consumed for a given area. The unevenness of the walls of the room and the thickness of the material applied will determine the consumption of Perlfix plasterboard adhesive.
Installation of drywall on Perlfix takes place in several steps:
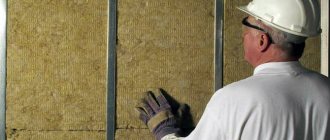
- The first step in the upcoming work will be to clean the walls from dirt, old coating, loose plaster and other contaminants that can impair the adhesion of surfaces. If the surface is very dirty, then it is worth washing it;
- The next step is to prime the walls. The primer is carried out with special means that prevent the appearance of water, condensation, mold, mildew and the destruction of the coating by harmful microorganisms. Surfaces that strongly absorb moisture must be primed with a specially designed product. After the primer has been applied, it must be allowed to dry. It is worth making sure that dust does not accumulate on the dried surface;
- Next, you should prepare a solution of Knauf Perlfix mounting adhesive in accordance with the instructions on the package. The glue should be mixed in small portions to avoid unnecessary consumption and premature hardening of the finished mixture. Dry glue is gradually added to the water and thoroughly mixed with a construction mixer or drill with a special attachment, at low speed, until the mixture turns into a paste. It is necessary to ensure that no clots form in the mixture, as this will greatly interfere with further work. It is prohibited to add or add other substances to the finished mixture. The period of use of the finished material will be significantly reduced if working tools and containers are dirty;
- You need to glue drywall to the wall as follows. The finished solution is applied pointwise to the prepared sheets in such a way that it is distributed along the middle line of the sheet with an interval of 3-5 cm. And for sheets whose thickness is more than 10 mm, Perlfix should be applied in two rows and along the entire perimeter at a short distance. One of the basic rules of this stage is not to overdo it, since drywall itself is fragile and can crack. If there are unevenness or small holes on the wall, they can be corrected using this mixture, namely by applying another layer of glue to the problem area. It is worth remembering that while using the mixture, adding dry mixture or water to it is prohibited. And after work with glue is completed, working tools should be washed with clean water;
- It is necessary to leave the walls without external influence for 7 days for the glue to dry. At the same time, you can finish other surfaces in the room.
Additional Information:
When starting a renovation, we always want to choose the best and highest quality materials for our home, so that we can then enjoy coziness and comfort.
Therefore, by choosing knauf perlfix adhesive, we ensure reliable fastening of drywall sheets or insulation, and we will be sure that they will last for many years.
Knauf perlfix is a dry mixture (mounting mixture) made using certain polymer additives.
Knauf perlfix glue is chosen by professionals because it
- easy to use
- Has excellent soundproofing and thermal insulation qualities
- Made from environmentally friendly materials
Knauf perlfix is used only for work inside the building. This glue is not suitable for outdoor use.
Knauf perlfix 30kg is intended for gluing plasterboard sheets, as well as gypsum panels and other materials on various types of surfaces. It is worth noting that Perlfix Knauf glue is also suitable for working with uneven or already plastered surfaces. The only requirement is to observe the thermal regime and not work at temperatures below five degrees Celsius with a plus sign.
Knauf perlfix (the price of the product is indicated in the price list) is not picky, but before work it is still worth cleaning the work surface of various fats, dust, sand, paint and other elements. This will provide better grip for the knauf perlfix 30 kg.
Knauf Perlfix (the price is presented on the store’s website) is quite easy to prepare for use. knauf perlfix 30 kg is mixed in fifteen liters of water. After the mixture has completely dissolved, let it sit for two minutes, and then stir for five minutes. Next, Perlfix Knauf glue is infused for no more than five minutes and mixed again. That's it - the glue is ready to use!
Usage
Average consumption of foam adhesive for silicate and gypsum boards: for products up to 130 mm wide - 1 strip, for larger ones - 2 strips for each joint. When working, you should follow some recommendations.
- The surface is carefully prepared and cleaned of dust.
- The container is shaken for 30 seconds and placed in a glue gun.
- 1 row of blocks is laid on a classic mortar.
- From the 2nd row, foam is applied. The cylinder is held with the bottom up; when applied, the nozzle of the gun should be 1 cm from the surface of the PGP. The optimal jet thickness is 20-25 mm.
- When used horizontally, the strips are not longer than 2 m.
- The leveling of the slabs is carried out within 2 minutes, position adjustment is possible by no more than 5 mm. If the curvature is greater, it is recommended to carry out the installation again, as well as when tearing off elements at the joints.
- After a break of more than 15 minutes, the gun nozzle is cleaned.
Installation is recommended to be performed in heated rooms or in warm, dry weather.