We have already told you how to make a cheap and simple frame greenhouse using PVC pipes. But greenhouses and sheds are not all that can be made from PVC and aluminum pipes of different diameters. Furniture, decorative items for the home, organizers, shelving, even weapons are beautiful bows of different shapes. People's imagination is constantly being embodied in new PVC forms, and we have made a selection of the most interesting DIY projects for you.
Let's start with homemade furniture made from aluminum and PVC pipes connected with fittings. There is both children's furniture and options for adults, cute designs that will fit into any interior, and shelving with many shelves.
Introduction
In this article we offer you a small master class - Do-it-yourself screen.
The design of the partition is not complicated and you will only spend a couple of evenings on it. The multifunctional screen is made of cedar boards and thin-layer plywood. This portable folding tri-fold screen easily creates a new living space in your room.
A screen for a room is made with your own hands by weaving strips of thin-layer plywood, which will be installed in simple cedar frames.
Fastened together with copper hinges, the screen sections can be installed in almost any room. It can be made to highlight a romantic dining area in a large living room. Or place a screen near a sunny window to create your own tranquil retreat without adding permanent walls. This decorative partition can be used in many ways, giving you plenty of room to be creative.
Decorative partitions: light and beautiful
Simple but elegant decorative partitions can radically change the design of a room, making it more interesting and attractive.
For example, such a light partition in the bathroom, in the hall, on the loggia, and in any room will create a separate nook and make the entire room more comfortable.
In fact - nothing complicated. You can make such decorative partitions yourself, spending a minimum of time. There is nothing to say about the material - it will cost very little. Take a closer look: these 3D partitions are made from pieces of white plastic pipe. In principle, the color of the pipe can be any. Combinations are also possible. For example, such partitions look very stylish in a black and white bathroom. That is, one partition for the bathroom can be made from pieces of white pipe, the second from black. You can “mix” colors in one partition.
Such decorative partitions with your own hands can perfectly zone a room. For example, a partition will separate the kitchen and dining areas, or the dining and relaxation areas.
Materials
When you decide to make a screen with your own hands, first decide on the appropriate material. Traditionally, a product of this type was made of wood - slats or solid boards. Today, creativity and originality are valued, so a variety of materials are used to make partitions. Common options:
- Tree. A simple smooth board or material with a pattern cut out on it, or a structure made of slats or beams will do. Plywood is easy to process, light and inexpensive. You can even build a partition from old doors, after first restoring their panels and giving them a fresh look.
- Plastic. Pipes made of this material are widely used, which are suitable for creating frames or frames. They are cheaper than metal ones and weigh less. The product made from plastic pipes is easy to assemble and disassemble. They are easy to care for: you just need to periodically brush off the dust from their surface. An alternative is plastic panels; it is very easy to make a partition from them. You can select several panels that have the same pattern and connect them to each other. The finished partition is well suited for a bathroom, swimming pool or garden shower.
- Metal. Metal frames of a given shape are often used, which can be ordered from a specialist. Panels made of plastic, glass, wood are inserted into them, or fabric is stretched. Iron sheets look bulky and do not make the room cozy, but an ornament forged from twigs will give the partition a spectacular look. Often, metal pipes with a diameter of no more than 5 cm are used to create a frame. A screen of this type will decorate a garden or yard.
- Cardboard. Cheap and affordable material from which you can make a creative, original screen with your own hands. It is very easy to work with it, because... you just need to cut out the parts in accordance with the diagram and fasten them into one sheet. Ready-made partitions are not suitable for the street, because... they will quickly deteriorate under the influence of weather factors.
- Branches. This includes reed, willow, and bamboo. Screens made from them are mobile, light and visually simple. They go well with various interior styles: tropical, classic, empire, eco-style. Their production requires the performer to have wicker weaving skills. The finished product will look great in the garden and will not deteriorate from wind, rain and sun if the material is processed correctly.
- CDs and vinyl records. These parts are connected to each other using staples or threads. The result is an original openwork canvas that can be hung anywhere in the room in the form of a wave, a semicircle or in a straight line.
For home/apartment
The range of products made from polypropylene pipes for the home is very extensive. The material can be used to make both compact desk organizers or shelves, stands, and large-sized furniture pieces. The material can be selected by color or the craft can be painted in your favorite shade after production. Polypropylene pipes, the surface of which is decorated with decorative painting, will look stylish and unusual. To cover the material with patterns or ornaments, you can use special stencils. From the variety of paints, it is better to choose ones that are resistant to humidity, for example, acrylic is suitable. Let's look at a number of master classes on how to create simple but necessary things in the house from polypropylene pipes with your own hands.
Organizer
Organizers were originally called notebooks for important daily notes. Now this word has acquired several new meanings. We are interested in a desktop or wall-mounted device for distributing writing instruments, that is, a product in which pens, scissors, paper clips, paper clips, sharpeners, buttons and other little things needed for work can be arranged into sections. Organizers are widely used not only in offices, but also in home workshops. For example, doing handicrafts also involves using a large number of small tools and parts, which it is advisable to put in their places. There are two types of organizers:
- Tabletop.
- Wall-mounted.
The former are used if there is enough space on the table to accommodate them. The latter are suitable for distributing a large number of small items. To make the organizer, you only need the tubes themselves, fasteners to connect them into a single structure, and any dense material from which the bottom of each section is made. You can use plastic scraps. The tubes are cut into pieces of the required length. Then they are connected to each other on the sides and the bottom is glued to the structure. If the organizer will be attached to the wall, the upper edges of the pipes are usually cut at an angle for ease of use. In this case, instead of a bottom, a board or piece of plywood is used.
Some people make a wire organizer out of pipe. Holes are drilled in it through which they will enter the room. All the “ugliness” from the tangle of wires is hidden inside the pipe, thereby not affecting the aesthetics of the interior of the room.
Decorative frame or partition
Decorative frames and partitions made of polypropylene pipes are made according to the same principle. To work you will need:
- Adhesive composition.
- Directly the tubes themselves.
They need to be cut into numerous “rings”. You can also use a regular knife, since polypropylene is a fairly soft material, but it is better to purchase special scissors specifically for plastic. Other devices can distort the edges of the pipe with jagged edges. After the required number of rings is ready, their sides are connected to each other using glue. Fragments of different diameters will look original. In this case, the illusion of soap bubbles is created in 2D. The rings are used to form a photo frame or a room divider. By the way, such a screen will be a worthy competitor to designer products. It looks fresh, original, airy and incredibly aesthetically pleasing. To complement the zoning element of the room space, you can use decorative lighting, which will harmoniously combine with a white product.
Shoe shelf
Shoe shelves made of polypropylene pipes are usually made in the form of a honeycomb. The material is cut into fragments of equal length. They are then connected to each other using glue. The shelf is formed from rows of scraps, where each subsequent fragment “lies” in the space between the two previous ones located below. Such a shelf can be given a wide variety of shapes. One of its main advantages is the versatility of the configuration. By adding or removing tube sections, you can choose the ideal shape for the hallway, which already has furniture, and where it is difficult to install a full-fledged shelf. Some craftsmen connect the shoe storage system with cabinets or hangers so that the design blends organically into the overall composition. For such shelves only large diameter pipes are suitable.
Before you start working, you need to try it on. It is enough to insert a pair of slippers or boots into the hollow part of the pipe. You can also make a shoe rack using boards as crossbars. In this case, the tubes will become side supports. They can be stylized as retro and painted with silver paint, and the surface of the fittings can be coated with a bronze composition.
Wine bottle rack and glass holder
A stand for wine bottles from polypropylene pipes can be made, like a shoe rack in the form of a “honeycomb”, but using fragments of a smaller diameter. They are also selected individually by trying on bottles. For the “tree” design, small diameter tubes are suitable. They are used to assemble a complex composition with side branches and branches. A coupling fitting with a diameter suitable for the neck of the bottle is attached to the end of each. The glass containers are then inserted into these holders. The wine “tree” can be decorated in steampunk, retro, eco style. For minimalism, you can use one piece of pipe, in which holes for the necks are cut out on the side. The fragment is fixed to the wall using self-tapping screws (possibly at an angle) and bottles are also inserted into it with their necks down.
To make a hanging or wall-mounted glass holder, one piece of pipe is also enough. Along its entire length, an incision is made as wide as the diameter of the stem of the glass. Then the product is fixed on the wall or bar counter. The glasses are threaded through the cut with their stems. The wide bottom will prevent glass containers from falling. On such a rack it is convenient not only to store glasses, but also to dry them after washing.
Vases and flower pots
Large diameter polypropylene pipes can be used to make pots for large indoor plants. For the bottom it is better to use a denser type of plastic. For small green spaces, small-diameter tubes are suitable, which are grouped into a single composition. The top is cut at an angle and then painted green. The result is a structure that vaguely resembles a thicket of bamboo. A pot for ornamental grass, cereals or seedlings is made from pipes and plugs. The fragments are placed horizontally. In each, a piece is cut out in the middle or along the entire length, leaving only small “walls” on the sides. Then a plug is attached to the cut pipe, soil is poured in and plants are planted. Such pots are usually mounted on walls. This way they save space and don’t get in the way.
Interior decorative items and gifts
A creative approach will help you create truly original things. When making, you must not forget to decorate the crafts with colored paper or paints.
Working with plastic pipes is not just a pleasure to create. This is the embodiment of the wildest ideas and fantasies. In addition, the work does not require a special tool; sometimes a simple hacksaw, ruler and felt-tip pen are enough. Crafts can be done by the whole family, involving children in this. This strengthens family relationships and develops creative thinking.
5921
Installation of pillars
The load-bearing structures of the fence are pillars to which lattice spans are attached.
Watch the video
How to install a FENCE POST FOREVER, Finnish Technology
For this, various profiles are used that are strong enough to withstand wind loads on the fence:
- galvanized steel pipes with a cross-section of 80 millimeters or more, round or profile;
- plastic ones ranging in size from 100-120 mm, as a rule, they need to be filled with concrete with reinforcement;
- reinforced cast concrete pillars;
- plastic poles, manufactured specifically for building fences;
- wooden pillars.
DIY closed screen
First of all, you should build two frames of the same size. One is stuffed with rods that act as risers. Thin rods are intertwined through them using the “darning” method. The last rods are nailed to the bar or to the frame itself very carefully. A second frame is placed on the “wattle fence”, which is attached to the first. The DIY garden screen is ready.
An ideal option would be a partition made of stems of marsh vegetation - reeds, cattails or rush. Good stems for the structure are harvested in June or July, or at least in September. They are cut and dried naturally in the attic or under a canopy.
It is very important that the stems are not exposed to sunlight, otherwise they may fade or lose color. It is not recommended to store them in plastic bags, as the stems may become covered with black spots.
Before starting work, the vegetation is moistened; you can simply put it in the rain or immerse it in water for 10 minutes. The main thing is that the stems are completely wet
After this, they are wrapped in a wet blanket for several hours; it is important not to overexpose them, otherwise they will lose color and become spotted. Take them out a few at a time and wipe them with a rag to remove excess moisture and displace air.
Weaving begins similarly to weaving a vine. The vertically mounted stems are attached to the frame using tape. When the screen-partition is made with your own hands, it is placed between wooden frames and attached beautifully and firmly to each other.
Alcove
These outdoor structures require good materials for construction, and PP blanks are ideal for this situation.
The design configuration can be anything, here everyone can realize their fantasies.
Video: making a gazebo yourself
158 Canopy made of PVC pipes and curtains for the bathroom.
What materials can it be made from?
A real classic is the wooden screen. Now it is no longer possible to establish what the very first structure of this kind in history was made of. But there is no doubt that wood is traditional and has been used since ancient times. Along with monolithic boards, partitions in the past were also made from slats. In the second case, fabric of various types was pulled over them - whatever was at hand and whatever they liked.
Today, wooden screens are still in demand, and their main types are still the same. But, along with simple slats, timber is used quite often. Plywood structures have also gained considerable popularity because they:
- allows you to save money;
- weighs relatively little;
- processed without any problems.
Design developments do not stand still. And recently, screens made from louvered doors (and simply from unnecessary wooden doors) have begun to appear more and more often. They usually still contain fairly good quality wood, but the structure itself becomes morally or technically obsolete.
But some home craftsmen try to use metal (usually stainless steel or aluminum). In this case, you will need a frame of a certain shape. Any experienced welder can make it, although sometimes it is better to contact a metalworking company. The following is inserted inside the frame:
- wooden panels;
- sheet glass;
- plastic.
Instead, small pipes (up to 5 cm in diameter) are also suitable. Tubular screens are widely used in gardens and courtyards. Regardless of the shape of the frame, it should be covered with elegant fabric or paper with an original image.
If you choose a high-tech style, then it is logical to use a steel screen for blinds to frame it with your own hands. But those who want to simplify their work as much as possible should abandon metal and focus on PVC. Pipes made of this material are quite light and, in addition, practical.
You can also use it in your work:
- cardboard;
- polymer panels;
- cane;
- willow or bamboo branches;
- CDs or vinyl records.
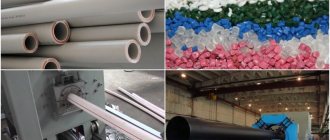
Advantages and properties of pipes
Polypropylene has the lowest density of all plastics. However, this property cannot be considered a disadvantage, since its indicators are sufficient for working with liquids and gases. The material is characterized by low moisture absorption and the ability to work in extreme conditions (both at low and high temperatures). Polypropylene has a low degree of flexibility, when again compared with other plastics. The material is characterized by high resistance to cracking, but only at constant temperatures. If sudden changes are observed, the likelihood of damage to the polypropylene pipe increases sharply.
The material has electrical insulation and resistance to a whole list of chemically active substances. Only some reagents are capable of destroying polypropylene, but only under certain conditions (temperature, humidity), which are difficult to recreate. This type of plastic boasts long service life, as mentioned above. However, when the maximum permissible operating temperature is exceeded, the material begins to melt and ceases to withstand pressure. In this situation, the service life is rapidly decreasing. Just one temperature jump is enough. Of course, this rule is more suitable for pipelines. It is unlikely that crafts will be placed in extreme environments and subjected to similar tests.
Among other things, if you purchase polypropylene from a reliable manufacturer, you can guarantee its environmental friendliness. Crafts made from this type of plastic are not subject to corrosion, which has become a real scourge for metals, and are perfect for both home decoration and gardening. Due to the light weight of the pipes, the product is easy to move, and using the type of fastening with bolts, it is just as easy to dismantle and reassemble in a different form.
During general cleaning, polypropylene can be washed with ordinary soapy water. The rest of the time, it is enough to wipe it with a damp cloth once a week, like any other surface.
Small table
In every living room, a coffee table is an essential element of the interior. If desired, you can place any magazines, documentation, drinks for guests, etc. on it. Such a table, as a rule, is small and goes well with the interior. Making such a craft from polypropylene pipes with your own hands is not as difficult as it seems at first glance.
Initially, you need to decide on the design of the table. It can be classic, consisting of 4 support legs on which some material will be placed. It can also be unique and stylized.
However, the most stable design is the version with 4 support legs. Ideally, if the structure runs across the entire area of the material, this will ensure uniform load distribution.
Glass is often used as the material that will serve as the table. It looks very advantageous in conditions of a small amount of free space.
Possibilities
Country crafts made from pipes may be useful. These are not just decorative elements that stand in place and decorate the space. They also perform other functions that are relevant for those who like to tinker in the garden.
In addition, they can be painted and even given the appearance of a tree or exotic plant. This way they will be both useful and beautiful, and not just thrown away as unnecessary.
Types of screens and their purpose
The design of the future partition completely depends on the functions that it will perform and on the time available for the implementation of ideas.
Depending on the purpose, screens can perform the following functions:
decorative - a partition is used to decorate the interior of a room, being an artistically designed object;
division of space - a screen visually divides the room into zones, which is often used by designers in large rooms;
implementation of creative ideas - a small screen made of pipes acts as theatrical equipment when performances are staged at home.
The size of the future product is also important for the project, so you should immediately decide on its function. Most often, partitions are made from plastic for a kindergarten group, for playing tabletop puppet theater, for fulfilling household needs, for zoning a one-room apartment, trying to separate an office from a bedroom or living room.
And also, this is a favorite craft of creative and creative craftswomen who prefer to make an unusual and completely unique thing with their own hands.
In principle, it is not at all difficult to buy a screen for every taste and size - manufacturers offer a huge range of different purposes from a wide variety of materials.
Photo from Plastic version - blinds. A lightweight partition, easy to clean, easy to carry to the right place, fits perfectly into modern interiors. Forging will apparently never go out of fashion. Artistic patterns made of metal, embodied in the design of the screen, will harmoniously fit into a room in which natural wood and leather predominate. Wood is a very popular material for partitions. It is easy to work with, and the finished product looks noble and is lightweight compared to a metal screen. Textiles are no less popular. Moreover, it is often used in combination with a wooden partition frame or plastic pipes. Moreover, they use both ready-made fabrics with a suitable texture and pattern, and design the fabric according to their own sketch. Plastic screen-blinds. Artistic forged partition. Wooden partition in the interior. Screen made of textiles and wood.
Ready-made solutions offered by art studios are not very expensive. Therefore, it is much more interesting to build a partition yourself. Moreover, there are always improvised materials at hand that will work, you just need to show your imagination.
You should immediately think about the design - mobile (on wheels), portable or stationary partition
It’s also important whether it folds or not
All these points need to be carefully considered, because the project of the future homemade screen depends on them.
Beautiful bows
You can make a beautiful bow from a PVC pipe - give it to a friend or have fun yourself, testing your accuracy. A practical guide can be read here or here.
If you have already tried making furniture, home decoration or other DIY projects from PVC pipes, please share your experience in the comments.
What types of screens are there?
When choosing a screen model, not only stylistic orientation is important. It is necessary to take into account the space in which the product will be located, its mobility and even its functional purpose. Therefore, let’s turn to theory and consider what types of screens there are.
- Casement sliding doors. They consist of several interconnected frames, from 3 to 8 or more. If necessary, they can be folded like an accordion and removed.
- Single-screen screens consist of one wide sash. This can be a frame made of any material with stretched fabric or paper, a sheet of plywood, chipboard, plastic or glass attached to a stand. It is advisable to equip such a screen with wheels so that you can roll it to the right place.
- The book screen consists of two doors of the same width (although asymmetry is allowed). Fold it like a book and move it to where there is less space. Depending on the decoration, such a screen can be used for changing clothes and even for holiday photo shoots.
- Flexible screens. They are made from many long thin sections: pipes, plates, slats, connected to each other. The peculiarity of this screen is that you can arrange it in a wave, a spiral, or even roll it up and put it aside - it does not take up much space.
- Blind screens can consist of a different number of sashes; their distinctive feature is complete opacity. It can be a solid board (plywood, chipboard, plastic, sheet metal, frosted glass), thick fabric stretched over a frame, or cardboard inserted into the frame. Such screens are used not only for zoning rooms, but also as partitions for changing clothes.
- Transparent screens. Most often this is transparent fabric stretched over a frame - organza, tulle and even starched gauze; It is very convenient to use a mosquito net. Also popular are metal models made using the air forging technique, or wooden screens with openwork through carvings. Such products are decorative in nature, they are often used for wedding and holiday photo shoots or to decorate rooms and gardens.
Pipe connection methods
Pieces of polypropylene pipes are connected using diffusion welding. Although there are many methods for fastening two parts, the rest are not capable of providing a reliable connection:
- Compression docking. The pipe is compressed, which over time will inevitably lead to deformation and leakage.
- Thread. The weak side of the technique when using polypropylene pipes is the mechanical strength of the connection.
- Press connection. Sometimes used for polypropylene pipes, but the rubber seal may change its position, which will lead to a violation of the tightness of the connection. Here we are talking about external loads on the pipeline.
The only reliable option is to heat polypropylene to a certain temperature by welding, then cool it and “seal” the joint. Of course, this method is applicable to pipelines that are used to transport gases, chemically aggressive substances or water of different temperatures. In our case, we are talking about crafts. Pipes are not used for their intended purpose, so as an exception, you can use any other method or use glue and even bolts. In a pipeline, as a rule, each fragment is tightly fastened, that is, with no expectation of subsequent disassembly. For connections, fittings are used - special parts that are used when assembling the pipeline and ensure hermetically sealed two fragments of the system. The same fittings are suitable for polypropylene pipes as for metal products. They are made from various materials (brass, bronze, cast iron, brass, steel, polyvinyl chloride, polypropylene). Depending on the shape and purpose, fittings are classified into the following groups:
- Caps and plugs. Used to plug the end of a “blind” pipe.
- Fittings. Connect pipes with flexible bends (hoses).
- Crosses and tees (manifolds). As the name implies, they are used to branch one pipe into several streams.
- Adapters. Allows you to connect pipes of different diameters.
- Bends and corners. They are used for “turning” and changing the angle of inclination of the pipe.
- Couplings and barrels. Extend the pipes in a straight line. This type of fitting is the most commonly used. They allow you to locally replace a piece of pipeline without affecting the entire system.
Depending on the complexity of the craft, you will need one or another set of fittings. The shape of the future product must be thought out in advance in order to purchase suitable connecting parts.
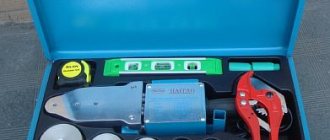
Rules for working with material
After you have purchased pipes and are ready to build a greenhouse, it is important to study the features of working with this material. There are a number of universal recommendations that are relevant for working with any type of plastic pipes.
It is better to start work on installing the frame in warm weather at a temperature not lower than +17 degrees and not higher than +23 degrees. This temperature is the most comfortable for plastic; it will bend well and, in general, exhibit all its best properties, so that it is as easy as possible for you to bend it into the desired shape.
You shouldn’t chase cheap prices and buy pipes and fittings from different manufacturers and in different stores. Make sure to buy these elements in one place so that there are no problems with their installation. The strength and reliability of your future greenhouse depends on the quality of the connections.
If you plan to create a monolithic structure that you will not disassemble for the winter, then it is better to connect the pipes by welding. Some materials stick together only thanks to a reliable alloy. This unit can be rented on the construction market, but if there are absolutely no options for finding it, then you can use a gas burner as a heating device, the main thing is not to overdo it.
It is also recommended to cut the pipes with a special tool to avoid burrs. But you can use a sharply sharpened construction knife, and simply sand down the rough edges.
Organizers and shelves
Desk organizer
Simple Desk Organizer
A simple organizer made from glued and painted PVC pipes looks cool and helps get rid of clutter on your desk.
Bathroom organizer
Organizer for the bathroom
Toothpaste, brushes, comb - with such an organizer everything will be in its place, and you won’t have to look for anything.
Shoe compartments
Shoe organizer
With such a budget organizer made from PVC pipes, shoes will not be lying around in the hallway and will not get under your feet at the most inopportune moment.
Wine shelf
Wine Rack
If you love wine and prefer to stock up on it for future use, this wine rack with PVC pipe shelves will keep all your supplies organized and completely safe. It looks great and is quite easy to make.
creative wine rack
Wine stand
If you need a stand for a maximum of four to five bottles, you can make a creative PVC like this. It's easy to do and looks great.
Notebook Stand
Laptop stand
A simple and convenient stand for working with a laptop.
Homemade plastic pipes
- 1. Popular homemade plastic pipes
- 2. DIY pipe flower garden
- 3. Greenhouse made of plastic pipes
- 4. Small fence made of plastic pipe
You recently completed renovations and you still have scraps of plastic pipes - don’t rush to take them to the landfill. Perhaps, from the remains of the pipe, you will like some useful homemade product that will come in handy in the country house or on the balcony.
Most of the homemade products from plastic pipes that are presented in this article will not be difficult to assemble with your own hands. The only tools you will need are a screwdriver, a hacksaw or a grinder, as well as various hardware (screws, bolts and self-tapping screws). So, let's go.
Popular homemade products made from plastic pipes
It’s very easy to make a small chair or table with your own hands from scraps of plastic pipe. True, you need to have a soldering iron on hand for welding pipes and fittings with tees.
The process of making a chair from plastic pipes is quite simple:
1. First, using corners and a pipe, we solder two frames. The lower frame, which will be used under the seat, should be slightly smaller than the main support frame.
2. Next, we weld a U-shaped frame from pieces of pipe and corners, which will serve as a backrest holder.
3. We connect the frames at the intersection points (as in the picture) with bolts.
4. The seat of a homemade chair deserves special attention; it can be made from thick fabric or from scraps of plastic pipes. In the latter option, you will have to fasten each tube to each other with a strong rope, and then fix the seat to the frame.
DIY pipe flower garden
To make the next homemade product from plastic pipes, you will need a 110 sewer pipe or at least a 50 diameter pipe, tees and bends. If there is one pipe, without fittings, then it doesn’t matter, because it will be perfect for making a flower bed.
We take a pipe and make preliminary markings of where and how the holes for the flowers will be located. Using a small angle grinder (125 circle), we cut holes into which the plants could be planted.
In the case of assembling a flower bed from sewer tees and bends, the whole work is much simplified. For these purposes, you only need to connect one tee to another, and insert 110 corners along the edges of the structure.
If desired, a homemade flower bed made from pipes can be attached to the wall with clamps, and then the facade of your house will have an original look.
Greenhouse made of plastic pipes
Who hasn’t dreamed of owning a real greenhouse on their own country plot? In the case of homemade products made from plastic pipes, it is quite possible to make a greenhouse with your own hands. Moreover, in this case, you will be able to save a considerable amount, because factory greenhouses made of polycarbonate and other materials cost a lot of money.
To make a greenhouse from pipes, it is better to sketch out a simple drawing in advance with the dimensions and diameter of plastic products. As support posts for the greenhouse, it is recommended to use a pipe of at least 32-40 in diameter, while for jumpers, a 25 pipe is quite suitable.
It is best to start assembling a greenhouse from plastic pipes from the base; for this, four pipes are welded together through corners in the shape of a rectangle. Then, in each pipe, every 0.5 m, a tee is soldered into which the vertical guides of the greenhouse will be installed.
You should think in advance about strengthening the structure in the place where the door will be provided. After the frame is assembled, it will remain covered with thick polyethylene film, which, if the greenhouse is used correctly, will last for many years.
Small fence made of plastic pipe
You need a small fence that will not only be a barrier for stray animals, but also a real decoration of the site - no problem. Taking into account the fact that plastic does not rot or deteriorate when exposed to moisture, such a fence will last for many years.
To make a plastic fence, you will need a pipe, angles and tees into which vertical crossbars will be soldered. A pipe fence has a very simple design in the form of supports (they are made of thick pipes) and crossbars (vertical and horizontal) that are welded to the supports through tees with corners.
Upon completion of construction, a homemade fence made of plastic pipes can be painted with “silver” or other paint, at your discretion. Such a homemade product made from unnecessary pipes will become a real decoration for any suburban area.
Furniture for the nursery and more
As mentioned above, full-fledged furniture can be made from polypropylene pipes. If you decorate it correctly, then such an item will not look like a homemade item for the garden that accidentally ended up in the house. The list of furniture items that can be made from pipes is quite impressive:
- Tables and coffee tables.
- Chairs and armchairs.
- Racks, shelves and cabinets for household items, shoes and clothes.
- Hangers and dryers.
- Children's beds (including bunk beds) and playpens for babies.
Shelves and stands
Let's consider the process of manufacturing storage systems using the example of a bookshelf. For such furniture, you can get by only with pipes or additionally use boards or cut pieces of MDF or chipboard. In this case, what matters is the content that will be placed on the shelf. Books, for example, can be laid out freely on an “empty” shelf without a crossbar if its width is less than the width of the publication. And the filling will not fall. Using the same principle, you can make shelves and holder stands for shoes, magazines, dishes, lids, bottles, cups, cutting boards, magazines, and disks. This option is not suitable for those shelves on which contents of different shapes and sizes will be placed. Here you will have to use crossbars made of a different material, which will be secured to the “sides” made of tubes. Corner shelves for books will look stylish and unusual. To make them you will need pipes, plugs, bends and corners. The holder is assembled from fragments, arranging them in U-shaped zigzags. When the shelf is ready and secured, the books will be held on it by being supported by the pipe itself and the wall. The shelf is ideal for interiors decorated in loft style.
Coffee table
To make a coffee table you will need small diameter pipes, fittings and a tabletop. A glass lid will look stylish. The tube system will act as a support. They can be connected to each other according to a standard scheme, like four legs, or you can use your imagination and decorate the supporting part of the table with an intricacy of tubes, decorated with various fittings.
Clothes hanger and drying rack
Assembling a hanger or clothes dryer starts from the base. You will need four tubes for the legs. They are connected to each other using tee fittings. A crossbar tube is inserted into the side branch, which will increase the stability of the product, and two racks are inserted into the top branch. Plugs are put on the legs to prevent dust and dirt from getting inside. Additionally, the side posts can also be secured at the top with another crossbar, again using a tee fitting. “Hooks” are made from the same parts. The top rail is assembled entirely from T-fittings with plugs.
Rack for living room, hallway, pantry
In the racks, a base structure is made from polypropylene pipes, which is subsequently supplemented with wooden shelves. The resulting furniture will be uncluttered, relatively light, but at the same time durable and resistant to heavy weight loads. Since the material is insensitive to aggressive microclimates, it is universal. These racks can be used in the kitchen, bathroom, living room, hallway, nursery and pickle pantry. Since the loads on the furniture will be quite large, polypropylene pipes cannot be connected to each other using bolts or adhesives. In this case, it is better to resort to diffusion welding, which will ensure reliable connection of the fragments.
Playpen for children
A playpen for babies is necessary if the mother plans to do household chores when the child is nearby. This design will protect the little person, but will not limit his movements. The playpen is easy to make from polypropylene tubes. To work you will need:
- Tee and eight-angle fittings.
- Small diameter tubes.
- Scissors for cutting polypropylene.
The playpen is assembled very simply:
- First, the tubes are cut into fragments of the required length (small horizontal and long vertical “rods”).
- Then T-fittings are put on each rod on both sides.
- On the sides, short tubes are inserted into the connecting parts, two on each side.
- Now T-shaped fittings are put on them again, which are connected to the next rod at the bottom and top.
Then the wall of twigs is “wrapped” 90 degrees using corners.
Bunk bed
The bunk bed is assembled entirely from pipes and fittings. The sleeping area itself, where the mattress will lie, is strengthened with the help of short tubes, which are often placed from side to side. It is easy to make a neat ladder from the material. If the bed is for boys, then you can even attach a small horizontal bar to it for exercise in the morning. A workplace is set up below for one child. To do this, it is enough to assemble additional supports for the tabletop from tubes. If the baby is still very small, then the bed is decorated with high sides.
Vintage wall for a photo shoot (master class)
Wanting to leave a piece of the celebration as a souvenir, the newlyweds create accessories and decoration elements with their own hands. Background walls are no exception. A screen for a photo zone in a rustic style is created very simply.
Materials and tools
- wooden boards (size depends on the desired size of the screen),
- frames of different sizes,
- beautiful hooks or furniture handles,
- water-based wood impregnation,
- white acrylic paint,
- wood glue,
- wood screws,
- drill or screwdriver,
- brush,
- sandpaper or sponge.
Time: 2-3 hours
Step-by-step instruction
- For the frame, lay boards of suitable size evenly and close to each other on a horizontal surface. Place 3 stiffening ribs perpendicular to them at the top, middle and bottom.
- Nail the two outer boards of the “fence” to the stiffening ribs to create a frame-type structure. Do not drive the nails all the way in.
- Turn the resulting frame over and apply wood glue to the stiffeners. Then glue each board one by one, including the last one, after removing the nails. Don’t know how to make a screen for a wedding with your own hands and not spend a lot of time and effort? – Find an element of an old fence or use a pallet - this will save both time and money. Also read about the design of a wedding arch - it will make the celebration even more fabulous.
- At a distance of 20 cm from the edge of the middle stiffener, attach the stops of your decorative wall with self-tapping screws and a drill. At the bottom, connect them together with a perch of the same size for stability. The frame is ready!
- If the wood is untreated, sand it with fine sandpaper and remove dust. Then apply the impregnation with a brush, or rub it in with a woolen rag (this will make the wood texture look nicer).
- After the impregnation has absorbed and dried, apply white paint with an artificial bristle brush.
- After waiting for it to dry (2-4 hours), take an emery sponge and lightly remove the top layer of white paint, revealing the impregnation. This will create the effect of aged wood.
- Prepare the frames, paint them, attach the ropes on which they will hang. Make markings for attaching them to the frame.
- Attach hooks or other furniture fittings to the markings. Hang up the frames. Complete the composition by hanging antique lamps, clocks or flower pots.
- The vintage wedding screen is ready, and no one else will have one like it, because you made it with your own hands.
Use Cases
In addition to the fact that such a wall is an excellent backdrop for a wedding photo shoot, use it as a seating plan for guests. Attach as many frames as there will be tables. Place a sign with the table number in the center of each, and stickers or pin flags with names around them.
Take care of the design of the wedding photo zone, and in memory of this day you will have many stunning photographs with your family and friends.
- 29 photos
Making your own screen
An ideal option for independent creativity would be to make your own screens from wood and fabric. This classic model will look perfect in any interior. You can assemble it easily and quickly if you use the tips and recommendations on how to make a screen with your own hands.
The essence of the work is that you need to stretch a piece of textile onto a wooden frame. The product model can be any: book, folded or single-screen.
The process of creating a screen begins with preparing the essentials:
- bars in the amount of 12 pieces measuring 170x2 cm and 12 pieces measuring 60x2 cm;
- piece of fabric;
- paint and varnish products;
- glue;
- decorative elements;
- power tools;
- fasteners;
- sandpaper.
Next you need to act in accordance with the step-by-step instructions:
- Using a ruler and pencil, mark the bars to assemble the frame.
- In the designated places, make cuts up to half of the wooden parts.
- Using a chisel and hammer, make a depression in the cut area.
- Assemble the wooden parts into the frame, first smearing the joints with wood glue.
- After the glue has dried, sand the finished frame with sandpaper and varnish.
- To strengthen the structure, fix the joints of the frame with screws to the metal corners.
- After making the frame, you can prepare the textile part of the screen. The fabric cut must match the size of the frame with allowances for hems. If it is not possible to use a whole piece, you can create a patchwork composition.
- Using a furniture stapler, secure the fabric to the frame, starting from the top. To prevent the fabric from sagging in the future, it must be fixed with tension.
- The structural parts covered with fabric must be connected with furniture hinges, piano hinges or textile elements.
Master class: screen made of plastic pipes
We introduce you to a master class on making a screen with your own hands from plastic pipes.
What we need for this design:
- plastic pipes;
- connecting corners (4 pcs. for each frame);
- hacksaw;
- soldering iron or glue;
- loops;
- fabric and machine;
- dye.
The work progress is as follows:
1. Align the pipes so that they are the same length. If you plan to make three frames, you will need to make 6 long and 6 short elements.
2. Paint the blanks with acrylic.
3. We connect the elements with a soldering iron or glue.
4. We drape the frames. To do this, we measure the length and width of the sashes, and sew the material according to these parameters. Its edges can be secured with Velcro or buttons.
5. To make the sashes fold, we fasten them with hinges.
6. You can attach caps to the legs to prevent damage to the floor.
For a country house and garden
Plastic is a universal material, products from which can decorate not only the house, but also the surrounding area. To improve a garden plot, you need light, mobile furniture, special stands for flowers and plants, greenhouses, feeders for pets, greenhouses, and pots for seedlings. In the games and recreation area, it is also necessary to install a couple of special structures: football goals, gazebos, pergolas and decorative arches. For lovers of active recreation, you will need a separate place for parking bicycles. An excellent replacement for a full-fledged garage, for which there is no time or money to build, will be a summer carport that will protect the car from the rain. All this can be made from one material - polypropylene tubes. Let's talk about how exactly.
Football goal
To make a football goal you will need tubes, mesh, fittings (corners, plugs, tees). Start work from the foundation. It will have a U-shape. First, the widest crossbar is assembled from three short fragments. They are secured with T-shaped parts. Then three fragments of the tube (two short sides and a wide middle) are connected to each other using corners. The same fittings are put on the ends of the “P”, but with branches pointing upward. Now they are making exactly the same design. It is connected to its “twin” through the branches of the corners, which were directed upward, and with the help of two crossbars inserted into T-shaped fittings. Finish the work by stretching the mesh.
Garden furniture made of plastic pipes
Chairs, sun loungers, tables, benches, and deck chairs are made from polypropylene tubes. It is better to choose a white material that can be easily combined with wood, metal and textiles of any shade. In addition, a neutral tone will make the furniture airy and add a touch of freshness. Sun beds, sun loungers, chairs can be made according to two principles:
- Strengthen the seating area with frequently spaced cross tubes.
- Use tension fabric that will allow the seat to sag slightly.
In the first case, you will have to use special mattresses or pads to make sitting softer. Products that combine polypropylene with wood look great. Tables and low tables are assembled using the same technology as similar home furniture. The only difference is the material for the countertop. If a coffee table with a glass lid looks appropriate in the house, then for the street it is better to use more durable and less easily soiled materials (plastic, wood, metal).
garden arch
Polypropylene tubes have sufficient plasticity so that they can be formed into a semicircular arch. The simplest example of the product consists of two rows of supports that smoothly flow into the upper crossbar, connected to each other by horizontal trimmings using T-shaped fittings. In order for the arch to cover most of the garden path, additional rows of supports are attached to it, as if stretching the structure lengthwise. The arch will be an excellent support for climbing roses, grapes, clematis, ivy and hops. Two years are enough for the branches to densely cover the tube structure, leaving only small gaps for sunlight. For more complex design options, tubes of various lengths are used. Their intersections and connections decorate the walls of the arches.
Alcove
For the gazebo, a frame base is made from polypropylene pipes. The design can be given a simple square or classic round shape. The roof is covered with polycarbonate, waterproof fabric or thin wooden slats. A patio does not require a roof, but on the sides the “walls” of gazebos are created from flowing curtains, which, if necessary, provide the necessary privacy. If the master has an impressive supply of polypropylene tubes and fittings (plugs, crosses, tees), then the side partitions can be made from them in the form of a fine grid (classic or at an angle of 90 degrees).
Carport
A carport is assembled according to the same principle as a gazebo. In simpler versions, the roof is made of waterproof material (as for tents) and is limited to this. If you have time and money, the parking space can be covered with polycarbonate sheets on the top and sides. This way the car will be protected from rain and wind, which will even allow you to work on car repairs in bad weather.
Bicycle parking spaces
A small parking lot for bicycles is assembled from polypropylene tubes of small diameter. First you need to form a lattice. The gaps necessary to accommodate a bicycle wheel are left between its rods. A T-shaped fitting is attached to each crossbar, with the help of which the stand-holder will be secured in the future. It is assembled from short pieces of pipes and similar connecting parts. Subsequently, one end of short tubes are threaded into them, the other ends of which are secured to the “grid”. As a result, the two planes will intersect at right angles, and the entire structure will stand firmly on the ground.
Greenhouse
A greenhouse is the most simplified design, covered with a film, which is intended for growing seedlings. They are used only in early spring, when the ambient temperature has not yet risen to the required values, and it is too dangerous to grow weak shoots outside without special barriers. Greenhouses are considered temporary structures. Unlike greenhouses, they do not have windows or doors. To build a small greenhouse, all you need is a set of pipes for the base, semicircular crossbars, T-fittings and corners. The structure is assembled from several “arches”, on which a transparent film will subsequently be attached using special plastic clothespins. You can enter the greenhouse only by removing the protective sheet.
Greenhouse and greenhouse made of plastic pipes
A greenhouse made of polypropylene tubes is a more “serious” and bulky structure than a primitive greenhouse. As a rule, special soil is brought into it, high beds are arranged, the walls are equipped with windows that open when ventilation is necessary, and there is a full-fledged door that closes with a latch. Since the structure is more monumental, it is usually covered not with a thin film, but with polycarbonate sheets, which are fixed to a “skeleton” of polypropylene tubes. The shape of the greenhouse can be either a classic semicircular or square or rectangular. The structure is assembled according to the principle of assembling gazebos. Inside it is usually equipped with special shelves made from the same tubes, which will later play the role of stands for long pots with seedlings and further strengthen the structure.
Some craftsmen make complex structures in which static segments alternate with mobile ones. The latter are equipped with special handles and rise up to ventilate the greenhouse. There is no need for windows for such a structure.
Containers for seedlings
To make containers for seedlings, you will need pipe cuttings, plugs and plastic scissors. First, two longitudinal and two transverse cuts are made in each fragment. The resulting polypropylene rectangle is removed from the tube. The sides of the fragment are covered with plugs. The pipe is placed horizontally. Fill it with soil and plant the plants. For such pots a “stepladder-stand” is made. Its “steps” are connected to each other by additional crossbars, on which tubes with seedlings are placed in a row.
Chicken feeder
Feeders for chickens from tubes can be built in two ways:
- Make a simple horizontal structure with several sections, just like pots with seedlings.
- Make a vertical feeder from several pipes. It takes up less space but stores a lot of food.
The second structure is fixed to the wall using brackets at such a height that the chickens can freely reach the grain. The feeder is equipped with a lid on top that will protect the feed supplies from dust and moisture. The height of the pipe is selected individually according to the height of the person who will fill the grain (approximately at the level of his chest).
From the choice of design and materials to decoration
The screen manufacturing instructions include the following steps:
- Drawing up a drawing
; - Selection of materials
; - Creating a wireframe
; - Decoration
.
Stage No. 1: drawing up a drawing
At this stage, it is enough to decide on a couple of criteria:
- Number of doors
. The best option is three. This design is quite multifunctional and can be used:
For the room. Separate a corner or bed from the rest of the room to create a separate cozy corner in it;
For puppet theater. It is enough just to leave a hole on the central flap for the appearance of dolls;
For garden . Three sections are quite enough to create a place protected from prying eyes and sunlight on your suburban area;
- Dimensions
: The room should be selected in accordance with its dimensions; large structures will be used more effectively on the site, but, for example, in a kindergarten, on the contrary, a low partition will be sufficient.
After you decide on the specified parameters, you don’t even have to draw the diagram from scratch, but find a suitable template on the Internet and insert your own size values:
Stage No. 2: selection of materials
The screen can be made literally from scrap materials. Here are examples of some interesting solutions:
- Plastic pipes
. If you have a pipe soldering iron, then there is nothing easier and faster than soldering a frame made of polypropylene pipes. They will make a practical and moisture-resistant design, perfect for use outdoors, near a river, in a bathroom or next to a pool;
- Cardboard
. The price of this option is the lowest, it is well suited for a children's room;
- Polycarbonate
. Another not very expensive and practical option that can look stylish indoors and withstand all weather conditions outdoors;
- Tree
. Despite the abundance of different materials, wooden frames covered with fabric and paper are an immortal classic for making screens, which we will also turn to.
Stage No. 3: creating a frame
A master class on making frames looks like this:
| Photo | Description |
| Let's prepare :
| |
| We apply markings on all planks, departing 60 mm from the edges. | |
| We make cuts according to the markings. | |
| We do the cuts with our own hands using a hammer and chisel. | |
| |
| We fasten the corners with screws to strengthen the structure. |
Stage No. 4: decoration
All that remains is to assemble the frames together and decorate them.
Hi all! Alas, the situation in our kindergartens is not the best, so a lot of responsibility falls on the parents. You have to buy, make, collect something. But for some dads this is even a joy. A clear example of what you can do for your child is a screen made of plastic pipes for a kindergarten.
From a financial point of view, this is a low-cost event, since many may still have pipes after repairs. And they are quite cheap. There shouldn’t be any problems finding fabrics for upholstery either.
But buying ready-made screens, which will differ little from homemade ones, is not a cheap pleasure. Therefore, it is often natural to decide to do everything yourself. Dads will be able to make the design, and moms will be able to sew the necessary fabrics. The result is a wonderful children's screen for many tasks and activities.
Creating a screen design
To get started you will need:
- adhesive composition;
- saw for working with metal;
- several meters of pipe (six), but of different sections.
If it is possible to professionally cut pipes using a special machine, then this can be done in a hardware store. The width of the screen must be calculated in advance and will be about 5 cm. If the diameter is smaller, then the pipes will have to be cut using improvised means. To do this, marks are made in advance on the surface of the pipe every 5 cm, after which the material is fixed in a vice and cut using a saw.
Cutting PVC pipes
After cutting, all edges are combed, which will make them smooth and even. An iron works best. To do this, it is heated and applied to the material through baking paper. After each action, the paper must be peeled off from the pipe, since after a while it will no longer be possible to do this.
The resulting rings are glued together using special glue. First of all, all elements are laid out on the floor. This will help you see the big picture and assemble the structure without making mistakes. When using rings of different sizes, first lay out larger elements, and then small rings between them.
The pattern is chosen arbitrary or chaotic. The edges of the screen are thought out in advance. If the structure will be installed along the wall, it is recommended to make the edges smooth. However, the edges can also be curved. Once the final design of the structure has been selected, you can begin gluing the rings together.
All places where the rings come into contact are carefully coated with glue. Excess is removed with a dry and clean cloth. A spray can will allow you to quickly and effectively paint an already assembled structure. If you plan to make the structure multi-colored, then the elements should be painted before assembly begins.
The screen can remain mobile or be attached to the wall surface. These rings are very convenient for storing bottles of elite alcohol, decorative items, magazines and newspapers.
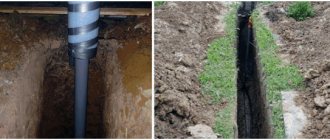
Use of ventilation pipes in everyday life
Ventilation pipes with a set of connecting and fastening parts are usually called air ducts. They are designed to ensure air circulation and are installed in those rooms where there is no access to natural air movement or there is an additional need for ventilation: in kitchens, bathrooms, toilets.
Before the appearance of plastic parts on the market, air ducts were made of zinc-coated alloy; they are still often found in production shops or in catering establishments (their introduction is associated with high temperatures).
But for implementation in everyday life, that is, for installing ventilation in apartments and cottages, polymer products are more suitable.
They have the following advantages:
- have less weight than iron ones, so they are easier to install with your own hands;
- smooth walls have little resistance to air movement;
- airtight, as they have no seams;
- resistant to high humidity, do not rust;
- On sale you can always find a set of fittings suitable for the cross-section.
Products that meet GOST standards and have certificates of conformity are allowed for sale, so we can talk about the safety of plastic parts.
https://www.youtube.com/watch?v=4wC36soTX8k
Corn husker from grass cutter
Making a homemade grass cutter step by step: Holes were drilled in the flange and threads were cut. The knives were made from a piece of an old rusty two-handed saw. The knives were screwed to the flange. The grass cutter frame was made from a sheet of metal 4 mm thick. A strip of metal with a cross-section of 4x40 mm was welded to the square, which was bent in a circle. A hole was drilled in the center of the bed.
I bent the strip with a hammer, striking the metal on the jaws of a vice. The radius was controlled in a circle by drawing it on the frame. At the finish, the user welded the legs to the base. Fixed the electric motor. I made a large tank with a lid to prevent debris from flying out of the grass cutter while the engine is running. The tank is removable for ease of use of the grass chopper. Alex Nk decided, based on the grass cutter, to make a mechanism for shelling corn. The result is a two-in-one unit. To make a homemade product you need: Cut a disk out of metal. Drill holes in it for M6 bolts. Grass cutter-corn peeler assembled. Places for storing fasteners.I found experimentally that the optimal option for chopping grass is two knives. Four knives turn the grass into mush. I also threshed apples for the poultry. One bucket of apples is crushed in 4-5 minutes. The result is a grass cutter-vegetable cutter-fruit cutter.
What it is
A screen can be called a structure containing various hidden elements. With its help, you can organize skits, performances, use it for a puppet theater, conduct a master class in a kindergarten, and much more.
Handles rails for furniture: sizes, installation options, photos in the interior
In addition to its entertainment function, a screen or decorative fence is actively used for the development, education and upbringing of children. Believe me, any teacher in the kindergarten will only be glad if something similar appears at her disposal. These are truly multifunctional products that, with imagination and experience, can be used for a huge and varied range of applications. Using medical-themed covers, you can organize a lesson on taking care of your health. By stretching thematic canvases, it is easy to stage different performances or stage a whole performance.
Officially, such screens are called nothing less than a developing subject-spatial environment. There is even a state educational standard that it must meet.
Don’t worry, if you have ordinary polypropylene, verified dimensions and the right tools, it will be difficult to violate these standards.
But it is still important to remember that we are talking about a product for children, not adults. Leaving the kids alone near the screen, the teacher or parents should have no reason or reason to worry about their safety
All this is spelled out in the requirements and standards. In relation to the screen they are:
- Safety. We are talking about the stability of the structure and its strength;
- Transformability. The ability of the screen to change its appearance through simple movements;
- Availability. This is not about price, but about the ability of each child to carry out certain actions;
- Variability. That is, the ability to change covers and contents;
- Content and richness. Here, I think, everything is clear;
- Multifunctionality. In fact, a combination of all the previous points.
Such a decorative partition has excellent developmental functions, it allows you to concentrate and hold the attention of children, develop their intelligence, thinking, show ingenuity, learn something new, develop creatively, etc. A screen also becomes an excellent way to zone a room when conducting quizzes, skits, various kinds of events, so that children are not distracted by other things
A screen also becomes an excellent way to zone a room during quizzes, skits, and various events so that children are not distracted by other matters.
Material of manufacture
The main materials for production are glass and plastic. Each of these materials has both disadvantages and advantages. Comparing glass and plastic, we can say that glass, although it has a high price, is much stronger than plastic. Another disadvantage of plastic is its short-lived aesthetics. Over time, it fades and loses its appearance, unlike glass.
Glass screen
Glass is the most popular material for bathroom screens. It is easy to clean, so caring for it is a pleasure. You just need to wipe it with a damp cloth from time to time.
You can build interesting decorative partitions from glass. You can order a design to be applied to it or paint it yourself with special paints.
Tempered glass has high strength. It is almost impossible to break it. Therefore, this type of glass is most often used in interior design.
Plastic screen
Typically polycarbonate is used for screens. Its main advantage is its low cost. This material is produced in various colors, so this partition will suit any bathroom. For a low price you can get an interesting designer color accent option.
Another plus is ease of installation. You don't have to worry about damaging the structure. Polycarbonate is easy to attach to the frame and can easily withstand bends. Dismantling will also take a little time.
Stage two: installing the partition
At this step you need to do the following:
- attach the loops to a block of wood and mark the areas for hardware;
- drill holes in a wooden block;
- screw the hinges to the wooden block;
- attach a block with hinges to the gate structure and mark areas for hardware;
- drill holes in the pipe;
- lubricate the screws with glue;
- Screw the loops to the pipe.
The next step is to attach a wooden block with a PVC structure fixed on it to the railing baluster or to the wall or door frame.
You can fix the position of the partition in any convenient way, for example, using clamps.
Once the partition is in place, all that remains is to attach a hook and loop or other lock to it.
Found a violation? Report content