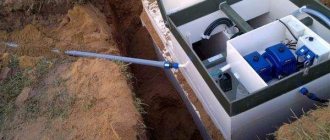
Rain and melt water is one of the reasons for the destruction of residential buildings and utility structures. Therefore, they are trying to get rid of it, and quickly, moving it away from the foundations. Typically, such water is discharged into storm drains or outside the site: ravine, river, lake and other bodies of water. Trays assembled into one structure are called surface drainage or a surface drainage system.
Reinforced concrete drainage trays
When choosing a concrete drainage tray for any system, you first need to carefully study all the pros and cons of the product, technical properties, operating features, installation rules, varieties, etc. All this will help to correctly perform calculations and install a high-quality, reliable and durable system.
Varieties
Trays have different purposes. Although they are all designed to drain water and offer a certain standard design, you need to consider all options when choosing a product for a specific system.
Concrete drainage systems according to their intended purpose:
- Storm drains are used for installing channels to collect and drain atmospheric precipitation from the territory.
- Culverts are sectional channels created for gravity drainage of various types of water.
- Drainage trays are relevant for use in foundation structures and basement/basement floors.
- Telescopic - drain water from slopes and bridge structures.
- Edge - remove excess water from roadways to ditches.
- Sewer - used to transport wastewater to collector sewer systems.
Concrete drainage can be made in two modifications - prefabricated or solid. Both options can be of two forms: in the form of a parabolic or trapezoidal flat floor slab, as well as in the U-shaped bracket format with a round or rectangular gutter. All open trays require additional protective grilles.
Concrete drainage trays with or without gratings are available in more than 150 standard sizes, designated by the letter L (tray) and two numbers separated by a hyphen: the first displays the series number in the range 1-38, the second indicates the maximum permissible value of the vertical load on the tray (expressed in kN/m).
Additionally, behind the letter L, manufacturers can indicate their symbols, which are usually deciphered in price lists. So, Ldr is a drainage tray, Ld is an additional tray (of reduced length, which makes it more convenient to complete the route), etc.
Advantage of concrete products
The concrete tray for water drainage is produced in accordance with GOST 21509-85 using vibrocompression technology. The production uses concrete grades from M200 to M400 (in rare cases, usually a little less). The channels are densely structured and durable, resistant to various negative factors, changes in humidity/temperature, heat/freeze.
The design may contain expansion joints (necessarily sealed with bitumen mastic as waterproofing), which makes the products more resistant to mechanical stress. Plasticizers are introduced into the concrete composition, which significantly increase frost resistance, moisture resistance, and corrosion resistance. Also, additional strength of the trays is provided by a reinforcement frame made of steel rods of classes A-I and A-III.
The main advantages of concrete water trays:
- Completely waterproof.
- High level of resistance to various aggressive influences.
- Reinforcement of metals, which increases strength.
- Resistant to temperature changes, frost and heat.
- Ability to receive and discharge large volumes of water.
- Resistance to mechanical damage and vibration.
- Aesthetic appearance.
- Simple and quick installation.
- Long service life.
- Relatively low cost.
- The versatility of using trays for a wide variety of systems.
- Smooth surface, due to which not only water, but also debris is removed.
- Environmental friendliness and safety in operation.
- There is no need to carry out large volumes of excavation/installation work, due to which trays are often used in the installation of drainage systems in private households.
The products have quite a few disadvantages: heavy weight (which to a certain extent increases time, financial and labor costs for installation), considerable transportation costs, loss of all basic characteristics if the manufacturer does not comply with the technology.
What else to consider when choosing?
When choosing drainage trays, also consider the following:
throughput, i.e. the volume of water that the system, including drainage trays, can receive and discharge per unit of time. The larger the tray, the higher the throughput. When selecting, it is worth taking into account the intensity of precipitation in the region, the characteristics of the territory (this is the area adjacent to the house, where it is usually dry, or the area in front of the car wash), the area of the catchment area
It is also important to take into account the parameters of discharges into storm sewers so that the drains do not become overcrowded. You can calculate the capacity of trays using special programs or by contacting specialists;
the dimensions of the tray are calculated using a formula, taking into account the volume of precipitation, the area of the site and the drainage coefficient, depending on the type of coating;
Depending on the characteristics of the territory, universal ones are purchased (they drain large volumes of water, often used in private construction), wear-resistant (they cope with the drainage of constantly large amounts of water) or deep drainage trays (optimal for low-lying areas, characterized by increased throughput).
Making storm drainage trays with your own hands
Despite the relatively low price of plastic drainage trays, there is an even cheaper option for arranging the system - making gutters yourself. This will make it possible not only to save money, but also to get a product with parameters that exactly match the needs of your site.
Making a drainage tray with your own hands begins with the production of a mold. For this, boards or laminated plywood with a thickness of 10-15 mm are usually used. A U-shaped shape is made from these materials, the elements of which can be fastened together using metal corners for greater strength. If you use boards for formwork, their thickness should not exceed 25 mm, and the surface should be free of knots. It is best to connect them together using wood screws; they hold the boards together well under the influence of concrete.
After the main part of the mold for making the gutter is ready, the molding part is made. The best solution for this is a regular plastic water pipe cut in half. The main thing is that its surface is as smooth as possible, since it is along the semicircular part of the gutter that water will flow. The concrete mixture is poured into the finished form.
Manufacturing a concrete tray for storm drainage
To form durable concrete, it is recommended to use the following materials:
- filtered sand without foreign impurities;
- crushed stone of medium or small fraction;
- Portland cement M400, which is characterized by a high level of frost resistance and strength (if desired, other types of cement can be used);
- fittings with a diameter of 6 mm.
In order for the concrete drainage trays that you will install into the storm sewer system to be as strong as possible, the ratio of cement, sand and crushed stone should be 1:2:4 or 1:3:5. In the second case, the amount of concrete produced will be greater, but its strength will be slightly lower.
When calculating the final size of a reinforced concrete drainage tray, it is necessary to take into account the installation of reinforcement. These can be individual rods or a mesh. The latter can be mounted with your own hands, placing the reinforcement bars at a distance of 5-10 cm from each other and connecting using electric welding or wire. After this, the resulting concrete mixture is poured into the mold, into which the cut plastic pipe is immediately pressed. You can disassemble the mold and remove the pipe a day after pouring the mixture.
The flat inner surface of the tray facilitates quick and efficient drainage of rainwater
The time for complete hardening of concrete is 28 days. After this, each tray must be carefully inspected for defects, pits and cracks. If they are absent, you can proceed with the installation of a storm sewer system.
The advantages of making it yourself include not only the exact size of concrete drainage trays you need, but the price will also be significantly lower than when purchasing a finished product. However, if you decide to buy plastic drainage trays for storm drainage, this will definitely save your time. So the decision whether to buy or make your own gutters depends entirely on your personal preferences.
https://youtube.com/watch?v=f9QqaUKm1hY
Setting up the mold for pouring
To figure out how to make cement water drainage trays, you need to understand the principle of their operation. In autumn and winter, a large amount of precipitation falls on the area near the house or cottage. Then they spread over the surrounding area, flooding low-lying areas, creating dampness in the basements and spoiling the finishing of the walls. If there are properly made cement trays near a private house, then the water will flow through them and then be drained away without creating trouble on the site.
How to make sure that water is drained through the tray quickly and without delay? There is a conclusion that a trench with a slope of 30° will allow water to drain quickly. Despite the fact that this is true, a trench with such a slope will soon be washed away and then collapse. Making cement trays is the best option because they are not afraid of liquids and will do their job perfectly. You can buy such trays in stores, or you can make them yourself. Let's look at how below.
What are the advantages of cement trays that you personally made? Firstly, it's saving. Despite the fact that they are not very easy to make, it will be cheaper than buying such factory-made trays in a store. Secondly, these are personal dimensions, since some trays from the store will need to be cut if there is a turn in the drainage trench, but at home it is possible to fill trays of the required length and shape.
By the way, about the form. The optimal shape is considered to be a semicircular shape, through which water passes virtually without resistance. But, because such a shape is not easy to make, trays are much more often made according to the following scheme. A U-shaped structure is made from boards or pages of laminated plywood 10–15 mm thick. To give strength, the panels in the formwork are fastened with rolled metal corners.
At the time when the main part of the formwork is done, prepare the molding part, which is made from a pipe sawn in half lengthwise
It is fundamentally important that the surface of the pipe used is smooth, because thanks to it a semicircular part of the tray will be formed, along which wastewater will flow. it is optimal to make at least 10 such formworks, otherwise the process of pouring trays for the entire water drainage may drag on for an unknown amount of time
A sewer plastic pipe of suitable diameter is ideal for the molding part, because its surface is smooth. There are virtually no pores on such a pipe, which allows you to pour concrete much better.
Installation of concrete, metal or plastic drainage trays with gratings: cost of work
The cost of installing a storm drainage system depends on the depth to which the gutters are dug. The cheapest installation (from about 1,800 rubles) is the installation of a shallow water drainage system, that is, to a depth of 1 m. Installation deeper than 1.5 m will cost more - 3,900 rubles and more.
Regardless of what material the gutters are made of, they are installed according to the following scheme:
- the type and size of trays is selected, their number and the degree of physical load on the entire system are calculated. Depending on the last parameter, the material from which the gutters are made is selected;
- The depth to which the trays will be buried is determined. You can entrust this matter to specialists or carry out the necessary calculations yourself. Please note that when calculating the depth of the trench, you need to take into account an additional 10 cm for a concrete or gravel pad. It is also necessary to provide a slope along which water will be drained into drains;
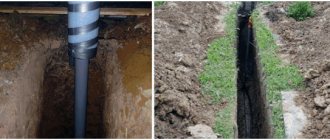
- a trench or several trenches are dug with a width of 50 cm and a length according to the number of gutters;
- Concrete or cement is poured into the bottom of the trench. To increase the strength of the base, it is recommended to reinforce it with a metal mesh;
Installation of plastic drainage trays
Concrete tray with cast iron grate for storm drainage system
How to install?
Installation work begins with excavating a trench, which should be twice as wide as the size of the drainage gutter. Since plastic channels are mounted on a concrete base, when digging a trench you need to take into account the height of the concrete base. After this, concreting is carried out. If vehicle traffic is not planned on the site, the concrete base can be replaced with gravel and river sand. Direct installation of the surface drainage system begins from the lowest point of the route. If the system has a sand trap, then installation begins with its installation. In the case of corner and rotary joints, trays and gratings are cut with a regular saw, or an angle grinder with a cutting disc is used.
Options for rain gutters made of polymer materials are quite convenient not only in operation, but also in installation. They can be docked in specified locations and additional modules can be attached to them. The polymer material from which the modules are made can withstand high mechanical loads and withstand temperature changes.
Surface drainage system
Drainage systems are designed primarily to collect rain and melt water, rather than groundwater. In the future, they must carry out the transfer of water to the sewer, where such water will undergo filtration and return to nature, for example, evaporate or merge into rivers. Surface drainage is a prerequisite for construction. According to engineering standards, every construction project must be equipped with such a system at the planning stage.
Surface drainage systems are available in several configurations, which are expressed in assembly systems. Thus, each of the systems is designed for a certain volume of water, loads, etc. Drainage trays are used in linear surface drainage, the purpose of which is to collect water in large volumes. This type functions most successfully when it comes to asphalt areas, highways and the like.
In some cases, it is necessary to install sand traps, the purpose of which is to collect debris, filter sand and large particles, which in theory can clog gutters. Their presence greatly increases the service life of storm drains.
Components
If we talk about industrial storm drainage, it consists of several elements.
- Storm water inlet. It is designed to drain water from the surface locally. To prevent debris, leaves, etc. from clogging the rain inlet and other elements, a siphon is used. It serves as a kind of partition. A special basket is provided for collecting waste.
- Rain well. Serves for transporting wastewater. It is constructed only at the end of the assembly of the entire storm sewer. They are also needed in cases where it is necessary to regularly drain large areas of soil in a short period of time.
- Tray. Actually, what we see on the surface: a trench made of materials resistant to water. The tray transports water, moving it from the site.
- Pipes. Mounted on rain gutters. Through these pipes, water subsequently moves into the sewer itself. The pipes are located underground so as not to spoil the overall appearance of the site.
Installation Tools
In order to install water intake gutters, you will need to buy some tools. It may turn out that you already have some of these tools, but for others you will have to go to a specialty equipment store. In any case, the tools cannot be called scarce - they can be found in any large construction hypermarket.
- Shovel. It will serve to make a trench under the tray. Make sure the nozzle is sharp. This will greatly facilitate the work.
- Buckets. It is advisable to have at least two buckets. They are useful for transporting sand to the installation site.
- Concrete mixer. In some cases, owners decide to firmly fix the gutter in place using concrete. In these cases, it is better to mix it not by hand, but using a special machine. Then the concrete will be homogeneous and will lie evenly.
- Hacksaw. With the help of this simple tool you will have to saw parts. Depending on what material the drain is made of, you will need a hacksaw of a certain type: for metal, capable of sawing concrete, and so on.
- Hammer. It is needed for fastening parts together, adjusting shapes and simply compacting the tray in place.
- Saw or grinder. If you choose a metal gutter, then purchase a diamond saw or diamond blade for an angle grinder, especially if you are dealing with durable metals such as cast iron. Then there will be no problems with quickly sawing parts.
Materials, tools, procedure
The dimensions of the future product are taken based on the specific distances from the planned installation of the mixer or concrete mixer to the farthest point of the structure being poured.
In private low-rise housing construction, the length of the tray usually does not exceed 12 meters. The width of the tray is taken to be the “width” of a shovel plus 5 centimeters on each side (usually 300 millimeters), the height of the wall is the width of the existing edged board 150-200 millimeters.
The following materials and tools will be required:
- Edged board 25x150 or 25x200 of the maximum possible length for the tray box;
- Wooden block 40x40 or similar to strengthen the box;
- Wooden block 50x50 or similar for supports under the box;
- Galvanized or roofing iron for lining the bottom of the box;
- “Seventy”, “25”, “weaving” nails or wood screws;
- Hammer, wood saw, screwdriver, tape measure;
- Angle grinder with a metal disc or metal scissors. For cutting galvanized or roofing iron.
In order to save on expensive galvanized iron, you can independently plane the side of the boards along which the concrete will be transported as smoothly as possible. For these purposes you will need a plane or jointer.
Typical storm drainage designs
In the manufacture of storm drainage trays, a variety of materials are used, from cast iron to polymer plastic. But at the same time, all products have a standard design and comply with established standards EN 1433. In the range of offered and manufactured products you can find the following standard design of trays:
- A storm drain tray made in the form of a simple long U-shaped or round gutter without a lid. Such a product is installed without additional reinforcement in a pre-prepared trench with access to the central water collection point.
- A storm drain tray made in the form of a standard elongated gutter, but with a reliable lattice cover along the entire length of the product. The grate prevents various types of debris from entering the sewer drain and prevents blockages in the drainage system.
- Slotted trays for storm drainage. This type of design looks like a long gutter with a slot for water to flow into it.
- L-shaped trays for storm drainage. These products look like slotted ones, only instead of a central hole in the tray they have a special protrusion in their upper part, made in the shape of the letter G. Such products are suitable for installation both in domestic and in more complex industrial conditions (on highways, highways , runways, etc.).
As for the methods of manufacturing storm drainage trays, they completely depend on the specific material from which the products will be made. Thus, in the case of using plastic polymers with additives, the extrusion method is used (extrusion under high pressure and at hot temperatures). If concrete or metals (cast iron, steel) are used, then the casting method is used.
Installation technology
It makes no sense to consider installation technology in public buildings or commercial facilities, since for such work, as a rule, a team of professionals is hired. Installation on your own personal plot is a completely different matter. Then it’s really worth studying the work better so that, if necessary, you can carry out the installation yourself or immediately see if your workers are violating the technology.
Once the tray is selected and the tools are prepared, some preparatory work needs to be done. These include markings on the ground. This is done in order to clearly understand where exactly the drainage system will be located and how wide it can be made. Keep in mind that it is best to locate such objects in the lowlands, on the slopes of hills, if they are on your site. Then the water will collect there, and not accumulate somewhere on the site, leading to the leaching of useful substances from the soil.
Subsequence
To install a drainage tray yourself, use the following step-by-step instructions.
Dig trenches for installing trays. There should be as many of them as the number of drainage systems planned to be installed
Pay attention to the size of the recesses, their depth and width: the drainage channel must fit completely there. For complete installation and subsequent work, the storm drains must be positioned at an angle. If you make them on a plane, then the water will stagnate in them and not flow where it should.
The slope fluctuates greatly: it can be a meter high, or it can be only 1 cm. Trenches dug in compliance with the above conditions must be well compacted. To do this, you can use ordinary sand, which has a drainage effect.
Pay special attention to the next point if your plans include installing plastic products. Sand compaction alone is not enough here.
It is imperative to create a concrete base, since without it the strength of the polymer drain will drop significantly. The concrete box is made in the shape of a tray. It also serves to compensate temperatures. In it, the plastic gutter will not deform, being compressed by the surrounding earth. The presence of a grille is optional, but desirable as it provides additional protection. Debris, leaves and other large objects will not fall into the storm drain, clogging it. Pay attention to the rules for installing sewerage. It must be placed half a centimeter below the ground level, otherwise it will protrude and get in the way. To connect the trays, you need to insert one into the other at the locations of the grooves. In the future, you need to seal the joints well. High strength silicone sealant is suitable for this.
Connection types
This refers to the direction in which water should flow through the tray. Depending on this, the grooves are calculated. The channel must not be positioned in any other way than as indicated in the diagram. By the way, the layout diagram of the tray itself, as well as its individual elements, is attached to each individual set, so it will not be possible to consider any general sequence.
Blitz tips
Most often, installation of drainage gutters is carried out along the perimeter of a residential building, plot and near the garage
However, it is not necessary to fulfill this condition; it is important that the storm drainage system is installed where it is most needed.
The storm drainage system can be installed with or without sand trays. If the installation involves the use of one, then the connection to the sewer drain will be made through the installation of a sand collector
Before installing it, you need to knock out the plug. If a sand collector is not used, a hole for the drain is cut directly in the tray. The hole is drilled along the contour from 2 sides, after which it is knocked out with a hammer from the inside.
To make corner connections from reinforced concrete trays, use a saw. To create a 100-degree angle, cut 50-degree corners on each connected gutter. The cut is carried out while gripping the walls of the product. The joints are sealed using acrylic or bitumen sealant.
If constant high loads on drainage are planned, the concrete layer under the gutters should not be less than 10 cm.
To prevent clogging of the drainage system, it is recommended to clean it every two weeks.
When choosing a product, it is recommended to pay attention to the brand of concrete from which the trays are made. The best grades of concrete are B15, B20 and B25. No less important is the grade of steel that is used to strengthen the structure. Classes A-1, A-3, BP-1 are best suited for this. The cross-section of steel rods should not be less than 8 mm.
Video description
The work procedure and installation of a septic tank made of concrete rings in the video:
How to choose the optimal location for a septic tank
The structure is mounted above the groundwater level. The best location is at the maximum distance from the house (at least 7 meters, but no more than 20, so as not to increase the cost of pipeline construction). It is logical to place the septic tank on the border of the site, next to the road. This will reduce operating costs, since the cost of leaving a sewage tank is affected by access to the system and the length of the hose. In addition, with the correct location, the sewage disposal truck does not need to enter the yard, and the hoses will not lie on the beds or paths (otherwise, when the hose is rolled up, waste may end up in the garden).
Pit preparation
Ground work using an excavator takes 2-3 hours. The size of the pit should be slightly larger than the dimensions of the wells. This is necessary for the smooth installation of the rings and their waterproofing. The bottom is covered with crushed stone and concreted.
Preparing a pit for a septic tank made of concrete ringsSource rostovgruz.ru
Installation of rings and sewer pipes
Rings for a septic tank are installed using lifting equipment, which significantly saves time (when compared with manual installation). Fixation of the seams is ensured with cement mortar; additionally, metal ties (staples, plates) are installed.
The crucial moment is the process of installing ringsSource remoskop.ru
Sealing and waterproofing
The seams of a septic tank made of concrete rings are sealed on both sides of the structure. For this purpose, cement and coating protective solutions are used. You can install ready-made plastic cylinders inside the well. This additional cost will make the system 100% sealed.
In the process of waterproofing concrete rings for a septic tank, the connections are treated with liquid glass, bitumen or polymer-based mastic, and concrete mixture. To prevent freezing (and destruction) of the structure in winter, it is recommended to insulate it with a layer of polystyrene foam.
Sealing joints and waterproofing a septic tank made of concrete ringsSource zen.yandex.ru
Hatch installation and backfilling
The wells are covered with concrete slabs, with holes for hatches. In the first two wells, ventilation is installed, which is necessary for the removal of methane (gas appears as a result of the activity of anaerobic bacteria). To backfill the installed floors, use soil taken from the pit (backfill).
Backfilling of finished wellsSource lanshaft.com
Rules for installing water drainage trays
In order to properly install storm drainage trays at any facility, you must adhere to clear rules. Otherwise, the water drainage system will not have the desired effect and will lead, at a minimum, to blockages, and at maximum to waterlogging of the area or damage to the concrete base of buildings, paths, etc.
Therefore, select and install storm drainage trays according to the following principles:
The throughput of the product you choose should be calculated using the formula = average monthly precipitation multiplied by 25%. Thus, it will be possible to choose the right drainage tray for a specific area.
The material from which the gutter will be made must be appropriate for your facility. It is unlikely that a powerful cast iron tray will be the right solution for domestic use in the garden or country house. When laying storm drainage trays, maintain a slope towards the sewer system at the rate of 1 cm per meter of product. For a high-quality water drainage system, you need to use a good substrate for the gutters. It is better to use a sand and gravel bed 10 cm thick, or at least a crushed stone bed of the same thickness.
You can choose lighter grates for domestic use on storm drain trays. Galvanized steel is suitable
In addition, it is better to fix all the grilles using special locking connections. It is also important to install a sand collection system in the gutter water drainage system. This will prevent siltation and contamination of communications.
Characteristics of drainage trays
The technical characteristics and properties of concrete drainage trays are determined by their purpose and production method. The higher the load that the tray can withstand, the higher the grade of cement used for its production. Reinforcement from steel rods is used for strengthening.
Main characteristics of trays according to GOST requirements:
- Compressive strength corresponds to minimum concrete grade M300.
- The filler fraction is a maximum of 15 millimeters.
- Cement for production is at least M400 grade.
- The thickness of the concrete above the reinforcement is a layer of at least 15 millimeters.
- Appearance – absence of any irregularities and sagging, cracks and chips.
The dimensions of the products can be different - the standard ones assume a length of 1000 millimeters, width and height, wall thickness can be different.
How are the dimensions of drainage trays indicated:
- DN – internal width in millimeters (100, 150, 200 and 300, 500 in Europe, in Russia 110, 150, 160, 200, 300 and 500 are used). If the marking indicates DN 500/150, then the second number indicates the internal depth.
- L – section length, can be in the range of 50-300 centimeters, less often you can find 6 meters or 70 centimeters.
- B – the outer width of the tray, varies from 40 to 190 centimeters.
- H – tray height, varies in the range of 38-150 centimeters.
Range of standard sizes
The drainage system may have different components, and they may differ in both shape and size. Plastic tray models are also advantageous because they are supplied to the market in different sizes. For example, they can reach 50 cm in width, and the minimum is 14 cm. This range makes it possible to install drainage systems with high throughput without the need for a deep trench. The height of drainage trays usually does not exceed 80 cm. But in private households, this format is rare. The most common indicator is still a height of 6 to 12 cm. If we talk about gutters, then when completed around the circumference, their radius is usually 10 cm. The weight of one module is from 9 to 14 kg. This is a rather modest weight when compared to similar indicators for modules made of metal and concrete.
Advantages and disadvantages
The main advantages and disadvantages that any storm drain has are determined by the characteristics of production. The most popular are products created by vibration pressing, which provides excellent technical characteristics and features.
The main advantages of storm drains:
High level of resistance to moisture and sudden temperature changes. Resistance to dynamic loads and corrosion. Safety in operation and environmental friendliness. Long service life - up to 70 years. Good mechanical strength. The versatility of using the element to create various systems. Stability due to high weight, which is important especially when large volumes of wastewater accumulate. Easy to install and maintain. Relatively low cost.
Among the disadvantages of concrete products of this type, it is worth mentioning such as heavy weight and the need to bring special equipment to the site, and fairly high transportation costs.
Estimated cost
For price analysis, a plastic gutter of class A15 was chosen (its dimensions are 1000x135x95, and the flow area is 54.2 cm2), since this model is the optimal solution for arranging a drainage system in a small summer cottage.
Photo of the gutter for which the price analysis was carried out
How prices are distributed in different regions can be seen in the table presented.
| City | Cost ($) | City | Cost ($) |
| Bryansk | 7,7 | Kazan | 7,55 |
| Krasnoyarsk | 7,6 | Omsk | 7,9 |
| Moscow | 7,5 | St. Petersburg | 7,5 |
The table clearly shows that storm drainage trays cost approximately the same both in the capital and in Bryansk, Omsk or Kazan. The insignificant difference does not exceed the permissible error limits. This model of gutter is also sold in other cities, while the price trend continues.
Lattices
Speaking about drainage trays, we should talk about the receiving grates that often come with them; they can be made of plastic, cast iron or steel.
Plastic products are installed on the gutters of the drainage system in places where strong mechanical loads are not expected, for example, in a park or personal plot. The advantages of plastic gratings include:
- light weight, which allows you to install it yourself;
- affordability;
- if necessary, changing the size of the product is not difficult;
- long service life.
The limitation on use is the insufficient strength of the product, which narrows the scope of application.
Grilles made of plastic
Steel gratings are stronger than their plastic counterparts, but they are much more expensive. Among the advantages of these products are the following:
- light weight, making installation and transportation easier;
- the material used is stainless steel, which has a positive effect on durability;
- excellent appearance brings a significant aesthetic component, which makes this type of grille very popular.
Stainless steel storm grates
Cast iron gratings for storm drainage trays are the most durable of all types. They are installed where it is not possible to use other types due to their insufficient mechanical strength. Characteristic features of these products:
- resistance to corrosion and temperature changes;
- high mechanical strength;
- long service life.
The fairly high cost is the only drawback of cast iron structures.
Drainage cast iron grates
VII. MATERIAL AND TECHNICAL RESOURCES
A. Basic materials
| Name | Unit | Quantity |
| Tray blocks measuring 0.8×0.55×4 m | PC. | 20 |
| Output head (absorber) blocks | PC. | 4 |
| Blocks for entrance head | PC. | 4 |
| Entry head floor slabs | set | 4 |
| Storm gratings for the entrance head | set | 4 |
| Tow | kg | 12 |
| Cement mortar | m3 | 0,6 |
| Crushed stone | m3 | 4 |
B. Machinery, equipment and fixtures
| Name | Brand, GOST | Quantity |
| Truck crane | K-64 | 1 |
| Excavator | E-4010 | 1 |
| Shovels | GOST 3620-63 | 4 |
| Steel crowbars type LO | GOST 1405-65 | 3 |
| Roulette type RS-20 | GOST 7502-69 | 1 |
| Shurovki | TsNIIS Ministry of Transport | 2 |
| Caulks | GOST 11618-65 | 2 |
| Templates for checking slope slopes | — | 2 |
| Hemp cord | — | 40 m |
| Four-line grip | — | 1 |
| Cables 3 m long | — | 2 |
| Tamping | — | 1 |
| Steel sheet (striker) | — | 1 |
| Compressor | ZIF-55 | 1 |
AQUA-TOP DN90 H100 with stamped galvanized grille
Submit your application
Office telephone numbers,
Drawings AQUA-TOP DN90 H100 Download drawing in DWG, DXF, PDFAq_DN90_h100_art1091 (2) (dwg)Aq_DN90_h100_art1091 (2) (dxf)Aq_DN90_h100_art1091 (pdf) Documentation
We design drainage systems for free from 1,000 m2
Colors :
black
grey
Load classes
Class A15 (15kN/1.5t) Pedestrian areas of dachas, cottages, courtyards, bicycle paths, etc.
A15
Characteristics:
- hydraulic section DN 90;
- weight – 1.5...1.8 kg assembled with grille;
- no special grille clamps required;
- vertical pipe for connection with a tube with a diameter of 110 mm;
ADDITIONAL CHARACTERISTICS
Dimensions: 1000x135x100
Main advantages:
Drainage channels
“Aqua-Top” series are supplied assembled with plastic and galvanized gratings. This is the most economical series of plastic channels. They do not require special grille clamps. They are recommended for installation in pedestrian areas, park areas, private households, and at the entrances to private garages for passenger vehicles. There are two versions of this channel, with plastic and stamped galvanized grating. Load class A15.
Types of trays used
There are several types of concrete trays for water drainage:
Concrete
Such gutters are considered the most durable in this category, they can withstand external loads in the range of 60-90 tons. Made by adding cement. They are used to drain stormwater after precipitation into sewers.
Polymer concrete
They combine the qualities of concrete and plastic water drains. They are made from quartz sand and granite chips with the addition of special polyester and epoxy resins. In this case, cement is replaced with polymer compounds, as a result of which the structure is resistant to various chemical elements.
The plastic included in the material makes the structure many times lighter compared to concrete. For private construction, gutters with and without gratings are used; their weight is an order of magnitude less than reinforced concrete trays.
Polymer sand
Gutters of this type are the most modern technological solution among drainage trays; they have special plasticity and a very long service life. The gutters are made from polymer chips with the addition of special fine sand. They are not inferior in strength to concrete products, but are lightweight, making them easy to install.
Types of sewer drains
There are three main types of storm drainage trays on the world market:
- Cast iron products for water drainage;
- Concrete trays for storm drainage;
- Plastic structures.
Let's take a closer look at each type.
Cast iron
This type of sewer pans is made from two main types of cast iron:
- ISO 185 - with the inclusion of lamellar graphite grain;
- EN1563 - metal with the addition of spherical graphite grains.
Such a powerful and durable product, thanks to its enhanced tensile and compressive resistance, is used only in industrial and complex facilities such as airports, long highways and runways.
At the same time, cast iron rain gutters are quite large. Thus, the maximum length of one gutter can be 50 cm, and its width - 20 cm.
Concrete trays
Popular products for use within the city. Many of us often observe the operation of the city drainage system during a summer rainstorm. The production of concrete sewer storm drains occurs using special polymer additives or reinforcing fiberglass in the concrete mixture. Thus, the finished product is more durable than standard reinforced concrete products.
Concrete storm drainage trays are produced using the vibration casting method, that is, a mold with reinforced concrete reinforced but still soft mixture is immersed on a vibrating table for greater shrinkage of the composition. This allows you to obtain greater density, and hence the strength of the finished product.
The parameters of concrete trays vary within the following limits:
- The length of the finished extended gutter is 500-4000 mm;
- The width and height of the finished storm drain can be from 140x150 mm to 430x880 mm.
Polymer
Trays made from polymers with mineral additives have very good performance characteristics.
Polymer trays are highly resistant to aggressive environments, especially chemical ones, and can withstand high loads, up to 60 tons per square meter. In addition, the material is almost impossible to damage mechanically: scratches or chips do not occur on polymer trays. Polymer products can be used at temperatures from -50 to 120 degrees Celsius. Good performance provides polymer trays with a wide range of applications: they can be used both for drainage of water near buildings and for drainage from railways. One element of the tray structure weighs about 9-14 kg.
The dimensions of a typical polymer tray vary within the following limits:
- length – 1 m;
- width – 0.14 – 0.5 m;
- height – 0.06 – 0.79 m;
- diameter – at least 0.1 m.
