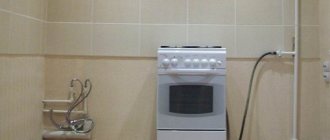
Working with gas equipment is a complex procedure that requires a careful and responsible approach. The installation of a gas stove should ideally be carried out by specialists from a service company.
Where to go to connect a gas stove in a house or apartment
Kitchen equipment is replaced during apartment renovation or if there are faults in the units. You can connect a gas stove at home yourself, but it is advisable to do this with the help of specialized specialists, although not everyone knows where to go to receive the appropriate service.
Where to look for a gas technician
When selling gas kitchen equipment, many stores additionally offer the service of professionally connecting the stove to the gas supply. This is the option that many buyers use. Otherwise, you can contact other specialists.
- Find out who is servicing gas appliances, if we are talking about an apartment building, and order work from specialists from the relevant company.
- Contact a specialized organization that has permission to work with gas. Employees of such companies are required to provide documents about their work. The latter usually confirm that all actions with gas equipment were carried out in accordance with government standards and regulations.
It's better to use the first option. In any case, an employee of the service company must check that the stove in your apartment is connected correctly. Additionally, he will make notes in the registration certificate.
Installation and inspection of a gas stove by a gas service employee
It is worth paying special attention to the legality of the work. Any actions with gas carried out without concluding an agreement are considered illegal. This applies to private craftsmen or employees of official organizations who decide to earn extra money on the side. None of them will be able to provide documents for work. Therefore, replacing the slab and any changes will be considered illegal.
How is equipment changed?
To make it clear in general terms, we present the technical stages of replacing one device with another.
The procedure is not complicated:
- The valve shuts off the gas flow and turns off the power supply to the old device.
- The plate is disconnected.
- The hose is replaced (if required) and then checked for leaks and the quality of the threaded connection.
- The new slab is installed and leveled.
- The hose is connected.
- The equipment is being checked and started up for the first time.
Next, the specialist issues you a certificate of access to the device for operation, and you sign the work acceptance certificate.
Connection cost
The state is trying to control prices for gas connection services so that they are affordable to the majority of the population. Otherwise, this will lead to an increase in the number of illegally connected equipment. And this is a direct threat to security. And not only the owners who took the risk, but also their neighbors.
Installation of the stove by a qualified technician
Regulated tariffs for work are not established. We can only say that the cost of connecting a gas stove ranges from 1 to 3 thousand rubles. A number of factors influence the final price. Among them:
- the region where the customer lives;
- price list of the company the homeowner contacts;
- the difficulty of connecting in a particular house or apartment.
Work is paid upon completion. You should definitely ask the specialist for a receipt, which is also a document confirming the work officially carried out. If the installation was carried out by third-party specialists, calling a gas service employee to check the correct connection will also cost money.
Why is electric ignition needed?
Housewives note the convenience of this small detail, since a spark for arson is always at hand.
Auto-ignition, first of all, was developed in order to significantly simplify the ignition of fire and, at the same time, increase the safety of gas stoves. In addition, such a system significantly speeds up the ignition process itself, which, together with other advantages of electric ignition, is especially important for people who spend a lot of time at the stove.
In addition to convenience, there is no risk of getting burned, as is the case with using matches.
Features of connecting a gas stove
Depending on what type of housing requires installation, some nuances are highlighted in the first stages of the procedure.
In the apartment
After purchasing housing in an apartment building, the owner will need to enter into an agreement with the service company for the supply of gas. If all the papers are in order, the owner collects a package of documents and receives permission to install the stove. The list of papers includes the following.
- A purchase and sale agreement or other document fixing the right to own property.
- Technical passport of the apartment.
- If you have a previous contract for the maintenance of gas equipment, in this case a kitchen stove.
- If a meter is installed, a product passport will be required.
- Passport for the purchased new stove.
Gas stove with meter
The collected papers are transferred to the gas service to obtain permission to operate the equipment. Additionally, employees provide instructions and provide documents for filling out under the new service agreement.
Scheme for connecting equipment and installing meters
In a private house
Depending on the homeowner’s decision, one of three options can be implemented:
- connection to a common pipeline supplying natural gas;
- using a stove powered by liquefied gas cylinders;
- lack of gas in the house.
The first option involves concluding a service agreement with a service company on the same principle as with apartment owners. In the second case, the equipment connection is carried out on your own or by ordering the services of specialized specialists.
Stove powered by a gas cylinder
Attention! The owner must take into account that when using gas under pressure, a lot will depend on the quality of the cylinders and the reliability of the connection. Many people prefer to carry out such work themselves, which often affects safety and reliability.
If possible, it is preferable to connect the gas supply of a private house to a common pipeline. Company employees will monitor compliance with standards. Thanks to this, the residents of the house will feel calmer than when ordering the services of third-party specialists, who cannot always provide sufficient guarantees when connecting.
Requirements for premises and rules for installing gas equipment in a residential building
1. In the room where gas-using equipment is installed, it is allowed to use window openings as easily removable enclosing structures, the glazing of which must be at least 0.8 m2 - with a glass thickness of 3 mm, 1 m2 - with a glass thickness of 4 mm, 1.5 m2 - with a glass thickness of 5 mm .
When installing equipment with a power of more than 60 kW or placing equipment in the basement or ground floor of a building, regardless of its power, window openings must have a glazing area of 0.03 m2 per 1 m3 of room volume and structures enclosing them from adjacent rooms.
Materials
Most craftsmen provide materials for the work. However, if owners want to independently select the necessary consumables for connection, they can contact specialized stores. The list of necessary parts is discussed with the master in advance.
Typically, the list of consumables includes the following.
- Ball valve. Preferably brass, made for use in medium and low pressure liquefied and natural gas systems. Previously, spade valves were used when connecting slabs. Currently they do not meet established standards. After a long period of use, the part must be replaced.
Ball valve "Butterfly" - Hose made of flexible material.
The most common option is a rubber reinforced hose. - Pad . It is mainly included with the stove upon purchase and protects the equipment from small-caliber debris.
- Sealing material. Experts use either FUM sealing tape or Loktail 55 thread. The flax thread used previously is no longer as popular due to its lower reliability and durability.
FUM tape - Gas and adjustable wrenches.
- Screwdrivers.
Additionally, a soap solution is prepared to check the tightness. Medium saturation is enough. The liquid is applied with a brush to the mounting points to check the tightness of the system.
If the source of gas for the stove is a liquefied gas cylinder, a pressure stabilizing device must be installed. This is necessary to extend the life of the equipment. Plus this is one of the security measures.
Previously, it was common practice to connect a gas stove using a metal pipe. Now it is practically not used. Such a procedure requires more money, time and skills on the part of the master. The disadvantages of this method also play a role:
- Impossible. move the slab to another location due to the rigid fastening system.
- The pipes will more likely need to be made to order, which will be much more expensive.
What to choose: mechanical or automatic electric ignition?
The difference between the two types of electric ignition lies only in the need to press an additional button, which is usually placed on a common control panel.
If we approach this issue from the point of view of ease of use, then automatic electric ignition, as a more progressive mechanism, is much more practical. To turn it on, no additional buttons are needed; just press the handle a little when applying gas.
Despite the fact that electric ignition is powered by electricity, energy costs will be minimal.
The only thing that can be attributed to the disadvantages of automatic ignition is that when using it, the stove begins to click unpleasantly due to repeated electrical impulses, but this can hardly be called a real problem.
When automatic electric ignition occurs, there is a corresponding clicking sound. They irritate some people, but it's everyone's business.
Hoses for gas stoves
Special attention is paid to the choice of hose. There are 3 types of products on the market , among which the owner or craftsman selects the most suitable one. According to regulations, the length of the flexible tube should not exceed 4 meters. The diameters of the fittings are standard ½″ and ¼″ inches, or the less common ⅜″ inches. The latter are connected through a conductor. Both ends of the hose are equipped with union nuts. Less often - a nut on one side and a thread on the other.
Table 1. Types of hoses for gas stoves and their properties.
| Hose type | Material | Dielectric properties | Life time | Advantages | Flaws |
| Rubber | Rubber, fabric seal for increased durability | Rubber is a dielectric; installing a gasket to protect against stray currents is not required | Up to 10 years | Low cost, due to which they are common in household use | Vulnerable to sudden temperature changes. They crack over time. Easily damaged by sharp objects |
| Rubber with metal braid | Vulcanized rubber or polymers, metal braid | Requires a gasket to eliminate stray current | Up to 10 years | More durable than rubber hoses, protected from mechanical stress | It is impossible to control the tightness of the rubber tube |
| Bellows | Stainless steel. Sometimes supplemented with a PVC polymer shell. The product has the shape of a corrugated hose | It is necessary to install a gasket to avoid stray currents | 25 years or more | Greatest resistance to mechanical stress. Resistant to pressure changes | High price compared to other items |
Bellows hose
Preparing a place for a new device
When replacing a stove, everything is simple: the new device is installed in the same place. But if you need to change the location of the device, then you need to take into account some nuances:
- The distance from the gas pipeline to the stove should not exceed four meters. It is better if it is within two meters.
- Almost all modern gas stoves have additional functions such as lighting and electric ignition. Therefore, you will need to install a grounded outlet near the device.
- It is most convenient to connect to the gas pipeline using a flexible hose. The gas hose must have an internal diameter of at least 10 mm. This is necessary for the unhindered flow of gas. Hoses can be made from a variety of materials, but the most common choice is a rubber hose with a metal braid. This will allow you to move the stove a little if necessary.
It is quite difficult to confuse a gas hose with a water hose: the water hose has red and blue stripes on the braid, while the gas hose has yellow marks. When replacing the stove, it is also advisable to replace the flexible hose with a new one.
Free replacement
Utility services in some regions provide the opportunity for certain categories of citizens to replace outdated and faulty gas equipment without paying a penny for it. The rules of procedure will need to be clarified in advance with the city gas service.
Who is eligible for the benefit?
Only certain categories of citizens can use the free stove replacement service. The benefit is obtained in the following cases:
- apartment owners receive subsidies from housing and communal services, are WWII veterans, have the titles of heroes of the USSR, socialist labor, the Russian Federation, or have received the Order of Glory;
- existing gas equipment is the property of the state, regardless of whether the apartment is municipal or owned by the tenant;
- the apartment is occupied by persons who have received it by right of queue for housing;
- in a family that needs to replace the stove, or a person living alone, the income is less than 1.15 of the subsistence level;
- single pensioners or families of pensioners who have reached retirement age and do not receive additional social assistance to pay for housing and communal services and living space.
Installing a stove for pensioners
In practice, there are very few such people, and replacement under the benefit is possible only if you have a package of documents confirming the right to receive such a service.
Free connection procedure
To replace a gas stove free of charge, you will need to provide a technical inspection certificate for the equipment. One copy remains with the gas service. The second one is received by the applicant, who transfers the document to the housing cooperative or economic development department. The examination is carried out by employees of the organization that controls the operation of gas appliances.
The paper indicates the service life, existing defects and malfunctions. Based on the conclusion received and the application for replacement, beneficiaries can receive a new gas stove for free. Additionally, the host provides identification.
Pensioners will also need:
- pensioner's ID;
- if necessary, a certificate in form 9 about registration at the place of residence.
Citizens with an income level below 1.15 of the subsistence minimum are prepared to submit:
- certificates of income of your personal and other family members for the last 3 months;
- if necessary, a certificate in form 9 about permanent registration at the place of residence.
Hood above the burners
Using forced ventilation above the food preparation area has many advantages:
- The odors generated during cooking do not spread throughout the apartment.
- Most of the soot and grease goes into the ventilation, which allows you to make renovations in the kitchen much less often.
- Most modern hoods are equipped with additional functions, the use of which increases the comfort of cooking.
- The hood also provides additional protection in the event of a possible gas leak.
The process of installing a hood in the kitchen is quite simple, but there are several mandatory rules for its installation:
- The width of the hood must exceed the working surface of the stove or be at least equal to it.
- The minimum distance from the burners to the hood is 65 cm. It is better to raise it higher, but so as not to reach for the control panel.
- The hood pipe should have minimal bending.
- The air duct itself should consist of small straight elements.
Safety regulations and rules
The requirements established for the connection process must be met regardless of who carries out the work. The specialist or the owner himself is obliged to take them into account. In this case, the risks will be minimal.
The list of standards includes the following items.
- The gas supply hose is always located in a visible place. There is unhindered access to it; nothing blocks the flexible tube. The part that supplies natural gas to the stove can be easily replaced by a specialist during a routine inspection.
- The flexible hose is manufactured in accordance with accepted standards; the cross-sectional size should not differ from the established one.
- Instead of paint, only self-adhesive paper is used to change the appearance of a rubber or metal gas line. Otherwise, the material, especially unbraided rubber, will quickly crack. This will break the tightness of the entire system.
- The flexible hose connects directly to the stove and the general gas supply system. The only exception is when the connection on the equipment or gas tap is made with an individual thread.
The hose is screwed to the tap without adapters - Installation of the unit is carried out only with the use of tools and materials designed specifically for working with natural or liquefied gas.
- Before carrying out work, the specialist stops the gas supply when it comes from the common riser, and be sure to notify all residents of the apartment about the installation of gas equipment.
- If the gas source is not shut off with a special tap and the work is not carried out immediately, the end of the supply pipe is plugged with a wine stopper or a wet thick cloth to stop the gas supply. When it is necessary to shut off the gas for several days, gas service employees install a special plug.
Stage #2 - connecting the electrical line
The location of the electrical connection terminal is the rear wall of the gas (hybrid) stove housing. Typically, the terminals are hidden inside an insulated housing that has a circuit cover. The box cover can be removed easily - just press the latch with a screwdriver and then push it up. The terminal configuration opens, where the supply cable conductors are connected.
An example of the electrical connection configuration that is widespread in the designs of household hybrid stoves. Terminals L1, L2 are energized. Terminals N and PE – neutral and for grounding. The connection of the supply cable conductors should be carried out according to the markings indicated on the terminal backing or on the documentation diagram. In this case, it is necessary to comply with the parameters of the electrical network used - using the correct connection configuration.
Typically, the following color combination of conductors is used on the network cables of combined home ranges:
- Voltage lines (L1, L2, L3) – black, black, brown.
- The neutral line is blue.
- Protective earth (PE) – green-yellow.
After making the connections, the cable body inside the terminal box must be secured, thus preventing possible stretching and breakage. Then close the box lid tightly. We should also not forget about the need for regular maintenance and performance testing of gas-using equipment. Why do you need to enter into an agreement with the gas company?
[my_custom_ad_shortcode5]
We connect the gas stove ourselves
Carrying out work on your own is permissible in extreme cases, provided that the owner of the house has the appropriate knowledge and strictly adheres to safety rules on his part. The step-by-step process can be described as follows.
Step 1. Shut off the gas supply to the stove using the existing ball or petal valve.
Closed gas valve
Step 2. Check the fuel supply to the burners. If, when you try to light the gas, the fire does not appear, the stove can be turned off.
Hardware check of gas supply to burners
Step 3. Unscrew the hose from the stove and the gas supply tap.
Disconnecting the hose from lowering
Step 4. If necessary, replace the gas valve with a new one.
- Open windows or vents, or use special ventilation equipment.
- Close the new tap by turning the lever and wind a sealing thread or tape onto the external thread.
- Using an adjustable wrench, unscrew the old part from the gas supply system. Clean the threads on the pipe and screw a new closed valve to it. If the lowering pipe is equipped with an external thread, the sealant is wound onto it, and the valve is subsequently connected using a pipe with an internal thread.
- Check the connections for leaks using special equipment or the “old-fashioned” method. A strong soap solution is applied to the joint. If bubbles appear, the work must be redone and checked again for leaks. You will have to work especially carefully with FUM tape, since it often breaks under the influence of the thread.
Installing the hose to the riser and stove
Step 5. Place the kitchen stove in the unit or in a separate place where it will be located in the future. Leave the distance to the wall in accordance with the requirements in the technical data sheet of the equipment. If necessary, level the legs using a building level.
Connecting a stove built into a kitchen unit
Step 6. Check the presence of gaskets in the flexible hose kit. If there is an external thread, seal it with thread or FUM tape.
Winding-FUM-tape
Step 7. If the threads on the plate do not meet the standards, attach the adapter, sealing the joints.
Hose gasket
When using a bellows or rubber hose with a metal braid, use couplings made of dielectric material to protect against stray currents. The latter appear if the stove uses electric ignition, or the hob or oven runs on electricity.
Step 8. Screw on the hose using a wrench. It is important to carry out the work carefully. Otherwise, gas will enter the room from the supply system. This occurs due to the fastening being too tight, damaging the sealant, or when the connection is loose.
Gas hose connection diagram
Under no circumstances should the hose be twisted or bent too much. It is ideal when it is not tense and hangs freely.
Step 9. Conduct a final tightness check of the entire connection.
Checking the tightness with a soap solution
Any homeowner should know the basic principles of proper connection. Even if you do not install gas equipment yourself, this will allow you to monitor the work of invited specialists. Safety depends not only on the professional. You can connect a kitchen stove with your own hands only if you have sufficient experience and skills.
Premises requirements
Gone are the days when tiny Khrushchev-era kitchens quietly placed four-burner gas stoves by the window, next to hanging curtains. Now the situation has changed . A new regulatory document has been approved and put into effect - SP 402.1325800.2018 “Residential buildings. Rules for the design of gas consumption systems."
It includes a number of requirements for premises in which gas stoves are allowed to be installed:
- purpose of the premises - kitchens, kitchen-dining rooms, corridors;
- ceiling height - at least 2.2 m;
- the presence of natural ventilation, an exhaust ventilation duct and a window with an opening sash or window;
- the door from the room opens outward;
- there is a gap of at least 0.02 m² between the floor and the door leaf (for air flow);
- minimum room volume: for two-burner stoves - at least 8 m³, for three-burner stoves - at least 12 m³, for four-burner stoves - at least 15 m³;
- window glazing area - at the rate of at least 0.03 m² per 1 m³ of room volume (glass acts as an easily removable enclosing structure in the event of an explosion).
These requirements apply to both free-standing and built-in devices.