The ventilation system in an apartment is of the same fundamental importance as heating or water supply. At the same time, a ceiling hood in the bathroom is no less important and is an integral part for optimal air exchange in the house. To correctly select and install an exhaust fan, you need to understand the classification, selection criteria and know the basics of its installation.
Why install ventilation grilles
The main reason for installing diffusers in a suspended ceiling is purely targeted. Ventilation is necessary in an apartment, and this fact in the modern world does not even need to be proven to anyone. Musty air, destructive mold, serious problems with the respiratory tract are just a small list of problems that arise when gas exchange between an apartment and the outside world is disrupted. And if, after installing the stretch ceiling, the opening of the ventilation duct remains above the level of the vault, the need for diffuse openings arises.
According to sectional shape
Round ducts
most often made of galvanized steel. Ideal for installing long routes because they have less air resistance per unit length than rectangular ones. In addition, they are characterized by a low price, since they are easier to produce.
Rectangular ducts
easier to install, they are easier to hide behind a suspended ceiling, including already assembled ones. When the route length is more than 20 m, it is recommended to use a galvanized steel duct. They are cheaper than plastic ones, but more difficult to install. They are manufactured separately for each object, so with their help you can build a network of any configuration.
Central ventilation is also installed using rectangular air ducts, only of a larger size. Outlets are connected to them, through which air enters and is removed from the room.
In the photo: Varieties of air ducts according to cross-sectional shape
Why do you need a hood?
The need for a hood in the kitchen is obvious:
- it eliminates odors (no matter whether you are cooking or smoking, the hood will do an excellent job of removing all types of odors);
- ventilates the room (modern hoods are equipped with a ventilation function);
- balances temperature changes (during cooking, the air temperature above the stove rises and then drops sharply, this greatly affects all decorative elements and furniture in the house).
Is it possible to stretch the ceiling alone?
A conventional single-level structure can be installed alone. The basic principles of installation remain the same, although it will take longer. But installing a two-level ceiling or more complex shapes will require help.
If the work is done alone, when marking, the laser level is installed on a platform stand or a special holder (a rod that is fixed directly between the floor and the ceiling). During tapping, a screw is screwed in at the marking point and a cord is pulled from it. You can also attach the rope to tape.
The second likely problem is the installation of a large, heavy chandelier by one person. It is difficult to hold and screw such a lamp at the same time. If possible, it is better to choose something simpler and lighter (a compact chandelier or built-in lamps).
Ventilation installation
You can install ventilation grilles in the ceiling yourself or call a specialist if necessary. To make ventilation, you need to follow the simplest scheme of actions (nobody cancels accuracy):
- Before fixing the film sheet, it is necessary to carry out preparatory actions, install air ducts if necessary, and secure them securely. Lay communications, ducts, ensure the sealing of seams and joints.
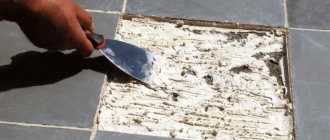
- After installing the canvas, you need to make holes for the gratings. To do this, a tread ring is glued to the pre-marked places where they are attached to prevent the ceiling from breaking.
- Only after the ring has set to the surface is the canvas inside it cut out.
- The ventilation grille is installed in the resulting opening and secured.
Stretch ceiling ventilation diagram
Additionally, before installing the stretch ceiling, you can:
- insulate the main ceiling (will reduce the amount of condensation);
- seal seams and cracks at the junctions of walls and ceilings;
- make sure the strength of the ceiling (so that later the plaster and finishing do not crumble onto the canvas), if the need arises, strengthen it;
- treat surfaces with an antiseptic;
- If there are ventilation outlets in the inter-ceiling space, be sure to cover them with a grille to protect against rodents.
Tips and tricks
When installing ventilation, experts recommend following these recommendations:
- After installing the hood in a suspended ceiling, make sure that its components do not touch each other. Otherwise, the vibration and vibration caused by the fan will affect the PVC cover. As a result, the fabric may become deformed, which will negatively affect its functionality.
- It is not recommended to seal gaps in the ventilation shaft with foam. If the ventilation grille is installed on the opposite side from the PVC, air exchange will occur even when the ventilation is not working.
- The elongated ceiling and gas hood should be harmoniously combined. Therefore, for safety reasons, ventilation elements must be hidden in special decorative channels.
- When assembling the exhaust unit, make sure that all parts are fixed as firmly as possible. Otherwise, vibrations will occur during ventilation. This will affect the aesthetics of the coating, as the fabric will constantly vibrate.
Before installing PVC, it is recommended to strengthen the waterproofing of the concrete base. This is due to the fact that the presence of a ventilation grill reduces the tightness of the structure. Such a canvas will not protect against flooding from above.
Types of diffusers
In a store or company that sells ventilation equipment, you will be offered a large number of diffusers of different appearance and materials to choose from. Deciding on materials is more or less simple - choose what you like best or what is best suited for the operating conditions. If the ventilation ducts are made of metal, it is logical (although not necessary) to use metal grilles. They are galvanized, made of stainless steel, or made of ordinary steel, but painted with powder paint.
If the ventilation ducts are made of plastic pipes, they are better connected to plastic diffusers. Everything seems to be clear here. The rest of the parameters are a little more complicated, let's figure it out.
All these are diffusers
Place of use
According to their purpose, diffusers are divided into:
Which duct is better?
Air channels rarely run exactly as indicated in the documentation or sketches. Sometimes you need to go around the beam, often the distances are indicated with an error. Such errors are not of great importance if a corrugated pipe is used. It is cheaper than air ducts with smooth walls and is easier to install.
But there are also disadvantages. Flexible channels sag between suspension points. At the attachment point, the clamp compresses the pipe, reducing the cross-section of the channel. All this and the corrugated surface of the corrugated walls provide significant resistance to air flow. A situation may arise when the airflow to the radiator of the indoor unit is insufficient.
In this case, the automation will work and turn off the compressor. Thus, it is better to use ducts made of pipes with smooth walls. Not only do they have less resistance to air flow, but they are also less likely to become dirty. And they are much easier to clean.
In addition, the thermal insulation of ducts is an important factor that influences not only the efficiency of the air conditioning system, but also reduces noise in the rooms. A galvanized steel duct is much easier to insulate than a flexible corrugated pipe.
The air duct must be thermally insulated. Then condensation will not form on the pipes. The efficiency of the air conditioning system will increase significantly
Separately, we note that polymer is not suitable for supply ventilation. Pipes made of polymer materials have a coefficient of thermal expansion 10 times greater than that of steel. For this reason, the polymer is difficult to coordinate with steel load-bearing structures. And the smell of plastic cannot be eliminated.
Ventilation principle
To prevent negative phenomena, it is necessary to arrange supply and exhaust ventilation.
The occurrence of negative phenomena in the opening between the film and the slab occurs due to stagnation in a confined space. You can get rid of them by organizing constant and effective air circulation, when it penetrates inside through one or more holes and is discharged through another. In this case, fumes and contaminants will be removed immediately, even before they have time to settle on surfaces.
The space under the ceiling has the same temperature and pressure as the atmosphere of the room. To ensure draft above the canvas, it is necessary to create an air exchange system for this, which can be autonomous or an integral part of the air exchange of the apartment. Installation is carried out using ventilation ducts, grilles, ducts and exhaust devices.
Main design stages
There are no standard diagrams for residential and domestic premises due to the architectural and functional diversity of buildings.
To make a decision on creating an optimal air exchange system, it is necessary to adhere to the general principles of organizing ventilation, maintaining air balance, rules for developing technical specifications and recommendations for its practical implementation (+)
Development of technical specifications
Drawing up technical specifications is the first stage of ventilation design. Here it is necessary to specify the requirements for the volume and type of air exchange for all rooms of the house.
An example of a technical specification (in terms of air exchange) for the development of a home ventilation system. You can create such a document yourself
For each individual room, depending on its purpose, air exchange parameters are determined.
So, for apartments and private houses, ventilation should be used as follows:
- Living rooms, living rooms, gyms. Constant influx. The volume depends on the average daily number of people in the room. There may be requirements for inlet temperature and humidity.
- Bathroom, restroom, laundry. Constant natural exhaust. Operation of mechanical devices during use of the premises.
- Kitchen. Constant natural exhaust. Turning on forced draft during intensive use of gas, or in case of significant emissions of steam into the air during open cooking methods.
- Corridor and hallway. Free movement of air.
- Pantry. Natural exhaust ventilation.
- Boiler or furnace room. When calculating the air balance, it is necessary to take into account the presence of exhaust ventilation due to the removal of combustion products through the chimney.
- Work premises (workshop, garage). Autonomous ventilation depending on the purpose of the rooms.
The terms of reference can be developed independently or by third-party specialists. In the latter case, when concluding a contract, designers will be forced to adhere to Russian regulatory documents regulating the air speed in the air duct and the frequency of air exchange.
Choosing the best ventilation scheme
Based on the technical specifications, a ventilation system diagram is created. The layout plan for its elements must be agreed upon before the interior decoration of the premises. Otherwise, in the case of installation after renovation, there will be an additional task of fitting them into the interface of the house.
Air circulation in the house. A separate exhaust from the pool is necessary to reduce the volume of condensate in the recuperator. Separate cycle in the boiler room - fire safety requirements. Separate cycle in the garage - technical simplicity of the solution
As a rule, any ventilation plan can be implemented in several ways.
The best solution must fully satisfy the requirements of the technical specifications and take into account the following wishes:
- contain a minimum number of components and elements that are susceptible to breakdowns;
- regular maintenance should be simple and, if possible, carried out by residents;
- the use of ventilation in regulating the microclimate should be understandable for people who do not have special knowledge of the technical nuances of the system;
- availability of backup solutions in case of failure of one of the nodes;
- the system should be seamlessly integrated into the interior of the apartment or house.
When making financial calculations, it is necessary to take into account both a one-time investment of funds for the purchase of system elements and their installation, as well as regular costs for periodic maintenance and electricity spent on heating and humidification.
Modern solutions for household ventilation systems contain a compact electronic control unit, with which you can easily adjust the microclimate of any room in the house
Ceiling diffuser: installation
There are two ways to connect diffusers to ventilation ducts: directly or through an adapter (static pressure chamber). The second option is more correct, but it requires a larger gap between the base and decorative ceilings.
If the shape and dimensions of the ceiling diffusers and ventilation pipes match
To connect the ceiling diffuser directly to the ventilation pipes (branches), a tee/splitter is placed in the ventilation pipe at the installation site. The device is placed in the free third exit.
Cutting a hole directly in the pipe for its installation is the wrong decision. The housing protrudes beyond the pipe, impeding the movement of air, the performance of the system drops, and over time a dust plug forms, which can completely block the clearance. In general, this should be avoided.
The outlets from the main pipe must be selected so that they can be conveniently connected to the diffusers. It is not difficult to connect a round diffuser to a round outlet from the air duct, and a rectangular diffuser to a rectangular one
It is also important that their sizes match. This simple truth must be remembered when creating a system, choosing tees or making bends with the appropriate parameters
If the shape and size match, installing a ceiling diffuser is not a problem
Diffusers of matching sizes are installed in ventilation ducts simply by inserting them. Models that are small in size and weight can be fixed to the box using sealant (neutral silicone). This is how models with a round base are usually attached.
For suspended ceilings of various types (plasterboard, plastic, Armstrong), a special fixation system has been developed - Clip in. It consists of spacers like those you see on recessed ceiling lights.
More massive square/rectangular models are attached to the walls of the box using self-tapping screws or on hangers from the ceiling. The first option is simpler, but it is better not to use it, since dust collects on the protruding self-tapping screw. Unless the design provides special protrusions for fasteners. Otherwise, over time, a solid plug will form in the place where the self-tapping screw sticks out, preventing the passage of air.
An example of using an adapter - a round ceiling diffuser is connected to a rectangular ventilation duct
If the outlet is made of corrugated material or there is a desire to do everything “right,” heavy cases are suspended from the ceiling on studs or hangers.
Using adapters
Adapters or static pressure chambers help to avoid such unpleasant phenomena as drafts. In this tank there is a uniform redistribution of air, which flows in an even flow over the entire surface of the grille. But these devices have a significant drawback - they “steal” the ceiling height. Models with side connections are smaller in size, but still take up enough space.
Types of adapters for ventilation ceiling diffusers
Most often, the static pressure chamber is a parallelepiped, to the bottom of which a diffuser is attached. On the top or side there is an outlet for connecting a ventilation duct. It can be of any required shape: circle, square, rectangle, oval.
Adapters available:
- With built-in rotary valve. If the diffuser model does not provide for adjustment, this can be done using an adapter.
- With removable filter. They also allow you to clean the incoming air.
- With air flow divider. This is a sheet of metal with a small cell. Placed on powerful supply systems, it allows you to evenly distribute the air flow over the entire surface of the grille. .
Static pressure chambers for ventilation diffusers are most often made from galvanized steel. Sheet thickness - 0.5-0.8 mm. There are companies that will make a device according to your parameters. There are also standard adapters on sale for standard solutions. They can be made of steel (galvanized, stainless) or plastic.
Plastic adapters fit into corrugated or plastic air ducts
If necessary, the static pressure chamber is lined with insulation. This is necessary so that when the warm surface of the adapter interacts with cold air, condensation does not form on it.
One way to install an adapter for a ventilation diffuser
If the diffuser is connected via an adapter, the main task is to secure this device. If it is a suspended ceiling, you can attach the camera to profiles. In the case of a suspended ceiling, you will have to hang it from the main ceiling. The methods are known: studs or perforated hangers.
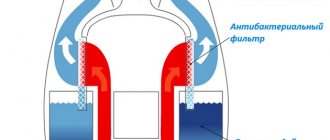
Best Fan Models for Bathrooms
| Brand | Manufacturer | Power | Performance | Price |
| CATA E100GTH D100 | Spain | 8 W | 95 m3/h | 6630 rub. |
| Blauberg 100 Aero | Germany | 14 W | 102 m3/h | 1900 rub. |
| VENTS 100 D | Ukraine | 14 W | 95 m3/h | 670 rub. |
| Equation D100 29dB(A) | Spain | 15 W | 95 m3/h | 1320 rub. |
| ERA 4S | Russia | 14 W | 80 m3/h | 424 rub. |
What is it for?
The first thing you need to decide is in which room this element will be installed. In the bathroom, a hood is necessary to remove excess humidity from the air. There is often a cord pulled there to dry clothes, which adds additional moisture. This can lead to mold on the surface, so an exhaust hood is a must. High-quality ventilation will create comfort in the bathroom. You will be able to feel comfortable.
A hood is installed in the kitchen for the same reason as in the bathroom. There is also a lot of moisture in this room, condensation accumulates. While cooking, steam rises from the pans. If the windows are closed at this time (for example, during the cold season), moisture remains inside the room. In addition, when cooking food, sometimes not very pleasant odors appear, which will “escape” into the hood. Therefore, you can’t do without it in the kitchen.
Why is a ductless mobile air conditioner ineffective?
In fact, there have been and still are attempts by manufacturers to manufacture and market an air conditioner without dissipating heat outside the room. All the models turned out to be not very successful only because the manufacturers tried to deceive the laws of physics in their operating principle.
For example, at one time there was an air conditioner model on sale that required ice to be poured into it! The air was forced through a container with ice, cooled and entered the room. Naturally, the ice melted and often it was necessary to fill in new ice, draining the melt water. Or now you can find a model in which heat is somehow recovered inside the “air conditioner” structure. Of course, you can’t utilize much heat inside a small box on wheels, so such an air conditioner produces very little cold: in any case, it won’t be enough even for a very tiny room!
Therefore, today we can say unequivocally: if we are talking about even a slight decrease in the temperature in the room, we cannot do without an air duct that removes heat!
Centralized ventilation system
Before installation, it is necessary to carefully calculate the performance and power of the system, since changing its parameters after commissioning will be extremely difficult. In some situations, a centralized ventilation system is the only acceptable option (for example, in kindergartens, medical institutions, office premises).
At the same time, the throughput capacity of ventilation shafts is not infinite and requires calculation of the connected equipment. In addition, it is necessary to periodically maintain it, clear the inlet and outlet openings from debris or foreign objects in order to avoid the occurrence of a backdraft effect. Otherwise, you may end up with a ventilation system that is not capable of performing its intended tasks.
For natural ventilation you only need to make a hole. If you are going to use artificial, then you need to install diffusers, adjust the holes for them, and then carefully secure the grilles and air ducts.
First, it is necessary to install the air ducts, which should be firmly fixed to the supporting structures. Only after this can you begin installing the film system, determine the location of the holes and install the necessary thermoplastic elements.
It is important to achieve complete sealing of existing joints. This is especially important when creating artificial ventilation. After all, it is the fan that provides air draft from the room, creating pressure inside the system
If depressurization occurs, an area with negative pressure will form in the area between the base and the main sheet. And the film will simply stick to the base fabric. Which will greatly spoil the aesthetic appeal of the canvas
After all, it is the fan that draws air from the room, creating pressure inside the system. If depressurization occurs, an area with negative pressure will form in the area between the base and the main sheet. And the film will simply stick to the base fabric. Which will greatly spoil the aesthetic appeal of the canvas.
It is recommended to patch cracks, which may not only be on the ceiling and walls, but also in the corners connecting them. This will prevent changes in pressure within the area.
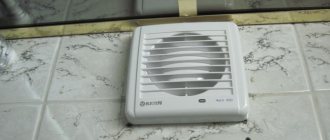
Requirements for exhaust fans
The requirements for the ventilation system are based on safety and efficient operation, so apartment owners are not recommended to neglect them. Let's list the basic rules:
- The noise level for ventilation equipment installed in a residential building cannot exceed 30 dB. Only silent household appliances should be used in the bathroom.
- To ensure the maximum level of draft in the duct, the ceiling hood is located opposite the entrance door, from which it draws fresh air.
- The device must be installed as far as possible from electric heating mechanisms, since it can withstand temperatures up to 50 degrees. When it increases to a critical level, the fan fails.
- The power, performance and energy consumption of the device depend on the volume of the room and the frequency of use of the equipment.
- The ventilation duct shaft must be clean. Standards for the installation and performance of ventilation systems are specified in SNiP 41-01-2003. This document describes the maximum permissible level of dust content in the ventilation duct and the air exchange rate.
Ways to hide a pipe from a hood
How to seal a hole and seal a hole in a stretch ceiling
The exhaust arm, as a rule, is large in size, thereby affecting the aesthetics of the interior. It is difficult to install it so that it does not catch the eye and does not disrupt the design of the kitchen. In order to disguise this element, owners choose different methods.
Construction of a plastic box
The plastic version of the box has a number of advantages unique to it:
- low price category;
- long service life;
- ease of installation and maintenance;
- almost complete silence;
- hygiene.
Over time, the box will change color, but if the air duct is correctly located behind the furniture, this aesthetic flaw will not play any role. This type of camouflage is optimal when the hood and ventilation shaft are located close together.
The plastic box can be easily installed even at home, assembled according to the “socket-pipe” principle. Many connecting elements will solve the problem of a large number of corners and obstacles in the kitchen. If necessary, you can manually adjust the pipes, because plastic is easy to saw.
To fully assemble the box you must have:
- main pipes;
- adapters;
- knee;
- connectors;
- anti-return valve;
- grate.
With the help of the listed elements, there will be no problems in assembling a structure of any length.
Disguise under a suspended or suspended ceiling
Very often, when the question of masking an air duct arises, installers recommend hiding the element under a suspended or suspended ceiling. The pipe, with this type of camouflage, is not visible at all, but in case of damage it will have to be completely disassembled. There is also a minimum ceiling height limitation. So, if the ceiling height in the kitchen is less than 2.6 m, then it will not be possible to hide the box.
Construction of a plasterboard box
The most economical type of masking of an air duct is a box assembled from plasterboard sheets. This material fits perfectly into any interior. This design does not have any special installation difficulties and does not require large financial expenditures.
Due to the peculiarities of its structure, it cannot serve as an air duct, so drywall serves as a decor covering the corrugation.
The main advantages of a plasterboard box are:
- variety in the choice of form;
- Possibility of choice of final finishing;
- low cost.
How to close the corrugation from the hood in the kitchen by building a channel through the furniture
Another way to hide the corrugation is to embed it in the cavity of a wall cabinet.
The advantage of this method of disguise is the ability to preserve the original interior of the kitchen and increase the functionality of the furniture by using its free space. To achieve these goals, it is recommended to design custom-made furniture so that the design already includes the possibility of hiding the corrugation. A plus will be the ability to easily dismantle and replace pipes if necessary. To successfully install the hood and its air duct into the cabinet, do the following:
- construct a valve from aluminum to prevent air from entering the room from the ventilation;
- make a hole for it on the top of the cabinet, place the valve in this place, subsequently attaching it using assembly adhesive;
- remove the element of the kitchen unit and, using a jigsaw, cut a hole in its bottom, focusing on the dimensions of the hood;
- remove the shelves and cut holes in them for the air duct;
- make a hole in the top shelf for the valve, leaving an allowance on each side of 3 mm;
- place the piece of furniture on the back wall and insert the corrugation;
- form the upper edge of the corrugation into a square in order to insert it into the hole;
- cut the inserted edge of the corrugation along the edges and bend it;
- install the cabinet in place and insert the valve into the ventilation.
Finally, install the hood into the hole cut out in the bottom of the cabinet, securing it with screws. The corrugation is put on the pipe and secured with a clamp.
Calculation of required materials
After choosing the type of suspended ceiling, you should decide on the required amount of materials. To do this, you need to measure the area of the ceiling and preferably develop a sketch, which will greatly facilitate the upcoming work.
The materials for the frame for almost all types of ceilings will be similar, so we will give an example of calculating the necessary materials for an Armstrong-type panel ceiling.
The frame structure for a suspended ceiling consists of longitudinal and transverse profiles and hangers. The selected suspended ceiling material will be attached to it.
In order to understand the material consumption standards for an Armstrong-type suspended ceiling frame, imagine that we have a square room with an area of 25 m2.
To install a panel ceiling you will need the following materials:
- main profile 3.6 m long;
- cross profile 1.2 m long;
- cross profile 0.6 m long;
- pendants;
- wall corner 3.0 m long;
- dowel-screws;
- anchor dowels;
- panel slabs 600*600 mm.
Installation of the main profile is carried out in increments of 1200 mm. To find out the number of rows of the main guide, divide the width of the room 5 m by 1.2 (step) and get 4.17 rows. The next step is to find out how many linear meters of this profile are required. To do this, multiply the length of the room 5 m by the number of rows 4.17 and get 20.9 m.p.
Installation of a transverse profile 1.2 m long is carried out in increments of 600 mm. To find out the number of rows of the transverse profile, divide the length of the room 5 m by 0.6 (step) and get 8.33 rows. Next, we will find out the required amount of profile in linear meters. To do this, multiply the width of the room 5 m by 8.33 (rows) and get 41.7 m.p.
The installation step of a transverse profile 0.6 m long is 1200 mm. The number of rows of the transverse profile is calculated by dividing the length of a room of 5 m by 1.2 (step). We get 4.17 rows. We multiply the resulting value by 5 m - the width of the room and get 20.9 m.p. – this amount is needed for an area of 25 m2.
The hangers are installed on the main guides with a pitch of 1200 mm. To find out the number of hangers for 1 row of main guides, divide the length of the room of 5 m by the hanger pitch of 1.2 and get 4.17 hangers for 1 row.
Previously we found out that we have 4.17 rows of main guides. Accordingly, for a room 5 x 5 m you will need 4.17 rows multiplied by 4.17 and we get 17.39 pieces of hangers.
Next, you need to install a wall corner 3.0 m long around the perimeter of the entire room. In this case, the perimeter is 2 x (5+5) = 20 m
Therefore, 20 m of wall corner will be required.
To calculate the number of panel slabs, it is enough to know the area of one slab (0.6 x 0.6 = 0.36) and then divide the ceiling area of 25 by the area of one slab of 0.36. In total, we get 70 pieces.
It is worth noting that after installing ceiling panels or slabs, joints are formed that can be eliminated using a special finishing tape
Fastening elements should be purchased on the basis that one dowel is needed per 0.5 m of profile.
To install a plasterboard ceiling you will need the following materials:
- guide profile 27 x 28 cm;
- ceiling profile 60 x 27 cm;
- straight U-shaped hangers;
- dowel-nails;
- self-tapping screws;
- 9.5 mm thick plasterboard sheets.
To finish plasterboard ceilings, additional materials will be required, such as primer, putty and water-based paint.
How does the ventilation process work?
Ventilation of the interceiling space involves the natural movement of air masses due to ventilation in the suspended ceiling. Natural air exchange involves the inflow and outflow of air mass through the valve for a stretch ceiling using draft.
In a suspended ceiling structure, the process is as follows:
- Holes are cut out in the stretch fabric, trying to place them diagonally across the ceiling, and they are masked using a decorative grid for suspended ceilings.
- Air is drawn into one opening, captures a certain space between the ceilings and exits into other openings.
High-quality ventilation of the interceiling space is possible in the presence of natural or forced air exchange directly in the room. In this case, the air masses are included in the overall ventilation system and ensure proper air exchange between the stretched and base ceiling.
It is possible to install forced ventilation of the inter-ceiling space by installing an exhaust fan in the suspended ceiling, ducts and air ducts. In such a situation, you should pay attention to complete sealing of the joints.
Advantages of suspended ceilings
Suspended ceiling systems make it easy, quick and at a reasonable price to get a finished ceiling that will hide cracks and defects in the base, as well as hide electrical wiring, ventilation and communication cables.
Suspended ceilings are universal; they can be used to decorate almost any residential, office, commercial and industrial facility.
The great advantage of installing suspended ceilings is the ability to erect complex geometric structures with every possible combination of textures, colors and patterns
Such ceilings make the height of the room smaller and, due to this, have good thermal insulation, which is especially important for owners of apartments on the upper floors.
Some types of materials for suspended ceilings can provide sound insulation in a room, which will be very helpful if noisy neighbors live on the floor above.
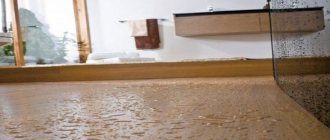
Possible consequences in the absence of ventilation
If ventilation is not done or done poorly, mold will appear in a damp room. They are constantly present in the air, their activity and intensive reproduction provoke conditions of high humidity and heat:
- the air between the suspended and draft ceiling does not move and is heated by warm masses from below;
- the surface of the ceiling has a lower temperature, so condensation forms on it;
- condensation accumulates and penetrates deep into the building and finishing material.
The lack of air movement behind the tension fabric allows fungi to cling to the surface. They grow well on concrete and paint, follow moisture along the outside and inside of the ceiling, fill the joints between the ceiling and the walls, and fill the gaps around spotlights.
1 m² of mold releases billions of spores into the air per day. In bathrooms it is black in color and can contain toxic species that can poison people. First of all, allergy sufferers, children and elderly people with a weakened immune system suffer - they develop a runny nose and cough, develop asthma, nosebleeds, sinusitis, and dermatoses. The fungus can cause:
- headaches;
- dizziness;
- diseases of the musculoskeletal system;
- attacks of nausea;
- internal bleeding;
- general exhaustion of the body.
In the absence or poor ventilation, impregnation of the tension material with a bactericidal composition will not prevent the formation and spread of mold. In addition, the following defects may appear:
- sagging of the canvas - more often observed in the summer when the air temperature rises;
- vibrations of the canvas, retraction and pressing against the concrete floor when opening windows or doors.
The air exchange system equalizes temperature and pressure in the spaces of the room and between the ceilings.
In what position are air conditioners transported or carried?
Some components of air conditioners are transported in a certain position, and first of all this applies to the most popular type of device - split systems, consisting of an external and internal unit.
If the internal module can be transported both horizontally and vertically, then it is not recommended to place the outer part horizontally or on its side, and it is strictly forbidden to transport it upside down.
Improper transportation may result in the device breaking the tubes, as well as compressor oil flowing along the freon circuit line. All these factors provoke incorrect operation of the equipment and its premature failure.
If the external unit of the split system was transported in a horizontal position (but in no case upside down!), it must be placed vertically for several hours before installation, without removing it from the original packaging. It should be remembered that when buying expensive equipment, it is absolutely unreasonable to neglect the rules for its transportation and, without certain skills, do what should be done by experienced specialists.
If circumstances do not allow you to use the services of professionals, be sure to read the rules for transporting climate control equipment, which are contained in the split system operating manual. Read more about how to properly transport an air conditioner here.
Source
Criterias of choice
Arrangement of spotlights on a suspended ceiling
Even if you have decided which type of device from those listed is suitable for your kitchen, you still need to arm yourself with additional technical knowledge.
Performance
According to construction and sanitary standards, a coefficient has been calculated for each room, with which you can determine how much air should be replaced with fresh air in one unit of time.
To calculate the power of a ventilation device, a hood built into the ceiling or a wall-mounted one, the volume of the kitchen is multiplied by the air replacement factor. To the result obtained, add 15% - the resistance of the filters and the loss of power at the bends of the air duct.
Noise level
The exhaust fan, which is an indispensable part of the kitchen hood, should not produce noise above 40-50 dB. Some devices, in order to increase power, are equipped with several such fans at once. If your kitchen boasts a large area or high ceilings, be prepared for increased noise levels from the operating ventilation unit.
Filters. Let's start with the fact that a grease filter comes complete with all types of hoods. But it can be reusable (steel, aluminum) and disposable (plastic, padding polyester and non-woven fabric). Coal ones, as already mentioned, are installed on recirculating hoods to trap extraneous odors. The latest filters are disposable. That is, their service life is quite short.
Control Panel
Slide switches are economical from a financial point of view, but are not durable and quickly become overgrown with grease. A keypad is the best and not too expensive option. On “advanced” hoods a touch panel is installed.
Construction and appearance. A hanging hood is the cheapest and most convenient option for a kitchen where it is not possible to connect it to the ventilation duct. The built-in model is suitable for compact kitchens: small dimensions, pull-out metal filter. The dome hood resembles an open umbrella in shape and is mounted on the wall or ceiling.
A hood with built-in lighting is a popular option among consumers
Air circulation
Do-it-yourself home horizontal bar drawings, diagrams, photos
Figure 1. Diagram of air flow in a ventilated space.
- air flow area;
- air flow area;
- air exhaust area;
Regardless of the type of supply and exhaust (natural/mechanical), for unhindered air circulation throughout the house from the supply area to the exhaust area, it is necessary to install doors with cross-flow grilles, or leave a gap between the floor and the bottom of the door of at least two centimeters across the entire width of the doorway.
Without such gaps, ventilation will not occur. In addition, you will have difficulty opening the bathroom door when the exhaust fan is running due to excess pressure.
As a rule, the most polluted room in the house is chosen as the air exhaust area, for example: kitchen, bathroom.
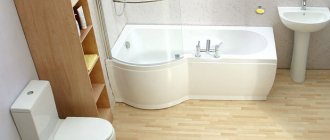
General rules for organizing air exchange in the bathroom
Air circulation in the bathroom must be properly organized. Ventilation inlets and outlets are mounted as high as possible.
To ensure good ventilation of the bathroom, you must follow the following rules:
- ventilation outlets are installed far from the place where street air enters the house. At the same time, the entire room is ventilated, and then the air flows go outside through the ventilation duct;
- ventilation grilles are installed in opposite corners of the room. Then the street air entering inside passes through the entire room;
- the hood is mounted as far as possible from the place where water can get on the working mechanism;
- The electrical wiring for the fan is hidden. It is carried out inside one of the walls and on the ceiling of the bathroom.
If the hood is installed after repair, the wires are covered with a plastic cable duct to prevent water from entering.