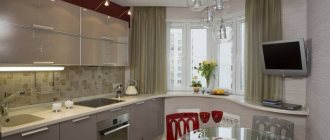
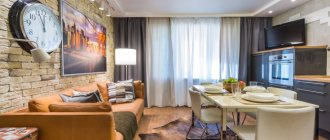
Cooking in the kitchen becomes a simple and enjoyable experience with the correct distribution of light.
The main lighting is created by ceiling and wall lamps; LED strips are chosen as an addition, but they can also be used as the main light source. LED strips divide the room into zones and provide additional light for convenient cooking. Such lighting helps to place accents in the interior.
For the kitchen, most often (95% of cases) a set is immediately selected: Ice strips, profile, screen, plugs, power supplies. In addition to them, a control system (sensors, buttons or remote control) is sometimes ordered.
If a person understands electrical engineering, installing a light strip is not difficult. But sometimes difficulties arise with which LED strip to choose for kitchen lighting. Therefore, we will consider this issue in more detail in our article.
- Wide variety of lighting for the kitchen
- Where can you install LED strips?
- How to choose LED strip
- Choosing the right power supply
- Profile for LED strip for kitchen
- Control options
- Installation recommendations
Wide variety of lighting for the kitchen
Depending on which LED strip you decide to choose for your kitchen, the impression of the entire interior largely depends. When searching for lighting and installation location, it is worth considering:
- room area;
- design;
- arrangement of interior items.
The advantages of LED strip for the kitchen are a large selection of brightness and color of light. Lighting can be made cold or warm, single-color or multi-colored. This is very convenient, as some people like dim light, while others like bright, cool colors. Most often, we recommend daylight glow (neutral), since it does not distort the color of food during cooking (which is important, for example, for confectioners) and is familiar to vision.
There are several other important factors that make LED strips the best option for the kitchen:
- small sizes - compact light sources do not spoil the design of other interior elements, but, on the contrary, emphasize them advantageously;
- low energy consumption - you won’t get huge electricity bills;
- safety – LEDs can be used under temperature changes and high humidity;
- durability – the backlight will last flawlessly for several years.
Which LED strip to buy for the kitchen primarily depends on your project. The scope for design ideas is limitless - the product can be cut to any desired length and mounted in places inaccessible to traditional light sources. You can install lighting along the entire wall, interrupt it with a hood, or focus on individual cabinets.
Where can you install LED strips?
The choice of LEDs for kitchen lighting is largely determined by the tasks that such lighting performs:
- at the bar counter – visually highlights this space, creating the effect of a real bar;
- near wall niches, cabinets - illuminates dishes and other contents of shelves. You can make lighting with sensors, when the light turns on only when the doors are opened;
- under the upper cabinets, inside the apron or in the hood above the stove - it illuminates the cooking area and creates a spectacular atmosphere;
- on the cornices - focuses on windows, curtains;
- above the wall cabinets - visually makes the room higher, gives a feeling of “airiness”;
- under floor cabinets – creates the effect of “floating” furniture;
- near shelves, stained glass windows, paintings - emphasizes interior elements, etc.
As you can see, different lighting options are possible. The choice depends on the desires and budget of the owners. The main thing is that the lighting in the kitchen should be beautiful, safe, and fulfill its functions.
How to choose LED strip
In order for LED lighting in the kitchen to meet your expectations, it is important to choose the right brightness of the LED lighting. It depends on the type of LEDs, as well as the density of their placement. Here are some recommendations on how to choose an LED strip for the kitchen.
A large number of multi-colored lights tires the eyes. Designers usually recommend choosing one option with soft natural light. With this lighting you get less tired and it is pleasant to the eyes. Therefore, owners usually buy products with single-color SMD diodes for the kitchen:
- smd 5050
– light strips with three crystals; - smd 3528
– light strips with one crystal.
For decorative lighting, for example, decorating shelves and cabinets, you can choose LED lighting with type 3528 diodes with a placement density of 60 pieces per 1 meter. Such lighting helps to emphasize individual areas of the room and create a romantic, pleasant atmosphere.
LED strips with type 5050 diodes with a placement density of 60 pieces per 1 meter or type 3528 LEDs with a placement density of 120 pieces per 1 meter are suitable for lighting tabletops. This way the work area is illuminated brightly and evenly.
And if you want fun multi-color lighting, you should consider RGB strips. Their design includes 3 diodes (red, green and blue), which are combined into one LED. Therefore, such ribbons can glow in different colors. The color effect is caused by mixing the glow of three diodes in different proportions. For the backlight to work, you need a controller that regulates the intensity of the glow and sets different flickering modes.
Before purchasing, you need to determine the length of the light strip to implement your project. LEDs are sold in rolls of 5 meters. Manufacturers make lines along which the tape can be cut to the desired length. This makes it very convenient to measure the required size.
Choosing the right power supply
LED lighting cannot be connected directly to the network. This needs to be done only through a power supply, which is selected depending on the power and length of the tape. Its power should be 15-20% higher than the total power of all connected devices. You can find out the required indicators from a store consultant or read the product instructions.
Usually the power supply is made small, so it is easy to hide even in hard-to-reach places. It is worth thinking in advance where it will be located. The power supply must be in an accessible place, for example, a separate box, so that it can be accessed for servicing the equipment in the event of failure.
Useful tips
Even before purchasing the tape, you should take measurements of the place where it will be located. You always need to buy material with some reserve (15-25%).
After soldering is completed, it is recommended to check all contacts. There should not be any contact between them. Poorly soldered contacts often cause short circuits.
The transformer is not installed in a visible place. The optimal location for the unit is a cabinet. In this case, the conductor with the plug is routed to the socket. This location of the block is optimal from the point of view of aesthetics and as a way to minimize the risk of mechanical damage.
Profile for LED strip for kitchen
When considering what types of LED strips there are, it is worth mentioning aluminum profiles. LED strips can be glued to any surface using an adhesive backing, but this is not a very attractive or safe option for the kitchen. Therefore, products are often ordered immediately with profiles. These elements perform both an aesthetic and protective function. They are used for the following reasons:
- facilitate installation;
- protect from high humidity, mechanical damage and other factors;
- smooth out the dots from the diodes and form a more even strip of light;
- help to beautifully decorate the lighting.
The LED profile is produced in a standard length of 2 meters. They come in overhead U-shaped, corner and built-in. The latter option is rarely used, since no one is usually going to dismantle the kitchen to install lighting. It is chosen only if such lighting is planned at the design stage.
The plastic screen of the profile can be matte or transparent. Usually matte is chosen, as it smoothes out the dots from the tape diodes. Plugs are placed at the end of the structure.
Advantages and disadvantages of LEDs
Kitchen lighting with LED strip provides a number of advantages:
- Resistance to mechanical damage.
- Long service life. The average lifespan of LEDs is 14-16 years based on 15 hours of daily use.
- Many color options. Possible colors include red, white, orange, green, blue, yellow and purple. The choice can also be made of light diodes operating in infrared and ultraviolet modes.
- High brightness. At the same time, the lamp does not need time to warm up.
- Constantly falling prices. Although LEDs are more expensive than competing light sources, prices are gradually coming down thanks to their increasing adoption.
- Availability of tapes with different angles of light emission.
- Safe to use.
- Environmentally friendly.
- Independence from room temperature.
LED strips also have disadvantages:
- Relatively high cost.
- Light bulbs with a warm white glow disrupt color rendition. In addition, such light tires the eyes.
- To install LED lighting, a power source (driver) is required. This device makes the entire system more expensive.
- Over time, the chemical and physical properties of light-reflecting crystals lose their qualities, causing the light to become dimmer.
Control options
In response to the question of which LED strips are best for the kitchen, many designers clearly name white lighting, since it does not strain the eyes and fits well into any environment. But if you wish, you can make multi-color lighting.
The LED strip can turn on and/or change colors when connecting controls:
- motion sensors;
- touch buttons;
- remote control.
It’s worth showing your imagination, and you can get a beautiful and comfortable work area in any room.
Types of desk lamps
Manufacturers offer various solutions for desk lamps. There are different types of housings, materials for their manufacture, luminous flux power, etc.
| Lighting type | Brief operational and technical characteristics |
| They are sold fully assembled and ready for installation or in separate parts. The second option requires professional knowledge of electrical installation, but makes it possible to create the most optimal options for each specific case. Finished equipment is installed within a few hours, but in many cases it is impossible to make adjustments to them. LED lamps are used as lighting devices. |
| They allow you to separately zone small spaces and focus attention only on those areas that are necessary for performing kitchen work. Each device operates separately and can be switched on either manually or automatically. Housings of various sizes and geometries can be metal or plastic. |
| The cabinets are hidden in kitchen furniture or walls above the work area. The most difficult installation option; installation requires special tools. Disadvantages: recessed lamps take a long time to install; they are not suitable for all sets of kitchen furniture. And this applies not only to design, but also to technical difficulties. |
When choosing a specific option, it is necessary to take into account the maximum number of individual factors, including the architectural features of the kitchen, the type of furniture and the cost of the system.
Prices for LED strips
LED strips
Installation Tips
Finally, we will give some recommendations on how to install a beautiful LED strip in the kitchen:
- do not cut the strip in any place - do it only according to the marks made by the manufacturer;
- think in advance about how to hide the wires and power supplies so that water does not get on them;
- When using multiple light strips, connect them to the power supply in parallel.
If you do not have sufficient experience in installing lighting equipment, it is better to turn to professional craftsmen. The work will take a minimum of time and will be done with a guarantee of reliability and safety.
What do we need for installation?
Self-installation of LED backlighting will require the use of the following tools and components:
- The actual kit: tape reel (12W), electrical cable with a cross section of 0.74 mm square;
- Transformer - 12W power supply and dimmer with remote control (if available);
- Solder with rosin;
- Soldering iron;
- Scissors;
- Double sided tape;
- Insulating tape (or heat shrink tube with a heat gun);
- PVC corner and or aluminum profile for LED mounting – if necessary;
- Drill - if necessary;
- Electrical installation brackets - if necessary.
