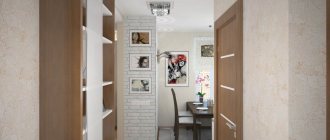
The bathroom is a small room. When choosing furniture for it, a good solution is to mount the countertop under the sink. It will not take up much space and will allow you to use the space wisely.
It is important to choose and install the right fixtures for the bathroom countertop so that it lasts for a long time.
What it is?
Due to the relatively high cost, wall-hung kitchens cannot be found in every furniture showroom. Therefore, floating furniture for many still remains a mystery, causing a number of doubts. In fact, everything is quite simple.
The effect of a floating kitchen is achieved by eliminating the lower supports. The lower modules are hung on the wall in the same way as the upper kitchen cabinets or shelves. Naturally, both the fastenings and the wall on which such modules are installed must be sufficiently strong and reliable.
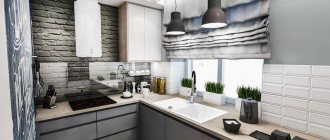
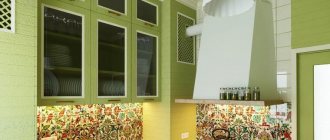
Hanging kitchen without handles. MDF kitchen with lighting. With electric drive SERVO-DRIVE Servo Drive Blum.
In some cases, manufacturers are cunning, passing off something else as floating furniture. They simulate the soaring effect in two ways:
- cabinets and tables are installed on transparent supports made of glass or durable plastic, which creates the effect of not being in contact with the floor;
- the legs are pushed further under the cabinets, so that from the height of an ordinary person they are invisible.
For authenticity, the lower part of the pseudo-floating kitchen is illuminated with an LED strip. The effect is quite convincing, but the operating features of a real wall-hung kitchen and its imitation are still different.
It is worth noting that the designers did not focus their idea only on kitchen units. Floating tables, beds and other parts of furniture sets quickly occupied their niche among other style solutions.
Materials
Made from artificial stone
One of the popular options. This material is strong, reliable and quite durable. Easy to clean, comes in a wide range of colors.
It makes it possible to make a tabletop of the required shape, and it can also be repaired. Artificial stone is cheaper than natural stone, and therefore more affordable. Does not tolerate high temperatures well.
Made of plastic
This is an economical option. Allows you to make the surface as smooth as possible. There are a huge number of colors.
You can use any detergents (but do not use metal sponges - they will scratch the surface, as well as acetone and solvent - they are bad for the top layer of the countertop).
Mechanical damage cannot be repaired, and for larger damage, the entire countertop must be replaced. Easy to install, easy to clean. But it won't last long. Fungus may appear on it. This material tends to fade.
From plasterboard
This is one of the common options. If you choose drywall that is resistant to moisture, it will last a long time. It is quite durable and allows you to make a tabletop of any shape.
It is advisable to cover the material with additional protective agents against moisture (it is very afraid of moisture and water). For greater strength, plywood is placed under the drywall.
You can make it at home and install it yourself. The surface of drywall can be covered with both tiles and mosaics. These two options can be combined if desired and with the right approach.
From tiles
This option for finishing the countertop immediately implies a plasterboard base. This method of making a countertop is not the easiest, but with some knowledge and skills you can do it yourself.
Advantages and disadvantages
Despite the fact that hanging furniture appeared not so long ago, its main advantages and disadvantages are already clearly defined.
The advantages of a floating kitchen include:
- sleek appearance. Unusual and stylish automatically becomes fashionable. The non-standard kitchen interior very quickly won a large number of fans with its simplicity and originality of lines;
- extra space. Instead of cluttering a balcony or storage room, long narrow objects (remnants of building materials, etc.) can be successfully hidden under hanging cabinets. The main thing is to ensure that nothing peeks out from under the kitchen modules, spoiling the design of the set;
- improved air circulation. The kitchen is the wettest room in the house (in some cases, the bathroom competes with it). Constant fumes that occur during cooking and washing dishes negatively affect not only kitchen furniture, but also expensive household appliances. The absence of a lower plinth and kitchen supports promotes unhindered air circulation, improving the atmosphere in the kitchen. This is especially important in the presence of built-in equipment that requires increased ventilation and cooling;
- ease of cleaning. You can get rid of dust and dirt under wall-hung kitchen units in a matter of seconds. After all, you don’t need to manually wash the floor around each leg (it’s impossible to efficiently remove dirt around kitchen supports with a mop or vacuum cleaner) or remove the base, risking breaking the plastic clips. And you can wash the floor under a set with a non-removable base only by moving the kitchen cabinets away from the walls. In the case of floating modules, such difficulties do not arise; the absence of obstacles makes the cleaning process quick and easy;
- flood protection. In the event of a flood, an MDF kitchen plinth or wooden legs may swell and lose their appearance. The suspended kitchen has no contact with the floor, so the facades can only be damaged by actively pouring water on them;
- ease of use. Owners of kitchen sets with legs know how painful it can be to hit your toes on such supports. Owners of kitchens with a plinth often encounter a problem when their feet rest against the bottom bar, making it difficult to get close to the countertop. The floating kitchen has no such disadvantages. In addition, the absence of lower drawers and shelves prevents constant bending and squatting. Exercise is certainly useful, but for people with problems with joints and spine, it is better to relieve themselves of unnecessary stress.
But there are no advantages without disadvantages; a floating kitchen is also not perfect. The disadvantages of hanging cabinets include:
- high cost. Such models are practically never found on the open market; they are usually made only to order. At the same time, materials and fittings must be of high quality, otherwise the supports and fasteners will not withstand the load. It is clear that a carved oak set will not cost less. But compared to a regular kitchen from Ikea, floating cabinets are much more expensive;
- additional load on the wall. It is clear that a lightweight plasterboard partition will not support such weight. But even for a brick or concrete wall this will not be an easy task. After all, in addition to the weight of the lower modules, she will have to support the upper cabinets. And if the kitchen apron is made of tiles, then this means additional tens, or even hundreds of kilograms. Taking into account the contents of the cabinets, the total weight can approach a ton;
- adjustment of fittings. Canopies, drawer runners and other fittings work flawlessly only when they are installed “level”. Over time, wall-mounted cabinets can sag under their own weight. Deviation from the level can lead to the fact that the drawers begin to creak when opening, become difficult to open, or, on the contrary, move out on their own, etc. This happens infrequently, but such a problem can only be solved by restoring the geometry of the headset (everything will need to be leveled again);
- difficulty choosing a style. Hanging furniture is ideal for modern interiors in minimalist, modern or high-tech styles. It is very difficult to choose a set in a retro or Provence style that harmoniously combines with the floating effect. To avoid such difficulties, they usually use a “pseudo-floating” option, pushing the legs with a plinth as deep as possible under the kitchen cabinets. But such a decision must be implemented with some caution so as not to disrupt the overall style of the room;
- lack of usable space. Depending on the height of the residents, the standard countertop height can vary from 80 to 90 cm. Floating cabinets, raised 20–30 cm above the floor, take up 30% of the usable volume of the drawers. For some, such a loss is not critical, but if you have a large number of dishes and kitchen appliances, you may encounter a lack of usable space. It is impossible to hide a large saucepan or baking sheet in the gap between the floor and the furniture; they will peek out, making the interior cluttered and untidy;
- fallen objects. Small children and pets love to push their toys and foreign objects into the space under the kitchen unit. Yes, and all the fallen round-shaped vegetables certainly tend to roll under the cabinet. There are usually no particular difficulties in retrieving objects, but sometimes it can be annoying;
- problems with the placement of kitchen appliances. Refrigerators, washing machines and dishwashers are produced in relation to the average human height and, as a result, to the height of the average countertop. By raising the cabinets above the floor level, it will not be possible to raise the refrigerator or washing machine to the same height. And equipment standing on the floor disrupts the overall harmony and ambiance. You can place all floor-standing appliances on a separate wall, but only owners of fairly large kitchens can afford such a luxury.
There are quite a lot of pros and cons of a floating kitchen, so you should give preference to this design only after thoroughly assessing all the possible risks. After all, what looks beautiful on the cover of a fashion magazine is not always as convenient and practical in real life.
Comments: 17
- Like
- Save
ryllova
I just don’t want what you sent. That's why I turned to the experts
- Like
- Save
Dmitry Evgenievich
Just attach the tabletop to the wall, in the corner. To do this, even at the stage of wall construction, it was necessary to provide fastening elements. Otherwise, you won’t be able to do what you want.
- Like
- Save
ryllova
It's not too late for us to make these fasteners in the wall. It was just laid out to us. Yes, we planned to mount it in the wall and on the corner, where it would be adjacent to the cabinet wall. I'm worried about the other corner that will hang up, near the bathtub. What fasteners do you recommend? It seems to me that the letter G is a little dangerous, the edge will be hanging
- Like
- Save
SOS REPAIR
- Like
- Save
ryllova
Thank you very much for the recommendations. Some are just a mystery to me: “do it on the floor, but make the very bottom mirrored and a little ruined.” I can’t even imagine what it is and how it is :)
Do you have an example?
And about the lighter analogue. What did you mean? What could be lighter and more like a stone?
- Like | 1
- Save
Galina
- Like
- Save
SOS REPAIR
- Like
- Save
davidenko_olga_interiors
- Like
- Save
ryllova
Thanks for the advice. But in your example, the wall in which the frame is embedded is most likely concrete. In my case, both the side wall and the back are made of tongue-and-groove slabs :(
- Like
- Save
Evgeny S
In 1 comment they wrote to you the best solution to your problem, contact the countertop manufacturer so that they issue a technical specification for the installation of embedded parts. Or so that they themselves prepare a welded structure, for example, under a tabletop.
- Like | 1
- Save
Box mounting
The main criterion for choosing fasteners is its reliability. The ideal installation method is when part of the cabinets rests on a support box. It can be played out in an interesting way and harmoniously fit into the interior, or made hidden.
The visible box often becomes the highlight of the interior. It is given an unusual shape, or an emphasis is placed on a contrasting color.
For modern and high-tech styles, a common solution is when the box is decorated with a mirror base, deliberately drawing attention to it.
When installing a hidden support box, it is made narrow (no more than a third of the total width of the cabinets) and placed along the far wall of the set. In this case, you can only notice such a stand by looking into the gap between the floor and the lower cabinets.
The advantage of this installation is that part of the load passes from the wall to the box, thereby relieving the fasteners. The downside is that the kitchen only partially floats.
Tabletop type
Advantages of solid tiles:
- The product is “hygienic”. Monolithic design, that is, it has a sink. There are no cracks, there are no joints, and therefore there will definitely be no accumulation of dirt.
- Simple installation, because there is no need to insert the sink or install it.
Minuses:
- The price is very high.
- Low maintainability - the sink cannot be replaced.
A countertop for an overhead sink has the following advantages:
- Any plumbing fixture can be placed on the shelf.
- There is no need to cut into the sink.
As the reviews show, there are no downsides at all.
A countertop for a built-in sink has the following disadvantages:
It takes time to restore order, because dirt accumulates in places where the shelf comes into contact with the plumbing.
Not an easy installation. For the result to be perfect, you need to have working skills and a special expensive tool. If there is a large indentation, then it is possible that there will be gaps, and it will not be easy to seal.
Installation features depending on the type of fastenings
The usual hanging of cabinets, which is used to install upper shelves, is not suitable in this case. Standard fasteners for wall cabinets are not used for a rather banal reason - the screws and dowels, which during such an installation bear the entire weight of the structure, simply cannot withstand the load.
In addition, fasteners for kitchen wall cabinets in the form of a hook have another significant drawback - it is very difficult to adjust such hangers. If for upper cabinets a difference in height of a few millimeters is unpleasant, but not critical, then hanging the lower floating modules at different levels will lead to difficulties with installing the countertop.
In some cases, the solution to this problem is a floating tabletop; it is placed 10–20 cm above the hanging cabinets. In this case, the top cover of the lower cabinets becomes an open shelf, and separate fasteners are used to mount the tabletop.
If the design of a wall-hung kitchen does not require support, then there are three fairly reliable methods of fastening:
- rails. This option is suitable for cabinets that completely occupy the space along one wall. In this case, longitudinal rails (profiles) are installed under the headset, which are mounted into the end walls (preferably load-bearing). There can be a different number of support profiles (depending on the parameters and weight of the cabinets), but usually no more than three. In addition, the cabinets are additionally secured to the wall with conventional fasteners. In this case, standard fixation is sufficient, since the main load falls on the rails;
- mounting angle. Typically, a reinforced angle is chosen for these purposes; such a mount can withstand bending loads of up to 120 kg per unit. One module has from two to four mounting angles (i.e. one filled cabinet can have a maximum weight of 240 to 480 kg). This installation allows even fairly large kitchen appliances (oven, etc.) to be built into wall-hung modules. When installing, you need to clearly ensure that all the cabinets after hanging are on the same level, without differences in height;
- mounting profile. This installation method is only suitable for a perfectly flat wall (without protrusions, niches or protruding communications). The profile is rigidly attached to the wall, and the cabinets are fixed onto it using special adjustable hooks. When mounted on a profile, the height of individual cabinets is easier to adjust, which simplifies the process of installing the countertop. Attaching an adjustable canopy is not difficult, so this is the installation method that is chosen when installing a hanging modular kitchen with your own hands.
Separately, it is worth noting that when installing a hanging cabinet under the sink and kitchen appliances, you need to take into account communications. The brackets must be positioned so that the floating cabinet hides all wires and pipes, but at the same time there must be free access to communications in case of a possible accident.
You can evaluate the reliability of various fastening systems by watching the video:
When will your kitchen fall? Secrets of a furniture maker, useful tips, tests. Construction hack.
Such furniture is rarely assembled independently; in most cases, the assembly and installation of the set is carried out by the company that manufactured it. Since such organizations provide a guarantee for their products only when ordering installation of structures from them.
What are bathroom countertops made of?
A variety of materials are used to make bathroom countertops: glass, wood, mosaic and ceramic tiles, chipboard and MDF, natural and artificial stone. Let's look at the features of each option:
- Tree. Advantages: beauty, elegance, environmental friendliness. Disadvantages - does not tolerate high humidity, temperature changes, gets dirty easily, maintenance is quite difficult, requires treatment against fungus and mold. In addition, solid wood countertops are quite expensive and will only last a few years.
- Chipboard and MDF. Advantages: ease of processing, wide selection of colors, affordable cost. Disadvantages: high moisture absorption, short service life.
- Glass. Advantages: environmentally friendly, glass is not susceptible to fungus, looks elegant, allows you to choose the right color and shape. Disadvantages: difficult maintenance, heavy weight of the structure.
- Mosaic and ceramic tiles. Advantages: aesthetic appearance, ease of installation on a plasterboard base. Disadvantages - many seams, which complicates maintenance.
- Stone. The most popular materials nowadays are natural and artificial stone.
Marble countertops for bathrooms attract with their unique pattern and luxurious appearance. At the same time, they are difficult to maintain, do not allow the use of aggressive cleaning agents, and are difficult to restore. Marble easily absorbs moisture and has a fairly porous structure; stains may appear on it, which are almost impossible to remove.
Design
When choosing a floating set for your kitchen, you need to ensure that the entire interior of the room is made in the same style. Hanging furniture complete with a massive kitchen corner located in the dining area will look awkward. Therefore, to embody elaborate styles (Baroque, Empire, Gothic, etc.) it is better to choose a different solution.
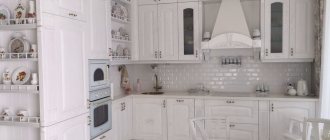
Minimalism
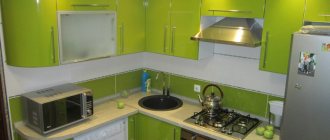
Hanging furniture seems to be created to embody this style: simple lines, a minimum of decor and a large amount of free space. When recreating minimalism, it is advisable to choose a monochrome palette for a floating set. In this case, the kitchen will look laconic and original.
Read more about minimalist kitchen >>>
High tech
Modern technology, plenty of chrome and unusual lines go perfectly with floating furniture. Characteristic lighting will help complement the impression of a futuristic interior. LED strips and lighting fixtures can be located not only above the work surface, but also under wall-mounted cabinets.
Read more about high-tech kitchen >>>
Modern
For those who are tired of classical styles, modernity was created. Modern kitchen - goes well with hanging cabinets. The interior in Art Nouveau style is filled with chic and gloss. Such a set will invariably attract attention with its design and functionality.
Loft
A floating kitchen in the loft style should be made of natural materials. Furniture made of solid wood or plywood fits well into such an interior.
Very often, a set in this style is only partially hung. The supporting pedestals in this case can be made of either wood or metal. Matte chrome does not disturb the overall ambience, but only emphasizes the integrity of the interior.
Read more about the loft style kitchen >>>
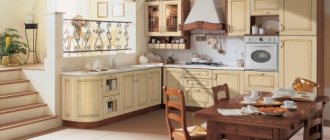
Classic
Classic styles are dissonant with modern trends, so floating sets in their pure form are not used in such interiors. An alternative to wall cabinets is a set on a plinth. The protective strip is pushed under the modules as deeply as possible, but so that it is still visible from the height of an adult.
Read more about a kitchen in a classic style >>>
Retro
The concept of “retro” is quite broad. The “antique” of this style is practically unlimited in time. Therefore, with the correct selection of equipment and fittings, hanging cabinets can be used in this style. These can be pseudo-floating modules on the base, as in the case of classics, or truly floating furniture.
In this case, they try to make the base darker so that it is practically invisible under the cabinets. If the cabinets are completely hanging on the wall, then the gap between the floor and the set is left quite narrow, usually its width does not exceed 10–15 cm.
Construction portal No. 1
A good way to update the interior is to replace its parts.
You can change handles and doors on cabinets. There is a tabletop on the table. That’s why it’s important for a home craftsman to know something about fastening a kitchen countertop. Well, we will help him with this by giving 4 ways to do this. One end of the Z-bracket is firmly attached to the table top with a screw, and the other goes into a narrow groove sawn into the frame.
Advantages
. Cheap and easy to install.
Flaws
. Metal fasteners are traditionally not used in classic-style furniture, where preference is given to wooden parts.
How to do it
. Press the end of the Z-bracket with the hole for the screw firmly onto the flat base and measure the distance from the second end of the bracket to the mounting plane (usually about 10 mm). On the inside of the drawer, stepping back 10 mm from the top edge, cut a narrow groove using a router, circular saw or lamella router. Mark the centers of the mounting holes for screws on the underside of the tabletop in 200-300 mm increments and drill them, using a depth stop so as not to drill through the wood. Then use Z-clamps and screws to connect the table top to the drawers.
2. Homemade wooden clamps
Wooden analogues of Z-brackets, the protrusions of which are inserted into the reciprocal grooves of the drawer frames, are easy to make yourself from scraps of material, which are available in abundance in any carpentry workshop.
Advantages
. In furniture of traditional styles, preference is given to wooden fasteners, and making them yourself from scraps allows you to use the material more efficiently.
Flaws
. Making wooden clamps adds a few extra (albeit uncomplicated) steps, adding to the project's timeline.
How to do it
. On the inside of the table drawer, use a circular saw or cutter to select a longitudinal groove of 6x6 mm, departing 10 mm from the top edge. Then, in a wooden blank with a cross-section of 16x50 mm and a length of at least 380 mm, saw or mill transverse grooves 6 mm wide at intervals of 35 mm. After drilling the mounting holes for the screws, cut the workpiece into separate clamp blocks. Install the clamps, placing them at a distance of about 300 mm from the legs and inserting the projections into the longitudinal grooves of the drawers. Drill pilot holes in the table top and secure the clamps with round head screws, not forgetting to install the washers. On long countertops, wooden clamping blocks are used in combination with spacers.
3. Spacers with grooves
Two or three such spacers will help securely secure the tabletop. They can also be used in combination with other types of fasteners.
Advantages
. Spacers serve not only as fastening elements. They protect tabletops from warping, and long drawers from bending.
Flaws
. The use of additional parts inevitably increases the complexity of the entire project.
How to do it
. Precisely adjust the spacer (18 mm thick strip) in length to the space between the long table drawers and drill a mounting hole for the screw in the center of the strip. To make oblong slot holes to compensate for changes in the width of the tabletop, use a wood drill bit with a diameter slightly larger than the previous one. Drill a short series of overlapping holes along the center axis of the plank. Align the walls of the groove with a chisel, ensuring they are parallel. Attach the finished spacers to the long frames with flat insertable tenons-lamellas using a lamella router. Place the assembled tabletop on an inverted tabletop and carefully level it. Drive the screws in the middle of the spacers first, then on both ends of the spacers in the center of each slot.
When the width of the wooden parts changes due to fluctuations in humidity, these connectors rotate in shallow round recesses on the upper edges of the drawers, preventing the tabletop from bending. They may differ somewhat in size and shape: some have ring-washers of equal size, while others have a larger part that is attached to the drawbar.
Advantages
. The use of “eights” does not require cutting out a longitudinal groove in the drawers, and they are less noticeable than Z-brackets.
Flaws
. The “eights” must be recessed into the upper edge, which inevitably leads to an increase in the thickness of the drawer.
How to do it
. Clamp a Forstner drill bit into the drill chuck, the diameter of which is slightly larger than the size of the figure eight rings. In the upper edges of the short transverse frames, at intervals of 300-400 mm, drill shallow recesses for the “eights”, corresponding to their thickness. Then, using the mark in the wood from the center point of the Forstner bit, drill a pilot hole for the screw. Using a sharp chisel, cut off the edges of the indentations that prevent the “eight” from rotating.
Secure the "eight" in the recess on the frame, but do not tighten the screw too much so that the connector can rotate freely. The top of the “eight” should be flush with the top edge of the drawer or be slightly recessed into it.
Install the remaining “eights” in the same way (do not install them on the longitudinal drawers!). Place the assembled base on an inverted table top and align it with the edges. Mark the centers of the screw holes on the underside of the cover. Drill pilot holes using the depth gauge and finally finish attaching the table top to the table with screws.
Interior
When developing a design project, you need to take into account not only the appearance, but also the functionality of the headset:
- location of the “work triangle” (refrigerator-sink-stove);
- technological distances (from the hob, oven, sink and refrigerator);
- freedom of access;
- ease of opening drawers and cabinets.
Depending on the size and style of the wall-hung kitchen, it can be:
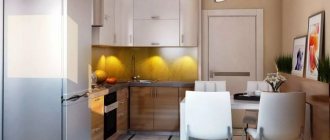
- straight. This option is used in small areas. This project involves moving the dining area and large household appliances to other walls. To create the effect of a more open space and unload a small kitchen, a floating set can be complemented with a table with a hanging top. It is often made on glass legs, but there are also completely hanging versions;
- U-shaped. Such a set rarely “floats” completely. Usually, only part of the cabinets are hung, in which the lightest dishes are placed, and equipment and more massive objects are installed permanently on the floor;
- L-shaped. You can hang one “wing” or both. If the entire set is hanging, then the dimensional equipment is located in the corners so as not to disturb the floating effect;
- with an island. The floating island looks very unusual and stylish. It can be suspended from the ceiling, installed on a glass box, or partially supported on visible supports that suit the style;
- with a peninsula. In this case, both the peninsula and the set installed along the wall can float. There are many installation options; any of the above methods is acceptable;
- with a bar counter. Glass supports in this case are quite widespread, as are options with the stand suspended from the ceiling or mounted to the wall.
When designing your own kitchen, you must first rely on personal preferences and the individual characteristics of the room.
What about technology?
Large ones - a refrigerator, washing machine and dishwasher - are placed on one wall or in the corners, and small ones are hung. Small equipment includes:
- microwave oven,
- hob,
- coffee machine,
- small single-compartment refrigerator.
A hanging kitchen is still a non-standard solution, and due to its high cost, not many people can afford it. But when choosing such a headset model, the owners will appreciate it. The main thing is to calculate everything correctly, think through the style, shades and overall weight of the structure. If a hanging kitchen still seems unreliable, it is better to give preference to a floating one.
Backlight
Pendant lighting is very popular. Soft diffused light coming from under the cabinets emphasizes the floating effect. Backlighting can be organized in two ways:
- LED strip. This option is the most popular. The color of the backlight can be either matching the tone of the headset or contrasting with it. Monochrome lighting is chosen for the minimalist style; bright and contrasting shades are more common in modern and high-tech styles;
- lamps. They are usually attached to the bottom wall of the cabinet, but sometimes they are placed directly on the load-bearing wall. When distributing lighting fixtures, you need to ensure that the lighting is uniform. Separate spots of light create a feeling of incompleteness.
When choosing a place to install the lighting, you need to control one point - the lighting devices should not be visible from a height of human height.
Also, do not forget about safety precautions. In the event of a flood, wiring located too close to the floor may short out. To prevent this from happening, wires and lighting fixtures must be located at a height of at least 15–20 cm from the floor.
Requirements
The bathroom has high humidity and changing air temperatures. This should be especially taken into account when selecting tabletop material.
If we talk about design requirements, here they are:
- Moisture resistant.
- Corrosion resistance.
- Chemical neutrality.
- Convenience, functionality.
- Beautiful view.
Design features largely determine ease of use. All possible options can be divided into 2 groups:
- One-piece designs, when the sink and countertop are a single unit. The material used is usually natural and artificial stone.
Important! The advantages include aesthetic appearance and hygiene. There is simply nowhere for dirt to accumulate. This design looks great in a large, beautifully decorated bathroom. Disadvantages include low functionality and excessive bulkiness.
- Countertops for mortise or overhead sinks. They have a sectional structure. As a rule, they have a compartment for detergent. Some designs provide a separate sector for the washing machine. Installing and servicing such a device is quite simple.
Photo gallery
Did you like the article? Tell your friends about it:
2 1
Hand-assembled folding table
Assembling a homemade table attached to the wall is the simplest of tasks. If you follow the proposed algorithm, it will take a maximum of half an hour.
- The workpiece is applied to the intended mounting location to clarify the parameters.
- Ready-made support strips are attached to the tabletop with hinges.
- The tabletop is attached to the wall or window sill using hinges.
- The strength of the structure is checked.
In this completely uncomplicated way, you can assemble with your own hands a surprisingly compact, but so functional folding table that is attached to a vertical surface.
On the structural impact of seasonal deformations
No matter what kind of board, be it a laminated board or a solid piece of wood, it is subject to swelling and shrinkage depending on the time of year and fluctuations in humidity. Tightly fixed countertops, deprived of the ability to freely contract and expand, begin to deform under the influence of internal stresses - warping, bending, twisting and eventually cracking.
With seasonal changes in humidity levels, wood expands and contracts more across the grain. The countertops of a room or kitchen set vary in width within 1 cm, depending on the size of the lid and the type of wood. Linear configurations along the fibers are nonsense.